初识springboot(傻瓜式教程)
项目所需的版本
IDEA 2018
maven 3.x
jdk-1.8
IDEA创建spring-boot项目(maven方法)
1、创建一个maven工程
点击Create New Project

选择新项目的SDK,按图中步骤操作。第一次创建会要求选择jdk位置
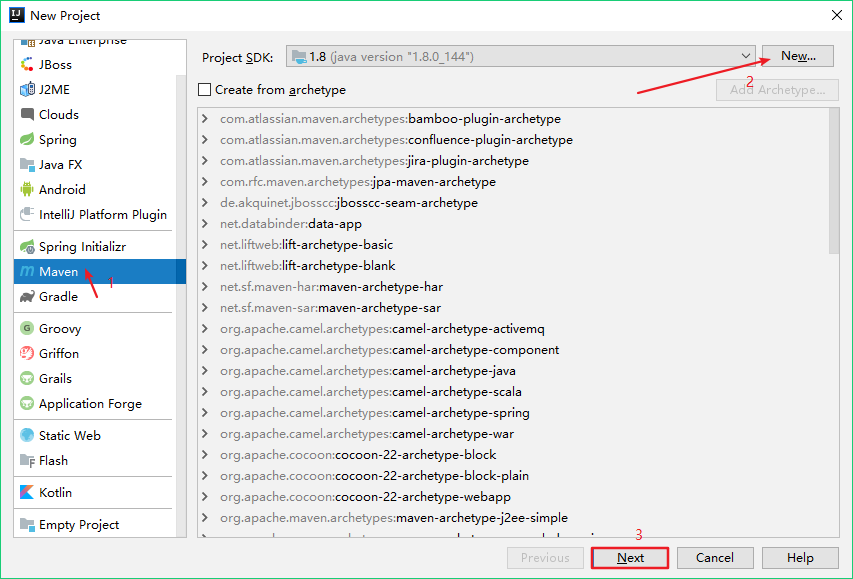
按图中顺序填写GroupId和ArtifactId,点击next

接下来会看到IDEA已经帮我们填写好项目名了,也就是我们填写的ArtifactId,直接finish.
finish后IDEA会打开刚创建好的项目,这是右下角会跳出maven包是否自动导入,选择右边的自动导入,这样以后我们写在pom.xml里面的东西就会自己下载导入了。
2、配置springboot启动
在pom.xml里面添加springboot的依赖(加入图中红色框内代码)
<parent>
        <groupId>org.springframework.boot</groupId>
        <artifactId>spring-boot-starter-parent</artifactId>
        <version>2.1.1.RELEASE</version>
        <relativePath/> <!-- lookup parent from repository -->
    </parent>
    <dependencies>
        <dependency>
            <groupId>org.springframework.boot</groupId>
            <artifactId>spring-boot-starter-web</artifactId>
        </dependency>
    </dependencies>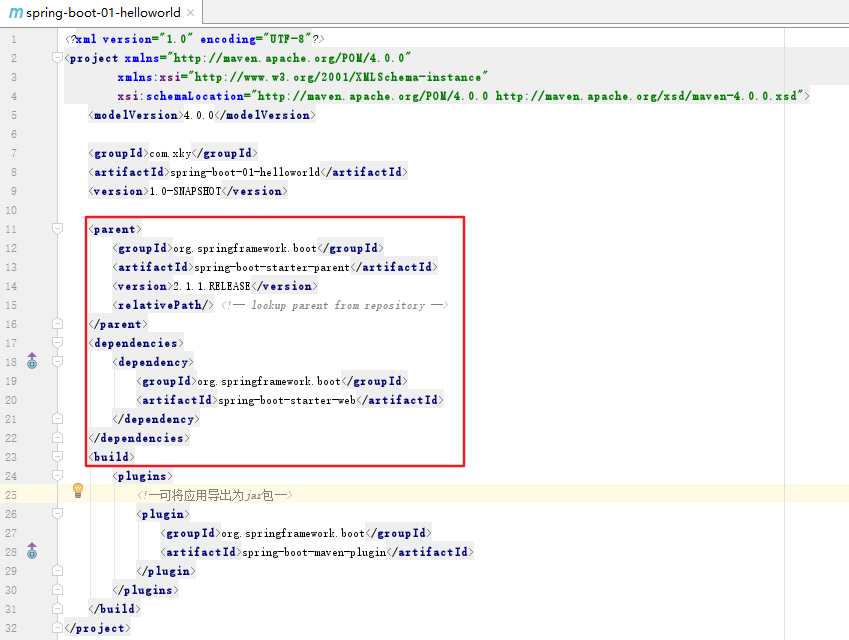
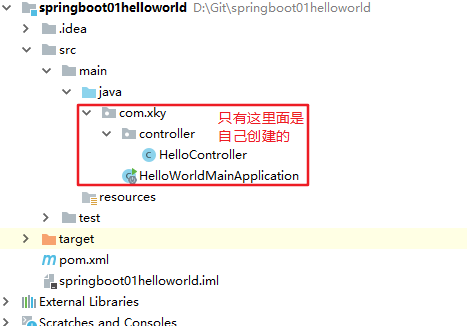
按下图创建好项目的结构(xxxxMainApplication类在的包一定要包含其他的所有包)
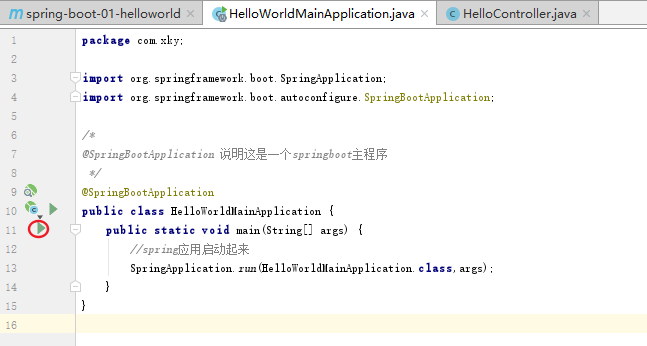
编写springboot启动类(即HelloWorldMainApplication)
/*
@SpringBootApplication 说明这是一个springboot主程序
 */
@SpringBootApplication
public class HelloWorldMainApplication {
    public static void main(String[] args) {
        //spring应用启动起来
        SpringApplication.run(HelloWorldMainApplication.class,args);
    }
}
编写HelloController
@Controller
public class HelloController {
    @ResponseBody
    @RequestMapping("/hello")
    public String hello(){
        return  "hello world";
    }
}
具体细节以后再说,本篇文章主要是简单体会springboot
3、运行springboot项目
只要点击HelloWorldMainApplication类中的main左边的运行键,选择第一个运行就可以了。方便吧!!!
什么Tomcat配置的全都滚蛋
看到如下提示就说明成功了,Tomcat started on port(s): 8080 (http) with context path ''这句话的意思就是在tomcat里启动了

注意:如果提示端口占用要去任务管理器里的服务找到自己的Tomcat停止掉
4、浏览器访问
在浏览器里输入localhost:8080/hello访问
出现如下页面就说明成功了

总结
springboot项目的实现和部署相比较spring来说简便太多了,想想spring哪些前端控制器、handler啊什么的就头疼(还不是因为自己菜!),写这篇博客也是记录以下自己的学习过程,傻瓜式的教程是我自己想写的,还请读者多多包涵,有好的建议我会虚心采纳的,希望一起进步。