【传送带–>mpvue+vant weapp项目开发过程中遇到的问题(第一篇)】
一、小程序页面跳转传参
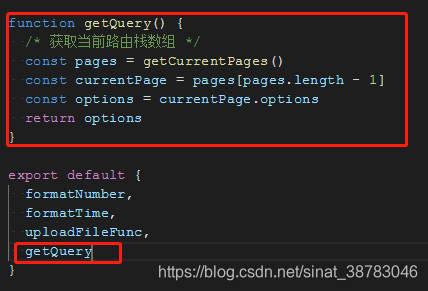
根据【mpvue 小程序 页面跳转获取参数】这篇文章,我在utils文件夹下的index.js中添加了getQuery函数:
代码:
function getQuery() {
  /* 获取当前路由栈数组 */
  const pages = getCurrentPages()
  const currentPage = pages[pages.length - 1]
  const options = currentPage.options
  return options
}
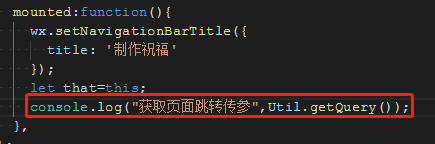
然后在跳转过去的页面中引用Util,并在mounted函数中调用Util.getQuery()来获取传参。
二、onLoad时请求接口数据更新,视图不更新
错误方法:
onLoad(){
    wx.request({
      url:globalStore.state.url+'getMyWishes',
      data:{
        openid:wx.getStorageSync('openid')
      },
      success:(res)=>{
        let cards=res.data.cards;
        for(let i=0;i<cards.length;i++){
           this.cardList[i]=cards[i];
        }
        console.log("onLoad",this.cardList);
      }
    })
  },
问题出在this.cardList[i]=cards[i];这一句代码,因为vue不能检测对象内容的改变,必须在当前文件引入Vue,调用Vue.set(items, indexOfItem, newValue),改变数据即可立即更新视图。
正确代码:
//之前要引入Vue : import Vue from 'vue';
onLoad(){
    wx.request({
      url:globalStore.state.url+'getMyWishes',
      data:{
        openid:wx.getStorageSync('openid')
      },
      success:(res)=>{
        let cards=res.data.cards;
        for(let i=0;i<cards.length;i++){
          Vue.set(this.cardList,i,{
            cardId:cards[i].cardId,
            festival:cards[i].festival,
            picture:globalStore.state.url+cards[i].picture,
            makedate:cards[i].makedate
          });
        }
        console.log("onLoad",this.cardList);
      }
    })
  },
三、画布图片不显示
错误代码:
    // 画布绘图
    const ctx = wx.createCanvasContext("shareCanvas");
    // 背景色
    ctx.rect(0, 0, 260, 320);
    ctx.setFillStyle("white");
    ctx.fill();
    // 封面图
    ctx.drawImage(this.cardPicTmp, 20, 20, 220, 220);
    // 文字
    ctx.setTextAlign("center"); // 文字居中
    ctx.setFillStyle("#000000"); // 文字颜色:黑色
    ctx.setFontSize(12); // 文字字号:22px
    ctx.fillText("长按识别二维码", 140, 280);
    ctx.fillText("来查看" + this.user.username + "分享给你的祝福吧~", 140, 300);
    // 小程序码
    const qrImgSize = 100;
    ctx.drawImage(this.qrcodeTmp, 20, 140, qrImgSize, qrImgSize);
    ctx.stroke();
    ctx.draw();
错误原因:直接使用图片的网络地址,应该先调用wx.downloadFile下载下来,用本地地址显示。
正确代码:在前面的代码之前,添加以下代码,来下载图片。
wx.downloadFile({
      url: this.pictureAddress,
      success: cres => {
        console.log(cres);
        this.cardPicTmp = cres.tempFilePath;
        wx.downloadFile({
          url: this.qrcode,
          success: qres => {
            console.log(qres);
            this.qrcodeTmp = qres.tempFilePath;
          },
          fail: function(fqres) {
            console.log("download qrcode", fqres);
          }
        });
      },
      fail: function(fres) {
        console.log("download cardPic", fres);
      }
  });
四、加载组件的使用
1. 使用vant weapp的Loading组件
感觉vant weapp的Loading组件没有写完整,vant-loading组件只是个图标,就自己写了一下。
html
<div class="loading">
	<van-loading color="#fff"/>
</div>
css
.loading{
  width: 100px;
  height: 100px;
  border-radius: 10px;
  background: rgba(0,0,0,0.5);
  display: flex;
  justify-content: center;
  align-items: center;
  position: absolute;
  top: 50%;
  left:50%;
  transform: translate(-50%,-50%);
}
然后操纵这个组件的显示隐藏就可以了
2. 使用微信自带的wx.showLoading()
还是这个比较好,不用自己写。
在需要出现加载中动画的地方写:
wx.showLoading({
	title:"加载中"
})
在不需要加载中动画的地方写:
wx.hideLoading();
五、用mpvue写自定义组件
未解决