Web App Builder 在2014年12月份终于发布了正式版本,与以前Beta版本稍有不同,今天分享下正式版本的安装部署使用。
通过Web App builder可以建立属于自己的应用,节省GIS开发的时间和成本。类似于Flexviewer这样的框架
1、获取Web APP Builder开发者版本
https://developers.arcgis.com/web-appbuilder/ 这是开发者网站的连接主页,首先获取下载版本,需要ArcGIS Online的企业级账号或者开发者账号进行下载。
2、Web App Builder安装部署
下载安装文件是个压缩包文件,解压之后运行里面的startup文件即可,这时候浏览器直接打开http://localhost:3344/webappbuilder/?action=setportalurl这样的地址。当然这种方法用起来是比较简便的,也可以自己安装Node.js。不过个人认为没太多必要性。
首先要做的事情就是连接ArcGIS Online或者Portal;其次的事情是需要一个应用程序ID号

那么如何来获得这个应用程序ID值呢?这个是非常重要的事情,分为两步
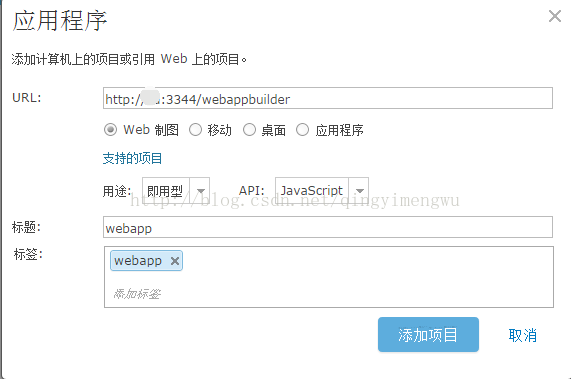
1、在Portal或者Online中发布应用程序。程序地址使用http://[yourmachinename]:3344/webappbuilder
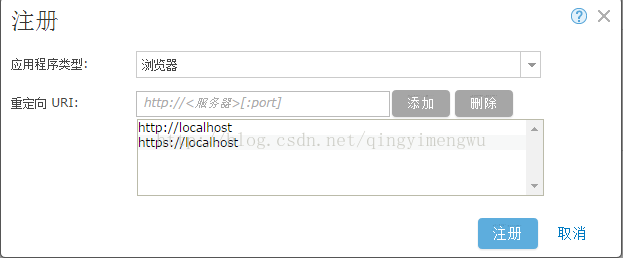
2、然后在对这个应用程序进行注册。

3、注册重定向地址推荐使用两个地址http://[yourmachinename]和https://[yourmachinename]
4、当注册完成之后,你就会看到APP ID这个值了,但是你现在输入这个ID值在web App Builder中,你会发现仍旧报错。

5、怎么解决这个问题呢?官方的解释如下
This is because the URI of Web AppBuilder is not added or not set correctly in the Redirect URI list when you registered App ID for Web AppBuilder in the ArcGIS portal. To update the Redirect URI list, refer to View and update app registration info for details. Reload Web AppBuilder after the update.
在命令窗口中可以看到是Token获取不正确造成的
解决办法:更新和查看应用程序注册信息,然后重新打开Web App Builder页面,最后终于见到了应用的页面。

我们就可以新建一个工程了,限于时间关系下一章会具体讲Web App Builder的使用