初次使用博客——记录初学html和css
前言:本人初学html和css,如有错误还望海涵
正文:首先说html和css,html是用于编辑网站页面的文本格式本身也可以对自身元素进行排版和设置格式,而css则是对html进行更好的格式排版和编辑。
因为hmtl和css创作的页面只是静态页面,与用户互动并不完善,就需要jsp和js后期处理页面后台的数据。本章就先不说jsp和js了,说说怎么样布置一个简单的页面。如下:
首先新建一个文件夹code,里面再创2个文件夹css和img,文件夹css是用于储css文件,img则是存储要用到的图片。如下图
然后就是在code文件夹下创建html文件,如下图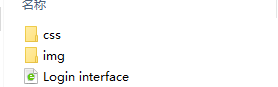
本人这里就写个简单的登入页面代码
如下代码:
<!DOCTYPE html>
<html lang="zh-cn">
<head>
	<meta charset="utf-8">
	<title>登入界面</title>
	<link rel="stylesheet" type="text/css" href="css/style.css">    //导入css样式布局
</head>
<body>
<div id="backgroundjpg">                //用于导入背景,下面是一些登入需要用到元素
	<div class="center1"></div>
	<div class="login_id">用户名:</div>
	<div class="login_psd">密码:</div>
	<a href="register.html" class="register">注册</a>
	<input type="text" class ="id" placeholder="请输入用户名">
	<input type="password" class="password" placeholder="请输入密码">
	<input type="button" class="login_button" value="登入">
</div>
</body>
</html>
后在img文件夹下放图片,记住名字后,去css文件夹下个css文件
代码如下:
@charset "utf-8";

#backgroundjpg{
	width: 100%;
	min-width: 1263px;
	height: 900px;
	background: url(../img/timg.jpg) no-repeat center;       //导入图片
	position: relative;     //相对距离和后面的绝对距离匹配
}
#backgroundjpg .center1{
	width: 260px;
	height: 100px;
	background-color: #000;
	position: absolute;
	top: 40%;
	left: 50%;
	margin: -50px 0 0 -150px;
	opacity: 0.6;     //透明度
}
#backgroundjpg .table{
	width: 300px;
	height: 100px;
	background-color: #eee;
	position: absolute;
	top: 40%;
	left: 50%;
	margin: -80px 0 0 -170px;
	font-size: 20px;
}
#backgroundjpg .table .text{
	font-size: 30px;
}
最后就可以去最后的结果图了

感谢阅读本章!本人是初学者,可能不够做得精细还有一些代码是参考大佬做的,如有错误还望见谅。