参考地址
官网:http://sciactive.com/pnotify/
GitHub:https://github.com/sciactive/pnotify
npm仓库:https://www.npmjs.com/package/pnotify
PNotify 属性和默认值
text: false – 通知的文本
styling: 'brighttheme' -使用的样式类. (可以使用'brighttheme', 'bootstrap3', 'bootstrap4', or a styling object.)
icons: 'brighttheme' – 使用的图标类(可以使用'brighttheme', 'bootstrap3', 'fontawesome4', 'fontawesome5', or an icon object.)
addClass: '' – 要添加到通知中的其他样式类(用户自定义类型)
autoDisplay: true - 创建通知时显示通知。关闭此选项可在不显示通知的情况下向历史记录中添加通知。
width: '360px' – 通知的宽度
minHeight: '16px' - 通知的最小高度。它将扩展以适应内容。
type: 'notice' – 通知的类型. 'notice', 'info', 'success', or 'error'.
icon: true - 将icon设置为true可为所选样式/类型使用默认图标,将false设置为noicon,或将字符串设置为自己的icon类。
animation: 'fade' - 显示和隐藏通知时要使用的动画。'CSS不支持“none”和“fade”。其他的是通过animate模块和animate.css支持的。
animateSpeed: 'normal' - 通知进出动画的速度。'slow', 'normal', or或'fast'。分别为400毫秒、250毫秒、100毫秒
hide: true – 加载通知延迟一段时间之后关闭通知
delay: 8000 - 通知关闭前的延迟(毫秒)
mouseReset: true - 如果鼠标移动到通知上方,则重置隐藏计时器remove: true -关闭通知后,将其元素从DOM中移除
destroy: true -关闭通知时是否从全局数组中移除通知
stack: PNotify.defaultStack -通知在页面上放置的位置
modules: {} – 定义模块选项
在页面引入pnotify.custom.min.css和pnotify.custom.min.js
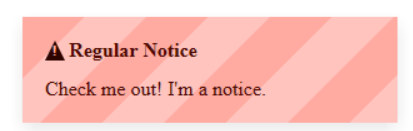
实例1:基本用法
 Var pn= new PNotify({

       title: 'Regular Notice',

       text: 'Check me out! I\'m a notice.',

      type:'error', //错误提示

        hide:false, //不隐藏

        addclass: "stack-bottomright",

        stack: stack_bottomright,

});
页面效果:
实例2:点击事件
//提示框点击事件,当点击提示框时触发的事件,可以改变鼠标的样式为小手的形状。

.css('cursor', 'pointer') 设置鼠标悬浮于通知时的样式

Pn.get().css('cursor', 'pointer').click(function (e){

//当点击通知的关闭按钮时不响应点击事件

if($('.ui-pnotify-closer, .ui-pnotify-sticker, .ui-pnotify-closer *, .ui-pnotify-sticker *').is(e.target))
    {return;}

//点击之后关闭通知
if(pn){
    pn.remove();
}

})
实例3: stack的应用
PNotify.defaultStack = {
    dir1: 'down',//主要的堆放方向,可以使用 up,down,right,left
    dir2: 'left',//二次叠加方向。应该是与dir1垂直的方向。当通知沿dir1到达视区边缘时,将继续沿此方向。
    firstpos1: 25,
    firstpos2: 25,
    spacing1: 36,
    spacing2: 36,
    push: 'bottom',
    context: document.body
}
dir1:’down’ down  指如果有多个通知,通知从上向下堆放。
dir2:’left’ left  指通知如果从上向下堆满之后,从右向左堆放。
var stack_bottomright = {"dir1": "up", "dir2": "left", "firstpos1": 25, "firstpos2": 25};

Var pn= new PNotify({

        title: 'Regular Notice',

        text: 'Check me out! I\'m a notice.',

       type:'error', //错误提示

         hide:false, //不隐藏

         addclass: "stack-bottomright",

         stack: stack_bottomright,

});
使用stack_bottomright之后,通知从右下角开始y由下向上堆放。
总结:使用PNotify构建的提示框外形美观,PNotify功能齐全,灵活性、易用性都很高。