版权声明:本文为博主原创文章,未经博主允许不得转载。 https://blog.csdn.net/wdays83892469/article/details/88071594
pyspider爬虫框架
这是一个非常好用的爬虫框架,下载和安装部署都极其简单
python及pip的安装参照https://www.jianshu.com/p/196f6fad1caa
在第五步的时候注意,因为它会用到非常多的依赖,有的时候直接pip install pyspider并没有下载下来,那么就需要我们手动下载依赖包http://www.lfd.uci.edu/~gohlke/pythonlibs/
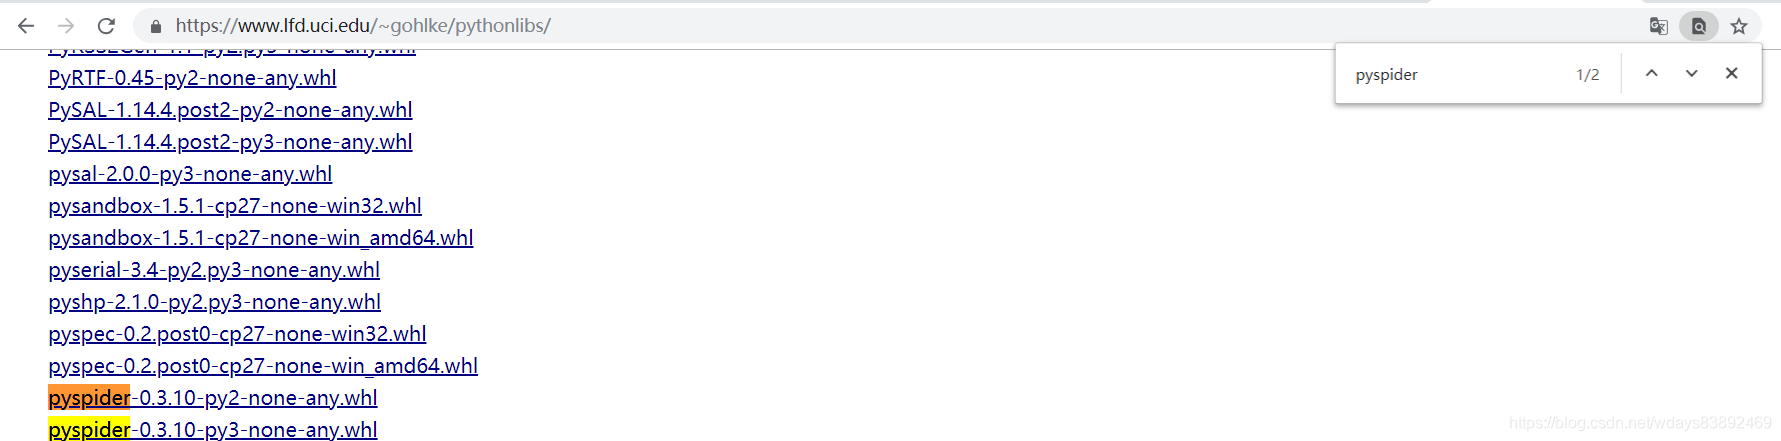
然后pip install 本地路径/xxx.whl即可
打开安装pyspider的目录
例如:d:\python27\lib\site-packages
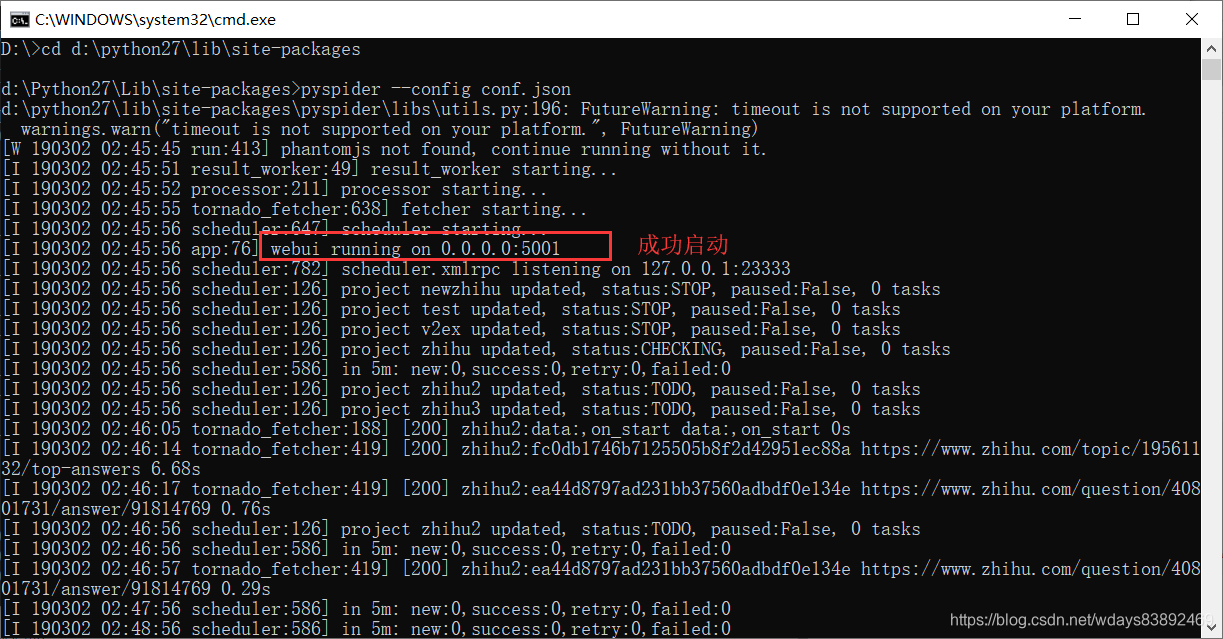
启动pyspider,在上面目录下
pyspider 默认启动
pyspider --config conf.json 带自己的配置文件启动
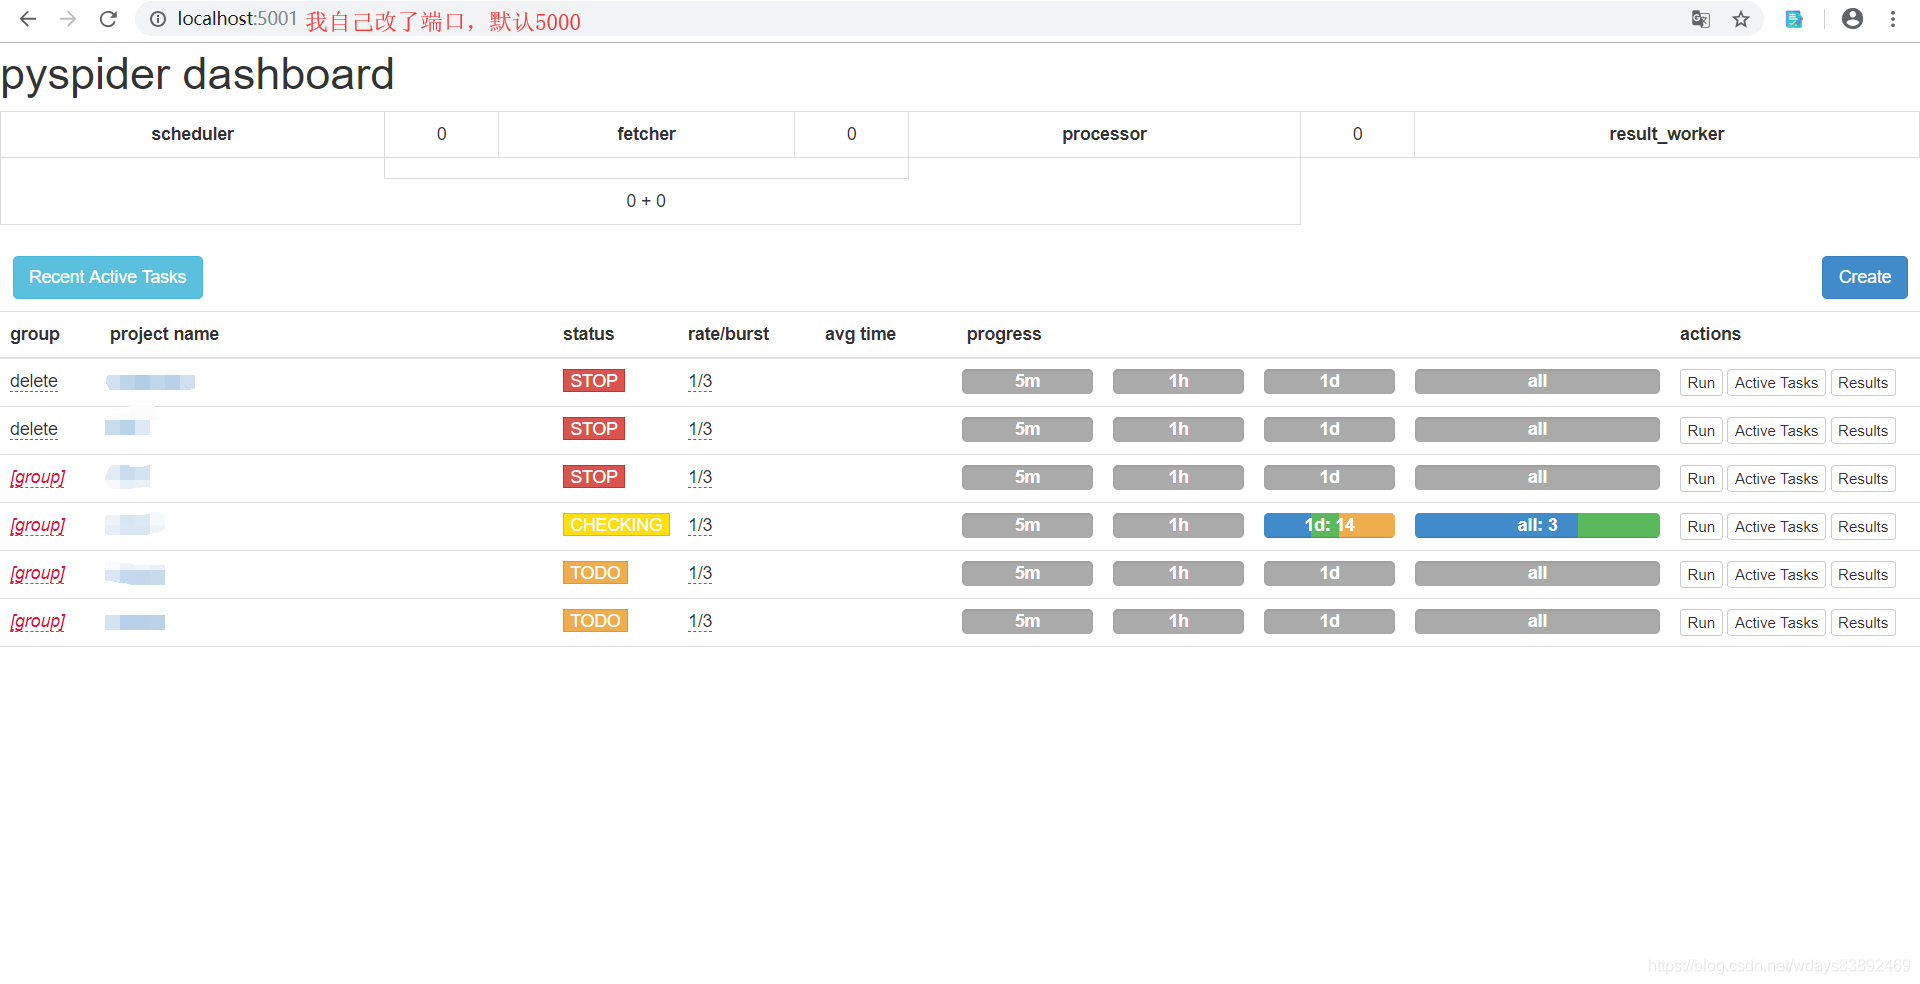
浏览器输入网址:localhost:5000
提前准备好数据库。
#mysql 建表语句如下
create database pyspider;
CREATE TABLE `question` (
  `id` INT NOT NULL AUTO_INCREMENT,
  `title` VARCHAR(255) NOT NULL,
  `content` TEXT NULL,
  `user_id` INT NOT NULL,
  `created_date` DATETIME NOT NULL,
  PRIMARY KEY (`id`),
  INDEX `date_index` (`created_date` ASC));
创建新的pyspider工程

编写右侧代码
#!/usr/bin/env python
# -*- encoding: utf-8 -*-
# Created on 2019-03-01 17:55:37
# Project: zhihu

from pyspider.libs.base_handler import *
import random
import MySQLdb

class Handler(BaseHandler):
    #基础配置
    crawl_config = {
        'itag': 'v1',
        'headers': {
            #伪装成Google爬虫
            'User-Agent': 'GoogleBot',
            'Host' : 'www.zhihu.com',
            'Accept':'text/html,application/xhtml+xml,application/xml;q=0.9,image/webp,*/*;q=0.8',
        }
    }
    #配置数据库基本参数
    def __init__(self):
        self.db = MySQLdb.connect('localhost', 'root', 'root', 'pyspider', charset='utf8')
    #将爬取结果插入数据库
    def add_question(self, title, content):
        try:
            CURSOR = self.db.cursor()
            SQL = 'insert into question(title, content, user_id, created_date) values ("%s","%s",%d, %s)' % (title, content, random.randint(1, 10) , 'now()');
            print SQL
            cursor.execute(SQL)
            qid = cursor.lastrowid
            self.db.commit()
        except Exception, e:
            print e
            self.db.rollback()
        return 0
    #每天执行一次        validate_cert=False是省略ssl安全检查
    @every(minutes=24 * 60)
    def on_start(self):
        self.crawl('https://www.zhihu.com/topic/19561132/top-answers', callback=self.index_page,validate_cert=False)
    #十天以内不重复爬
    @config(age=10 * 24 * 60 * 60)
    def index_page(self, response):
        #之前页面选取的爬取的条目 这里用css选择器写法 注意的是留空格的class样式 类选择器中间有空格代表后代选择,这里写法是同级,所以把空格换成点    也就是说pyspider的子元素是用空格空开,css的子元素和它不一样
        for each in response.doc('a[data-za-detail-view-element_name="Title"]').items():
            self.crawl(each.attr.href, callback=self.detail_page, validate_cert=False)

    @config(priority=2)
    def detail_page(self, response):
        items = response.doc('div.RichText.ztext').items()
        #detal页面的话题标题
        title=response.doc('h1.QuestionHeader-title').text()
        #话题内容
        html=response.doc('span.RichText.ztext.CopyrightRichText-richText').html()
        if html==None:
            html=''
        #避免转义错误 合法的规则插入数据库
        html=html.replace('"', '\\"')
        qid=self.add_question(title, html)
        return {
            "url": response.url,
            "title": response.doc('title').text(),
        }
运行
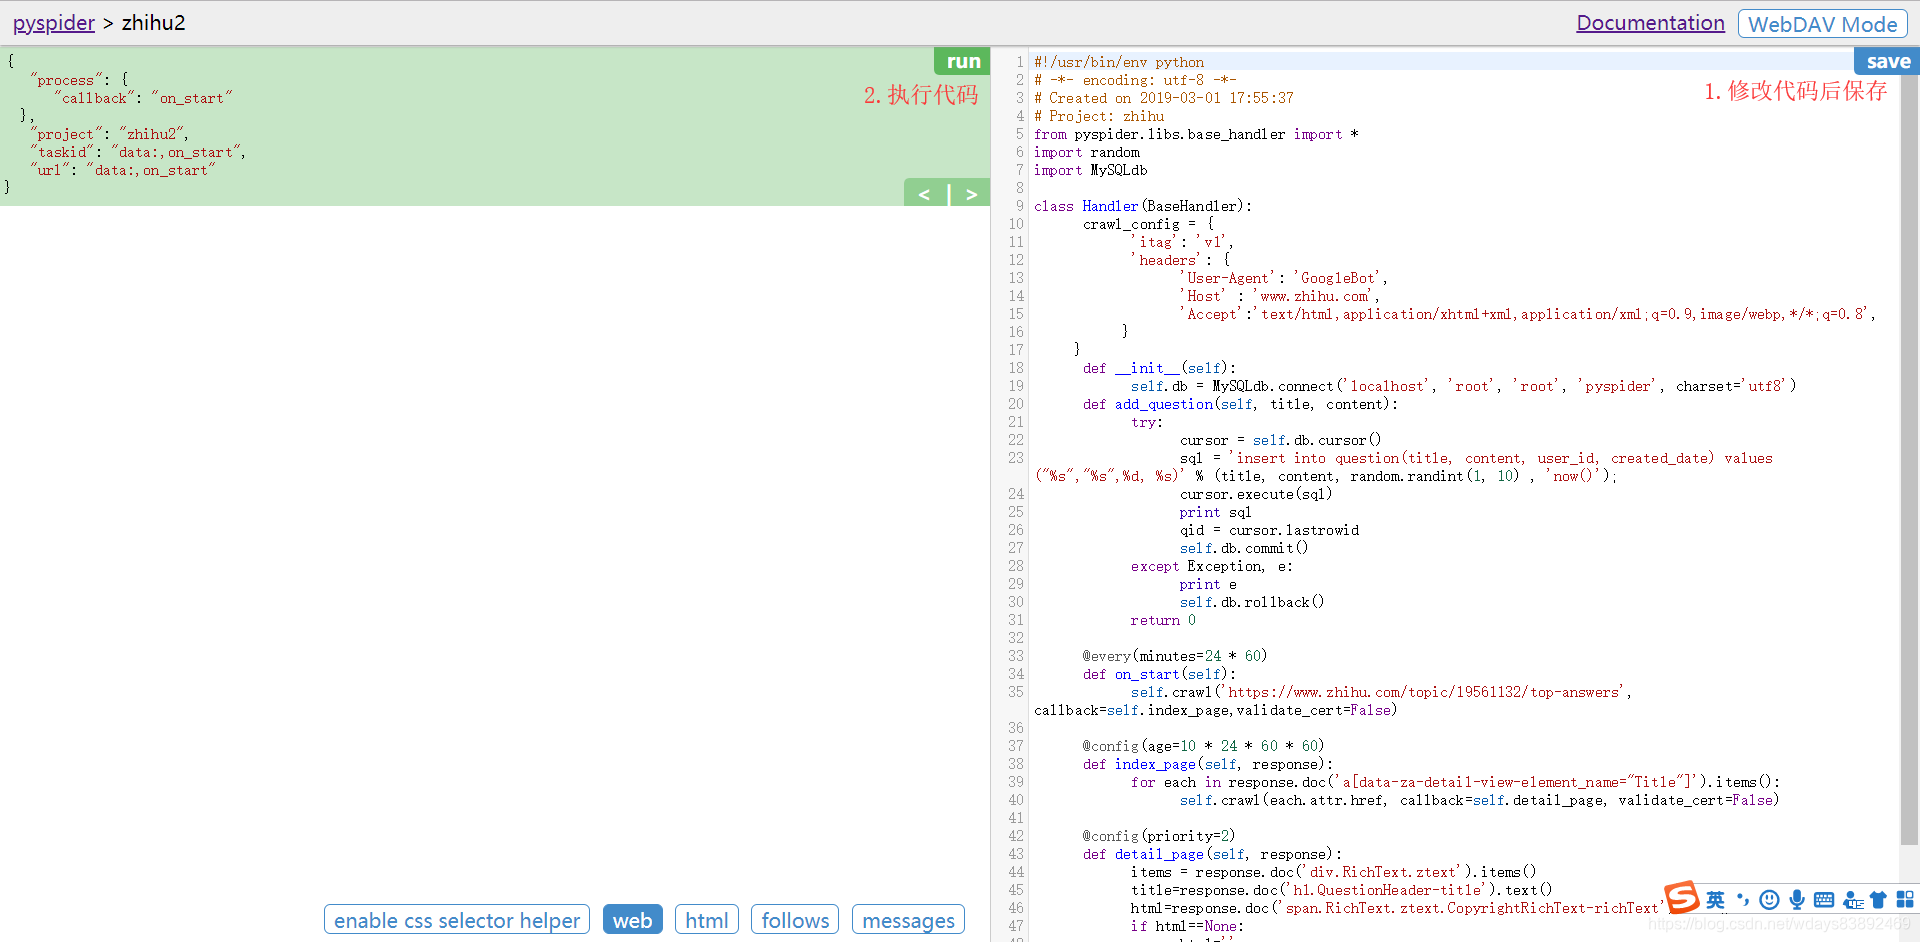
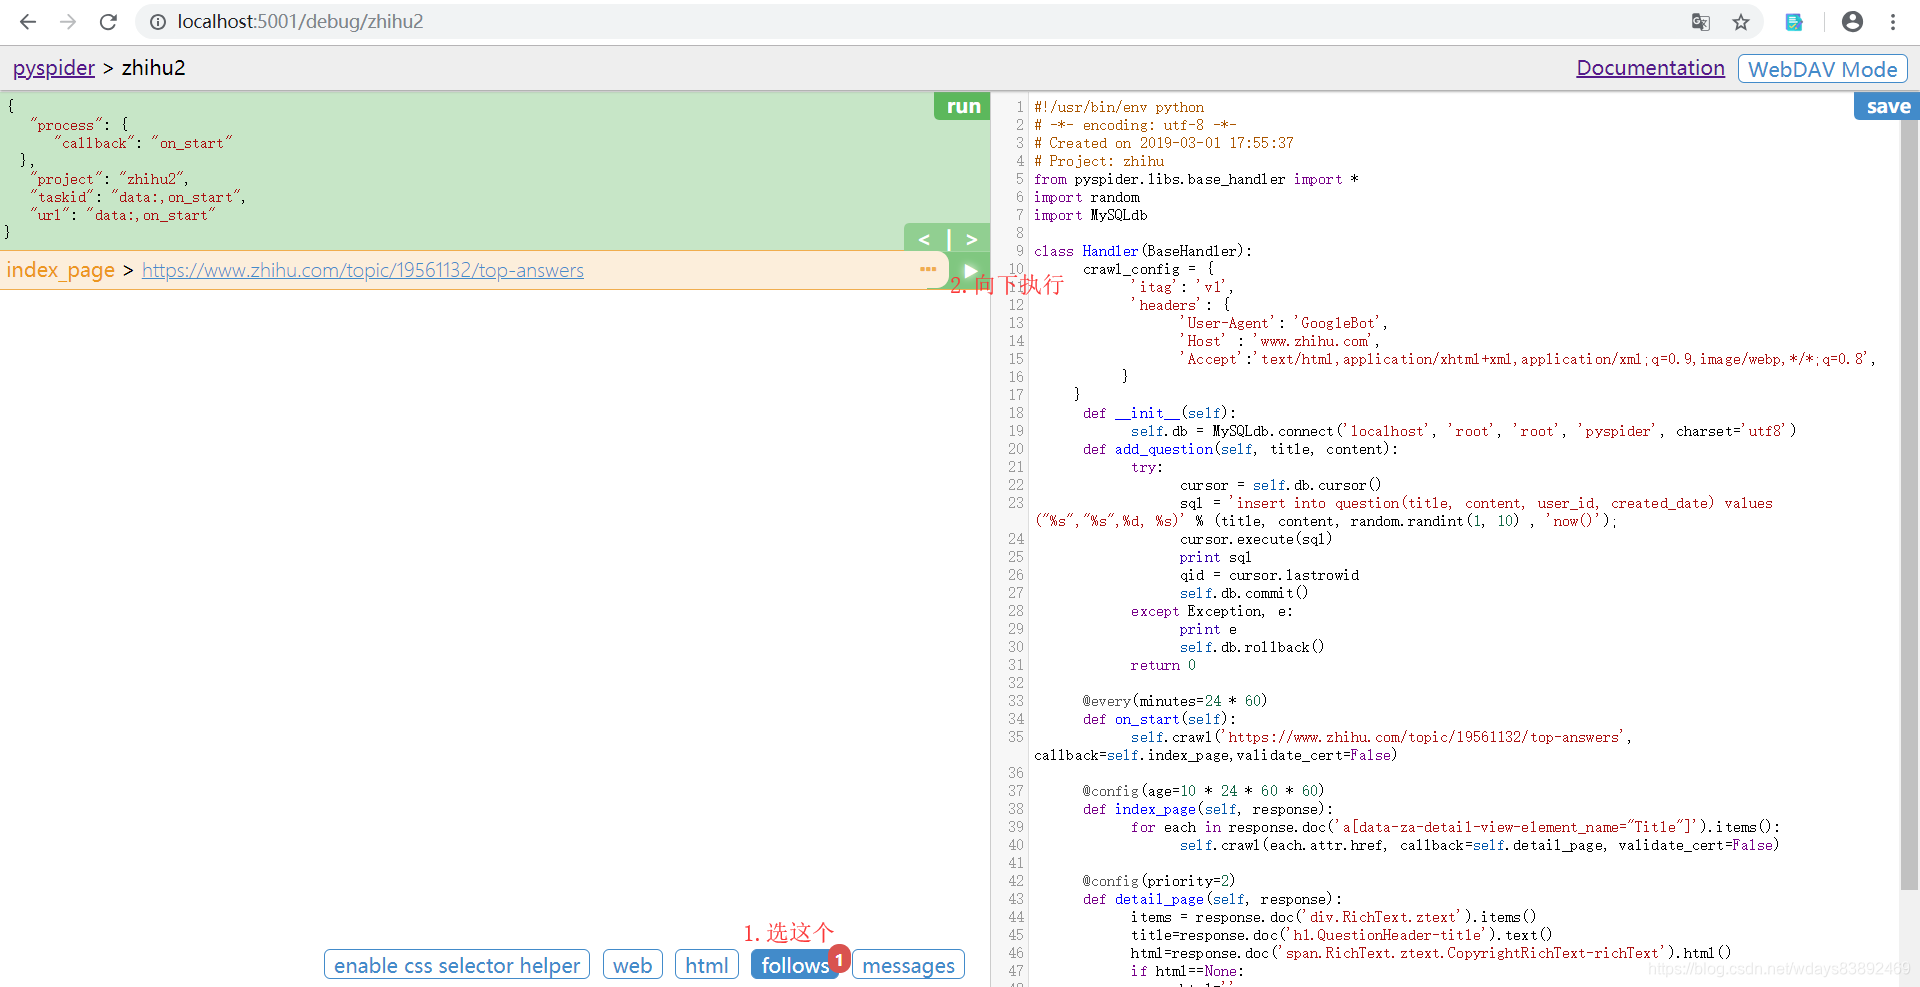
执行完on_start()函数,执行回调函数,继续向下执行

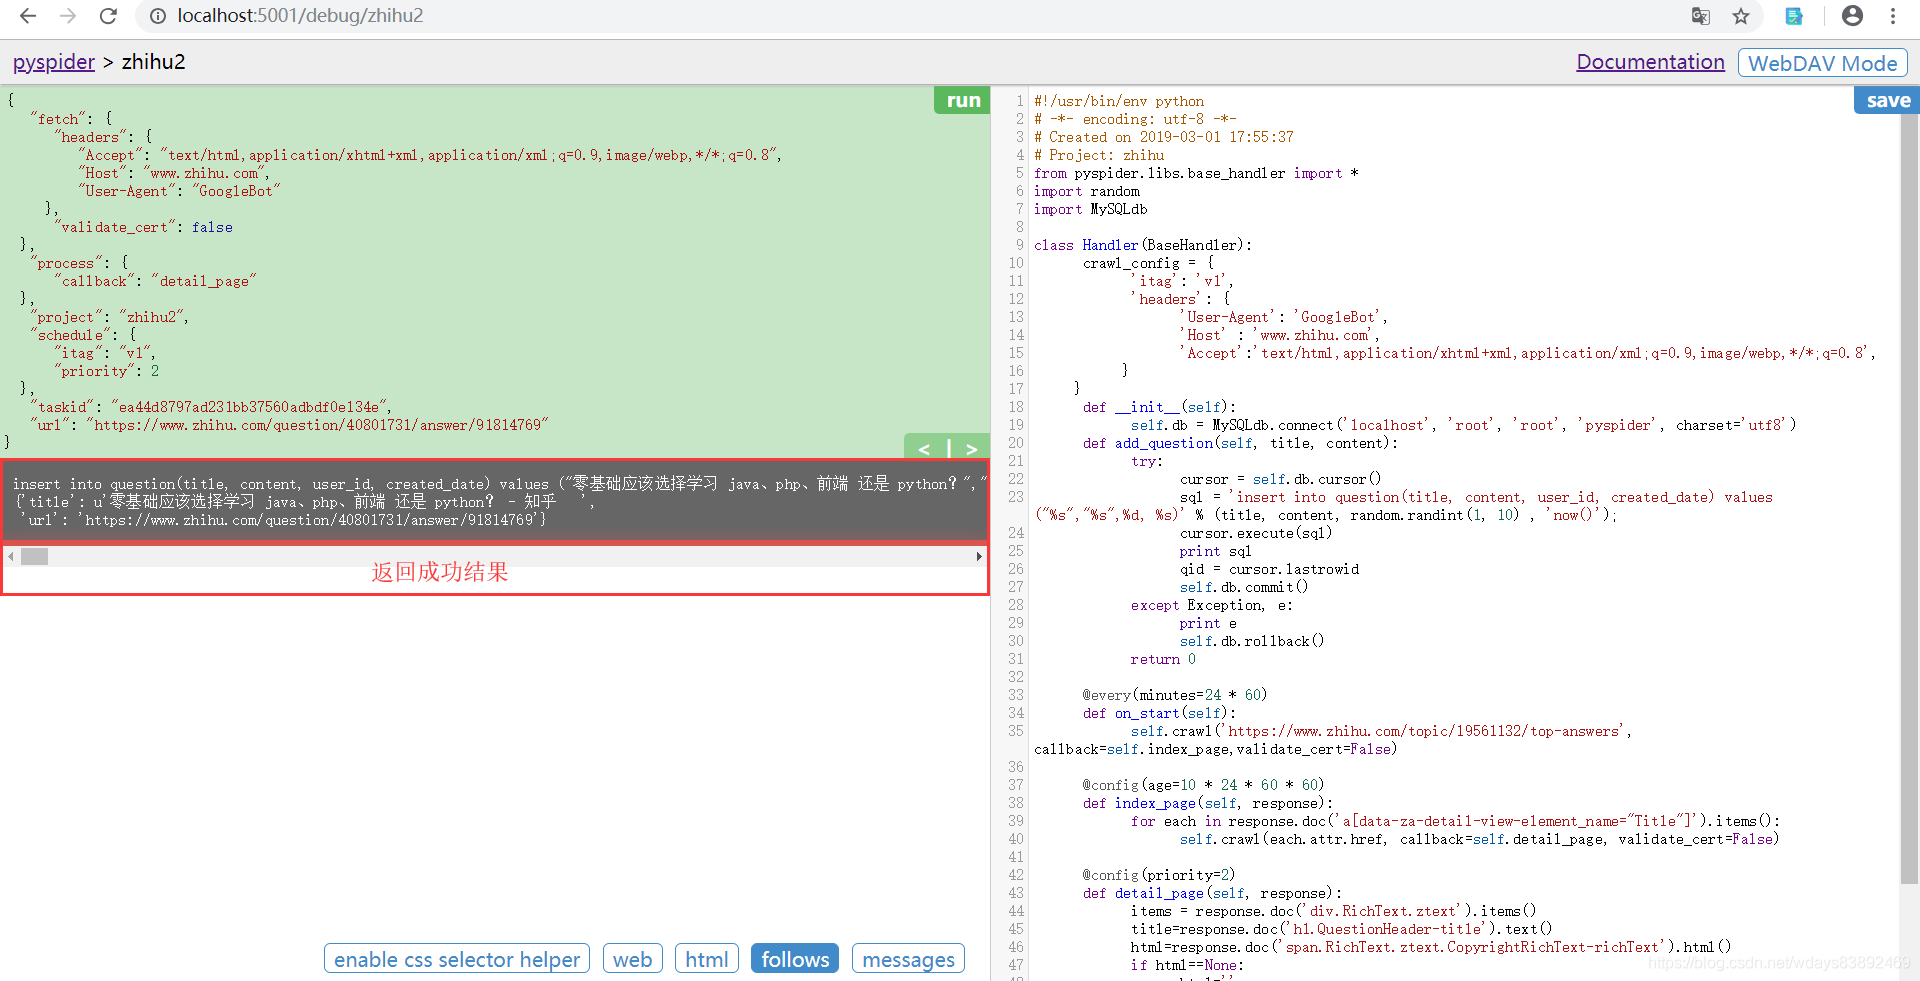
返回结果。代表成功。如果报错,那么跟调试程序的步骤一样,耐心调试。
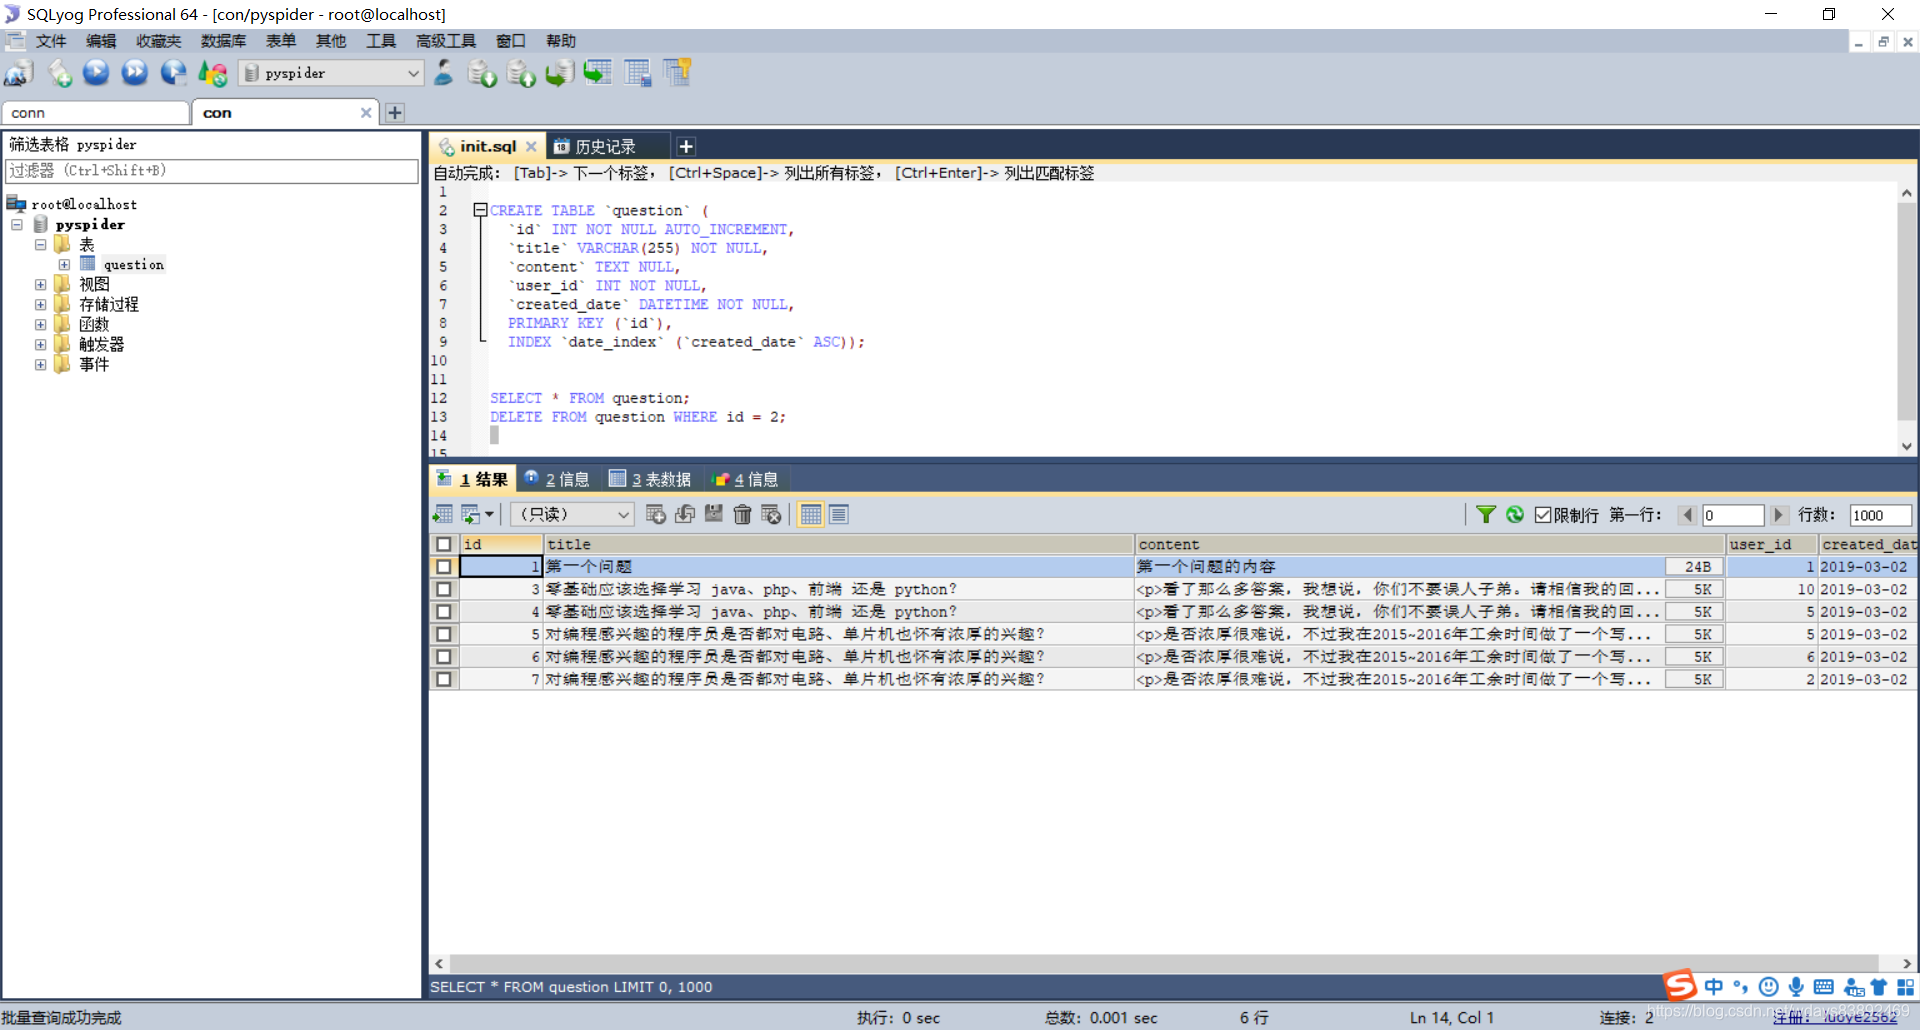
查看数据是否已经入库
将爬虫程序从调试模式转为运行模式

爬虫就可以慢慢爬取数据了。
建议掌握的前驱知识:http://www.w3school.com.cn/css/css_selector_attribute.asp
源码下载地址:https://github.com/13884566853/Python_pyspider