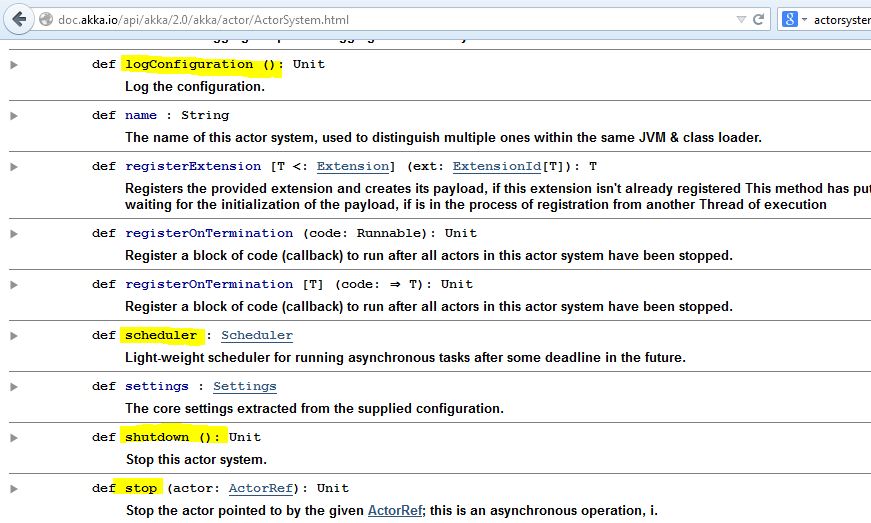
我们先看下 ActorSystem里的方法的一个子集。
1. 配置管理
还记得 前面](http://it.deepinmind.com/akka/2014/10/22/akka-notes-logging-and-testing.html)我们用来配置日志级别的那个application.conf文件吗?它就好比Java程序里的那些.properties文件一样。马上我们会看到如何通过这个配置文件来自定义分发器以及邮箱等。(这么说好像对[typesafe config](https://github.com/typesafehub/config)而言不太公平。看过[这几个例子之后你就知道它有多棒了)
当我们通过ActorSystem对象的apply方法创建ActorSystem实例而不指定任何配置的时候,它会在classpath的根路径下依次去查找application.conf, application.json以及application.peroperties文件并自动进行加载。
因此
val system=ActorSystem("UniversityMessagingSystem")
等同于
val system=ActorSystem("UniversityMessagingSystem", ConfigFactory.load())
为了证实这一说法,我们来看下ActorSystem.scala里的apply方法。
def apply(name: String, config: Option[Config] = None, classLoader: Option[ClassLoader] = None, defaultExecutionContext: Option[ExecutionContext] = None): ActorSystem = {
    val cl = classLoader.getOrElse(findClassLoader())
    val appConfig = config.getOrElse(ConfigFactory.load(cl))
    new ActorSystemImpl(name, appConfig, cl, defaultExecutionContext).start()
  }
A. 覆盖默认配置
如果你不喜欢使用application.conf的话(比如说在测试用例中),或者希望能自己指定配置文件(比方说想测试不同的配置文件或者部署到不同的环境上),你可以传入一个自己的配置来覆盖掉它,这样就不会去classpath中读取默认的配置了。
使用ConfigFactory.parseString
val actorSystem=ActorSystem("UniversityMessageSystem", ConfigFactory.parseString("""akka.loggers = ["akka.testkit.TestEventListener"]"""))
或者
在测试用例里也很简单
class TeacherTestLogListener extends TestKit(ActorSystem("UniversityMessageSystem", ConfigFactory.parseString("""akka.loggers = ["akka.testkit.TestEventListener"]""")))
  with WordSpecLike
  with MustMatchers
  with BeforeAndAfterAll {
还可以使用ConfigFactory.load
val system = ActorSystem("UniversityMessageSystem", ConfigFactory.load("uat-application.conf"))
如果你需要在运行时读取自己的配置参数的话,你可以通过它提供的API来完成:
val system=ActorSystem("UniversityMessageSystem", ConfigFactory.parseString("""akka.loggers = ["akka.testkit.TestEventListener"]"""))
println (system.settings.config.getValue("akka.loggers")) // Results in > SimpleConfigList(["akka.testkit.TestEventListener"])
B. 扩展默认配置
除了覆盖原有文件之外,你还可以通过 Config类的withFallback方法来使用自己的自定义配置去扩展默认配置。
假设你的application.conf是这样的:
akka{
    loggers = ["akka.event.slf4j.Slf4jLogger"]
    loglevel = DEBUG
    arun="hello"
}
而你希望覆盖掉它的akka.loggers属性:
val config=ConfigFactory.parseString("""akka.loggers = ["akka.testkit.TestEventListener"]""")
    val system=ActorSystem("UniversityMessageSystem", config.withFallback(ConfigFactory.load()))
最终你拿到的是两个配置合并之后的结果:
println (system.settings.config.getValue("akka.arun")) //> ConfigString("hello")
    println (system.settings.config.getValue("akka.loggers")) //> SimpleConfigList(["akka.testkit.TestEventListener"])
那么,为什么要介绍这个配置呢?因为ActorSystem就是用来加载并访问配置信息的。
请注意一下Fallback方法的顺序——哪个是默认配置,哪个又是扩展配置。记住,你是要回退到默认的配置上去,也就是说
config.withFallback(ConfigFactory.load())
是OK的,而
ConfigFactory.load().withFallback(config)
则不是你想要的结果。
2. 调度器

从 ActorSystem的API中可以看出,ActorSystem中有一个叫schedule的小而强大的方法,它会返回给你一个Scheduler。这个调度器有一系列的调度方法,我们可以用它们来完成许多有意思的事情。
A. 一次性调度
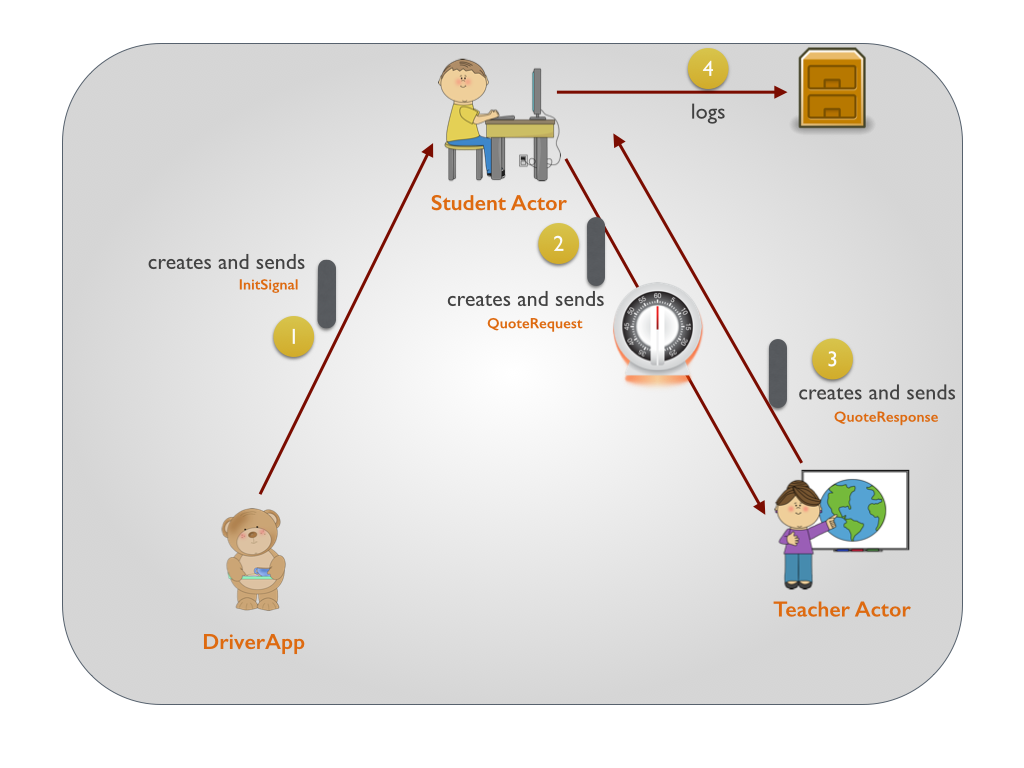
还是使用 学生-老师那个例子,假设StudentActor希望在收到InitSignal消息5秒之后才向老师发送请求,而不是立即发送,那么代码应该这么写:
class StudentDelayedActor (teacherActorRef:ActorRef) extends Actor with ActorLogging {

  def receive = {
    case InitSignal=> {
      import context.dispatcher
      context.system.scheduler.scheduleOnce(5 seconds, teacherActorRef, QuoteRequest)
      //teacherActorRef!QuoteRequest
    }
    ...
    ...
  }
}
测试用例
我们来编写一个简单的用例去验证下这个功能:
"A delayed student" must {

    "fire the QuoteRequest after 5 seconds when an InitSignal is sent to it" in {

      import me.rerun.akkanotes.messaging.protocols.StudentProtocol._

      val teacherRef = system.actorOf(Props[TeacherActor], "teacherActorDelayed")
      val studentRef = system.actorOf(Props(new StudentDelayedActor(teacherRef)), "studentDelayedActor")

      EventFilter.info (start="Printing from Student Actor", occurrences=1).intercept{
          studentRef!InitSignal
      }
    }

  }
延长Eventfilter拦截器的超时时间
噢,不妙。Eventfilter等待EventStream中出现消息的默认超时时间只有3秒。为了能验证我们这个用例,我们把这个超时时间增加到7秒。filter-leeway配置项就能帮助我们完成这点。
class RequestResponseTest extends TestKit(ActorSystem("TestUniversityMessageSystem", ConfigFactory.parseString("""
                                            akka{
                                              loggers = ["akka.testkit.TestEventListener"]
                                              test{
                                                  filter-leeway = 7s
                                              }
                                            }
                                    """)))
  with WordSpecLike
  with MustMatchers
  with BeforeAndAfterAll
  with ImplicitSender {
  ...
  ...
B. 循环调度
要想重复地执行某个动作,你可以使用Scheduler的schedule方法。
最常用的一个schedule方法就是定期地向一个Actor发送消息。这个方法接收4个参数:
1. 首次执行开始的延迟时间
2. 下一次执行的间隔时间
3. 接收消息的目标ActorRef
4. 消息
case InitSignal=> {
      import context.dispatcher
      context.system.scheduler.schedule(0 seconds, 5 seconds, teacherActorRef, QuoteRequest)
      //teacherActorRef!QuoteRequest
    }
注意事项
这里import context.dispatcher这条语句非常重要。
schedule方法需要一个非常重要的隐式参数——ExecutionContext,看一下schedule方法的实现你就会明白为什么这个参数如此重要了:
final def schedule(
    initialDelay: FiniteDuration,
    interval: FiniteDuration,
    receiver: ActorRef,
    message: Any)(implicit executor: ExecutionContext,
                  sender: ActorRef = Actor.noSender): Cancellable =
    schedule(initialDelay, interval, new Runnable {
      def run = {
        receiver ! message
        if (receiver.isTerminated)
          throw new SchedulerException("timer active for terminated actor")
      }
    })
schedule方法只是把消息发送封装到了一个Runnable中,而它最终是由传进来的ExecutionContext来执行的。
为了使得ExecutionContext在作用域内隐式可用,我们使用到了在上下文中可用的隐式分发器。
摘自 ActorCell.scala
/**
   * Returns the dispatcher (MessageDispatcher) that is used for this Actor.
   * Importing this member will place an implicit ExecutionContext in scope.
   */
  implicit def dispatcher: ExecutionContextExecutor
代码
同样的,项目的完整代码可以从 Github中进行下载。
原创文章转载请注明出处: http://it.deepinmind.com
英文原文链接