<!DOCTYPE html>
<html>
<head>
<meta charset='UTF-8'>
<meta name='viewport' content='width=device-width,initial-scale=1.0'>
<meta http-equiv='X-UA-Compatible' content='ie=edge'>
<title>Document</title>
<style>
.router-link-exact-active {
color: red;
}
</style>
</head>
<body>
<div id='app'>
<!-- 1.设置链接 -->
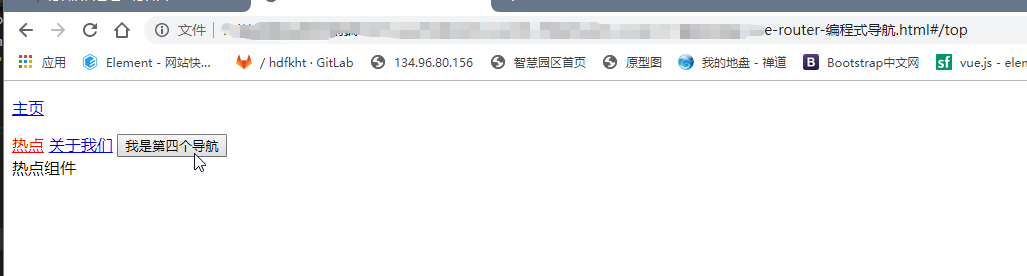
<router-link to="/home" tag="p">
<a>主页</a>
</router-link>
<router-link to="/top">热点</router-link>
<router-link to="/aboutus">关于我们</router-link>
<!-- 需求: 不想通过router-link标签改标识 使用js方法改标识 -->
<button @click="changeLink()">我是第四个导航</button>
<!-- 2. 提供容器:将来渲染组件 -->
<router-view></router-view>
</div>
<script src='./vue.js'></script>
<script src="./vue-router.js"></script>
<script>
// 3. 提供要渲染的组件选项(对象)
const Home = { template: `<div>首页组件</div>` };
const Top = { template: `<div>热点组件</div>` };
const Aboutus = { template: `<div>关于我们组件</div>` };
const routes = [
{ path: "/home", component: Home },
{ path: "/top", component: Top },
{ name: "aaa", path: "/aboutus", component: Aboutus }];
// 4. 实例化路由对象
const router = new VueRouter({ routes /* 5. 配置路由:匹配当前的标识 渲染对应的组件*/ })
// 路由选项 routes
new Vue({
el: '#app',
// 6. 挂载(使用)路由
router,
data: {},
methods: {
changeLink() {
// 改标识
// this.$router.路由对象的方法
this.$router.push({ path: "/top" })
}
}
});
</script>
</body>
</html>