一 Scrapy爬虫框架
发送请求 ---> 获取响应数据 ---> 解析数据 ---> 保存数据

** Scarpy框架介绍 **

    1、引擎(EGINE)
    引擎负责控制系统所有组件之间的数据流,并在某些动作发生时触发事件。有关详细信息,请参见上面的数据流部分。

    2、调度器(SCHEDULER)
    用来接受引擎发过来的请求, 压入队列中, 并在引擎再次请求的时候返回. 可以想像成一个URL的优先级队列, 由它来决定下一个要抓取的网址是什么, 同时去除重复的网址

    3、下载器(DOWLOADER)
    用于下载网页内容, 并将网页内容返回给EGINE,下载器是建立在twisted这个高效的异步模型上的

    4、爬虫(SPIDERS)
    SPIDERS是开发人员自定义的类,用来解析responses,并且提取items,或者发送新的请求

    5、项目管道(ITEM PIPLINES)
    在items被提取后负责处理它们,主要包括清理、验证、持久化(比如存到数据库)等操作
    下载器中间件(Downloader Middlewares)位于Scrapy引擎和下载器之间,主要用来处理从EGINE传到DOWLOADER的请求request,已经从DOWNLOADER传到EGINE的响应response,
    你可用该中间件做以下几件事:
        (1) process a request just before it is sent to the Downloader (i.e. right before Scrapy sends the request to the website);
        (2) change received response before passing it to a spider;
        (3) send a new Request instead of passing received response to a spider;
        (4) pass response to a spider without fetching a web page;
        (5) silently drop some requests.

    6、爬虫中间件(Spider Middlewares)
    位于EGINE和SPIDERS之间,主要工作是处理SPIDERS的输入(即responses)和输出(即requests)

** Scarpy安装 **
    1、pip3 install wheel
    2、pip3 install lxml
    3、pip3 install pyopenssl
    4、pip3 install pypiwin32
    5、安装twisted框架
        下载twisted
            http://www.lfd.uci.edu/~gohlke/pythonlibs/#twisted
        安装下载好的twisted
            pip3 install 下载目录\Twisted-17.9.0-cp36-cp36m-win_amd64.whl

    6、pip3 install scrapy

** Scarpy使用 **
    1、进入终端cmd
        - scrapy
            C:\Users\administortra>scrapy
            Scrapy 1.6.0 - no active project

    2、创建scrapy项目
        1.创建一个文件夹,专门用于存放scrapy项目
            - D:\Scrapy_prject
        2.cmd终端输入命令
            scrapy startproject Spider_Project( 项目名)
            - 会在 D:\Scrapy_prject文件夹下会生成一个文件
                   Spider_Project : Scrapy项目文件

        3.创建爬虫程序
            cd Spider_Project  # 切换到scrapy项目目录下
                          # 爬虫程序名称     目标网站域名
            scrapy genspider   baidu     www.baidu.com  # 创建爬虫程序

    3、启动scrapy项目,执行爬虫程序

        # 找到爬虫程序文件进行执行
        scrapy runspider只能执行某个 爬虫程序.py
            # 切换到爬虫程序执行文件目录下
            - cd D:\Scrapy_prject\Spider_Project\Spider_Project\spiders
            - scrapy runspider baidu.py

        # 根据爬虫名称找到相应的爬虫程序执行
        scrapy crawl 爬虫程序名称
            # 切换到项目目录下
            - cd D:\Scrapy_prject\Spider_Project
            - scrapy crawl baidu
安装成功的图示

微信机器人
wxpy基于itchat,使用了 Web 微信的通讯协议,,通过大量接口优化提升了模块的易用性,并进行丰富的功能扩展。实现了微信登录、收发消息、搜索好友、数据统计等功能。

总而言之,可用来实现各种微信个人号的自动化操作。(http://wxpy.readthedocs.io/zh/latest/bot.html)

安装:wxpy 支持 Python 3.4-3.6,以及 2.7 版本

pip3 install -U wxpy

安装 pillow模块

pip3 install pillow

安装 pyecharts模块

pip3 install pyecharts

 注意安装的版本
pyechat选择0.56版本 )python36)
扫码登录获得基本数据
男女生比例
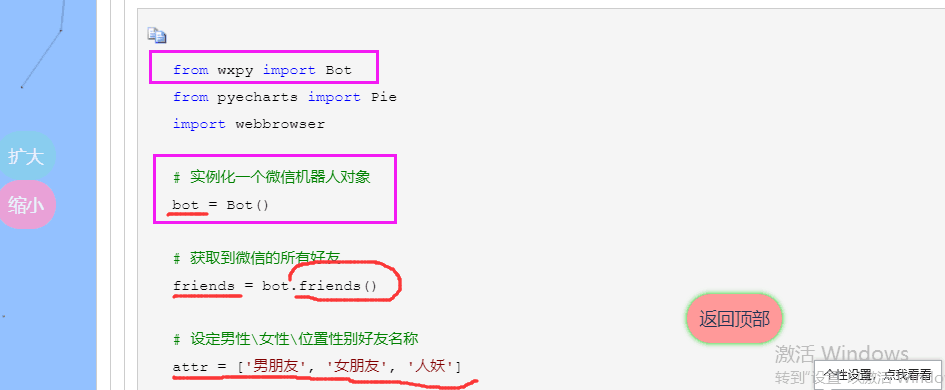
from wxpy import Bot
from pyecharts import Pie
import webbrowser

# 实例化一个微信机器人对象
bot = Bot()

# 获取到微信的所有好友
friends = bot.friends()

# 设定男性\女性\位置性别好友名称
attr = ['男朋友', '女朋友', '人妖']

# 初始化对应好友数量
value = [0, 0, 0]

# 遍历所有的好友,判断这个好友是男性还是女性
for friend in friends:
    if friend.sex == 1:
        value[0] += 1
    elif friend.sex == 2:
        value[1] += 1
    else:
        value[2] += 1

# 实例化一个饼状图对象
pie = Pie('tank的好友们!')

# 图表名称str,属性名称list,属性所对应的值list,is_label_show是否现在标签
pie.add('', attr, value, is_label_show=True)

# 生成一个html文件
pie.render('friends.html')

# 打开html文件
webbrowser.open('friends.html')
显示中国地图,需要装中国地图模块:
全球国家地图: echarts-countries-pypkg (1.9MB): 世界地图和 213 个国家,包括中国地图
中国省级地图: echarts-china-provinces-pypkg (730KB):23 个省,5 个自治区
中国市级地图: echarts-china-cities-pypkg (3.8MB):370 个中国城市
中国县区级地图: echarts-china-counties-pypkg (4.1MB):2882 个中国县·区
中国区域地图: echarts-china-misc-pypkg (148KB):11 个中国区域地图,比如华南、华北。
特别注明,中国地图在 echarts-countries-pypkg 里。需要这些地图的朋友,可以装 pip 命令行:
$ pip3 install echarts-countries-pypkg
$ pip3 install echarts-china-provinces-pypkg
$ pip3 install echarts-china-cities-pypkg
$ pip3 install echarts-china-counties-pypkg
$ pip3 install echarts-china-misc-pypkg
from wxpy import *
from pyecharts import Map
import webbrowser
bot=Bot(cache_path=True)

friends=bot.friends()


area_dic={}#定义一个字典,用来存放省市以及省市人数
for friend in friends:
    if friend.province not in area_dic:
        area_dic[friend.province]=1
    else:
        area_dic[friend.province]+=1

attr = area_dic.keys()
value = area_dic.values()


map = Map("好朋友们的地域分布", width=1200, height=600)
map.add(
    "好友地域分布",
    attr,
    value,
    maptype='china',
    is_visualmap=True, #结合体VisualMap

)
#is_visualmap -> bool 是否使用视觉映射组件
#
map.render('area.html')


webbrowser.open("area.html")
自动回复
from wxpy import *
bot=Bot(cache_path=True)

girl_friend=bot.search('女朋友的备注名称')[0]
print(girl_friend)

@bot.register() # 接收从指定好友发来的消息,发送者即recv_msg.sender为指定好友girl_friend
def recv_send_msg(recv_msg):
    print('收到的消息:',recv_msg.text) # recv_msg.text取得文本
    if recv_msg.sender == girl_friend:
        recv_msg.forward(bot.file_helper,prefix='老婆留言: ') #在文件传输助手里留一份,方便自己忙完了回头查看
        ms='老婆最美丽,我对老婆的爱如滔滔江水,连绵不绝'
        print('>>>给老婆回复的:', ms)
        return  ms#给老婆回一份

embed()
给制定的人回复
import requests
from wxpy import *
bot = Bot( cache_path=True)

girl_friend=bot.search('名字r')[0]

# 调用图灵机器人API,发送消息并获得机器人的回复
def auto_reply(text):
    url = "http://www.tuling123.com/openapi/api"
    api_key = "申请图灵机器人获取key值放到这里"
    payload = {
        "key": api_key,
        "info": text,
    }
    r = requests.post(url, data=json.dumps(payload))
    result = json.loads(r.content)
    return "[微信测试,请忽略] " + result["text"]


@bot.register()
def forward_message(msg):
    if msg.sender == girl_friend:
        return auto_reply(msg.text)

embed()
聊天机器人
import json
import requests
from wxpy import *
bot = Bot(cache_path=True)

# 调用图灵机器人API,发送消息并获得机器人的回复
def auto_reply(text):
    url = "http://www.tuling123.com/openapi/api"
    api_key = "9df516a74fc443769b233b01e8536a42"
    payload = {
        "key": api_key,
        "info": text,
    }
    r = requests.post(url, data=json.dumps(payload))
    result = json.loads(r.content)
    return "[来自智能机器人] " + result["text"]


@bot.register()
def forward_message(msg):
    return auto_reply(msg.text)

embed()