mybatis的配置文件
mybatis的配置文件有两种:
1.主配置文件
2.sql映射文件
mybatis的配置文件主要配置
别名
sql映射文件的位置
spring整合mybatis
需要把1数据源,2事物,3sqlsessionfactory,4动态代理对象 交给spring管理
扫描二维码关注公众号,回复:
6953735 查看本文章

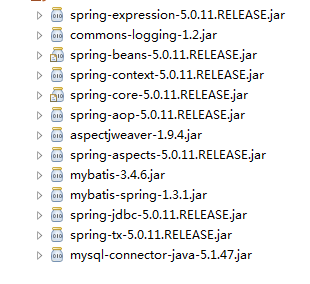
整合需要导入的jar包
1.spring相关jar
2.mybatis的jar
3.mybatis整合spring的jar
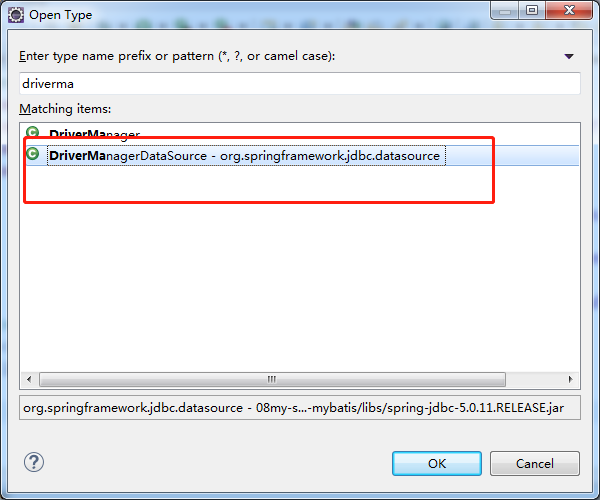
4.数据源(spring-jdbc-5.0.11.RELEASE.jar)
5.mysql的数据库驱动(mysql-connector-java-5.1.47.jar)
整合过程
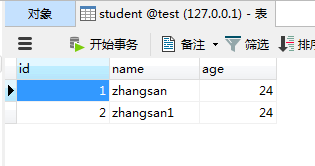
1.建表
2.定义表对应的对象,对象名和表名,属性和列名都一样,省了mybatis ,resultmap的配置
3.定义Dao对象和sql映射文件
5.定义mybatis的主配置文件
6.定义service对象,注入dao对象
7.定义spring的配置文件
注册数据库,访问数据库
注册sqlsessionfactory对象,创建sqlsessionfactory对象
注册动态代理对象,使用mubatis的动态代理生成dao对象
注册自定义的service对象,注入dao对象。
demo
package com.cn.vo;

public class Student {

    private Integer id;
    private String name;
    private Integer age;
    public Integer getId() {
        return id;
    }
    public void setId(Integer id) {
        this.id = id;
    }
    public String getName() {
        return name;
    }
    public void setName(String name) {
        this.name = name;
    }
    public Integer getAge() {
        return age;
    }
    public void setAge(Integer age) {
        this.age = age;
    }
    @Override
    public String toString() {
        return "Student [id=" + id + ", name=" + name + ", age=" + age + "]";
    }
}


package com.cn.dao;

import com.cn.vo.Student;

public interface StudentDao {

    int insertStud(Student stu);
}


<?xml version="1.0" encoding="UTF-8" ?>
<!DOCTYPE mapper
  PUBLIC "-//mybatis.org//DTD Mapper 3.0//EN"
  "http://mybatis.org/dtd/mybatis-3-mapper.dtd">
<mapper namespace="com.cn.dao.StudentDao">
    <!-- SQL语句 -->
    <insert id="insertStud">
        insert into student (name,age) values (#{name},#{age})
    </insert>
</mapper>


<?xml version="1.0" encoding="UTF-8"?>
<!DOCTYPE configuration
PUBLIC "-//mybatis.org//DTD Config 3.0//EN"
"http://mybatis.org/dtd/mybatis-3-config.dtd">
<configuration>
    <!-- 别名 -->
    <typeAliases>
        <!-- 表示这个包下的所有类的 类名就是别名 -->
        <package name="com.cn.vo"/>
    </typeAliases>
    <!-- sql映射文件的位置 -->
    <mappers>
        <!-- name 是dao接口的包名,表示 这个包下的所有映射文件都能找到
            要求:1.sql映射文件名和dao接口名一样
                 2.sql映射文件和dao接口在同一目录
         -->
        <package name="com.cn.dao"/>

    </mappers>
    <!-- 数据源和事物 不需要了 -->
</configuration>


package com.cn.service;

import com.cn.vo.Student;

public interface StudentService {
    int addStu(Student stu);
}


package com.cn.service;

import com.cn.dao.StudentDao;
import com.cn.vo.Student;

public class StudentServiceImpl implements StudentService{

    private StudentDao sDao ;
    @Override
    public int addStu(Student stu) {
        return sDao.insertStud(stu);
    }
    public StudentDao getsDao() {
        return sDao;
    }
    public void setsDao(StudentDao sDao) {
        this.sDao = sDao;
    }

}


<?xml version="1.0" encoding="UTF-8"?>
<!-- 增加约束文件 -->
<beans xmlns="http://www.springframework.org/schema/beans"
    xmlns:xsi="http://www.w3.org/2001/XMLSchema-instance"
    xmlns:context="http://www.springframework.org/schema/context"
    xmlns:aop="http://www.springframework.org/schema/aop"
    xsi:schemaLocation="
        http://www.springframework.org/schema/beans
        http://www.springframework.org/schema/beans/spring-beans.xsd
           http://www.springframework.org/schema/context
           http://www.springframework.org/schema/context/spring-context.xsd
           http://www.springframework.org/schema/aop
           http://www.springframework.org/schema/aop/spring-aop.xsd"
    >
    <!--
        注册数据源 3个数据源 ①spring提供的
     -->
     <bean id ="myDataSource" class="org.springframework.jdbc.datasource.DriverManagerDataSource">
         <!-- 设置注入,提供数据库的连接信息 -->
         <property name="driverClassName" value="com.mysql.jdbc.Driver"/>
         <property name="url" value="jdbc:mysql://127.0.0.1:3306/test"/>
         <property name="username" value="root"/>
         <property name="password" value="admin"/>
     </bean>


     <!--和mybatis有关的 注册SqlSessionFactoryBean
         单独使用过 mybatis的时候,创建SqlSessionFactoryBean 需要读主配置文件的。主配置文件包括 别名,sql映射文件的位置,数据源。
         现在需要将数据源信息赋值
     -->
     <bean id="sqlSessionFactory" class="org.mybatis.spring.SqlSessionFactoryBean">
         <property name="dataSource" ref="myDataSource"/>
         <!-- 指定mybatis主配置文件的位置
             classpath spring 遇到这个,就会转为当前的类路径src下
         -->
         <property name="configLocation" value="classpath:mybatis.xml"/>
     </bean>
     <!-- 注册动态代理对象 使用mybatis的动态代理技术,创建Dao对象
         这个id不需要。因为这个类是产生dao对象的,代码中不会用到的
      -->
     <bean class="org.mybatis.spring.mapper.MapperScannerConfigurer">
        <!-- 配置 sqlSessionFactory -->
        <property name="sqlSessionFactoryBeanName" value="sqlSessionFactory"/>
        <!-- 告诉这个类,去哪里找dao接口。配置dao接口所在的包名 -->
        <property name="basePackage" value="com.cn.dao"/>
     </bean>

    <!-- 注册service对象 -->
    <bean id="myService" class="com.cn.service.StudentServiceImpl">
    <!-- 默认 创建的dao对象  是类名 首字母小写
        例外: 当类名有两个大写字母时,此时创建的 就是赋值给 类名
     -->
        <property name="sDao" ref="studentDao"/>
    </bean>

</beans>


package com.cn.test;

import org.springframework.context.ApplicationContext;
import org.springframework.context.support.ClassPathXmlApplicationContext;

import com.cn.service.StudentService;
import com.cn.vo.Student;

public class Test {

    public static void main(String[] args) {
        String resource = "applicationContext.xml";
        ApplicationContext ac = new ClassPathXmlApplicationContext(resource);
        StudentService service=  (StudentService) ac.getBean("myService");
        Student stu = new Student();
        stu.setName("zhangsan");
        stu.setAge(24);
        service.addStu(stu);

    }
}
package com.cn.test;

import org.springframework.context.ApplicationContext;
import org.springframework.context.support.ClassPathXmlApplicationContext;

import com.cn.service.StudentService;
import com.cn.vo.Student;

public class Test {

    public static void main(String[] args) {
        String resource = "applicationContext.xml";
        ApplicationContext ac = new ClassPathXmlApplicationContext(resource);
        StudentService service=  (StudentService) ac.getBean("myService");
        Student stu = new Student();
        stu.setName("zhangsan1");
        stu.setAge(24);
//        service.addStu(stu);

        String[] strs = ac.getBeanDefinitionNames();

        for (String s : strs) {
            System.out.println(s);
        }
    }
}


myDataSource
sqlSessionFactory
org.mybatis.spring.mapper.MapperScannerConfigurer#0
myService
studentDao
org.springframework.context.annotation.internalConfigurationAnnotationProcessor
org.springframework.context.annotation.internalAutowiredAnnotationProcessor
org.springframework.context.annotation.internalRequiredAnnotationProcessor
org.springframework.context.annotation.internalCommonAnnotationProcessor
org.springframework.context.event.internalEventListenerProcessor
org.springframework.context.event.internalEventListenerFactory
拆出来数据库的配置
jdbc.driver=com.mysql.jdbc.Driver
jdbc.url=jdbc:mysql://127.0.0.1:3306/test
jdbc.user=root
jdbc.pwd=admin


<!-- 引入属性配置文件 -->
    <context:property-placeholder location="classpath:jdbc.properties"/>
    <!--
        注册数据源 3个数据源 ①spring提供的
     -->
     <bean id ="myDataSource" class="org.springframework.jdbc.datasource.DriverManagerDataSource">
         <!-- 设置注入,提供数据库的连接信息 -->
         <property name="driverClassName" value="${jdbc.driver}"/>
         <property name="url" value="${jdbc.url}"/>
         <property name="username" value="${jdbc.user}"/>
         <property name="password" value="${jdbc.pwd}"/>
     </bean>
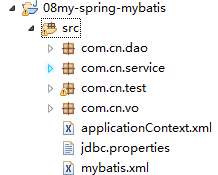
目录
其他的数据源
上面的数据源并不是数据库连接池
BDCP
导入两个JAR包

     <!--
        注册数据源 dbcp连接池
     -->
     <bean id ="myDataSource" class="org.apache.commons.dbcp.BasicDataSource">
         <!-- 设置注入,提供数据库的连接信息 -->
         <property name="driverClassName" value="${jdbc.driver}"/>
         <property name="url" value="${jdbc.url}"/>
         <property name="username" value="${jdbc.user}"/>
         <property name="password" value="${jdbc.pwd}"/>
     </bean>
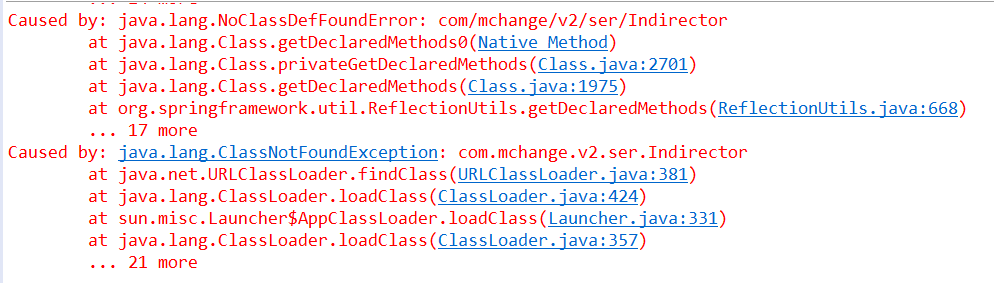
c3p0

      <!--
        注册数据源 c3p0连接池
     -->
     <bean id ="myDataSource" class="com.mchange.v2.c3p0.ComboPooledDataSource">
         <!-- 设置注入,提供数据库的连接信息 -->
         <property name="driverClass" value="${jdbc.driver}"/>
         <property name="jdbcUrl" value="${jdbc.url}"/>
         <property name="user" value="${jdbc.user}"/>
         <property name="password" value="${jdbc.pwd}"/>
     </bean>