一、概述
Nginx的静态处理能力很强,但是动态处理能力不足,可以通过配置反向代理将动态页面请求交给Apache处理。
二、实验步骤
安装apache----》》安装数据库----》》----》》配置php首页-----》》安装nginx----》》配置nginx反向代理----》》模拟动态请求测试
三、安装apache
[root@localhost ~]# yum -y install httpd httpd-devel
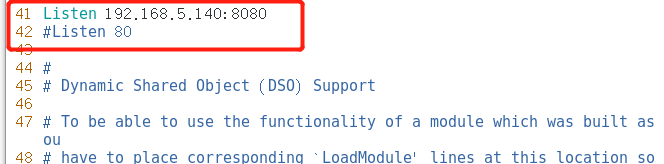
修改apache监听端口为8080(因为所有服务装在一台机子上);
关闭防火墙,启动httpd服务.
[root@localhost ~]# vim /etc/httpd/conf/httpd.conf
[root@localhost ~]# systemctl stop firewalld.service
[root@localhost ~]# setenforce  0
[root@localhost ~]# systemctl start httpd    ###启动httpd
[root@localhost nginx-1.12.2]#  netstat -ntap | grep httpd
tcp        0      0 192.168.5.140:8080      0.0.0.0:*               LISTEN      47052/httpd
四、安装轻量级数据库mariadb
[root@localhost ~]# yum install mariadb mariadb-server mariadb-libs mariadb-devel -y
[root@localhost ~]# systemctl start  mariadb   ##启动数据库
[root@localhost ~]# netstat -ntap | grep 3306
tcp        0      0 0.0.0.0:3306            0.0.0.0:*               LISTEN      4301/mysqld
[root@localhost ~]#
配置数据库
[root@localhost ~]# mysql_secure_installation
Enter current password for root (enter for none):   #回车
Set root password? [Y/n] y  ##是否设置密码
New password:     ####自己设置密码
Re-enter new password:   ###确认密码
Remove anonymous users? [Y/n] n   ##是否删除匿名用户
Disallow root login remotely? [Y/n] n  ##是否拒绝远程root登陆
Remove test database and access to it? [Y/n] n  ###是否删除测试
Reload privilege tables now? [Y/n] y  ##是否重新加载
 ... Success!
安装php
[root@localhost ~]# yum -y install php
[root@localhost ~]# yum install php-mysql -y ##安装php和mysql链接包
[root@localhost ~]# yum install -y php-gd php-ldap php-odbc php-pear php-xml php-xmlrpc php-mbstring php-snmp php-soap curl curl-devel php-bcmath
##环境工具包
配置php首页
[root@localhost ~]# cd /var/www/html
[root@localhost html]# vim index.php
<?php
  phpinfo();
?>
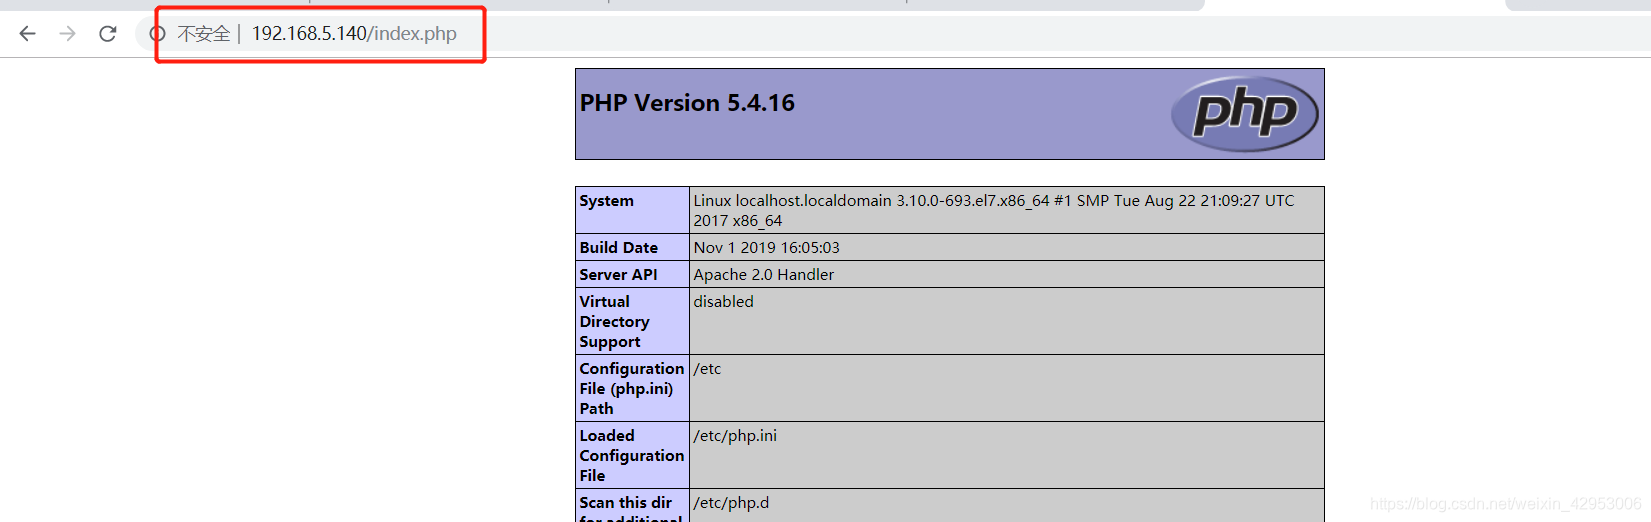
重新启动httpd,验证php网页
[root@localhost html]# systemctl restart httpd

扫描二维码关注公众号,回复:
8575100 查看本文章

五、安装nginx
安装环境包
[root@localhost html]# yum -y install gcc gcc-c++ pcre-devel zlib-devel
在nginx官网下载安装包(我这边用的1.12.2版本),解压到opt目录,创建程序用户。
[root@localhost LNMP-C7]# tar zxvf nginx-1.12.2.tar.gz -C
[root@localhost LNMP-C7]# useradd -M -s /sbin/nologin nginx
进入解压的/opt/nginx-1.12.2/目录中执行configure脚本
[root@localhost LNMP-C7]# cd /opt/nginx-1.12.2/
[root@localhost nginx-1.12.2]# ./configure \
> --prefix=/usr/local/nginx \
> --user=nginx \
> --group=nginx \
> --with-http_stub_status_module
编译并安装
[root@localhost nginx-1.12.2]# make && make install
创建软连接方便命令管理,启动nginx服务。
[root@localhost nginx-1.12.2]# ln -s /usr/local/nginx/sbin/* /usr/local/sbin
[root@localhost nginx-1.12.2]# nginx  ##启动nginx
[root@localhost nginx-1.12.2]# netstat -ntap | grep nginx
tcp        0      0 0.0.0.0:80              0.0.0.0:*               LISTEN      7996/nginx: master
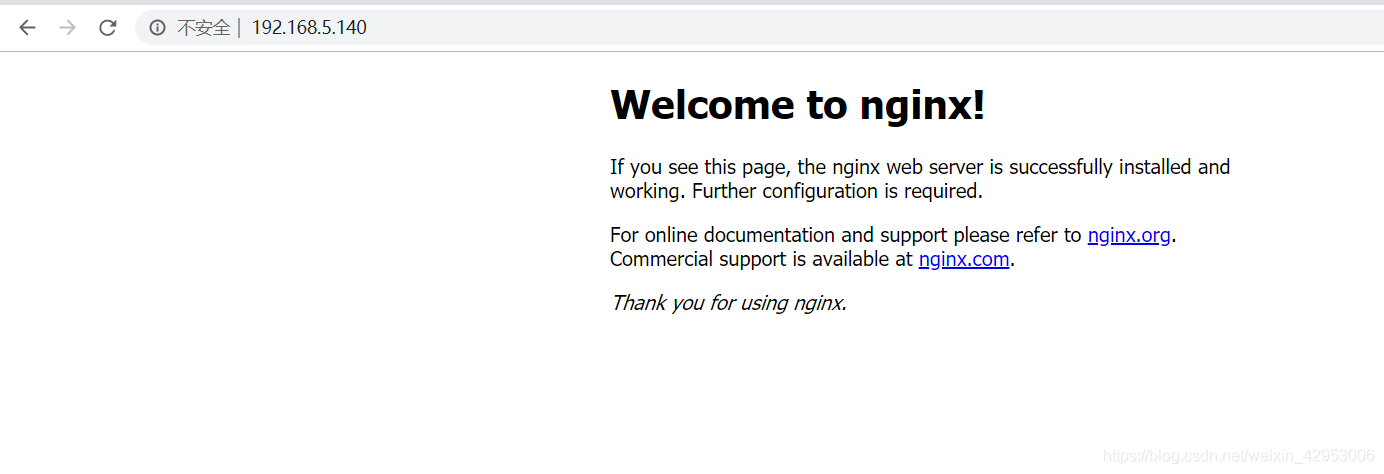
验证nginx首页
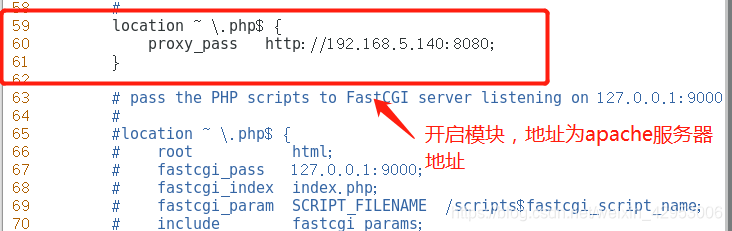
六、配置动静分离
[root@localhost nginx-1.12.2]# vim /usr/local/nginx/conf/nginx.conf
七、模拟动态请求测试
重新启动nginx服务
[root@localhost nginx-1.12.2]# killall -1 nginx  ##重启nginx服务
[root@localhost nginx-1.12.2]#  netstat -ntap | grep nginx
tcp        0      0 0.0.0.0:80              0.0.0.0:*               LISTEN      46918/nginx: master
模拟动态请求php网页,发现此请求直接跳转到apache首页