如果希望看到正常的原始数据,有两种方式:
1 修改cifar10_input.py文件,让它不去标准化。
2 手动读取数据并显示
一 通过修改cifar10_input.py
1 直接修改cifar10_input.py的240行到245行之间代码
  #下面这一行是添加的
  float_image=resized_image
  # Subtract off the mean and divide by the variance of the pixels.
  #下面这一行是注释的
  #float_image = tf.image.per_image_standardization(resized_image)
2 显示图片代码
import  cifar10_input
import tensorflow as tf
import pylab
#取数据
batch_size = 12
data_dir = '/tmp/cifar10_data/cifar-10-batches-bin'
images_test, labels_test = cifar10_input.inputs(eval_data = True, data_dir = data_dir, batch_size = batch_size)
sess = tf.InteractiveSession()
tf.global_variables_initializer().run()
tf.train.start_queue_runners()
image_batch, label_batch = sess.run([images_test, labels_test])
print("__\n",image_batch[0])
print("__\n",label_batch[0])
pylab.imshow(image_batch[0])
pylab.show()
3 运行结果后显示图片
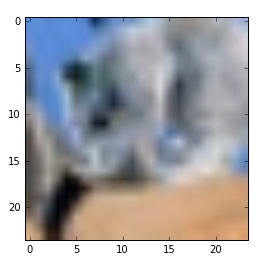
4 运行结果说明
可以看出是一只小松鼠,但图片仍然是被裁剪过的尺寸24*24*3
二 手动读取
1 实现说明
手动编写代码实现
2 代码
import numpy as np
from scipy.misc import imsave

filename = '/tmp/cifar10_data/cifar-10-batches-bin/test_batch.bin'
bytestream = open(filename, "rb")
buf = bytestream.read(10000 * (1 + 32 * 32 * 3))
bytestream.close()

data = np.frombuffer(buf, dtype=np.uint8)
data = data.reshape(10000, 1 + 32*32*3)
labels_images = np.hsplit(data, [1])
labels = labels_images[0].reshape(10000)
images = labels_images[1].reshape(10000, 32, 32, 3)

img = np.reshape(images[0], (3, 32, 32)) #导出第一幅图
img = img.transpose(1, 2, 0)

import pylab
print(labels[0])
pylab.imshow(img)
pylab.show()
3 运行结果

4 运行说明
这次得到的是真实的原始图片,尺寸为32*32*3