1 表单校验
检查应用程序的基底控制器 (App\Http\Controllers\Controller) 类你会看到这个类使用了 ValidatesRequests trait。这个 trait 在你所有的控制器里提供了方便的 validate 验证方法。
validate 方法会接收 HTTP 传入的请求以及验证的规则。如果验证通过,你的代码就可以正常的运行。若验证失败,则会抛出异常错误消息并自动将其返回给用户。在一般的 HTTP 请求下,都会生成一个重定向响应,对于 AJAX 请求则会发送 JSON 响应。
\vendor\laravel\framework\src\Illuminate\Foundation\Validation\ValidatesRequests.php
public function validate(Request $request, array $rules, array $messages = [], array $customAttributes = [])
{
    $validator = $this->getValidationFactory()->make($request->all(), $rules, $messages, $customAttributes);

    if ($validator->fails()) {
        $this->throwValidationException($request, $validator);
    }
了解了表单验证的原理,那接下来我们就使用控制器自带的 validate 方法进行校验吧!
首先,通过表单,我们了解到需要校验的字段包括了:name, age, sex
\app\Http\Controllers\StudentController.php
public function create(Request $request)
{
    // 判断是POST请求,也就是提交表单时走这个区间
    if($request->isMethod('POST'))
    {
        // 校验
        $this->validate($request, [
            'Student.name' => 'required|min:2|max:20',
            'Student.age' => 'required|integer',
            'Student.sex' => 'required|integer',
        ]);
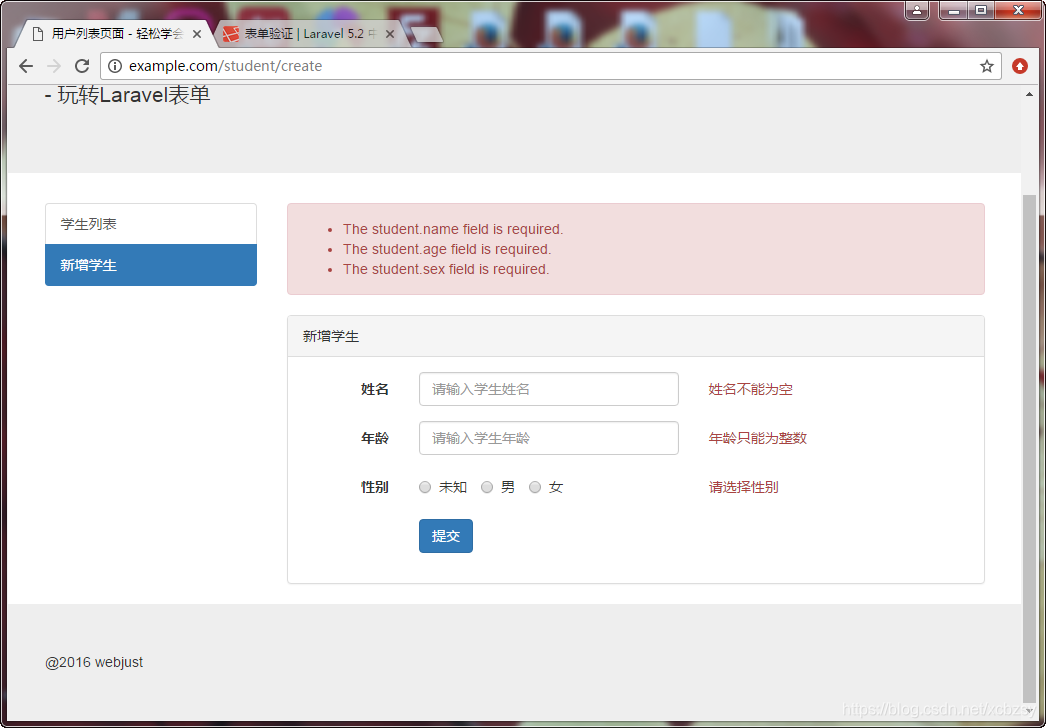
此时,我们尝试提交表单(注意:此处可以不填写任何内容),发现无法提交成功。因为当验证无法通过时,程序会抛出异常,不往下执行。
2 显示失败信息
好了,接下来我们就让表单的验证信息输出吧!之前,我们表单上的失败信息,就该派上用场了! GO!!!1
显示验证错误原理:如果本次请求的参数未通过我们指定的验证规则呢?正如前面所提到的,Laravel
会自动把用户重定向到先前的位置。另外,所有的验证错误会被自动 闪存至 session。请注意我们并不需要在 GET
路由中明确的将错误消息绑定到视图上。这是因为 Laravel 会自动检查 session
内的错误数据,如果错误存在的话,它会自动将这些错误消息绑定到视图上。因此需要的注意一点是 $errors
变量在每次请求的所有视图中都可以被使用,你可以很方便的假设 errors 变量是
Illuminate\Support\MessageBag 的实例。出处:http://d.laravel-china.org/docs/5.2/validation#validation-quickstart
\resources\views\shared\message.blade.php
@if(count($errors) > 0)
<div class="alert alert-danger">
    <ul>
        @foreach($errors->all() as $error)
        <li>{{ $error }}</li>
        @endforeach
    </ul>
</div>
@endif
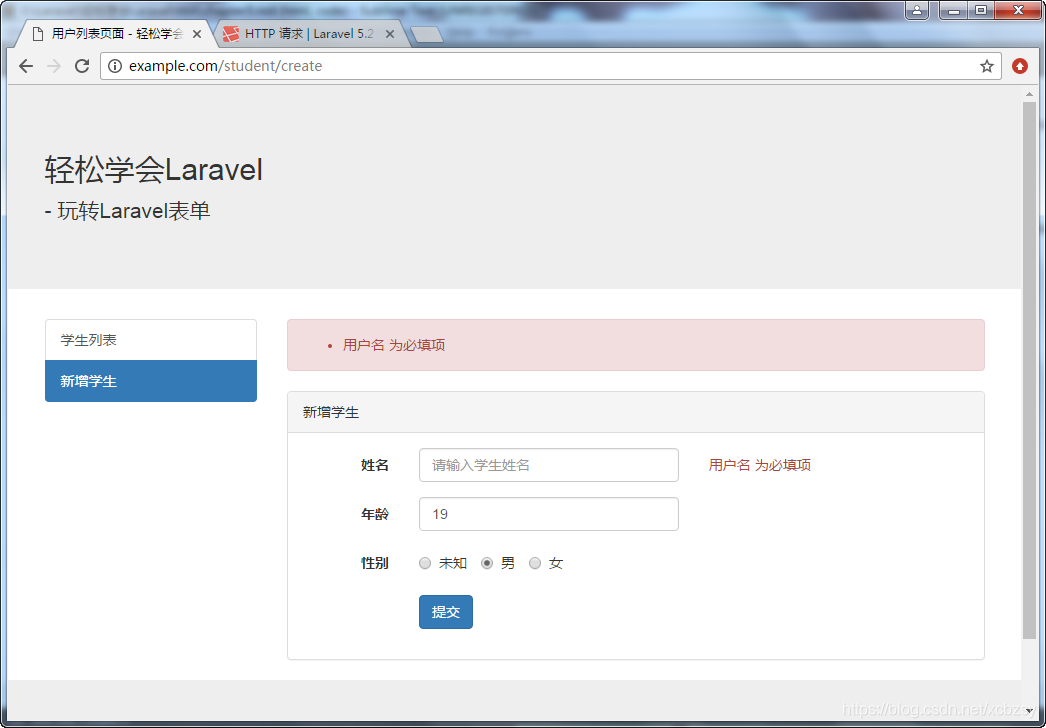
3 表单校验信息转化成中文
创建Request
php artisan make:request CreateUserRequest
CreateUserRequest代码块 ,校验方法如下:
// 校验
<?php

namespace App\Http\Requests;

use App\Http\Requests\Request;

class CreateUserRequest extends Request
{
        //验证规则可自己添加需要验证的字段
    protected $rules = [
        'Student.userName' => 'required|between:2,4',
        'Student.userAge' => 'required|integer',
        'Student.userSex' => 'required|integer',
        'Student.addr' => 'required',
    ];
    //这里我只写了部分字段,可以定义全部字段
    protected $strings_key = [
        'Student.userName' => '用户名',
        'Student.userAge' => '年龄',
        'Student.userSex' => '性别',
        'Student.addr' => '地址',
    ];
    //这里我只写了部分情况,可以按需定义
    protected $strings_val = [
        'required'=> '为必填项',
        'min'=> '最小为:min',
        'max'=> '最大为:max',
        'between'=> '长度在:min和:max之间',
        'integer'=> '必须为整数',
        'sometimes'=> '',
    ];

    /**
     * Determine if the user is authorized to make this request.
     *
     * @return bool
     */
    public function authorize()
    {
        return true;//修改为true
    }

    /**
     * Get the validation rules that apply to the request.
     *
     * @return array
     */
    public function rules()
    {

        $rules = $this->rules;
        // 根据不同的情况, 添加不同的验证规则
        if (Request::getPathInfo() == '/save')//如果是save方法
        {
            $rules['Student.addr'] = 'sometimes';
        }
        if (Request::getPathInfo() == '/edit')//如果是edit方法
        {
            $rules['Student.addr'] = 'required|min:5';
        }
        return $rules;

    }
  //返回给前台的错误信息
    public function messages(){
        $rules = $this->rules();
        $k_array = $this->strings_key;
        $v_array = $this->strings_val;
        foreach ($rules as $key => $value) {
            $new_arr = explode('|', $value);//分割成数组
            foreach ($new_arr as $k => $v) {
                $head = strstr($v,':',true);//截取:之前的字符串
                if ($head) {$v = $head;}
                $array[$key.'.'.$v] = $k_array[$key].$v_array[$v];
            }
        }
        return $array;
    }
}
控制器具体方法
/**
 * Show the form for creating a new resource.
 *
 * @return \Illuminate\Http\Response
 */
public function save(\App\Http\Requests\CreateUserRequest $request)
{
        //这里会自动调用表单验证
        //验证成功后继续向下执行
        $data = $request->input('Student');
        if(User::create($data)){
           return redirect('/')->with('success', '添加成功!');
        }else{
           return redirect('/create')->with('error', '添加失败!');
        }
}
对应的模板文件即视图文件,使用 {{ $errors->first(‘Student.name’) }} 可以只显示第一条错误信息:
<form class="form-horizontal" method="post" action="{{ url('student/create') }}">
    {{ csrf_field() }}
    <div class="form-group">
        <label for="name" class="col-sm-2 control-label">姓名</label>

        <div class="col-sm-5">
            <input type="text" name="Student[name]" class="form-control" id="name" placeholder="请输入学生姓名">
        </div>
        <div class="col-sm-5">
            <p class="form-control-static text-danger">{{ $errors->first('Student.name') }}</p>
        </div>
    </div>
    <div class="form-group">
        <label for="age" class="col-sm-2 control-label">年龄</label>

        <div class="col-sm-5">
            <input type="text" name="Student[age]" class="form-control" id="age" placeholder="请输入学生年龄">
        </div>
        <div class="col-sm-5">
            <p class="form-control-static text-danger">{{ $errors->first('Student.age') }}</p>
        </div>
    </div>
    <div class="form-group">
        <label class="col-sm-2 control-label">性别</label>

        <div class="col-sm-5">
            <label class="radio-inline">
                <input type="radio" name="Student[sex]" value="2"> 未知
            </label>
            <label class="radio-inline">
                <input type="radio" name="Student[sex]" value="1"> 男
            </label>
            <label class="radio-inline">
                <input type="radio" name="Student[sex]" value="0"> 女
            </label>
        </div>
        <div class="col-sm-5">
            <p class="form-control-static text-danger">{{ $errors->first('Student.sex') }}</p>
        </div>
    </div>
    <div class="form-group">
        <div class="col-sm-offset-2 col-sm-10">
            <button type="submit" class="btn btn-primary">提交</button>
        </div>
    </div>
</form>
此时表单提交的功能就完成大半啦,但是不能够保存上一次输入的信息,还是不够完美!那下一步就完善一下。
4 表单信息保持
闪存输入数据至 Session 后重定向。
你可能需要将输入数据闪存并重定向至前一页,这时只要在重定向方法后加上 withInput 即可。
// 模型的添加方法
$ret = Student::insert($data);
if($ret)
{
    return redirect('/')->with('success', '添加成功!')->withInput();
} else{
    return redirect('student/create')->with('error', '添加失败!')->withInput();
}
在表单的标签上加上 value 属性值。如 {{ old(‘Student’)[‘name’] }}
<form class="form-horizontal" method="post" action="{{ url('student/create') }}">
    {{ csrf_field() }}
    <div class="form-group">
        <label for="name" class="col-sm-2 control-label">姓名</label>

        <div class="col-sm-5">
            <input type="text" value="{{ old('Student')['name'] }}" name="Student[name]" class="form-control" id="name" placeholder="请输入学生姓名">
        </div>
        <div class="col-sm-5">
            <p class="form-control-static text-danger">{{ $errors->first('Student.name') }}</p>
        </div>
    </div>
    <div class="form-group">
        <label for="age" class="col-sm-2 control-label">年龄</label>

        <div class="col-sm-5">
            <input type="text" value="{{ old('Student')['age'] }}" name="Student[age]" class="form-control" id="age" placeholder="请输入学生年龄">
        </div>
        <div class="col-sm-5">
            <p class="form-control-static text-danger">{{ $errors->first('Student.age') }}</p>
        </div>
    </div>
    <div class="form-group">
        <label class="col-sm-2 control-label">性别</label>

        <div class="col-sm-5">
            <label class="radio-inline">
                <input type="radio" name="Student[sex]" {{ (isset(old('Student')['sex']) && old('Student')['sex'] == '2') ? 'checked' : '' }} value="2"> 未知
            </label>
            <label class="radio-inline">
                <input type="radio" name="Student[sex]" {{ (isset(old('Student')['sex']) && old('Student')['sex'] == '1') ? 'checked' : '' }} value="1"> 男
            </label>
            <label class="radio-inline">
                <input type="radio" name="Student[sex]" {{ (isset(old('Student')['sex']) && old('Student')['sex'] == '0') ? 'checked' : '' }} value="0"> 女
            </label>
        </div>
        <div class="col-sm-5">
            <p class="form-control-static text-danger">{{ $errors->first('Student.sex') }}</p>
        </div>
    </div>
    <div class="form-group">
        <div class="col-sm-offset-2 col-sm-10">
            <button type="submit" class="btn btn-primary">提交</button>
        </div>
    </div>
</form>
第一种:控制器验证
控制器内容
if ($request->isMethod('POST')) {
        $this->validate($request, [
            'Student.name' => 'required|min:2|max:20',
            'Student.age' => 'required|integer|max:100',
            'Student.sex' => 'required|integer',
        ], [
            'required' => ':attribute 为必填项',
            'min' => ':attribute 长度小于范围',
            'max' => ':attribute 长度超出范围',
            'integer' => ':attribute 必须为整数',
        ], [
            'Student.name' => '姓名',
            'Student.age' => '年龄',
            'Student.sex' => '性别',
        ]);

        $data = $request->input('Student');

        if (Student::create($data)) {
            return redirect('student/index')->with('success','添加成功');
        } else {
            return redirect()->back()->with('error', '添加失败');
        }
    }
    return view('student.create');
如果控制器中代码验证通过了(validate),那么会执行之后的代码,如果没有通过,框架会抛出一个异常,自动返回上一个页面;
错误信息被存到Session中了,并且将它绑定到视图;
第二种: Validator验证
控制器中:
使用\Validator::make创建验证:
 if ($request->isMethod('POST')) {
    $validator = \Validator::make($request->input(), [
        'Student.name' => 'required|min:2|max:20',
        'Student.age' => 'required|integer|max:100',
        'Student.sex' => 'required|integer',
    ], [
        'required' => ':attribute 为必填项',
        'min' => ':attribute 长度小于范围',
        'max' => ':attribute 长度超出范围',
        'integer' => ':attribute 必须为整数',
    ], [
        'Student.name' => '姓名',
        'Student.age' => '年龄',
        'Student.sex' => '性别',
    ]);
fails()代表验证失败,withErrors($validator)则为手动绑定错误信息
    if($validator->fails()) {
        return redirect()->back()->withErrors($validator);
    }
    $data = $request->input('Student');

    if (Student::create($data)) {
        return redirect('student/index')->with('success','添加成功');
    } else {
        return redirect()->back()->with('error', '添加失败');
    }
}
return view('student.create');
}
视图中调用错误信息
<p class="form-control-static text-danger">{{ $errors->first('Student.name') }}</p>
数据保持
(作用:验证失败时不用重新输入表单数据)
withInput() 默认将$request数据全部放进去
return redirect()->back()->withErrors($validator)->withInput();
视图中调用$errors的old方法:
普通input框:value="{{ old('Student')['age'] }}"

单选框:{{ old('Student.sex') == 0 ? "checked='checked'" : '' }}
