github仓库地址 https://github.com/gaoyangclub/GYTableViewController
前言
TableView是在项目开发的时候经常用到的组件,几乎百分之八十以上的页面都需要使用,一个最基本的Table需要实现DataSource的协议才能成功展示;那么当页面越来越多,根据不同的业务场景就需要实现不同的协议,将会出现不少相似冗余代码;当需求改变后,某些复杂页面的排版和业务需求耦合在一起,后期将变得越来越难以维护;大部分情况下,Table需要和下拉刷新上拉加载控件配合使用模拟网络请求;为了满足项目的可维护性,将UI排版和业务需求剥离出来,且自带一些常用的功能,GYTableViewController系列应运而生。
技术特点
- 无需继承自定义类,引入头文件UIViewController+GYTableView.h即可使用
- 支持OC和Swift(混合)
- Section和Cell层次更加清晰,根据传入的Section数据结构内部已经全部实现Section和Cell相关delegate方法
- Cell实例可获得外部动态数据,索引位置,上下关系,选中状态等,随时更换样式
- 自带MJRefresh框架,提供下拉刷新和上拉加载功能
- 提供Section,Cell间距设置,提供选中行高亮、选中行自动居中,提供设置Cell动态高度设置等API
- 框架中的元素全部继承于原生的tableView,除部分代理方法外,其他原生方法扔然可以使用
安装方法
- pod安装: pod ‘GYTableViewController’
- 手动安装:手动安装需要添加两个库,将GYTableViewController项目文件中Framework文件下的文件导入自身项目,同时此框架基于MJRefresh,所以也需要导入MJRefresh框架文件,手动或者pod都可以,MJRefresh安装方法请戳
- demo项目图标基于iconfont技术栈,请戳这里
框架用法
请使用该框架中的元素来代替原生Table控件,对应关系如下:
UIViewController+GYTableView -> UIViewController
GYTableBaseView -> UITableView
GYTableViewCell -> UITableViewCell
GYTableViewSection 原生使用UIView展示section内容,这里使用GYTableViewSection
SectionNode 用来设置Section样式与GYTableViewSection实例绑定
CellNode 用来设置Cell样式与GYTableViewCell实例绑定
使用时有Table控件的界面直接引入头文件UIViewController+GYTableView.h即可,.h示例如下
- Objective-C
#import "UIViewController+GYTableView.h"
@interface YourViewController : UIViewController
swift项目在Bridging_Header桥接文件中引入UIViewController+GYTableView.h,参照demo示例
.m或swift实现文件必须开启gy_useTableView开关来使用Table控件GYTableView
- Objective-C
- (BOOL)gy_useTableView {
    return YES;
}
- Swift
override func gy_useTableView() -> Bool {
    return true
}
.m或swift文件中重写headerRefresh添加元素,当自带的下拉刷新控件下拉时调用;从而开始Table内容层次搭建,以及各种类型的Cell位置如何摆放等
- (void)headerRefresh:(GYTableBaseView *)tableView {
    //下拉刷新后开始请求后台提供数据,请求到数据后根据解析的内容展开cell实例和位置等操作,代码结构如下(伪代码)
    request {
        tableView {
            sectionNode {
                cellNode,
                cellNode,
                ...
            }
            sectionNode {
                cellNode,
                ...
            }
            ...
        }
        [tableView headerEndRefresh:YES];//界面搭建完毕后停止刷新
    }
}
Cell控件直接继承GYTableViewCell,.h示例如下
- Objective-C
#import "GYTableViewCell.h"
@interface YourViewCell : GYTableViewCell
- Swift
class YourViewCell: GYTableViewCell
.m文件中重写showSubviews方法进行布局,利用getCellData获取Table控件中传入的数据
- Objective-C
- (void)showSubviews {
    id yourData = [self getCellData];//先获取外部传入的数据
    //开始界面布局...
}
- Swift
override func showSubviews() {
    let yourData = self.getData()
    //开始界面布局...
}
添加Cell
Table控制器内部实现
- Objective-C
- (void)headerRefresh:(GYTableBaseView *)tableView {
    [tableView addSectionNode:[SectionNode initWithParams:^(SectionNode *sNode) {
        //添加一个高度为230,类型为BannerViewCell,展示banner图片序列的Cell
        [sNode addCellNode:[CellNode initWithParams:230 cellClass:RefreshBannerViewCell.class cellData:Mock.bannerUrlGroup]];
    }]];
    [tableView headerEndRefresh:YES];//不要忘了结束刷新,否则刷新动画会停留原地
}
- Swift
override func headerRefresh(_ tableView: GYTableBaseView!) {
    tableView.add(SectionNode.initWithParams({ sNode in
        //添加一个高度为230,类型为BannerViewCell,展示banner图片序列的Cell
        sNode?.add(CellNode.initWithParams(230, cellClass: RefreshBannerViewCell.self, cellData: Mock.bannerUrlGroup))
    }))
    tableView.headerEndRefresh(true)
}
批量添加Cell
Table控制器内部实现(暴力添加,Swift略过…)
- (void)headerRefresh:(GYTableBaseView *)tableView {
    [tableView addSectionNode:[SectionNode initWithParams:^(SectionNode *sNode) {
        //添加一个高度为230,类型为BannerViewCell,展示banner图片序列的Cell
        [sNode addCellNode:[CellNode initWithParams:230 cellClass:RefreshBannerViewCell.class cellData:self.bannerUrlGroup]];
    }]];
    //注意banner和基金产品列表属于不同区域,应存放到各自section中添加,管理section视图会比较方便
    [tableView addSectionNode:[SectionNode initWithParams:^(SectionNode *sNode) {
        //添加多个高度为80,类型为RefreshFundViewCell,展示基金信息的Cell
        [sNode addCellNode:[CellNode initWithParams:80 cellClass:RefreshFundViewCell.class cellData:self.fundModels[0]]];
        [sNode addCellNode:[CellNode initWithParams:80 cellClass:RefreshFundViewCell.class cellData:self.fundModels[1]]];
        [sNode addCellNode:[CellNode initWithParams:80 cellClass:RefreshFundViewCell.class cellData:self.fundModels[2]]];
        //...
    }]];
    tableView.headerEndRefresh(true);//不要忘了结束刷新,否则刷新动画会停留原地
}
相同类型的Cell添加可以修改成通过原数组批量添加
- Objective-C
[tableView addSectionNode:[SectionNode initWithParams:^(SectionNode *sNode) {
    //添加多个高度为80,类型为RefreshFundViewCell,展示基金信息的Cell
    [sNode addCellNodeByList:[CellNode dividingCellNodeBySourceArray:80 cellClass:RefreshFundViewCell.class sourceArray:Mock.fundModels]];
}]];
- Swift
tableView.add(SectionNode.initWithParams({ sNode in
    sNode?.addCellNode(byList: CellNode.dividingCellNode(bySourceArray: 80, cellClass: RefreshFundViewCell.self, sourceArray: Mock.fundNewModels))
}))
添加Section
如果一节内容需要添加section页眉视图,只要在sectionNode实例设置sectionHeaderClass即可,同理section页脚设置sectionFooterClass
- Objective-C
- (void)headerRefresh:(GYTableBaseView *)tableView {
    [tableView addSectionNode:[SectionNode initWithParams:36 sectionHeaderClass:RefreshFundViewSection.class sectionHeaderData:@"精品专区" nextBlock:^(SectionNode *sNode) {
        //添加section内的cell...
    }]];
    [tableView headerEndRefresh:YES];
}
- Swift
override func headerRefresh(_ tableView: GYTableBaseView!) {
    tableView.add(SectionNode.initWithParams(36, sectionHeaderClass: RefreshFundViewSection.self, sectionHeaderData: "精品专区", nextBlock: { sNode in
        //添加section内的cell...
    }))
}
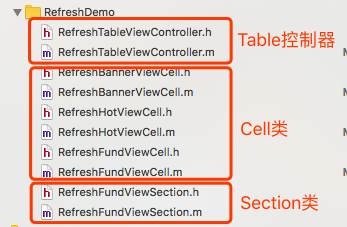
分类结构如下
isUnique唯一性
默认所有相同Class的Cell实例都是相互复用,每次下拉刷新或者table设置reloadData,被复用的Cell实例都会重新触发刷新调用showSubviews,从而根据传递的data展开;然而,一些特殊的Cell不需要复用或只实例化一次,比如标签按钮区域的Cell或者banner区域的Cell,每次下拉都是只用这个实例,可以设置为isUnique作为唯一Cell实例优化提高性能
- Objective-C
- (void)headerRefresh:(GYTableBaseView *)tableView endRefreshHandler:(HeaderRefreshHandler)endRefreshHandler {
    [tableView addSectionNode:[SectionNode initWithParams:^(SectionNode *sNode) {
       //添加一个高度为230,类型为BannerViewCell,展示banner图片序列的Cell
        [sNode addCellNode:[CellNode initWithParams:230 cellClass:RefreshBannerViewCell.class cellData:self.bannerUrlGroup isUnique:YES]];
        //添加一个高度为90,类型为RefreshHotViewCell,展示banner图片序列的Cell
        [sNode addCellNode:[CellNode initWithParams:90 cellClass:RefreshHotViewCell.class cellData:self.hotModels isUnique:YES]];
    }]];
    [tableView headerEndRefresh:YES];
}
- Swift
override func headerRefresh(_ tableView: GYTableBaseView!) {
    tableView.add(SectionNode.initWithParams({ sNode in
        //添加一个高度为230,类型为BannerViewCell,展示banner图片序列的Cell
        sNode?.add(CellNode.initWithParams(230, cellClass: RefreshBannerViewCell.self, cellData: Mock.bannerUrlGroup, isUnique:true))
        //添加一个高度为90,类型为RefreshHotViewCell,展示标签按钮区域的Cell
        sNode?.add(CellNode.initWithParams(90, cellClass: RefreshHotViewCell.self, cellData:Mock.hotModels , isUnique:true))
    }))
    tableView.headerEndRefresh(true)
}
上拉加载更多
Table控制器内部设置显示上拉加载控制器
- Objective-C
- (BOOL)gy_useLoadMoreFooter {
    return YES;
}
- Swift
override func gy_useLoadMoreFooter() -> Bool {
    return true
}
Table控制器内部重写footerLoadMore
- Objective-C
//lastSectionNode:上一节sectionNode数据,即当前Table页最后一节
- (void)footerLoadMore:(GYTableBaseView *)tableView lastSectionNode:(Section *)lastSectionNode {
    [lastSectionNode addCellNodeByList:[CellNode dividingCellNodeBySourceArray:80 cellClass:RefreshFundViewCell.class sourceArray:self.fundNewModels]];//将新增的CellNode实例继续添加到上一节SectionNode实例中
    [tableView footerEndLoadMore:YES];//不要忘了结束上拉加载刷新
}
- Swift
override func footerLoadMore(_ tableView: GYTableBaseView!, last lastSectionNode: SectionNode!) {
    lastSectionNode.addCellNode(byList: CellNode.dividingCellNode(bySourceArray: 80, cellClass: RefreshFundViewCell.self, sourceArray: Mock.fundNewModels))//将新增的CellNode实例继续添加到上一节SectionNode实例中
    tableView.footerEndLoadMore(true)//不要忘了结束上拉加载刷新
}
根据需求添加到Table页最后一节,或者添加到新的一节数据中,并设置添加上限,业务相关代码swift示例略…
if ([tableView getTotalCellNodeCount] > 30) {//总共超出30条数据不添加数据
    [tableView footerEndLoadMore:NO];//直接结束上拉加载刷新,并显示"已经全部加载完毕"
    return;
}
//根据业务需求的不同,可以继续添加到上一节sectionNode,也可以添加到新的一节sectionNode中
if ([lastSectionNode getCellNodeCount] < 15) {//上一节少于15条继续添加到上一节sectionNode
    [lastSectionNode addCellNodeByList:[CellNode dividingCellNodeBySourceArray:80 cellClass:RefreshFundViewCell.class sourceArray:self.fundNewModels]];
} else {//上一节超了 添加到新的一节sectionNode
    [tableView addSectionNode:[SectionNode initWithParams:36 sectionHeaderClass:RefreshFundViewSection.class sectionHeaderData:@"推荐专区" nextBlock:^(SectionNode *sNode) {
        [sNode addCellNodeByList:[CellNode dividingCellNodeBySourceArray:80 cellClass:RefreshFundViewCell.class sourceArray:self.fundNewModels]];
    }]];
}
[tableView footerEndLoadMore:YES];//不要忘了结束上拉加载刷新
更改UITableView的frame
Table控制器内部重写getTableViewFrame
如存在和容器底部对齐的元素,请在此方法对齐底部位置(默认占满controller边界);autoLayerout无需重写此方法,自行设置tableView和其他元素布局关系
- Objective-C
- (CGRect)gy_getTableViewFrame {
    self.noticeBack.frame = CGRectMake(0, 0, self.view.width, 30);
    self.submitButton.maxY = self.view.height;//底部按钮对齐容器底部
    //返回设置好的tableView位置frame 高度=总高度-公告区高-底部按钮高
    return CGRectMake(0, self.noticeBack.height, self.view.width, self.view.height - self.noticeBack.height - self.submitButton.height);
}
- Swift
override func gy_getTableViewFrame() -> CGRect {
    //...业务代码同上
    //返回设置好的tableView位置frame 高度=总高度-公告区高-底部按钮高
    return CGRect.init(x: 0, y: self.noticeBack.height, width: self.view.width, height:  self.view.height - self.noticeBack.height - self.submitButton.height);
}
自定义下拉刷新控件
Table控制器内部重写gy_getRefreshHeader
- Objective-C
- (MJRefreshHeader *)gy_getRefreshHeader {
    return [[DiyRotateRefreshHeader alloc] init];
}
- Swift
override func gy_getRefreshHeader() -> MJRefreshHeader! {
    return DiyRotateRefreshHeader()
}
侦听选中的Cell
Table控制器内部实现代理 (tableView:didSelectRowAtIndexPath:已废弃)
- Objective-C
- (void)didSelectRow:(GYTableBaseView *)tableView indexPath:(NSIndexPath *)indexPath {
    CellNode* cNode = [tableView getCellNodeByIndexPath:indexPath];//获取到绑定的CellNode
    YourClass* yourData = cNode.cellData;//获得cell的原始数据
    //根据数据添加业务逻辑...
}
- Swift
override func didSelectRow(_ tableView: GYTableBaseView!, indexPath: IndexPath!) {
    let cNode:CellNode? = tableView.getCellNode(by: indexPath)
    let yourData:YourClass? = cNode?.cellData as? YourClass
    //根据数据添加业务逻辑...
}
设置cell点击效果,cell实例内部重写showSelectionStyle
- Objective-C
- (BOOL)showSelectionStyle {
    return YES;
}
- Swift
override func showSelectionStyle() -> Bool {
    return true
}

设置Cell或Section元素间距
Table控制器内部设置tableView属性cellGap或sectionGap
- Objective-C
- (void)viewDidLoad {
    self.tableView.sectionGap = 6;//设置每一节区域之间间距
    self.tableView.cellGap = 3;//设置每个Cell之间间距(包含每一节区域)
}
- Swift
override func viewDidLoad() {
    self.tableView.sectionGap = 6//设置每一节区域之间间距
    self.tableView.cellGap = 3//设置每个Cell之间间距(包含每一节区域)
}
设置选中某个位置的Cell
当刷新完成后设置,Table控制器内部设置tableView属性selectedIndexPath
- Objective-C
- (void)headerRefresh:(GYTableBaseView *)tableView {
     [tableView addSectionNode:[SectionNode initWithParams:^(SectionNode *sNode) {
        //..添加cell数据
     }]];
     tableView.selectedIndexPath = [NSIndexPath indexPathForRow:0 inSection:0];//设置选中某个indexPath
     [tableView headerEndRefresh:YES];
}
- Swift
override func headerRefresh(_ tableView: GYTableBaseView!) {
    tableView.add(SectionNode.initWithParams({ sNode in
        //..添加cell数据
    }))
    tableView.selectedIndexPath = IndexPath.init(item: 0, section: 0)
    tableView.headerEndRefresh(true)
}
Cell实例设置选中效果,重写setSelected方法,选中样式请根据需求自行添加
- Objective-C
- (void)setSelected:(BOOL)selected {
    [super setSelected:selected];
    [self checkCellRelate];//自定义选中样式方法,非框架内部方法,实现如下
}
- Swift
override var isSelected:Bool {
    set {
        super.isSelected = newValue
        self.checkCellRelate()//自定义选中样式方法,非框架内部方法,业务实现略过...
    }
    get{
        return super.isSelected
    }
}
Cell实例位置关系isFirst,isLast,位于第一个或最后一个和中间段的Cell样式不同
- (void)checkCellRelate {
    if (self.isFirst) {
        [self drawFirstStyle:nodeColor];
    }else if(self.isLast){
        [self drawLastStyle:nodeColor];
    }else{
        [self drawNormalStyle:nodeColor];
    }
}
设置交互点击某个位置Cell并高亮
- Objective-C
- (void)viewDidLoad {
    self.tableView.clickCellHighlight = YES;
}
- Swift
override func viewDidLoad() {
    self.tableView.clickCellHighlight = true
}
设置点击Cell自动居中
- Objective-C
- (void)viewDidLoad {
    self.tableView.clickCellMoveToCenter = YES;
}
- Swift
override func viewDidLoad() {
    self.tableView.clickCellMoveToCenter = true
}
Cell自动调整高度
Table控制器内部设置CellNode传入高度CELL_AUTO_HEIGHT
- Objective-C
- (void)headerRefresh:(GYTableBaseView *)tableView {
    [tableView addSectionNode:[SectionNode initWithParams:^(SectionNode *sNode) {
        [sNode addCellNodeByList:[CellNode dividingCellNodeBySourceArray:CELL_AUTO_HEIGHT cellClass:AutoHeightWeiboCell.class sourceArray:Mock.weiboModels]];
    }]];
    [tableView headerEndRefresh:YES];
}
- Swift
override func headerRefresh(_ tableView: GYTableBaseView!) {
    tableView.add(SectionNode.initWithParams({ sNode in
        sNode?.addCellNode(byList: CellNode.dividingCellNode(bySourceArray: CELL_AUTO_HEIGHT, cellClass: AutoHeightWeiboCell.self, sourceArray: Mock.weiboModels))
    tableView.headerEndRefresh(true)
}
Cell实例重写getCellHeight方法获取动态高度,获取高度内容会被缓存不会二次计算
- Objective-C
- (CGFloat)getCellHeight:(CGFloat)cellWidth {
    WeiboModel *weiboModel = [self getCellData];//获取Model
    NSString *content = weiboModel.content;//获取动态内容字符串
    CGRect contentSize = [content boundingRectWithSize:CGSizeMake(cellWidth - LEFT_PADDING - RIGHT_PADDING, FLT_MAX)
    options:NSStringDrawingUsesLineFragmentOrigin
    attributes:@{NSFontAttributeName:[UIFont systemFontOfSize:TVStyle.sizeTextSecondary]}
    context:nil];//计算给定范围内最佳尺寸
    return TOPIC_AREA_HEIGHT + contentSize.size.height + IMAGE_AREA_HEIGHT + BOTTOM_PADDING * 2;//返回计算后的最终高度
}
- Swift
override func getHeight(_ cellWidth: CGFloat) -> CGFloat {
    let weiboModel:WeiboModel? = getData() as? WeiboModel//获取Model
    let content:String  = weiboModel!.content //获取动态内容字符串
    let contentSize:CGRect = content.boundingRect(with: CGSize.init(width: cellWidth - AutoHeightWeiboCell.LEFT_PADDING - AutoHeightWeiboCell.RIGHT_PADDING, height: CGFloat(Float.greatestFiniteMagnitude)), options: NSStringDrawingOptions.usesLineFragmentOrigin, attributes: [NSAttributedString.Key.font:UIFont.systemFont(ofSize: TVStyle.sizeTextSecondary)], context: nil)
    //计算给定范围内最佳尺寸
    return AutoHeightWeiboCell.TOPIC_AREA_HEIGHT + contentSize.size.height + AutoHeightWeiboCell.IMAGE_AREA_HEIGHT + AutoHeightWeiboCell.BOTTOM_PADDING * 2;//返回计算后的最终高度
}

自定义创建TableView
无上拉加载和下拉刷新控件的干净TableView实例
- Objective-C
self.tableView = [GYTableBaseView table:self];//创建并设置delegate
[self.tableView addSectionNode:[SectionNode initWithParams:^(SectionNode *sNode) {
    //添加元素...
}]];
[self.tableView gy_reloadData];//不要忘了刷新Table
- Swift
self.tableView = GYTableBaseView.table(self);//创建并设置delegate
self.tableView?.add(SectionNode.initWithParams({ sNode in
    //添加元素...
}))
self.tableView?.gy_reloadData();//不要忘了刷新Table

ChangeLog
1.1.0 当前版本,框架结构整体修改,兼容swift混编,底层delegate优化为动态绑定
历史版本
1.0.0 初版
1.0.1 iOS11.0 Table自动上移bug修复
1.0.2 自定义上拉加载控件支持
1.0.3 增加autolayout支持,修改TableBaseView参数传入方式
1.0.6 添加UIViewController+GYTableView分类
1.0.7 delegate添加prepareCell用来自定义对cell进行操作
1.0.8 部分bug修复
