最近假期在家闲来无事,天天吃了喝,喝了睡,突然想起年前手写了个spring和springmvc。废话不多说,直接上代码。
插入链接与图片
git地址 https://github.com/985391294/spring-demo

1.创建一个maven项目,然后在pom文件里面添加servlet的jar包以及jetty服务器,如果对tomcat熟悉,也可以使用tomcat启动。
<!--servlet的依赖-->
<dependencies>
        <!-- https://mvnrepository.com/artifact/javax.servlet/javax.servlet-api -->
        <dependency>
            <groupId>javax.servlet</groupId>
            <artifactId>javax.servlet-api</artifactId>
            <version>4.0.1</version>
            <scope>provided</scope>
        </dependency>

        <!--mysql驱动-->
        <dependency>
            <groupId>mysql</groupId>
            <artifactId>mysql-connector-java</artifactId>
            <version>5.1.47</version>
        </dependency>
    </dependencies>
 <build>
        <plugins>
            <plugin>
                <groupId>org.mortbay.jetty</groupId>
                <artifactId>maven-jetty-plugin</artifactId>
                <version>6.1.26</version>
                <configuration>
                    <webAppSourceDirectory>${basedir}/src/main/webapp</webAppSourceDirectory>
                    <scanIntervalSeconds>3</scanIntervalSeconds>
                    <contextPath>/</contextPath>
                    <connectors>
                        <connector implementation="org.mortbay.jetty.nio.SelectChannelConnector">
                            <port>8080</port>
                        </connector>
                    </connectors>
                </configuration>
            </plugin>
        </plugins>
 </build>
2.在webapp下面新建一个文件夹为WEB-INF,在WEB-INF新建web.xml文件。此处需要说的是idea开发工具不同于eclipse,刚开始新创建完项目之后,可能会没有webapp,需要自动手动创建,结构目录下图。
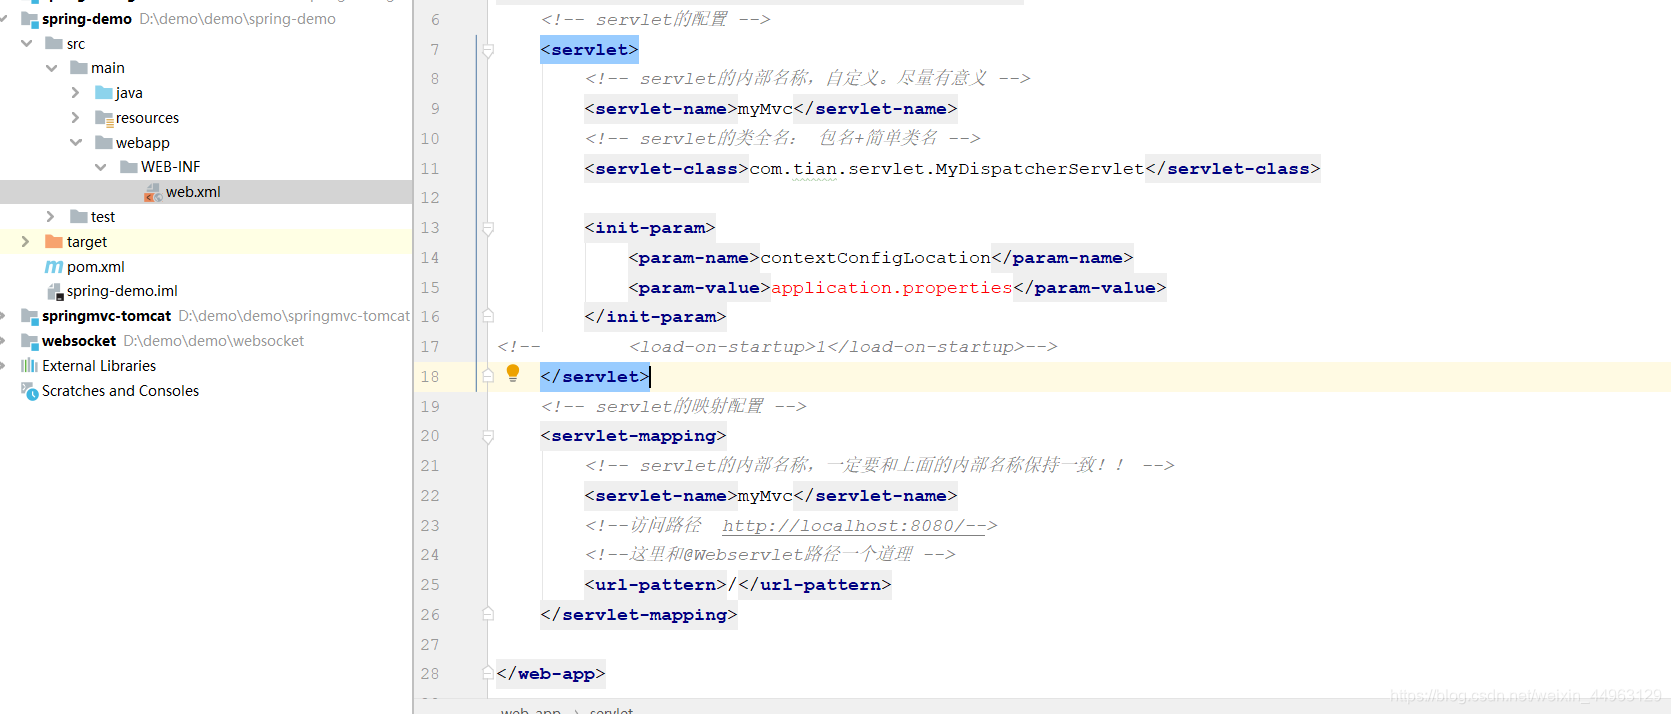
<?xml version="1.0" encoding="UTF-8"?>
<web-app xmlns="http://xmlns.jcp.org/xml/ns/javaee" xmlns:xsi="http://www.w3.org/2001/XMLSchema-instance"
         xsi:schemaLocation="http://xmlns.jcp.org/xml/ns/javaee
                      http://xmlns.jcp.org/xml/ns/javaee/web-app_4_0.xsd"
         version="4.0" metadata-complete="true">
    <!-- servlet的配置 -->
    <servlet>
        <!-- servlet的内部名称,自定义。尽量有意义 -->
        <servlet-name>myMvc</servlet-name>
        <!-- servlet的类全名: 包名+简单类名 -->
        <servlet-class>com.tian.servlet.MyDispatcherServlet</servlet-class>

        <init-param>
            <param-name>contextConfigLocation</param-name>
            <param-value>application.properties</param-value>
        </init-param>
<!--        <load-on-startup>1</load-on-startup>-->
    </servlet>
    <!-- servlet的映射配置 -->
    <servlet-mapping>
        <!-- servlet的内部名称,一定要和上面的内部名称保持一致!! -->
        <servlet-name>myMvc</servlet-name>
        <!--访问路径  http://localhost:8080/-->
        <!--这里和@Webservlet路径一个道理 -->
        <url-pattern>/</url-pattern>
    </servlet-mapping>

</web-app>
3.在resources下面新建一个application.properties配置文件,里面只需要写上一行包名的路径即可,稍后会读取当前配置文件里面的报名的路径,此处的代码就不往上面贴了。

4.配置工作都完成之后,开始我们的代码编写,首先自定义我们自己的注解,稍后我们的控制层就是由这些注解去实现请求路径的跳转。
/**
 * author: tian
 * date: 2020-1-1 17:11
 * desc:
 **/
@Target({ElementType.FIELD})
@Retention(RetentionPolicy.RUNTIME)
@Documented
public @interface MyAutowired {

    String value() default "";
}

/**
 * author: tian
 * date: 2020-1-1 17:12
 * desc:
 **/
@Target({ElementType.TYPE})
@Retention(RetentionPolicy.RUNTIME)
@Documented
public @interface MyController {

    String value() default "";
}

/**
 * author: tian
 * date: 2020-1-1 17:14
 * desc:
 **/
@Target({ElementType.TYPE,ElementType.METHOD})
@Retention(RetentionPolicy.RUNTIME)
@Documented
public @interface MyRequestMapping {

    String value() default "";
}

/**
 * author: tian
 * date: 2020-1-1 17:11
 * desc:
 **/
@Target({ElementType.TYPE})
@Retention(RetentionPolicy.RUNTIME)
@Documented
public @interface MyService {

    String value() default "";
}
5.手动实现我们自定义的DispatcherServlet,先编写一个类去实现HttpServlet,然后重写里面的三个方法,init()、doGet()、doPost()。然后在doGet()里面,调用doPost()方法,如果是get请求也去交给post。在初始化的方法里面完成spring所做的事情,里面包含了扫描当前项目的类、解析类、DI、初始化映射器。这里要重复的是,主要的功能都在3、4、5里面实现了。
package com.tian.servlet;

import com.tian.annotation.MyAutowired;
import com.tian.annotation.MyController;
import com.tian.annotation.MyRequestMapping;
import com.tian.annotation.MyService;

import javax.servlet.ServletConfig;
import javax.servlet.ServletException;
import javax.servlet.http.HttpServlet;
import javax.servlet.http.HttpServletRequest;
import javax.servlet.http.HttpServletResponse;
import java.io.File;
import java.io.IOException;
import java.io.InputStream;
import java.lang.reflect.Field;
import java.lang.reflect.Method;
import java.net.URL;
import java.util.*;

/**
 * author: tian
 * date: 2020-1-1 17:30
 * desc:
 **/
public class MyDispatcherServlet extends HttpServlet {

    private Properties contextConfig = new Properties();

    private List<String> classNames = new ArrayList<String>();

    // ioc容器
    private Map<String,Object> ioc = new HashMap<String,Object>();

    // 用来存放requestMapping的值和方法名
    private Map<String,Method> handlerMapping = new HashMap<String, Method>();

    @Override
    protected void doGet(HttpServletRequest req, HttpServletResponse resp) throws ServletException, IOException {
        // get请求也去交给post解决
        this.doPost(req,resp);
    }

    @Override
    protected void doPost(HttpServletRequest req, HttpServletResponse resp) throws ServletException, IOException {
        // 6.调用
        try {
            doDispatch(req,resp);
        } catch (Exception e) {
            e.printStackTrace();
        }
    }

    @Override
    public void init(ServletConfig config) throws ServletException {
        // 1.加载配置文件
        doLoadConfig(config.getInitParameter("contextConfigLocation"));

        // 2.扫描相关的类
        doScanner(contextConfig.getProperty("scanPackage"));

        // 3.实例化相关的类
        doInstance();

        // 4.依赖注入
        doAutowied();

        // 5.初始化handlerMapping
        doInitHandlerMapping();

        // 6.调用
        System.out.println("servlet初始化了。。。");
    }

    /**
     * author: tian
     * date: 2020-1-1 17:44
     * desc: 主核心做的事情
     **/
    // 1.加载配置文件
    private void doLoadConfig(String contextConfigLocation) {
        InputStream is = this.getClass().getClassLoader().getResourceAsStream(contextConfigLocation);
        try {
            contextConfig.load(is);
        } catch (IOException e) {
            e.printStackTrace();
        }finally {
            if(null != is){
                try {
                    is.close();
                } catch (IOException e) {
                    e.printStackTrace();
                }
            }
        }
    }
    // 2.扫描相关的类
    private void doScanner(String scanPackage) {
        // 把要扫描的包名转换为一个文件路径
        URL url = this.getClass().getClassLoader().getResource("/" + scanPackage.replaceAll("\\.","/"));
        File classPath = new File(url.getFile());

        // 递归遍历这个文件夹下面所有的文件
        for(File file : classPath.listFiles()){
            if(file.isDirectory()){ // 如果得到的是还是一个文件夹,就继续往下找
                doScanner(scanPackage + "." + file.getName());
            }else {
                // 如果不是class文件结尾的就调出当前循环层,因为可能会有xml properties 等文件
                if (!file.getName().endsWith(".class")) { continue; }
                // 得到当前类的报名和类名,
                String className = scanPackage + "." + file.getName().replace(".class", "");
                classNames.add(className);
            }
        }

    }
    // 3.实例化相关的类
    private void doInstance() {
        // 如果没有得到文件,就return
        if(classNames == null){
            return;
        }
        // 利用反射机制动态创建对象
        for(String className : classNames){
            try {
                // 根据文件名得到类名
                Class clazz = Class.forName(className);
                // 如果这个类不是注解类,就不放到ioc容器中去new
                if(clazz.isAnnotationPresent(MyController.class)){
                    // spring的原始配置文件 <bean id=""  class="">
                    // beanName 默认是类名的首字母小写加上其余所有的字母  clazz.getSimpleName()方法为得到文件的类名
                    String beanName = toLowerFirstCase(clazz.getSimpleName());
                    // 反射机制动态创建对象
                    ioc.put(beanName,clazz.newInstance());
                }else if(clazz.isAnnotationPresent(MyService.class)){  // 如果是service层的话情况比较复杂
                    // 第一种情况,默认类型首字母小写加其余字母
                    String beanName = toLowerFirstCase(clazz.getSimpleName());
                    // 第二种情况,自定义的名字
                    MyService myService = (MyService)clazz.getAnnotation(MyService.class);
                    // 如果是自定义的,也让首字母小写加上其余字母
                    if(!"".equals(myService.value())){
                        beanName = myService.value();
                    }
                    ioc.put(beanName,clazz.newInstance());
                    // 第三种情况,接口不能被new,实例化出来的是他的实现类
                    for(Class i : clazz.getInterfaces()){
                        if(ioc.containsKey(i.getName())){ // 如果一个接口有两个实现类,抛出一个异常
                            throw new Exception("当前实现类的id已经存在!!!");
                        }
                        ioc.put(i.getName(),clazz.newInstance());
                    }
                }else {
                    continue;
                }
            } catch (Exception e) {
                e.printStackTrace();
            }
        }
    }

    // 4.依赖注入
    private void doAutowied() {
        if(ioc.isEmpty()){ // 如果容器中没有对象就return
             return;
        }
        for(Map.Entry<String,Object> entry : ioc.entrySet()){
            // 拿到这个容器中所有的字段
            Field[] declaredFields = entry.getValue().getClass().getDeclaredFields();
            for(Field field : declaredFields){
                // 如果加了autowired注解的字段才给他赋值
                if(!field.isAnnotationPresent(MyAutowired.class)){
                    continue;
                }
                MyAutowired annotation = field.getAnnotation(MyAutowired.class);
                String beanName = annotation.value();

                //如果不是自定义,就默认根据类型注入
                if("".equals(beanName)){
                    beanName = field.getType().getName();
                }

                // 如果使用自动注入的对象的作用域为private,直接强制访问
                field.setAccessible(true);

                try {
                    field.set(entry.getValue(),ioc.get(beanName));
                } catch (IllegalAccessException e) {
                    e.printStackTrace();
                }
            }
        }
    }
    // 5.初始化handlerMapping
    private void doInitHandlerMapping() {
        if(ioc.isEmpty()){ return; }
        for(Map.Entry<String,Object> i : ioc.entrySet()){
            Class clazz = i.getValue().getClass();
            if(!clazz.isAnnotationPresent(MyController.class)){ continue; } // 如果不是controller就跳出当前循环层

            // 如果controller类里面有requestMapping注解的话
            String baseUrl = "";
            if(clazz.isAnnotationPresent(MyRequestMapping.class)){
                MyRequestMapping myRequestMapping = (MyRequestMapping) clazz.getAnnotation(MyRequestMapping.class);
                baseUrl = myRequestMapping.value();
            }

            // 得到controller中所有的方法
            for(Method method : clazz.getMethods()){
                // 如果方法上面没有加requestMapping注解的话也跳出
                if(!method.isAnnotationPresent(MyRequestMapping.class)){ continue; }

                MyRequestMapping myRequestMapping = method.getAnnotation(MyRequestMapping.class);
                // 得到requestMapping注解里面的值  replace是为了防止类上面的requestMapping结尾的 / 和方法上面的requestMapping的 / 拼接之后重复,全部替换成一个
                String url = ("/" + baseUrl + "/" + myRequestMapping.value()).replaceAll("/+","/");
                handlerMapping.put(url,method);
            }

        }
    }
    // 6.调用
    private void doDispatch(HttpServletRequest request,HttpServletResponse response) throws Exception {
        String url = request.getRequestURI();
        String contextPath = request.getContextPath();
        url = url.replaceAll(contextPath, "").replaceAll("/", "/");
        if(!handlerMapping.containsKey(url)){
                response.getWriter().write("<h1 align='center'>404 Not Found</h1>");
                return;
        }
        Map<String, String[]> parameterMap = request.getParameterMap();
        Method method = this.handlerMapping.get(url);
        System.out.println("得到的类名:"+method.getDeclaringClass().getSimpleName());
        System.out.println("request:"+request);
        System.out.println("response:"+response);
        System.out.println("参数:"+parameterMap.get("userName")[0]); // 此处的 userName 字段要和controller里面方法的参数保持一致
        String beanName = toLowerFirstCase(method.getDeclaringClass().getSimpleName());
        method.invoke(ioc.get(beanName),new Object[]{request,response,parameterMap.get("userName")[0]});
    }

    /**
     * author: tian
     * date: 2020-1-1 18:25
     * desc: 首字母小写加上其余字母
     **/
    private String toLowerFirstCase(String beanName){
        char [] chars = beanName.toCharArray();
        chars[0] += 32;
        return String.valueOf(chars);
    }
}
6.在控制层去使用我们完成的注解。
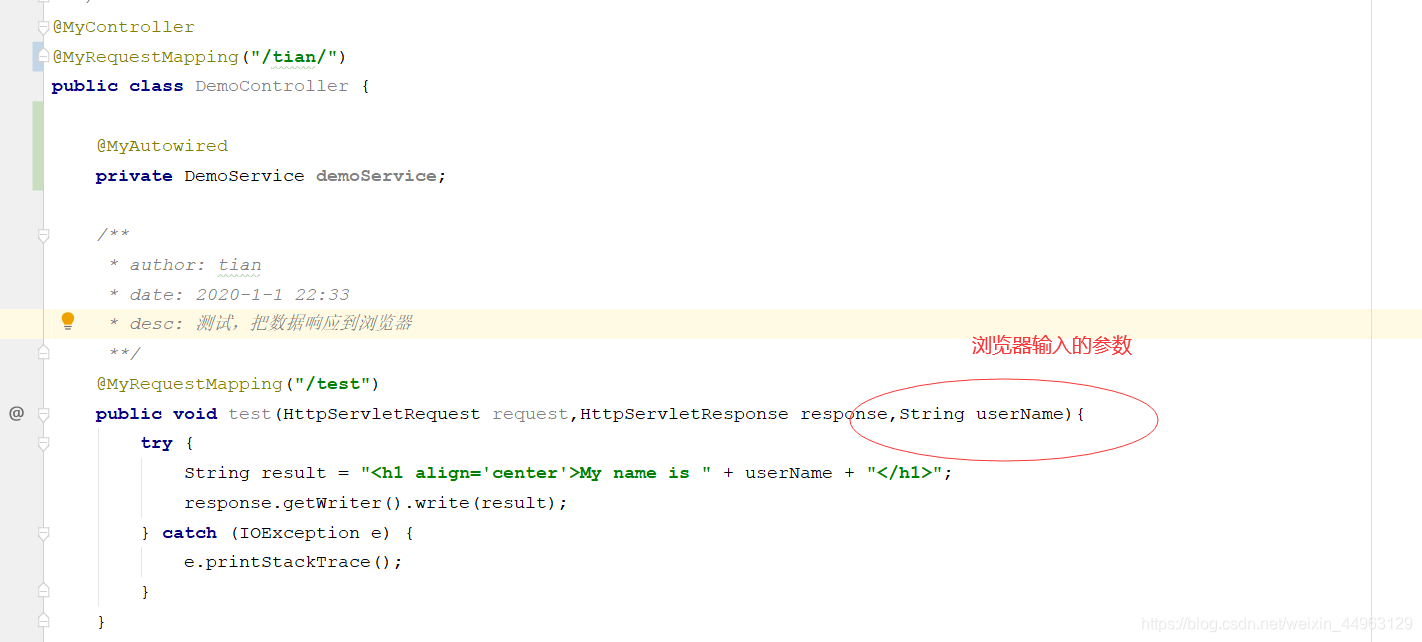

package com.tian.controller;

import com.tian.annotation.MyAutowired;
import com.tian.annotation.MyController;
import com.tian.annotation.MyRequestMapping;
import com.tian.entity.User;
import com.tian.service.DemoService;

import javax.servlet.http.HttpServletRequest;
import javax.servlet.http.HttpServletResponse;
import java.io.IOException;

/**
 * author: tian
 * date: 2020-1-1 17:17
 * desc:
 **/
@MyController
@MyRequestMapping("/tian/")
public class DemoController {

    @MyAutowired
    private DemoService demoService;

    /**
     * author: tian
     * date: 2020-1-1 22:33
     * desc: 测试,把数据响应到浏览器
     **/
    @MyRequestMapping("/test")
    public void test(HttpServletRequest request,HttpServletResponse response,String userName){
        try {
            String result = "<h1 align='center'>My name is " + userName + "</h1>";
            response.getWriter().write(result);
        } catch (IOException e) {
            e.printStackTrace();
        }
    }

    @MyRequestMapping("/user")
    public void selectAll(HttpServletRequest request,HttpServletResponse response,String name){
        try {
            User user = demoService.selectByName(name);
            response.getWriter().write(user.toString());
        }catch (Exception e){
            e.printStackTrace();
        }
    }
}
7.启动jetty,测试!总结:始终站在一个设计者的角度去看待问题。
我们要生产代码,不做代码的搬运工!
