了解LVS
LVS是Linux Virtual Server的简写,意即Linux虚拟服务器,是一个虚拟的服务器集群系统。本项目在1998年5月由章文嵩博士成立,是中国国内最早出现的自由软件项目之一。
宗旨
使用集群技术和Linux操作系统实现一个高性能、高可用的服务器.
很好的可伸缩性(Scalability)
很好的可靠性(Reliability)
很好的可管理性(Manageability)。
实操
我们这里用到的软件是keepalived,Keepalived的作用是检测服务器的状态,如果有一台web服务器宕机,或工作出现故障,Keepalived将检测到,并将有故障的服务器从系统中剔除,同时使用其他服务器代替该服务器的工作,当服务器工作正常后Keepalived自动将服务器加入到服务器群中,这些工作全部自动完成,不需要人工干涉,需要人工做的只是修复故障的服务器。
准备环境
准备三台服务器 lvs服务器: 10.0.0.41
nginx两台 :10.0.0.42
10.0.0.43
lvs服务器的操作
#!/bin/bash
yum -y install ipvsadm keepalived   //下载keepalived的服务
echo " " > /etc/keepalived/keepalived.conf  //清空配置文件
cat >>/etc/keepalived/keepalived.conf <<eof   //将以下内容写入配置文件
! Configuration File for keepalived

global_defs {
   notification_email {
     [email protected]
     [email protected]
     [email protected]
   }
   notification_email_from [email protected]
   smtp_server 192.168.200.1
   smtp_connect_timeout 30
   router_id LVS_DEVEL
   vrrp_skip_check_adv_addr
   vrrp_garp_interval 0
   vrrp_gna_interval 0
}
vrrp_instance VI_1 {
    state MASTER   //本机lvs服务器的身份
    interface ens33   //网卡的名字
    virtual_router_id 51
    priority 100   //权重 优先级
    advert_int 1
    authentication {
        auth_type PASS
        auth_pass 1111
    }
    virtual_ipaddress {
        10.0.0.100   //VIP地址
    }
}
virtual_server 10.0.0.100 80  {
    delay_loop 6
    lb_algo rr  //轮询方式
    lb_kind DR  //lvs的模式是DR模式
    protocol TCP
    //真实服务器
    real_server 10.0.0.42 80  {
        weight 1
        TCP_CHECK {
            connect_timeout 3
            connect_port 80
            nb_get_retry 3
            delay_before_retry 3
        }
    }
    //第二个真实服务器
    real_server 10.0.0.43 80  {
        weight 1
        TCP_CHECK {
            connect_timeout 3
            connect_port 80
            nb_get_retry 3
            delay_before_retry 3
        }
    }
}
eof
systemctl restart keepalived  //开启服务
ipvsadm -Ln
两台nginx的服务器:
#!/bin/bash
echo " " > /etc/sysconfig/network-scripts/ifcfg-lo:0
cat >> /etc/sysconfig/network-scripts/ifcfg-lo:0 <<eof
DEVICE=lo:0
IPADDR=10.0.0.100
NETMASK=255.255.255.255
ONBOOT=yes
eof
systemctl restart network
echo 1 > /proc/sys/net/ipv4/conf/lo/arp_ignore
echo 2 > /proc/sys/net/ipv4/conf/lo/arp_announce
echo 1 > /proc/sys/net/ipv4/conf/all/arp_ignore
echo 2 > /proc/sys/net/ipv4/conf/all/arp_announce
route add 10.0.0.100 dev lo:0
nginx的服务安装可以查看
https://editor.csdn.net/md/?articleId=103910922
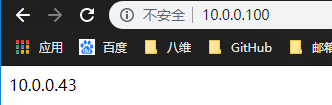
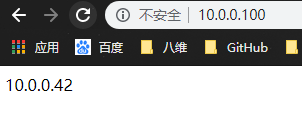
最终实现的效果 可以访问VIP第地址