今日头条搜索
三线城市程序员老陈观看视频教程,或者聊聊技术与人生,非常欢迎吭。
背景
本篇演示以下几点:
- 如何配置一个SpringBoot Web项目
- 如何使用注解提供web接口
- 如何使用配置文件配置端口与访问路径
创建项目并导入
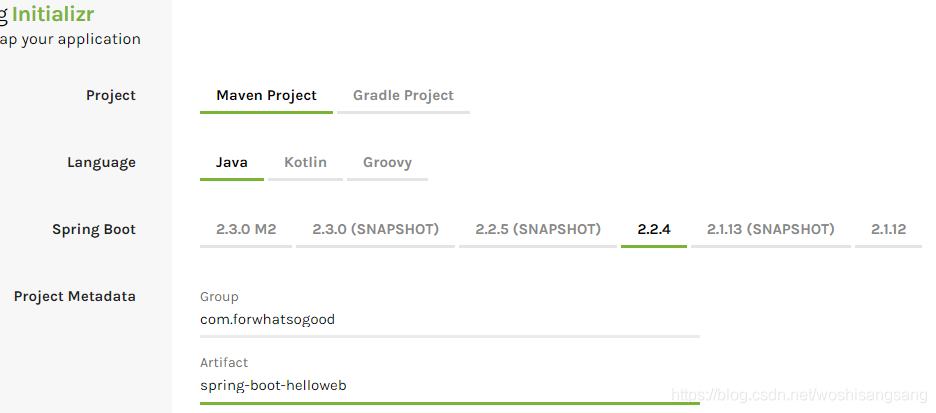
还是使用Spring Initializr创建一个项目,然后导入eclipse,项目信息如下:
配置SpringBoot Web项目
非常简单啊,只需要添加一个依赖即可:
	 	<dependency>
			<groupId>org.springframework.boot</groupId>
			<artifactId>spring-boot-starter-web</artifactId>
		</dependency>
看起来很简单,但是还是要稍微了解下spring-boot-starter-web到底为我们做了多少工作:
- 将src/main/resources/static作为存放css/js/html等静态资源的目录
- 配置SpringMVC所需的ViewResolver/Converter/HttpMessageConverter等组件。
- 配置默认使用嵌入式tomcat作为web容器,默认使用8080端口。
我们添加该依赖之后,跟web开发相关的功能,基本就都具备了,直接用就OK。
看下pom.xml整体:
<?xml version="1.0" encoding="UTF-8"?>
<project xmlns="http://maven.apache.org/POM/4.0.0"
	xmlns:xsi="http://www.w3.org/2001/XMLSchema-instance"
	xsi:schemaLocation="http://maven.apache.org/POM/4.0.0 https://maven.apache.org/xsd/maven-4.0.0.xsd">
	<modelVersion>4.0.0</modelVersion>
	<parent>
		<groupId>org.springframework.boot</groupId>
		<artifactId>spring-boot-starter-parent</artifactId>
		<version>2.2.4.RELEASE</version>
		<relativePath /> <!-- lookup parent from repository -->
	</parent>
	<groupId>com.forwhatsogood</groupId>
	<artifactId>spring-boot-helloweb</artifactId>
	<version>0.0.1-SNAPSHOT</version>
	<name>spring-boot-helloweb</name>
	<description>Demo project for Spring Boot</description>
	<properties>
		<java.version>1.8</java.version>
	</properties>
	<dependencies>
		<dependency>
			<groupId>org.springframework.boot</groupId>
			<artifactId>spring-boot-starter</artifactId>
		</dependency>
		<!-- 添加web开发功能 -->
		<dependency>
			<groupId>org.springframework.boot</groupId>
			<artifactId>spring-boot-starter-web</artifactId>
		</dependency>
		<dependency>
			<groupId>org.springframework.boot</groupId>
			<artifactId>spring-boot-starter-test</artifactId>
			<scope>test</scope>
			<exclusions>
				<exclusion>
					<groupId>org.junit.vintage</groupId>
					<artifactId>junit-vintage-engine</artifactId>
				</exclusion>
			</exclusions>
		</dependency>
	</dependencies>
	<build>
		<plugins>
			<plugin>
				<groupId>org.springframework.boot</groupId>
				<artifactId>spring-boot-maven-plugin</artifactId>
			</plugin>
		</plugins>
	</build>
</project>
编写控制器类
通过为控制器添加@RestController注解,将控制器方法的返回值都设置为json。
package com.forwhatsogood.springboothelloweb;
import java.util.HashMap;
import java.util.Map;
import org.springframework.web.bind.annotation.RequestMapping;
import org.springframework.web.bind.annotation.RestController;
@RestController//注册为控制器,可响应web请求,同时将方法返回值序列化为json
@RequestMapping("/hello")//访问路径
public class HelloController {
	@RequestMapping("web")
	public Map web() {
		Map<String,String> map=new HashMap<String,String>();
		map.put("path","/hello/web");
		return map;
	}
}
此时直接运行SpringBootHellowebApplication启动项目,访问http://localhost:8080/hello/web,结果如下:
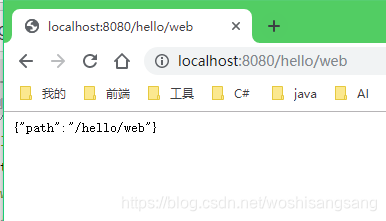
可见响应请求成功,且返回值为json格式。
配置扫描路径
如果控制类与启动类不在一个包,则需要手动指定扫描该包,一定要注意使用了手动指定后,就不存在默认扫描的包了,需要逐一手工指定。
package com.forwhatsogood.springboothelloweb;
import org.springframework.boot.SpringApplication;
import org.springframework.boot.autoconfigure.SpringBootApplication;
import org.springframework.context.annotation.ComponentScan;
@SpringBootApplication
@ComponentScan(basePackages = { "com.forwhatsogood.springboothelloweb", "com.forwhatsogood.other" }) // 手动指定扫描的包
public class SpringBootHellowebApplication {
	public static void main(String[] args) {
		SpringApplication.run(SpringBootHellowebApplication.class, args);
	}
}
同时如果不使用@RestController,则需要在方法上添加@ResponseBody来将返回值序列化为json格式,如下:
package com.forwhatsogood.other;
import java.util.HashMap;
import java.util.Map;

import org.springframework.stereotype.Controller;
import org.springframework.web.bind.annotation.RequestMapping;
import org.springframework.web.bind.annotation.ResponseBody;
@Controller//注册为控制器,可响应web请求
@RequestMapping("/user")//访问路径
public class UserController {
	@RequestMapping("web")
	@ResponseBody
	public Map web() {
		Map<String,String> map=new HashMap<String,String>();
		map.put("path","/user/web");
		return map;
	}
}
测试下,访问地址:http://127.0.0.1:8080/hello/web,http://127.0.0.1:8080/user/web均访问成功!
配置访问端口与路径
这个就更加简单了,在application.properties中直接添加:
# 配置端口
server.port=8000
# 配置路径 注意springboot2.0之前是server.context-path=/demo
server.servlet.context-path=/demo
重启程序,访问地址变为:
http://127.0.0.1:8000/demo/hello/web
http://127.0.0.1:8000/demo/user/web
总结
使用SpringBoot之后,只须pom中引入相应模块,然后直接编写bean组件如控制器,然后SpringBoot会自动识别导入,直接使用即可。
非常简单方便!
