1.webpack.base.conf中配置svg的依赖和loader
{
            test: /\.svg$/,
            loader: 'svg-sprite-loader',
            include: [resolve('src/icon')],
            options: {
                symbolId: 'icon-[name]'
            }
       },
      {
        test: /\.(png|jpe?g|gif|svg)(\?.*)?$/,
        loader: 'url-loader',
        exclude: [resolve('src/icons')],
        options: {
          limit: 10000,
          name: utils.assetsPath('img/[name].[hash:7].[ext]')
        }
      },
2.插入svg-sprite-loader包 npm i svg-sprite-loader
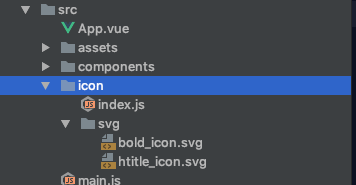
3.在src文件夹下创建icon文件夹 结构如下:
4.icon中index.js
import Vue from 'vue'
import SvgIcon from '@/components/SvgIcon'// svg组件

// register globally
Vue.component('svg-icon', SvgIcon)

const requireAll = requireContext => requireContext.keys().map(requireContext)
const req = require.context('./svg', false, /\.svg$/)
requireAll(req)
5.写一个全局组件SvgIcon
<template>
  <svg class="svg-icon" aria-hidden="true">
    <use :xlink:href="iconName"></use>
  </svg>
</template>

<script>
export default {
  name: 'SvgIcon',
  props: {
    iconClass: {
      type: String,
      required: true
    }
  },
  computed: {
    iconName() {
      return `#icon-${this.iconClass}`
    }
  }
}
</script>

<style>
.svg-icon {
  width: 1em;
  height: 1em;
  vertical-align: -0.15em;
  fill: currentColor;
  overflow: hidden;
}
</style>
6.main.js中引入icon

7.在vue文件中使用

8.大功告成,,略略略(ps:记得一定要npm i svg-sprite-loader哦 不然图片是不可能显示出来的 )
注意:运用的过程中发现需要改变颜色的操作
1.直接在svg-icon组件中进行例如悬浮改变颜色的效果
添加样式如下:
.svg-icon:hover{ fill: #409EFF; }
2.起初发现并没有效果-----》找了半天发现在.svg文件中有fill设置的内容 然后去除了尝试下 可以修改成功 如下图所示

⚠️⚠️⚠️ 必须把.svg源文件中的fill属性去除 然后设置对应的默认的颜色 就可以了