什么是 Webpack?
webpack 是一个静态模块打包器(module bundler)
作用:
① 它能将多个js文件打包成一个文件(传统开发会需要引入很多js,导致网页加载需要发起多次http请求而是加载速度变慢)
② 解决传统的依赖引用混乱问题,有时候传统js引用必须要按规定顺序加载,
③ 可以支持css和less的加载,图片处理(可以将较小的图片转成base64,减少http请求)
④ 可以通过模板引擎插件html-webpack-plugin生成HTML页面,html-webpack-plugin默认支持ejs格式的模板文件,如果你想使用其它格式的模板文件,那么需要在webpack配置里设置好相应
的loader
从 webpack v4.0.0 开始,可以不用引入一个配置文件。
然而,webpack 仍然还是高度可配置的。在开始前你需要先理解四个核心概念:
入口(entry)
输出(output)
loader
插件(plugins)
1.先安装node.js
https://nodejs.org/en/download
查看版本
$ node -v
v10.14.2

$ npm -v
6.5.0
2.使用淘宝镜像
$ npm install -g cnpm --registry=https://registry.npm.taobao.org3.安装webpack
$ cnpm install webpack -g查看版本
$ webpack -v
4.41.5
安装babel
cnpm install -D babel-loader@7
//cnpm install -D babel-loader会默认安装到[email protected]版本,需要babel7.x支持
cnpm install -D babel-core
cnpm install -D babel-preset-env
cnpm i babel-plugin-transform-runtime
4.创建项目
$ mkdir webtest
创建src文件夹
$ cd webtest
$ mkdir src5.新建文件
*1 webtest下新建index.html
<!doctype html>
<html>
    <head>
        <meta charset="utf-8">
        <meta name="viewport" content="width=device-width, initial-scale=1.0">
        <meta http-equiv="X-UA-Compatible" content="ie=edge">
        <title>Webpack入门</title>
    </head>
    <body>
        <div id="webContent"></div>

        <script type="text/javascript" src="./src/index.js" charset="utf-8"></script>
    </body>
</html>
*2 src下新建getById.js内容如下
function getById(id) {
  return document.getElementById(id);
}

export default getById;
*3 src下新建index.js内容如下
import getById from './getById.js';

getById('webContent').innerHTML = 'Hello Webpack!!!';
6.初始化
$ npm init
一直按回车即可,最后会生成package.json
{
  "name": "webtest",
  "version": "1.0.0",
  "description": "",
  "main": "index.js",
  "scripts": {
    "test": "echo \"Error: no test specified\" && exit 1"
  },
  "author": "",
  "license": "ISC"
}
7.打包,在webtest执行webpack
结果是会生成一个dist文件夹,里面有一个main.js文件
这时会有一个警告
WARNING in configuration
The 'mode' option has not been set, webpack will fallback to 'production' for this value.
Set 'mode' option to 'development' or 'production' to enable defaults for each environment.
You can also set it to 'none' to disable any default behavior.
Learn more: https://webpack.js.org/configuration/mode/
就是没有指定打包模式,默认会以production模式打包,可以在命令行指定或在配置文件指定
模式可选 string = 'production': 'none' | 'development' | 'production'
module.exports = {
  mode: 'development'
};
或
webpack --mode=development
C:\Users\01\Desktop\webtest>webpack --mode=development
Hash: f514556032677b335a67
Version: webpack 4.41.5
Time: 238ms
Built at: 2020-01-04 11:08:12
  Asset      Size  Chunks             Chunk Names
main.js  4.58 KiB    main  [emitted]  main
Entrypoint main = main.js
[./src/getById.js] 90 bytes {main} [built]
[./src/index.js] 92 bytes {main} [built]
development模式打包会生成很详细的main.js文件默认的打包配置webpack.config.js如下
const path = require('path');

module.exports = {
  mode: 'production',
  entry: './src/index.js',
  output: {
    path: path.resolve(__dirname, 'dist'),
    filename: 'main.js'
  }
};
这个文件没有,如果只执行webpack也是一样的
9.修改index.html的js引用
<script type="text/javascript" src="./dist/main.js" charset="utf-8"></script>然后就可以在浏览器打开index.html,就会页面看到
Hello Webpack!!!至此,我们将多个js打包合并就完成了,如果有兴趣可以查看main.js里面的内容
10.查看main.js内容,格式化后如下
!
function(e) {
    var t = {};
    function n(r) {
        if (t[r]) return t[r].exports;
        var o = t[r] = {
            i: r,
            l: !1,
            exports: {}
        };
        return e[r].call(o.exports, o, o.exports, n),
        o.l = !0,
        o.exports
    }
    n.m = e,
    n.c = t,
    n.d = function(e, t, r) {
        n.o(e, t) || Object.defineProperty(e, t, {
            enumerable: !0,
            get: r
        })
    },
    n.r = function(e) {
        "undefined" != typeof Symbol && Symbol.toStringTag && Object.defineProperty(e, Symbol.toStringTag, {
            value: "Module"
        }),
        Object.defineProperty(e, "__esModule", {
            value: !0
        })
    },
    n.t = function(e, t) {
        if (1 & t && (e = n(e)), 8 & t) return e;
        if (4 & t && "object" == typeof e && e && e.__esModule) return e;
        var r = Object.create(null);
        if (n.r(r), Object.defineProperty(r, "default", {
            enumerable: !0,
            value: e
        }), 2 & t && "string" != typeof e) for (var o in e) n.d(r, o,
        function(t) {
            return e[t]
        }.bind(null, o));
        return r
    },
    n.n = function(e) {
        var t = e && e.__esModule ?
        function() {
            return e.
        default
        }:
        function() {
            return e
        };
        return n.d(t, "a", t),
        t
    },
    n.o = function(e, t) {
        return Object.prototype.hasOwnProperty.call(e, t)
    },
    n.p = "",
    n(n.s = 0)
} ([function(e, t, n) {
    "use strict";
    n.r(t),
    (function(e) {
        return document.getElementById(e)
    } ("webContent")).innerHTML = "Hello Webpack!!!"
}]);
function前面有个感叹号是什么意思呢?
我们来看一下,一般我们定义函数有2种方法
第1种
function funcName () {

}
第2种
var funcName = function() {

}
console.log(funcName()); // 会在控制台输出undefined,因此function默认返回值是undefined
那么我们怎么在定义的时候就执行这个函数呢,一般就是FunctionName(),我们改变一下
function funcName () {}(),这样会报错,应该这样
(function funcName () {

})();
这样控制台就会打印出undefined了,也就是定义时就直接执行了
我们加个感叹号试试
console.log(!funcName()); // 控制台当然就会打印出true,就是一个取反运算
我们再修改一下我们的定义
!function funcName(){

}();
把这段代码放到Chrome的console里,发现会打印处true
因此,感叹号的作用就是将函数定义给编译了,就是将
function funcName(){

}
编译为funcName这个函数了,然后等于执行!funcName(),
因此感叹号的作用就是执行一个取反操作,函数该怎么定义还是怎么定义
10.假如要export多个函数,并import,可以修改一下
getById.js
function getById(id) {
	return document.getElementById(id);
}
function getValueById(id) {
	return document.getElementById(id).value;
}

export {getById,getValueById};
index.js
import {getById, getValueById} from './getById.js';

getById('webContent').innerHTML = 'Hello Webpack!!!';

getById('webContent2').innerHTML = getValueById("login");
index.html
<!doctype html>
<html>
    <head>
        <meta charset="utf-8">
		<meta name="viewport" content="width=device-width, initial-scale=1.0">
		<meta http-equiv="X-UA-Compatible" content="ie=edge">
		<title>Webpack入门</title>
    </head>
    <body>
		<div id="webContent"></div>
		<div id="webContent2"></div>
		<input id="login" value="登录">

        <script type="text/javascript" src="./dist/main.js" charset="utf-8"></script>
    </body>
</html>
最终显示

11.使用webpack-dev-server来进行本地自动热更新开发
安装webpack-dev-server
$ cnpm install -g webpack-dev-server修改package.json增加serve
"scripts": {
    "serve": "webpack-dev-server --open --mode development"
}
修改webpack.config.js增加devServer
devServer: {
  contentBase: path.join(__dirname, "dist"), // 默认本地服务器所在的根目录
  port: 8084,      // 端口号,默认8080
  hot: true
}
安装html-webpack-plugin和clean-webpack-plugin插件
$ cnpm install -g html-webpack-plugin clean-webpack-plugin添加插件配置
const HtmlWebpackPlugin = require('html-webpack-plugin');    //生成html文件
const {CleanWebpackPlugin} = require('clean-webpack-plugin');  //清除
// 注意引用CleanWebpackPlugin必须是对象,否则会报错TypeError: CleanWebpackPlugin is not a constructor

plugins: [
    new HtmlWebpackPlugin({
    	title: '首页',
    	template: './index.html'  // 以当前目录的index.html为编译模板
    }),
    new CleanWebpackPlugin()
],
运行npm run serve,报错Error: Cannot find module 'webpack/lib/node/NodeTemplatePlugin'
网上查了,webpack必须本地安装
$ cnpm install webpack最终运行npm run serve效果
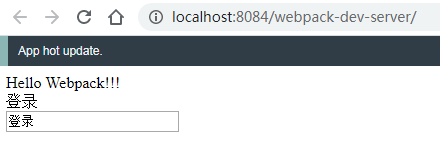
默认显示模式是iframe, 就是页面有修改,直接用iframe加载修改后的页面,顶部会显示提示信息,状态栏不会改变
如果不需要这样方式,可以在devServer添加配置选项:
inline: true这样就不会有顶部提示了,文件修改就刷新整个页面
12.添加2个有用的插件
banner-plugin(webpack 内置插件,不用独立安装)
作用:在输出的打包压缩的JS代码内嵌入版权识别注释
引入:
const webpack=require('webpack')
plugins[]配置属性加入
new webpack.BannerPlugin('Made by Andy 2020')
作用: 打包时复制文件到指定目录
var CopyWebpackPlugin = require('copy-webpack-plugin');
plugins[]配置属性加入
new CopyWebpackPlugin([
{from:'./src', to:'./dest'}
])
13.实现多页面打包编译生成
比如login.html和index.html分别都有它们的js(login.js, index.js)
我们可以配置如下
src
 - pages
   - login.html
   - index.html
 - js
   login.js
   index.js
webpack.config.js
const path = require('path');
const HtmlWebpackPlugin = require('html-webpack-plugin');     //生成html文件
const {CleanWebpackPlugin} = require('clean-webpack-plugin'); //清除

module.exports = {
  mode: 'production',
  entry: {
    index: './src/js/index.js',
    login: './src/js/login.js',
  },
  output: {
    path: path.resolve(__dirname, 'dist'),
    filename: 'js/[name].js'
  },
  plugins: [
    new CleanWebpackPlugin(),
    new HtmlWebpackPlugin({
		filename: 'index.html',
    	title: '首页',
    	template: './src/pages/index.html',  // 以index.html为编译模板
		chunks: [
		  'index'
		]
    }),
    new HtmlWebpackPlugin({
		filename: 'login.html',
    	title: '登录页',
    	template: './src/pages/login.html',  // 以login.html为编译模板
		chunks: [
		  'login'
		]
    }),
  ],
  devServer: {
	contentBase: path.join(__dirname, "dist"),      // 默认本地服务器所在的根目录
	historyApiFallback: true,   // 是否跳转到index.html
	inline: true,    //
	port: 8083,      // 端口号,默认8080
	hot: true
  },
};
src/js/getById.js
function getById(id) {
	return document.getElementById(id);
}
function getValueById(id) {
	return document.getElementById(id).value;
}

export {getById,getValueById};
src/js/index.js
import {getById} from './getById.js';

getById('webContent').innerHTML = 'index - Hello Webpack!!!';
src/js/login.js
import {getById} from './getById.js';
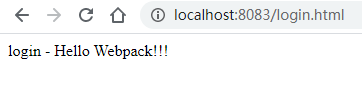
getById('webContent').innerHTML = 'login - Hello Webpack!!!';src/pages/index.html
<!doctype html>
<html>
    <head>
        <meta charset="utf-8">
		<meta name="viewport" content="width=device-width, initial-scale=1.0">
		<meta http-equiv="X-UA-Compatible" content="ie=edge">
		<title>首页</title>
    </head>
    <body>
		<div id="webContent"></div>
    </body>
</html>
src/pages/login.html
<!doctype html>
<html>
    <head>
        <meta charset="utf-8">
        <meta name="viewport" content="width=device-width, initial-scale=1.0">
        <meta http-equiv="X-UA-Compatible" content="ie=edge">
        <title>登录</title>
    </head>
    <body>
        <div id="webContent"></div>
    </body>
</html>
最终效果
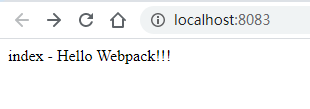
这是自动打开首页,因为配置了historyApiFallback: true,如果要打开login.html,http://localhost:8083/login.html