本篇介绍步进电机驱动库的使用,通过读取电位器输入,控制步进电机转动相应角度。
Stepper库是官方提供的驱动库,我们启动Arduino IDE,点击「文件」—「示例」就能找到Stepper库,官方提供了四个例程。关于Stepper库可参考官方介绍。
1. 实验材料
- Uno R3开发板
- 配套USB数据线
- 面包板及配套连接线
- ULN2003驱动板
- 步进电机
- 电位器
2. 实验步骤
1. 根据原理图搭建电路。
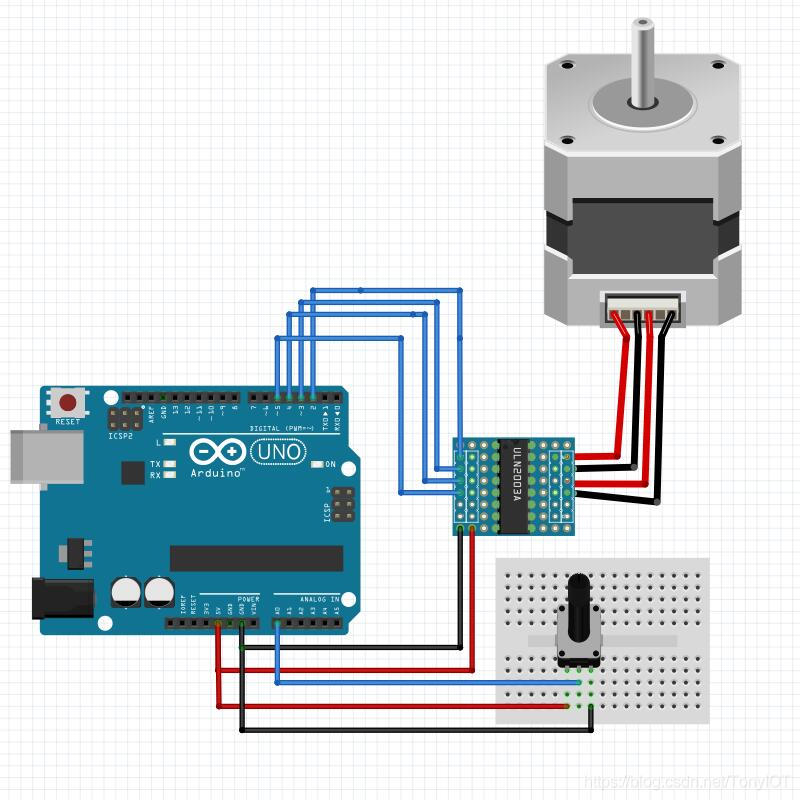
原理图在上一篇基础上添加了电位器的连接。ULN2003驱动板上IN1、IN2、IN3、IN4分别连接UNO开发板的数字引脚2,3,4,5;驱动板电源输入+、-引脚分别连接UNO开发板的5V、GND;电位器中间引脚连接Uno模拟引脚A0,电位器两端引脚分别连接Uno的5V和GND。
实验原理图如下图所示:
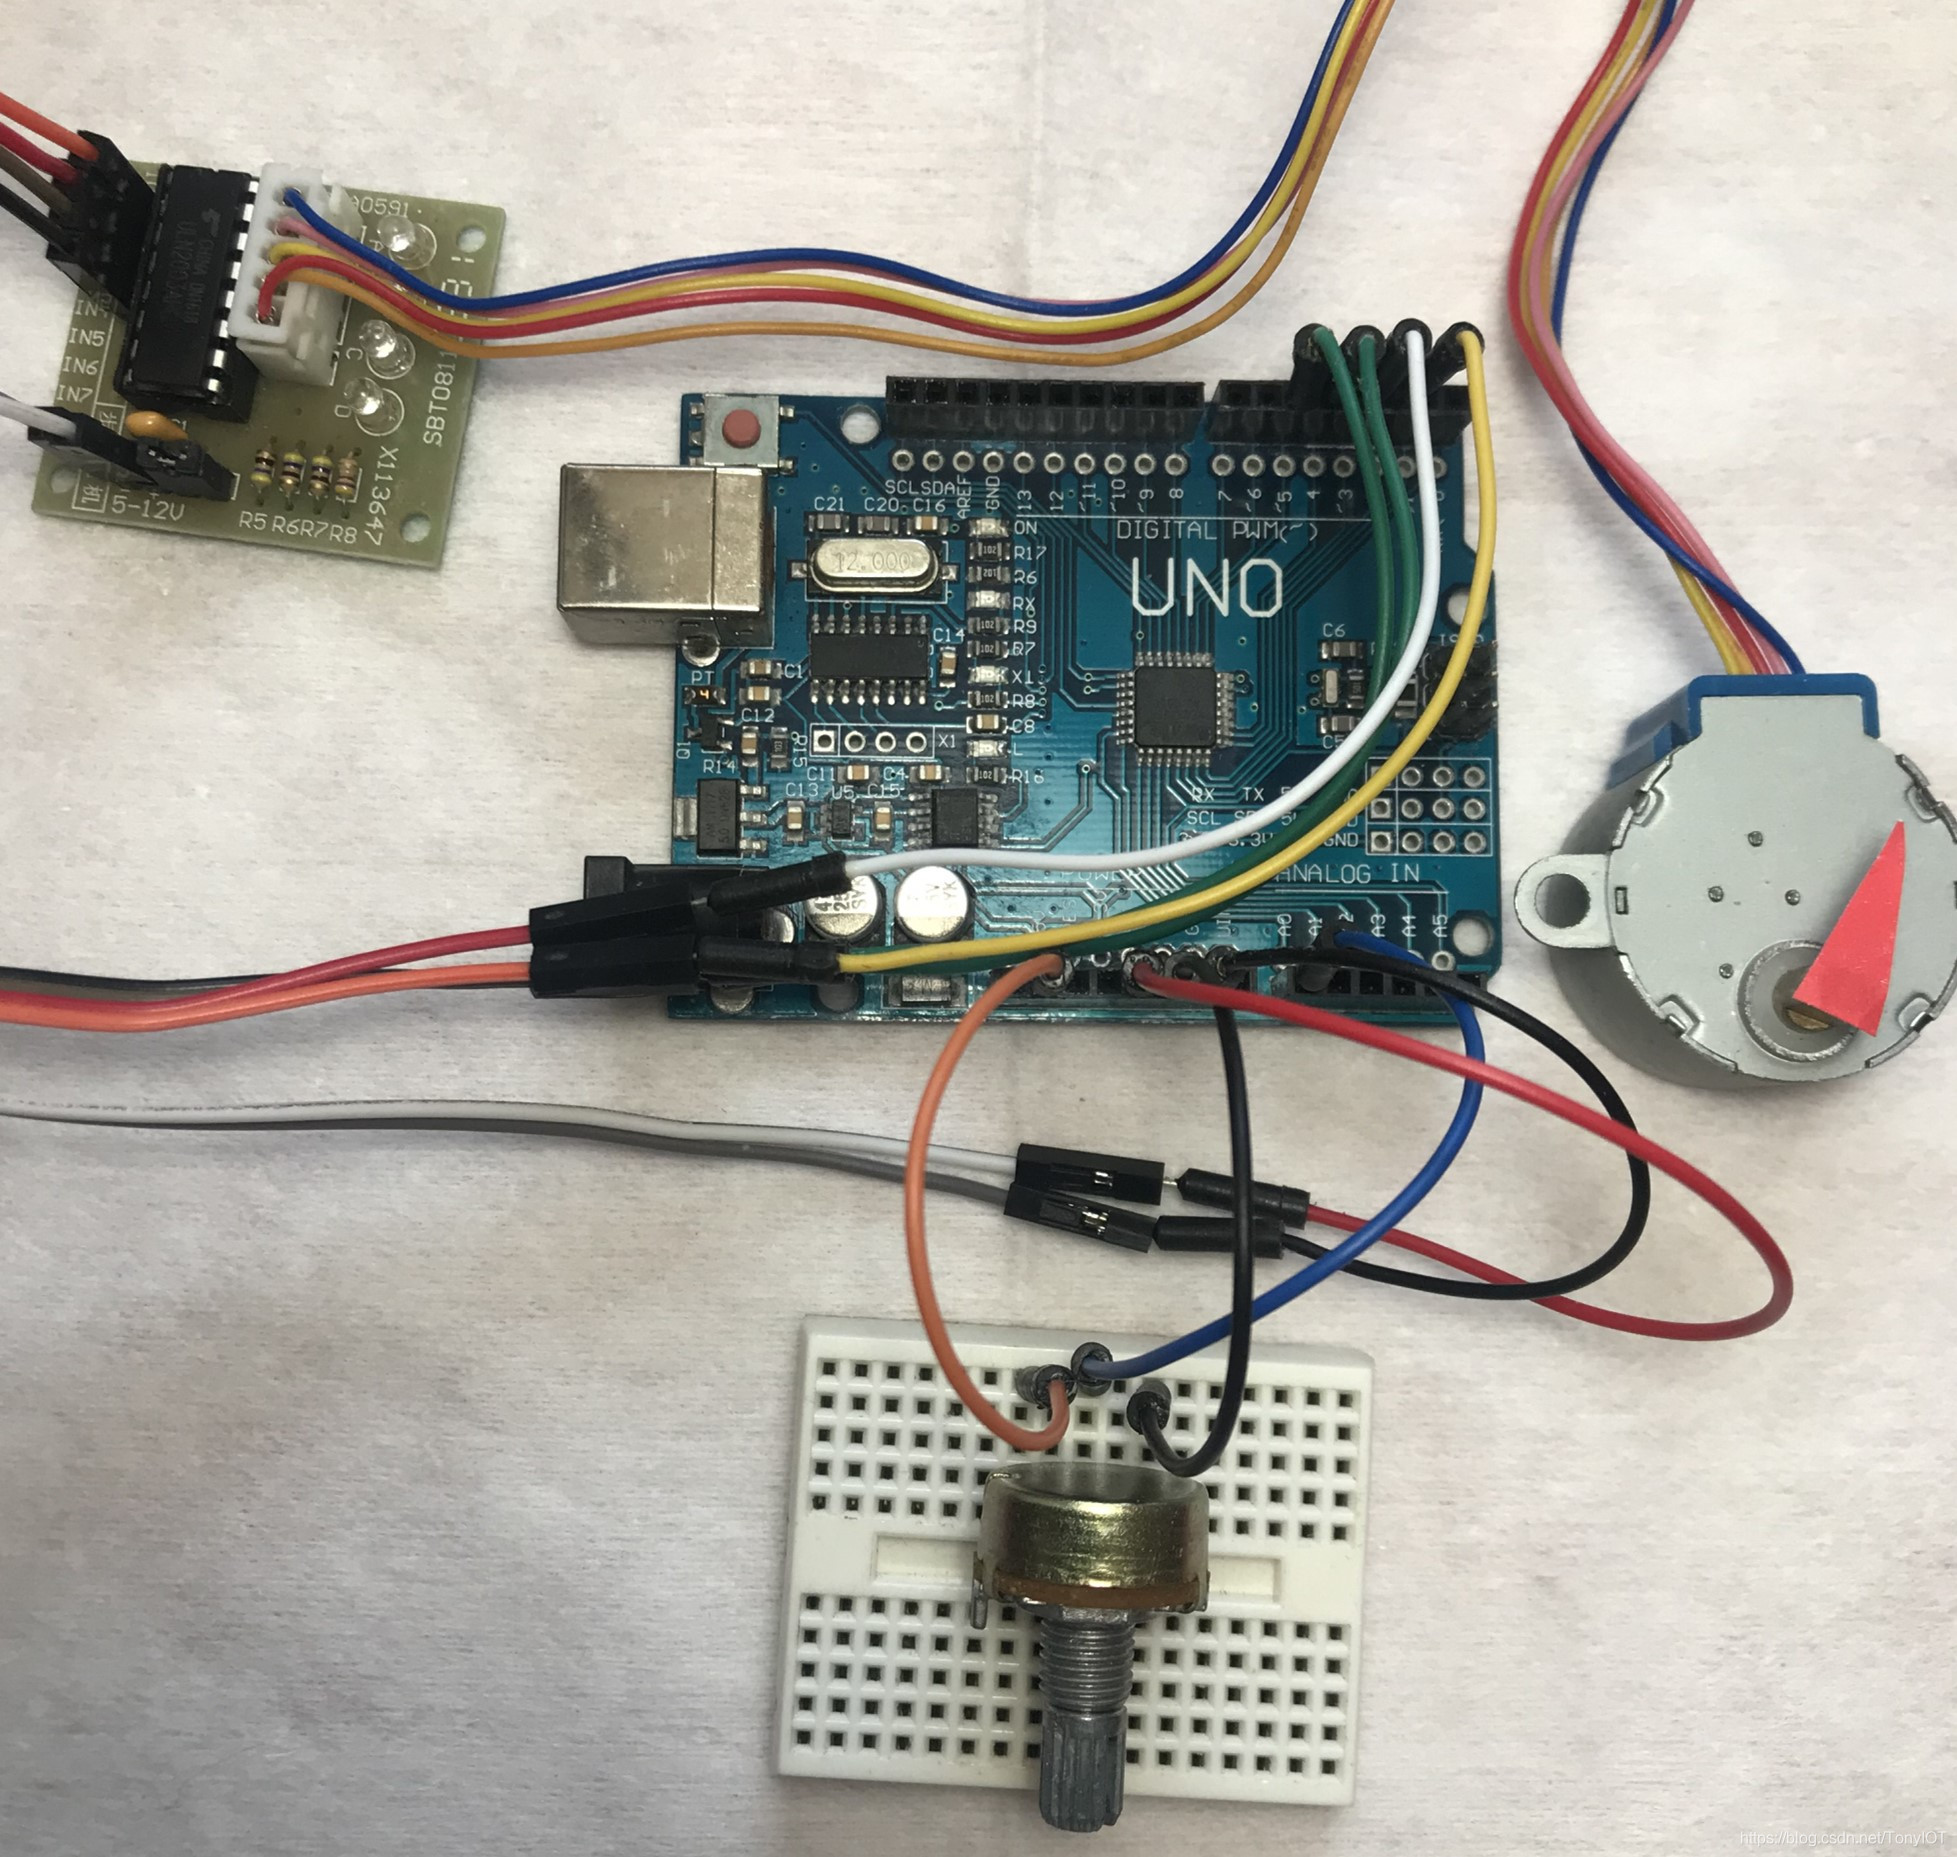
实物连接图如下图所示:
2. 修改Stepper源文件。
由于我们使用的步进电机和官方驱动库中有所差异,所以需要对驱动库稍加修改。
- 找到Arduino IDE安装目录,进入\libraries\Stepper\src\,用文本文件打开Stepper.cpp。将255行switch包含的case注释掉。
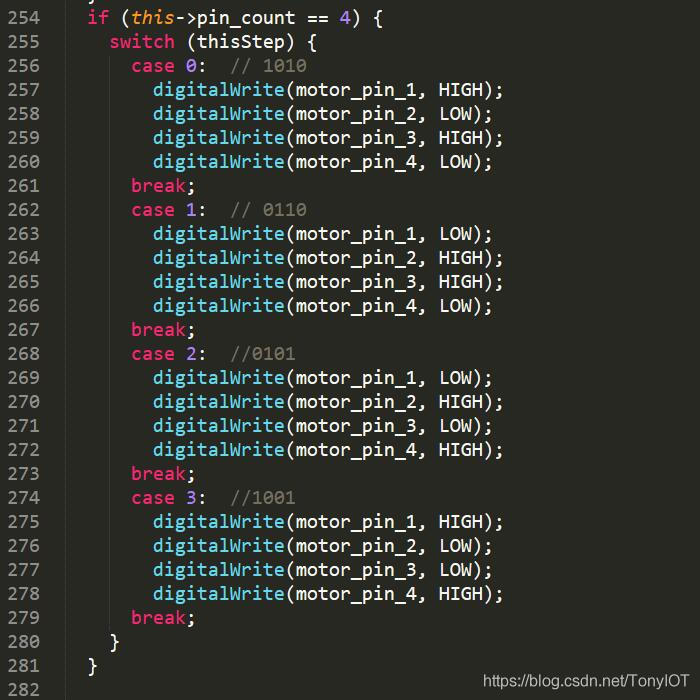
- 拷贝如下代码到switch中。
	 case 0:  // 1010
        digitalWrite(motor_pin_1, HIGH);
        digitalWrite(motor_pin_2, LOW);
        digitalWrite(motor_pin_3, LOW);
        digitalWrite(motor_pin_4, LOW);
      break;
      case 1:  // 0110
        digitalWrite(motor_pin_1, LOW);
        digitalWrite(motor_pin_2, HIGH);
        digitalWrite(motor_pin_3, LOW);
        digitalWrite(motor_pin_4, LOW);
      break;
      case 2:  //0101
        digitalWrite(motor_pin_1, LOW);
        digitalWrite(motor_pin_2, LOW);
        digitalWrite(motor_pin_3, HIGH);
        digitalWrite(motor_pin_4, HIGH);
      break;
      case 3:  //1001
        digitalWrite(motor_pin_1, LOW);
        digitalWrite(motor_pin_2, LOW);
        digitalWrite(motor_pin_3, LOW);
        digitalWrite(motor_pin_4, HIGH);
      break;

- 保存并关闭Stepper.cpp。
3. 新建sketch,拷贝如下代码替换自动生成的代码并进行保存。
/*
 * MotorKnob
 *
 * A stepper motor follows the turns of a potentiometer
 * (or other sensor) on analog input 0.
 *
 * http://www.arduino.cc/en/Reference/Stepper
 * This example code is in the public domain.
 */

#include <Stepper.h>

// change this to the number of steps on your motor
#define STEPS 200

// create an instance of the stepper class, specifying
// the number of steps of the motor and the pins it's
// attached to
Stepper stepper(STEPS, 2, 3, 4, 5);

// the previous reading from the analog input
int previous = 0;

void setup() {
  // set the speed of the motor to 90 RPMs
  stepper.setSpeed(90);
}

void loop() {
  // get the sensor value
  int val = analogRead(0);

  // move a number of steps equal to the change in the
  // sensor reading
  stepper.step(val - previous);

  // remember the previous value of the sensor
  previous = val;
}
4. 连接开发板,设置好对应端口号和开发板类型,进行程序下载。

3. 实验现象
步进电机跟随电位器旋转而转动。
4. 实验分析
程序中使用Stepper库,设置步进电机四相驱动引脚,设置转动速度。主循环中读取A0口模拟输入,与上次数据作比较,以上次数据为参考点驱动步进电机转动。
更多内容,欢迎关注我的公众号。 微信扫一扫下方二维码即可关注: