废话
本篇大概记录一下,vuex 使用,Vue-router 使用,基本与2.0一样(下载安装请移步第一篇)
正文
vuex
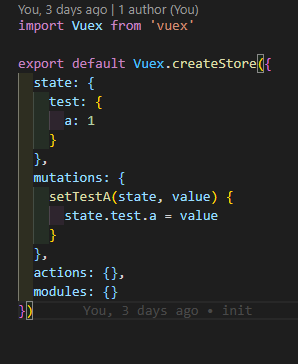
默认安装好,里面是只有一个index.js文件,和vue2.0一样,当然你可以直接在index.js里直接去写,像下图这样
也可以适当的扩展一下,例如vue2.0的模块化写法是这样的
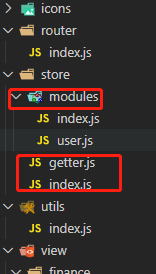
咱么就扩展一下,目录结构如下(就是简单的分开,不像vue2.0 modules那样)
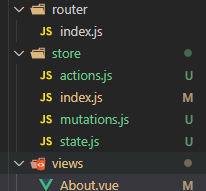
index.js
import {
  createStore
} from 'vuex'
import state from './state'
import mutations from './mutations'
import actions from './actions'

export default createStore({
  state,
  mutations,
  actions,
  modules: {}
})
actions.js
const actions = {

}
export default actions
mutations.js
const mutations = {
  setAddress: function (state, value) {
    state.userInfo.address = value
  }
}
export default mutations
state.js
const state = {
  userInfo: {
    name: '前端',
    age: '18'
  }
}
export default state
使用
About.vue
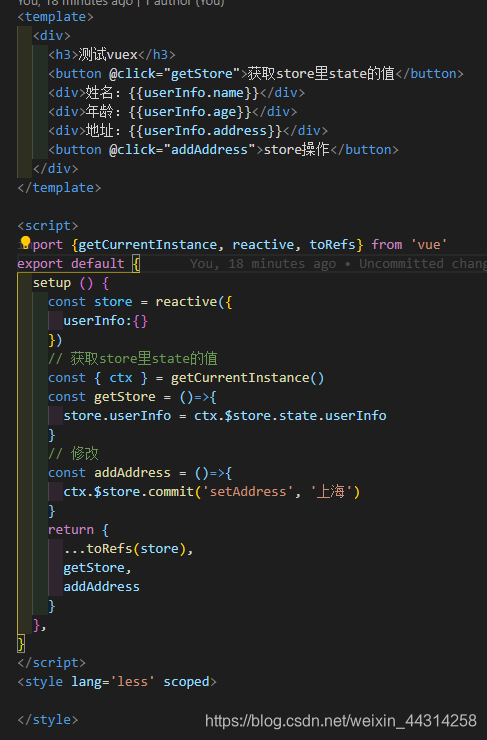
代码也附上,尽量自己理解之后,写一遍,熟练了在Ctrl c Ctrl v
<template>
  <div>
    <h3>测试vuex</h3>
    <button @click="getStore">获取store里state的值</button>
    <div>姓名:{

   {userInfo.name}}</div>
    <div>年龄:{

   {userInfo.age}}</div>
    <div>地址:{

   {userInfo.address}}</div>
    <button @click="addAddress">store操作</button>
  </div>
</template>

<script>
import {getCurrentInstance, reactive, toRefs} from 'vue'
export default {
  setup () {
    const store = reactive({
      userInfo:{}
    })
    // 获取store里state的值
    const { ctx } = getCurrentInstance()
    const getStore = ()=>{
      store.userInfo = ctx.$store.state.userInfo
    }
    // 修改
    const addAddress = ()=>{
      ctx.$store.commit('setAddress', '上海')
    }
    return {
      ...toRefs(store),
      getStore,
      addAddress
    }
  },
}
</script>
<style lang='less' scoped>

</style>
vue-router
目录结构
index.js
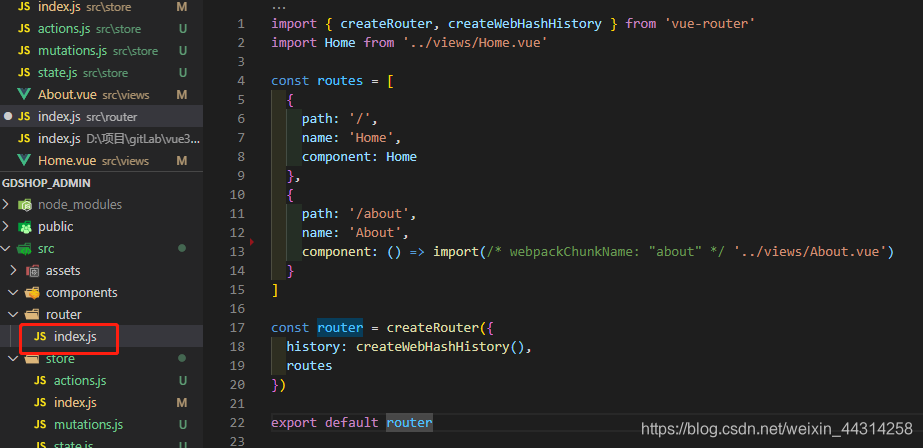
这是cli5.0 ui面板安装之后自动初始化的文件及目录,我们可以自己手动安装,手动创建一下,熟悉下他的基础写法
main.js
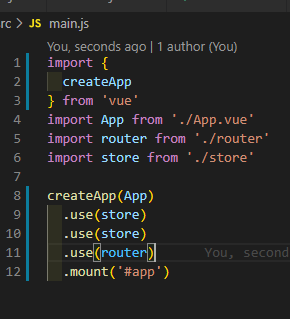
引用,然后use使用即可,熟悉vue2.0的就发现了,options Api里初始化都是new的构造函数,3.0的composition Api都是对象形式
页面中获取使用router&route
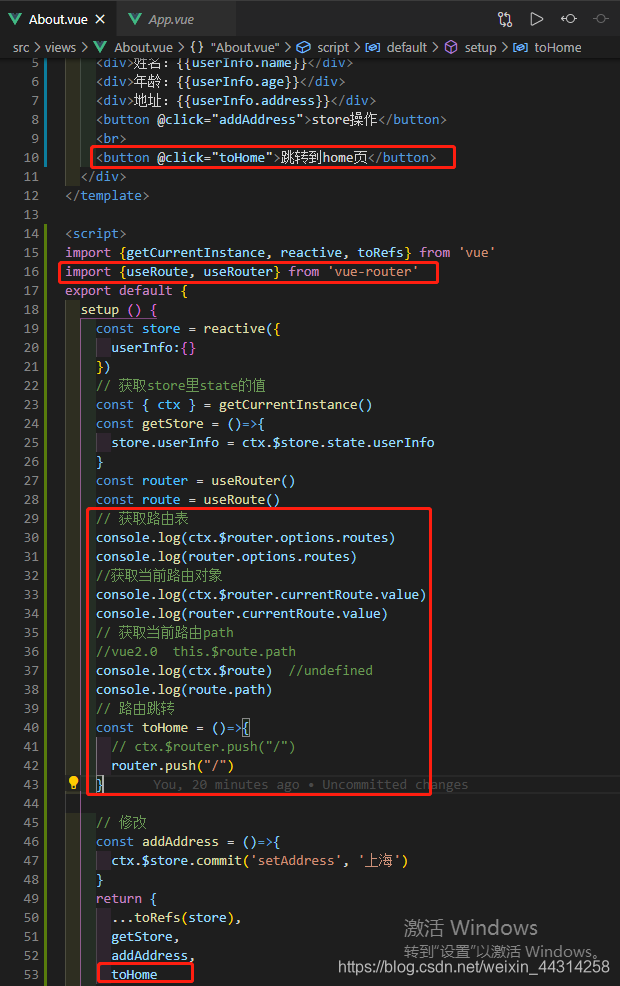
两种方式(在About.vue里直接写了)
- 第一种(和2.0相似,vue2.0里的this,换成现在的ctx)
    // 获取路由表
    console.log(ctx.$router.options.routes)
    //获取当前路由对象
    console.log(ctx.$router.currentRoute.value)
    // 获取当前路由path
    //vue2.0  this.$route.path
    console.log(ctx.$route)  //undefined
但是,ctx. r o u t e 是 u n d e f i n e d , c t x . route 是undefined,ctx. route是undefined,ctx.route.pash自然不行了,所以想获取当前的path,可以去当前路由对象里去拿
- 第二种(推荐)
    //先引入 router
    import {useRoute, useRouter} from 'vue-router'
    // 获取路由表
    console.log(router.options.routes)
    //获取当前路由对象
    console.log(router.currentRoute.value)
    // 获取当前路由path
    console.log(route.path)
路由跳转
    // html写法
    <router-link to="/">Home</router-link>

	// setup写法
	const toHome = ()=>{
	  // 两种写法都可以
      // ctx.$router.push("/")
      router.push("/")
    }
附上图片
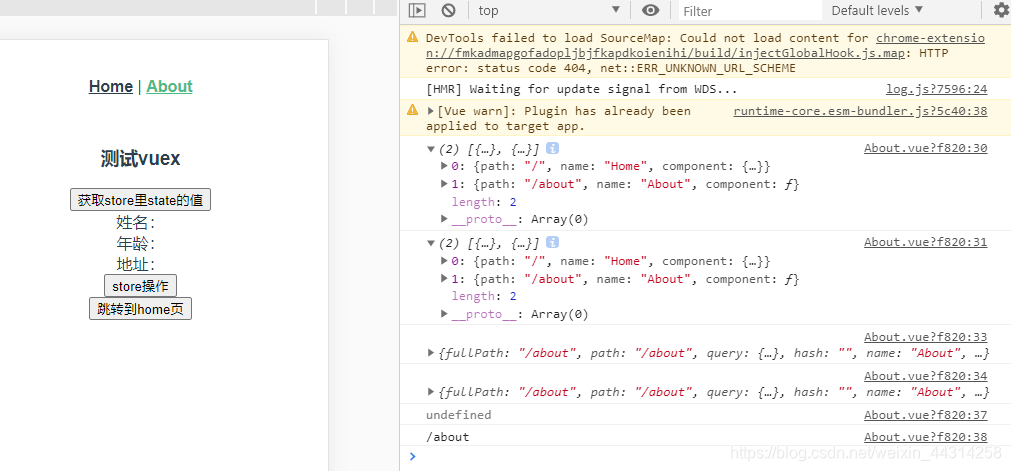
运行结果
提示
1、composition Api 没有this,方法里调用方法,直接方法名(),即可
2、自己试了下无法在setup中使用map辅助函数了,有兴趣的可以试试,还想使用的可以使用2.0的options Api,3.0也是兼容的,不过也不建议过度使用vuex了,可以多使用vue3.0开源的新的底层功能
3、ctx. r o u t e 为 u n d e f i n e d , c t x . route为undefined,ctx. route为undefined,ctx.route.path 不可用