目录
一.安装Nginx服务
1.安装Nginx服务

[root@localhost ~]# systemctl stop firewalld.service
[root@localhost ~]# setenforce 0
[root@localhost ~]# yum -y install pcre-devel zlib-devel gcc gcc-c++ make
2.编译安装Nginx


[root@localhost opt]# rz -E
rz waiting to receive.
[root@localhost opt]# ls
nginx-1.12.0.tar.gz
[root@localhost opt]# tar zxf nginx-1.12.0.tar.gz
[root@localhost opt]# ls
nginx-1.12.0  nginx-1.12.0.tar.gz
[root@localhost opt]# cd nginx-1.12.0/
[root@localhost nginx-1.12.0]# ls
auto  CHANGES  CHANGES.ru  conf  configure  contrib  html  LICENSE  man  README  src
[root@localhost nginx-1.12.0]# ./configure \
> --prefix=/usr/local/nginx \
> --user=nginx \
> --group=nginx \
> --with-http_stub_status_module
[root@localhost nginx-1.12.0]# make && make install -j4
3.优化路径

[root@localhost nginx-1.12.0]# ln -s /usr/local/nginx/sbin/nginx /usr/local/sbin/4.添加 Nginx 系统服务


[root@localhost nginx-1.12.0]# cd /lib/systemd/system
[root@localhost system]# vim nginx.service
[Unit]
Description=nginx
After=network.target
[Service]
Type=forking
PIDFile=/usr/local/nginx/logs/nginx.pid
ExecStart=/usr/local/nginx/sbin/nginx
ExecReload=/usr/bin/kill -s HUP $MAINPID
ExecStop=/usr/bin/kill -s QUIT $MAINPID
PrivateTmp=true
[Install]
WantedBy=multi-user.target
[root@localhost system]# systemctl start nginx.service
[root@localhost system]# systemctl enable nginx.service
Created symlink from /etc/systemd/system/multi-user.target.wants/nginx.service to /usr/lib/systemd/system/nginx.service.
[root@localhost system]# ss -natp |grep 80
LISTEN 0 128 *:80 *:* users:(("nginx",pid=5117,fd=6),("nginx",pid=5116,fd=6))二.隐藏版本号
1.查看版本号

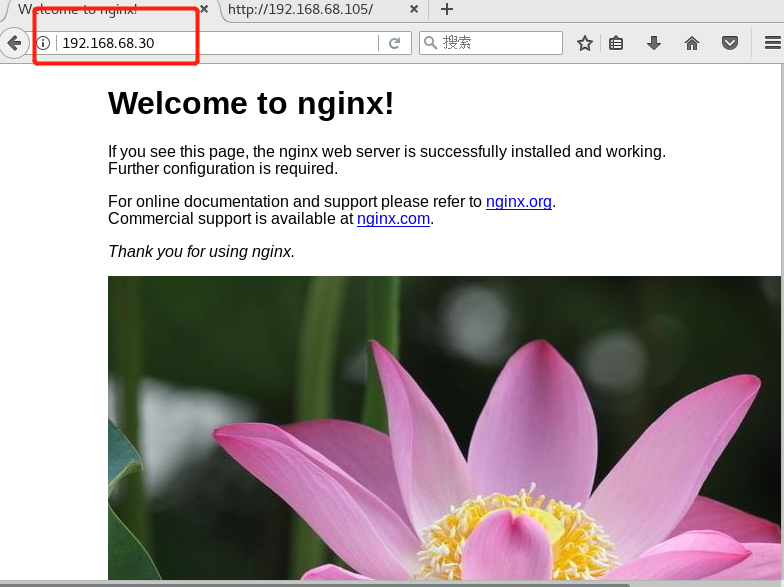
[root@localhost ~]# cd /usr/local/nginx/html
[root@localhost html]# ls
50x.html  index.html
[root@localhost html]# rz -E
rz waiting to receive.
[root@localhost html]# ls
1.jpg  50x.html  index.html
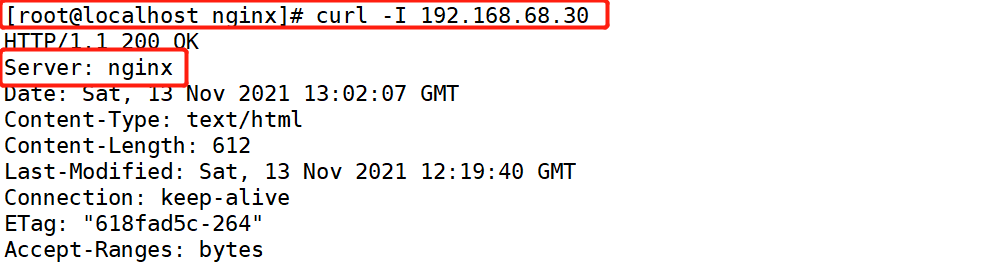
此时可以查看nginx的版本号和ip地址

curl -I +IP地址也可以查看nginx的版本号
2.隐藏版本号法一
修改主配置文件

[root@localhost html]# vim /usr/local/nginx/conf/nginx.conf

[root@localhost html]# vim /usr/local/nginx/conf/nginx.conf
 18     include       mime.types;
 19     default_type  application/octet-stream;
 20     server_tokens off;
##加入server_tokens off
[root@localhost html]# cd ..
[root@localhost nginx]# nginx -t
nginx: the configuration file /usr/local/nginx/conf/nginx.conf syntax is ok
nginx: configuration file /usr/local/nginx/conf/nginx.conf test is successful
[root@localhost nginx]# systemctl restart nginx.service 
3.隐藏版本号法二
修改源码文件,重新编译安装


重新编译安装

[root@localhost nginx-1.12.0]# vim /usr/local/nginx/conf/nginx.conf


[root@localhost ~]# cd /opt/
[root@localhost opt]# cd nginx-1.12.0/
[root@localhost nginx-1.12.0]#
[root@localhost nginx-1.12.0]# cd
[root@localhost ~]#
[root@localhost ~]# cd /opt/nginx-1.12.0/
[root@localhost nginx-1.12.0]# ls
auto     CHANGES.ru  configure  html     Makefile  objs    src
CHANGES  conf        contrib    LICENSE  man       README
[root@localhost nginx-1.12.0]# systemctl stop nginx.service
[root@localhost nginx-1.12.0]# cd src/
[root@localhost src]# ls
core  event  http  mail  misc  os  stream
[root@localhost src]# cd core/
[root@localhost core]# vim nginx.h
 12 #define nginx_version      1012000
 13 #define NGINX_VERSION      "12345678"
 14 #define NGINX_VER          "IIS/" NGINX_VERSION
[root@localhost core]# cd ../../
[root@localhost nginx-1.12.0]# ls
auto     CHANGES.ru  configure  html     Makefile  objs    src
CHANGES  conf        contrib    LICENSE  man       README
[root@localhost nginx-1.12.0]# ./configure \
> --prefix=/usr/local/nginx \
> --user=nginx \
> --group=nginx \
> --with-http_stub_status_module
[root@localhost nginx-1.12.0]# make && make install -j4
[root@localhost nginx-1.12.0]# systemctl restart nginx.service
[root@localhost nginx-1.12.0]# vim /usr/local/nginx/conf/nginx.conf
 17 http {
 18     include       mime.types;
 19     default_type  application/octet-stream;
 20     server_tokens on;
[root@localhost nginx-1.12.0]# curl -I 192.168.68.30
HTTP/1.1 200 OK
Server: IIS/12345678
Date: Sat, 13 Nov 2021 13:15:04 GMT
Content-Type: text/html
Content-Length: 612
Last-Modified: Sat, 13 Nov 2021 12:19:40 GMT
Connection: keep-alive
ETag: "618fad5c-264"
Accept-Ranges: bytes三.修改用户与组


[root@localhost nginx-1.12.0]# ps aux |grep nginx
root       8048  0.0  0.0  20496   600 ?        Ss   21:14   0:00 nginx: master process /usr/local/nginx/sbin/nginx
nginx      8049  0.0  0.0  23024  1640 ?        S    21:14   0:00 nginx: worker process
root       8124  0.0  0.0 112680   980 pts/2    R+   21:20   0:00 grep --color=auto nginx
[root@localhost nginx-1.12.0]# !vim
vim /usr/local/nginx/conf/nginx.conf
2 user  ooo ooo;
[root@localhost nginx-1.12.0]# useradd -s /sbin/nologin ooo
[root@localhost nginx-1.12.0]# systemctl restart nginx.service
[root@localhost nginx-1.12.0]# ps aux |grep ooo
ooo        8216  0.0  0.0  23028  1396 ?        S    21:25   0:00 nginx: worker process
root       8228  0.0  0.0 112676   984 pts/2    S+   21:25   0:00 grep --color=auto ooo
四.缓存时间
当nginx 将网页数据返回给客户端后,可设置缓存时间,以方便在日后进行相同内容的请求时直接返回,避免重复请求,加快了访问速度一般针对静态网页设置,对动态网页不设置缓存时间。

[root@localhost nginx-1.12.0]# vim /usr/local/nginx/conf/nginx.conf


[root@localhost nginx-1.12.0]# vim /usr/local/nginx/conf/nginx.conf
 48         location ~\.(gif|jpg|jpeg|png|bmp|ico)$ {
 49             root   html;
 50             expires 1d;
 51         }
[root@localhost nginx-1.12.0]# nginx -t
nginx: the configuration file /usr/local/nginx/conf/nginx.conf syntax is ok
nginx: configuration file /usr/local/nginx/conf/nginx.conf test is successful
[root@localhost nginx-1.12.0]# systemctl restart nginx.service
五.日志切割

[root@localhost logs]# vim log.sh


![]()
[root@localhost nginx-1.12.0]# cd /usr/local/nginx/logs
[root@localhost logs]# vim log.sh
#!/bin/bash
d=$(date +%F -d -1day)
logpath="/var/log/nginx"
pid="/usr/local/nginx/logs/nginx.pid"

[ -d $logpath ] || mkdir -p $logpath
mv /usr/local/nginx/logs/access.log ${logpath}/www.ooo.com.log-$d
kill -USR1 $(cat $pid)
find $logpath -mtime +30 -exec rm -rf {} \;

[root@localhost logs]# chmod +x log.sh
[root@localhost logs]# bash log.sh
[root@localhost logs]# ls /var/lo
local/ lock/  log/
[root@localhost logs]# ls /var/log/nginx/www.ooo.com.log-2021-11-12
/var/log/nginx/www.ooo.com.log-2021-11-12
[root@localhost logs]# crontab -e
crontab: installing new crontab
30 1 * * * /usr/local/nginx/logs/log.sh
六.连接超时
- HTTP服务有一个KeepAlive模式,它告诉web服务器在处理完一个请求后保持这个TCP连接的打开状态。若接收到来自同一客户端的其他请求,服务端会利用这个未被关闭的连接,而不需要再次建立一个连接
- KeepAlive在一段时间内保持打开状态,它们会在这段时间内占用资源,占用过多就会影响服务器的性能

[root@localhost conf]# vim nginx.conf


[root@localhost nginx]# cd /usr/local/nginx/conf
[root@localhost conf]# vim nginx.conf
 30     #keepalive_timeout  0;
 31     keepalive_timeout  65 180;
[root@localhost conf]# systemctl restart nginx.service
七.更改请求进程数

[root@localhost conf]# !vim
vim nginx.conf

[root@localhost conf]# ps aux |grep nginx
root      11496  0.0  0.0  20496   612 ?        Ss   22:41   0:00 nginx: master process /usr/local/nginx/sbin/nginx
nginx     11497  0.0  0.0  23024  1648 ?        S    22:41   0:00 nginx: worker process
root      11690  0.0  0.0 112676   984 pts/2    S+   22:56   0:00 grep --color=auto nginx
[root@localhost conf]# !vim
vim nginx.conf
  2 #user  nobody;
  3 worker_processes  4;
[root@localhost conf]# systemctl restart nginx.service
[root@localhost conf]# ps aux |grep nginx
root      11736  0.0  0.0  20496   612 ?        Ss   22:57   0:00 nginx: master process /usr/local/nginx/sbin/nginx
nginx     11737  0.0  0.0  23024  1396 ?        S    22:57   0:00 nginx: worker process
nginx     11738  0.0  0.0  23024  1392 ?        S    22:57   0:00 nginx: worker process
nginx     11739  0.0  0.0  23024  1396 ?        S    22:57   0:00 nginx: worker process
nginx     11740  0.0  0.0  23024  1396 ?        S    22:57   0:00 nginx: worker process
root      11742  0.0  0.0 112676   980 pts/2    S+   22:57   0:00 grep --color=auto nginx
八.网页压缩

[root@localhost conf]# vim /usr/local/nginx/conf/nginx.conf


[root@localhost conf]# vim /usr/local/nginx/conf/nginx.conf
33 gzip on;
34 gzip_buffers 4 64k;
35 gzip_http_version 1.1;
36 gzip_comp_level 6;
37 gzip_min_length 1k;
38 gzip_vary on;
39 gzip_types text/plain text/javascript application/x-javascript text/css text/xml application/xml application/xml+rss image/jpg image/png;
[root@localhost conf]# nginx -t
nginx: the configuration file /usr/local/nginx/conf/nginx.conf syntax is ok
nginx: configuration file /usr/local/nginx/conf/nginx.conf test is successful
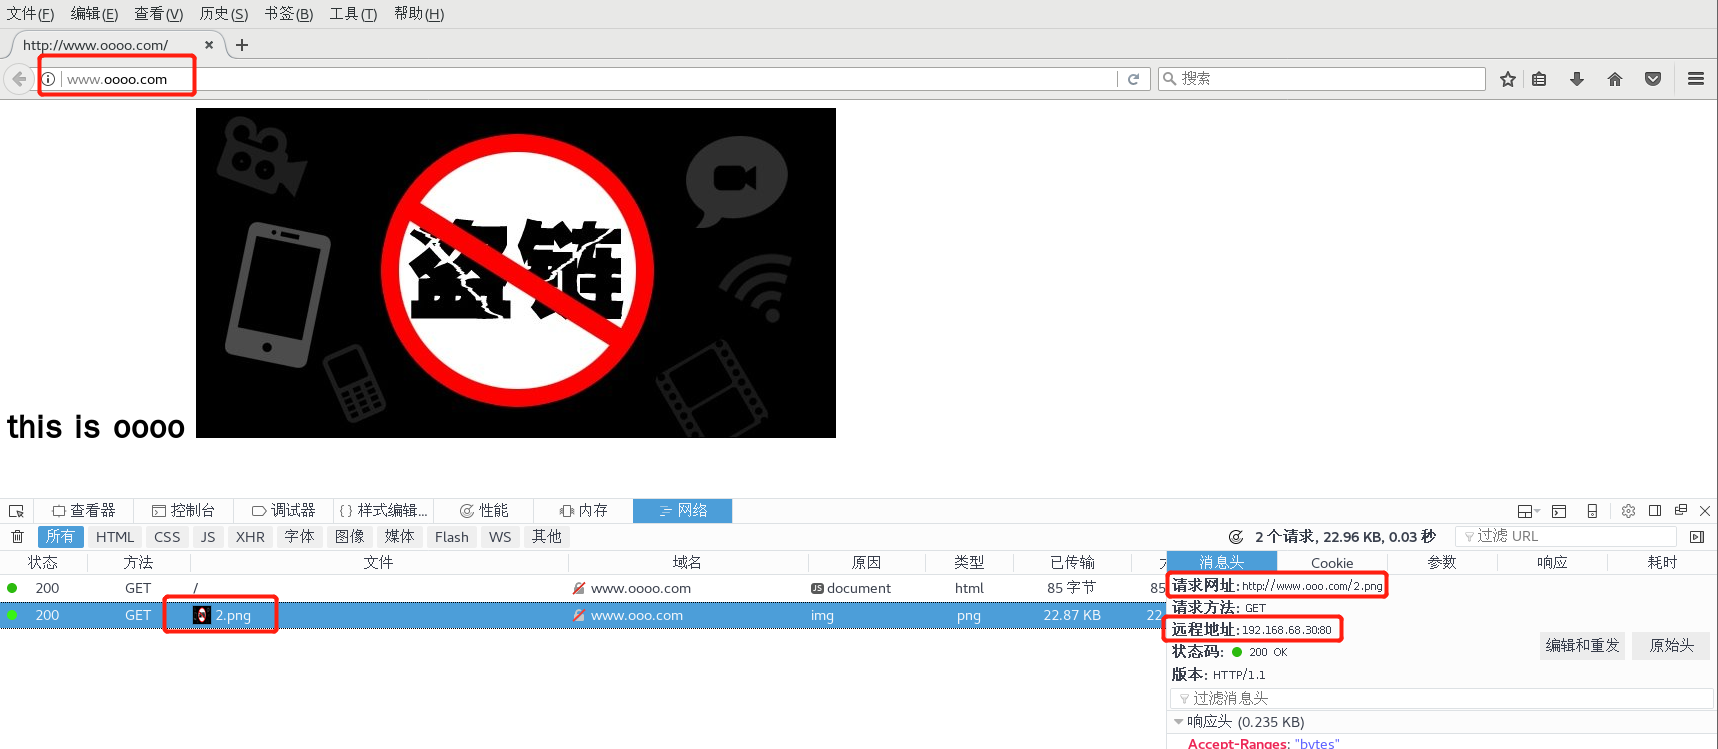
[root@localhost conf]# systemctl restart nginx.service 九.防盗链
盗图主机

[root@localhost html]# vim index.html

[root@localhost html]# vim /etc/hosts

防盗主机

将防盗的图拖到这个目录下


最后将错误图片放到防盗主机的html文件夹下,再刷新,在盗图主机下输入www.oooo.com之后就看不到原来的图片了
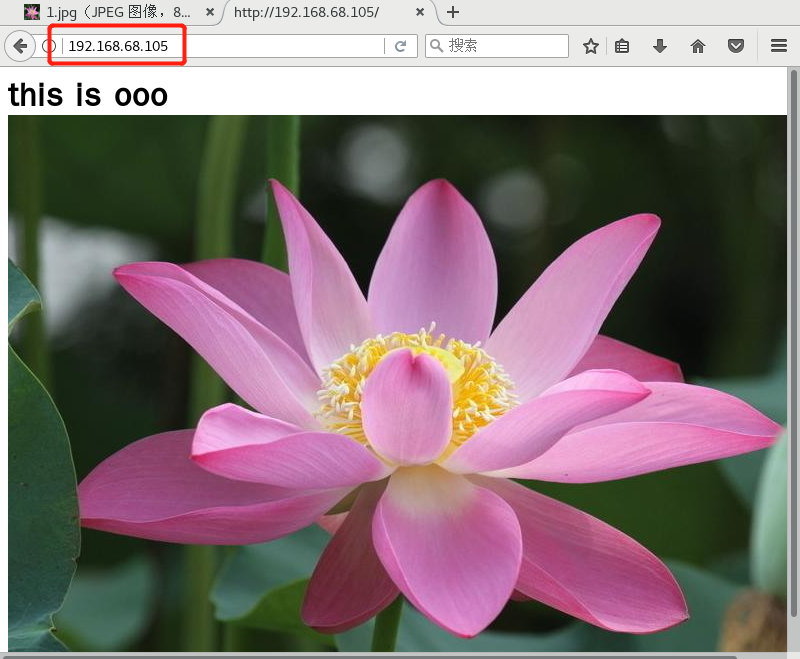
[root@localhost ~]# cd /var/www/html/
[root@localhost html]# vim index.html
<html>
<body>
<h1>this is ooo
<img src="http://www.ooo.com/1.jpg"/>
</body>
</html>
[root@localhost html]# vim /etc/hosts
127.0.0.1   localhost localhost.localdomain localhost4 localhost4.localdomain4
::1         localhost localhost.localdomain localhost6 localhost6.localdomain6
192.168.68.30 www.ooo.com
192.168.68.105 www.oooo.com
[root@localhost html]# systemctl start httpd
[root@localhost conf]# vim nginx.conf
 54         location ~* \.(gif|jpg|jpeg|bmp|ico)$ {
 55             valid_referers none blocked *.ooo.com ooo.com;
 56             if ( $invalid_referer ) {
 57                            rewrite ^/ http://www.ooo.com/2.png;
 58         }
[root@localhost conf]# nginx -t
nginx: the configuration file /usr/local/nginx/conf/nginx.conf syntax is ok
nginx: configuration file /usr/local/nginx/conf/nginx.conf test is successful