filebeat收集tomcat,nginx日志,elasticsearch,logstash,kibana
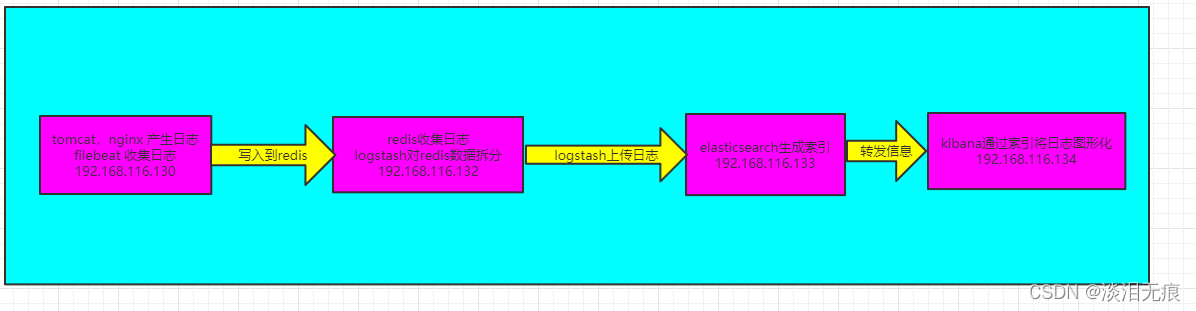
1 filebeat收集tomcat,nginx日志发送给redis–>logstash --> elasticsearch实现日志分类缓存及写入到Redis不同的index
日志收集拓扑
全部最小化安装,设备初始化源
cd /etc/yum.repos.d/
yum install -y wget
wget http://mirrors.aliyun.com/repo/Centos-7.repo
wget http://mirrors.aliyun.com/repo/epel-7.repo
mv CentOS-Base.repo CentOS-Base.repo.bak
yum clean all
yum makecache
systemctl stop firewalld
systemctl disable firewalld
sed -i 's/SELINUX=enforcing$/SELINUX=disabled/g' /etc/selinux/config
setenforce 0
1.1 安装elasticsearch
vi /etc/hosts
192.168.116.130 filebeat.test.io.aa
192.168.116.132 logstash.test.io.aa
192.168.116.133 elasticsearch.test.io.aa
192.168.116.134 kibaba.test.io.aa
hostnamectl set-hostname elasticsearch.test.io.aa
修改打开文件限制
vi /etc/security/limits.conf 文件最底下添加
root soft core unlimited
root hard core unlimited
root soft nproc 1000000
root hard nproc 1000000
root soft nofile 1000000
root hard nofile 1000000
root soft memlock 32000
root hard memlock 32000
root soft msgqueue 8192000
root hard msgqueue 8192000
elasticsearch soft core unlimited
elasticsearch hard core unlimited
elasticsearch soft nproc 1000000
elasticsearch hard nproc 1000000
elasticsearch soft nofile 1000000
elasticsearch hard nofile 1000000
elasticsearch soft memlock 32000
elasticsearch hard memlock 32000
elasticsearch soft msgqueue 8192000
elasticsearch hard msgqueue 8192000
#注意:filebeat,logstash,elasticsearch版本最好一致
wget https://repo.huaweicloud.com/elasticsearch/7.6.2/elasticsearch-7.6.2-x86_64.rpm
rpm -ivh elasticsearch-7.6.2-x86_64.rpm
vi /etc/elasticsearch/elasticsearch.yml 修改内容
network.host: 0.0.0.0 #允许全部人访问
http.port: 9200 #开放端口
cluster.initial_master_nodes: ["192.168.116.133"] #设置本机IP
action.destructive_requires_name: true #开启删除确认
http.cors.enabled: true #开启跨域访问
http.cors.allow-origin: "*"
vi /etc/elasticsearch/jvm.options 启动内存调大,要不然可能启动不了,默认1G,调大点
-Xms2g
-Xmx2g
chown elasticsearch.elasticsearch -R /var/lib/elasticsearch/
chown elasticsearch.elasticsearch -R /var/log/elasticsearch/
systemctl start elasticsearch.service
systemctl enable elasticsearch
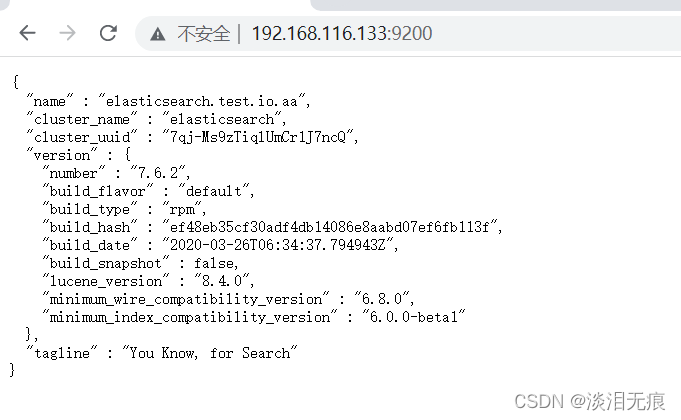
访问 http://192.168.116.133:9200/ 出现这样的信息表示安装成功
为elasticsearch 安装图形化索引插件head
安装docker
wget -O /etc/yum.repos.d/docker-ce.repo https://mirrors.aliyun.com/docker-ce/linux/centos/docker-ce.repo
yum install docker-ce-19.03.12-3.el7 docker-ce-cli-19.03.12-3.el7  -y
systemctl start docker
systemctl enable docker
docker run -d  -p 9100:9100 mobz/elasticsearch-head:5-alpine

访问:http://192.168.116.133:9100/
输入elasticsearch的连接地址:http://192.168.116.133:9200/
默认会有自己主机名的索引

1.2 安装redis,logstash
vi /etc/hosts

192.168.116.130 filebeat.test.io.aa
192.168.116.132 logstash.test.io.aa
192.168.116.133 elasticsearch.test.io.aa
192.168.116.134 kibaba.test.io.aa

hostnamectl set-hostname logstash.test.io.aa

安装redis
yum install -y redis
vi /etc/redis.conf
bind 0.0.0.0           修改监听地址
requirepass test1234   设置redis账户密码

systemctl enable redis
systemctl start redis

安装java 8,logstash必须要安装java才能用
wget https://repo.huaweicloud.com/java/jdk/8u202-b08/jdk-8u202-linux-x64.tar.gz
tar xf jdk-8u202-linux-x64.tar.gz -C /usr/local/
cd /usr/local/
ln -s jdk1.8.0_202/ jdk

vi /etc/profile.d/java.sh      添加变量
export JAVA_HOME=/usr/local/jdk
export PATH=$PATH:$JAVA_HOME/bin
export JRE_HOME=$JAVA_HOME/jre
export CLASSPATH=$JAVA_HOME/lib/:$JRE_HOME/lib

source /etc/profile.d/java.sh
ln -s /usr/local/jdk1.8.0_202/bin/java /usr/bin/java

安装logstash,注意:filebeat,logstash,elasticsearch版本最好一致
wget https://repo.huaweicloud.com/logstash/7.6.2/logstash-7.6.2.rpm
rpm -ivh logstash-7.6.2.rpm
1.3 安装tomcat,nginx,filebeat
安装tomcat
vi /etc/hosts
192.168.116.130 filebeat.test.io.aa
192.168.116.132 logstash.test.io.aa
192.168.116.133 elasticsearch.test.io.aa
192.168.116.134 kibaba.test.io.aa
hostnamectl set-hostname filebeat.test.io.aa
安装java 8
wget https://repo.huaweicloud.com/java/jdk/8u202-b08/jdk-8u202-linux-x64.tar.gz
tar xf jdk-8u202-linux-x64.tar.gz -C /usr/local/
cd /usr/local/
ln -s jdk1.8.0_202/ jdk
vi /etc/profile.d/java.sh 添加变量
export JAVA_HOME=/usr/local/jdk
export PATH=$PATH:$JAVA_HOME/bin
export JRE_HOME=$JAVA_HOME/jre
export CLASSPATH=$JAVA_HOME/lib/:$JRE_HOME/lib
source /etc/profile.d/java.sh
ln -s /usr/local/jdk1.8.0_202/bin/java /usr/bin/java
安装tomcat 8.5
wget https://mirrors.bfsu.edu.cn/apache/tomcat/tomcat-8/v8.5.75/bin/apache-tomcat-8.5.75.tar.gz --no-check-certificate
tar xf apache-tomcat-8.5.75.tar.gz -C /usr/local/
cd /usr/local/
ln -s apache-tomcat-8.5.75/ tomcat
echo 'PATH=/usr/local/tomcat/bin:$PATH' > /etc/profile.d/tomcat.sh
source /etc/profile.d/tomcat.sh
useradd -r -s /sbin/nologin tomcat
echo "JAVA_HOME=/usr/local/jdk"> /usr/local/tomcat/conf/tomcat.conf
chown -R tomcat.tomcat /usr/local/tomcat/
vi /lib/systemd/system/tomcat.service
[Unit]
Description=Tomcat
#After=syslog.target network.target remote-fs.target nss-lookup.target
After=syslog.target network.target
[Service]
Type=forking
EnvironmentFile=/usr/local/tomcat/conf/tomcat.conf
ExecStart=/usr/local/tomcat/bin/startup.sh
ExecStop=/usr/local/tomcat/bin/shutdown.sh
PrivateTmp=true
User=tomcat
Group=tomcat
[Install]
WantedBy=multi-user.target
修改tomcat日志记录格式为json
vi /usr/local/tomcat/conf/server.xml
<Valve className="org.apache.catalina.valves.AccessLogValve" directory="logs"
prefix="localhost_access_log" suffix=".txt"
#修改下面的值
pattern="{"client":"%h", "client user":"%l", "authenticated":"%u", "access time":"%t", "method":"%r", "status":"%s", "send bytes":"%b", "Query?string":"%q", "partner":"%{Referer}i", "Agent version":"%{User-Agent}i"}"/>
</Host>
systemctl daemon-reload
systemctl enable tomcat
systemctl start tomcat
安装nginx
yum install -y nginx
vi /etc/nginx/nginx.conf
#在http模块下修改日志格式为json格式
http {


log_format access_json '{"@timestamp":"$time_iso8601",'
        '"host":"$server_addr",'
        '"clientip":"$remote_addr",'
        '"size":$body_bytes_sent,'
        '"responsetime":$request_time,'
        '"upstreamtime":"$upstream_response_time",'
        '"upstreamhost":"$upstream_addr",'
        '"http_host":"$host",'
        '"url":"$uri",'
        '"domain":"$host",'
        '"xff":"$http_x_forwarded_for",'
        '"referer":"$http_referer",'
        '"status":"$status"}';
    access_log  /var/log/nginx/access.log  access_json;
}

systemctl enable nginx
systemctl start nginx

安装filebeat,注意:filebeat,logstash,elasticsearch版本最好一致
wget https://repo.huaweicloud.com/filebeat/7.6.2/filebeat-7.6.2-x86_64.rpm
rpm -ivh filebeat-7.6.2-x86_64.rpm
1.4 在filebeat配置收集tomcat,nginx日志信息
filebeat配置
vi /etc/filebeat/filebeat.yml    在指定的地方添加
#找到这个
#=========================== Filebeat inputs =============================
#注释这些
#- type: log
#  enabled: false
#  paths:
#    - /var/log/*.log
#添加下面这些
- type: log
  enable: true
  paths:
    - /var/log/nginx/access.log
  tags: ["nginx"]
- type: log
  enable: true
  paths:
    - /usr/local/tomcat/logs/localhost_access_log.*.txt
  tags: ["tomcat"]

#找到这个
#-------------------------- Elasticsearch output ------------------------------
#注释这些
#output.elasticsearch:
#  hosts: ["localhost:9200"]
#添加下面这些
output.redis:
  hosts: ["192.168.116.132"]
  password: "test1234"
  db: 1
  timeout: 5
  keys:
    - key: "nginx-192.168.116.130"
      when.contains:
        tags: "nginx"
    - key: "tomcat-192.168.116.130"
      when.contains:
        tags: "tomcat"

systemctl start filebeat   启动服务
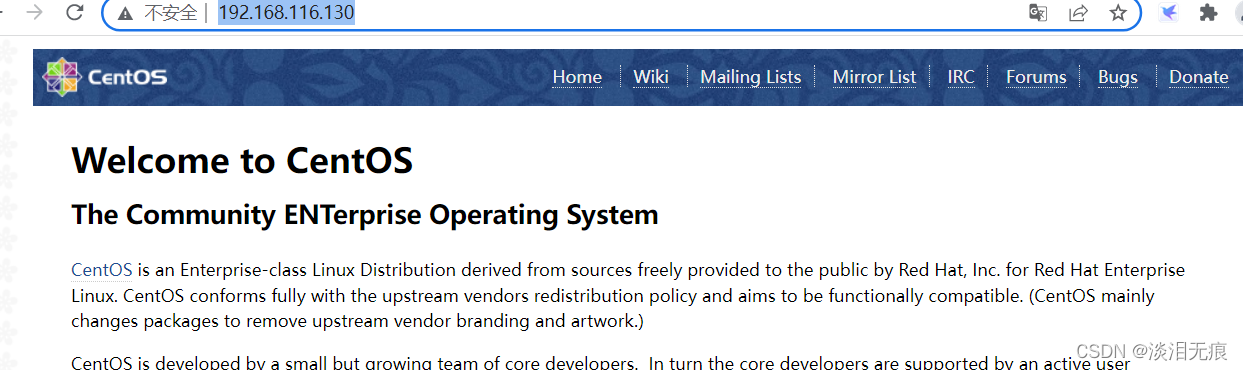
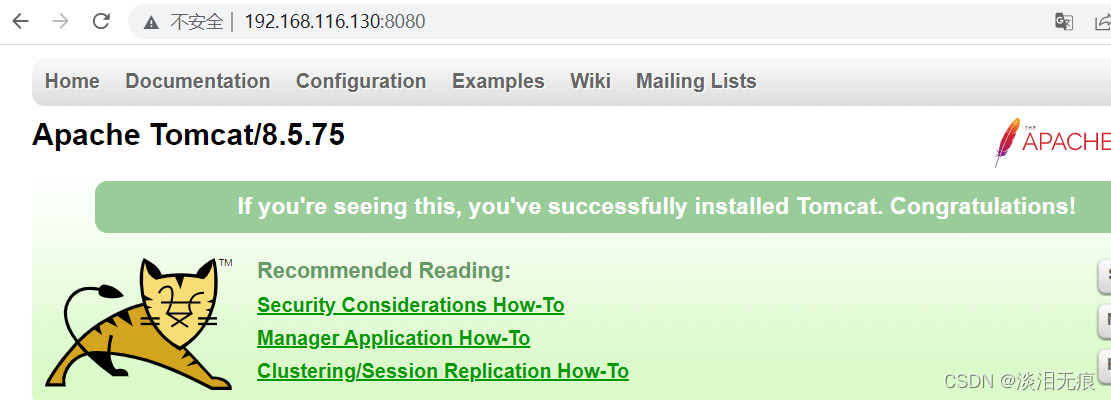
访问tomcat,nginx生成日志
http://192.168.116.130/
http://192.168.116.130:8080/
查看filebeat日志是否生成
tail -n 1 /var/log/nginx/access.log
tail -n 1 /usr/local/tomcat/logs/localhost_access_log.2022-02-13.txt

1.5 在logstash服务器将redis的日志分类,并且发送给elasticsearch
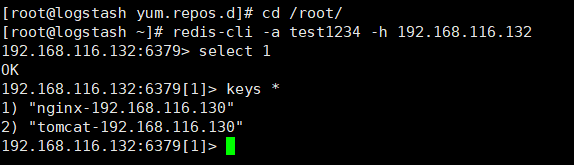
登录redis,查看keys是否生成
redis-cli -a test1234 -h 192.168.116.132  连接redis
select 1                  指定redis数据库
keys *
配置logstash,将redis的数据拆分并发送到elasticsearch
vi /etc/logstash/conf.d/nginx.conf
input {


  redis {


    host => "192.168.116.132"
    password => "test1234"
    db => 1
    data_type => "list"
    key => "nginx-192.168.116.130"
    type => "nginx-accesslog"
  }
}
output {


  if [type] == "nginx-accesslog" {


        elasticsearch {


                hosts => ["192.168.116.133"]
                index => "logstash-nginx-accesslog-%{+YYYY.MM.dd}"
         }}
}

vi /etc/logstash/conf.d/tomcat.conf
input {


  redis {


    host => "192.168.116.132"
    password => "test1234"
    db => 1
    data_type => "list"
    key => "tomcat-192.168.116.130"
    type => "tomcat-accesslog"
  }
}
output {


  if [type] == "tomcat-accesslog" {


        elasticsearch {


                hosts => ["192.168.116.133"]
                index => "logstash-tomcat-accesslog-%{+YYYY.MM.dd}"
         }}
}

测试文件语法是否正确,有2个OK表示成功
/usr/share/logstash/bin/logstash -f /etc/logstash/conf.d/nginx.conf -t
/usr/share/logstash/bin/logstash -f /etc/logstash/conf.d/tomcat.conf -t

systemctl start logstash
systemctl enable logstash
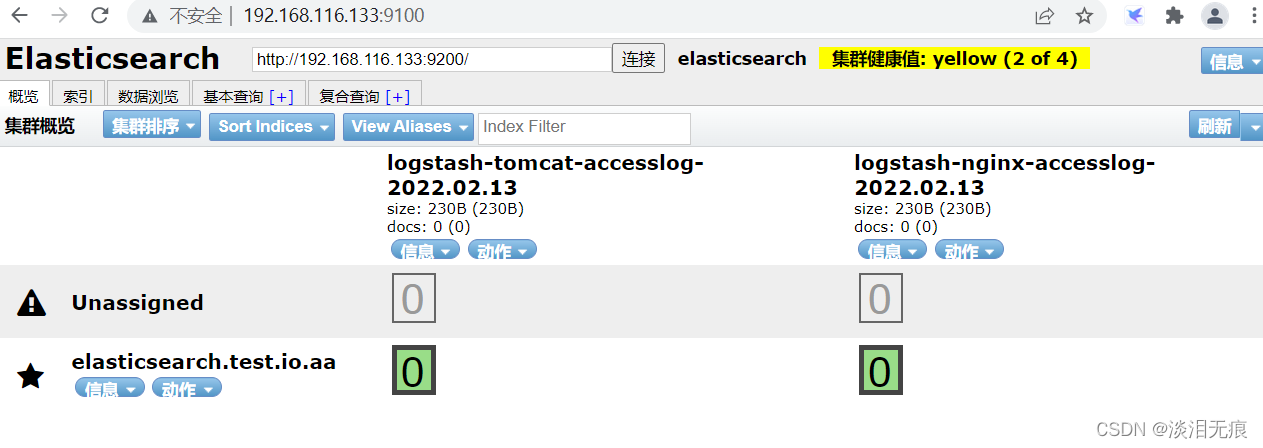
1.6 在elasticsearch-head插件上查看是否有索引生成
http://192.168.116.133:9100/
2 ELK实现使用地图显示用户所在城市
elasticsearch:主要用来处理大规模日志数据,提供API接口、全文搜索和分析引擎等
logstash:主要用来收集服务器的各种日志
kibana:对elasticsearch收集过来的日志进行图形化显示
geolite2-free-geolocation-data:地图库
2.1 安装kibana
按照上面配置好:elasticsearch和logstash
开始kibana的安装,让elasticsearch的数据图形化显示
vi /etc/hosts

192.168.116.130 filebeat.test.io.aa
192.168.116.132 logstash.test.io.aa
192.168.116.133 elasticsearch.test.io.aa
192.168.116.134 kibaba.test.io.aa

hostnamectl set-hostname kibaba.test.io.aa
wget https://repo.huaweicloud.com/kibana/7.6.2/kibana-7.6.2-x86_64.rpm
rpm -ivh kibana-7.6.2-x86_64.rpm

vi /etc/kibana/kibana.yml
server.port: 5601
server.host: "0.0.0.0"
elasticsearch.hosts: ["http://192.168.116.133:9200"]  #输入elasticsearch的IP
i18n.locale: "zh-CN"

systemctl start kibana
systemctl enable kibana
访问网页,选择自己浏览
http://192.168.116.134:5601/

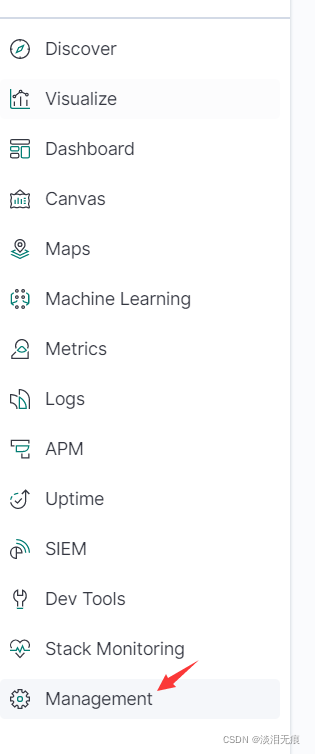
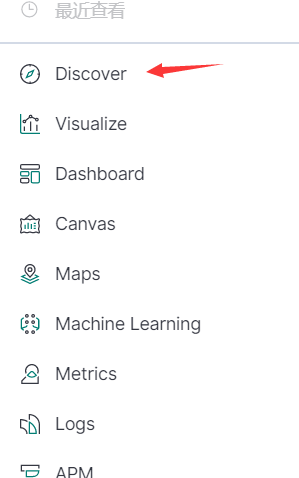
在左边列表选这个
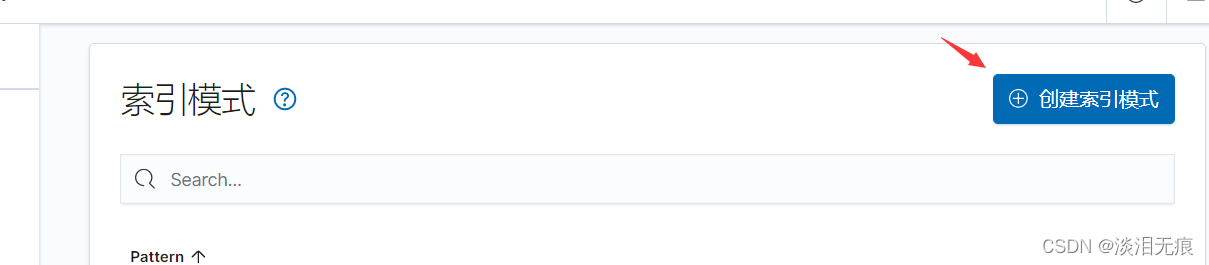
因为填了elasticsearch的IP,默认会自动读取到索引信息,没有自己手动添加
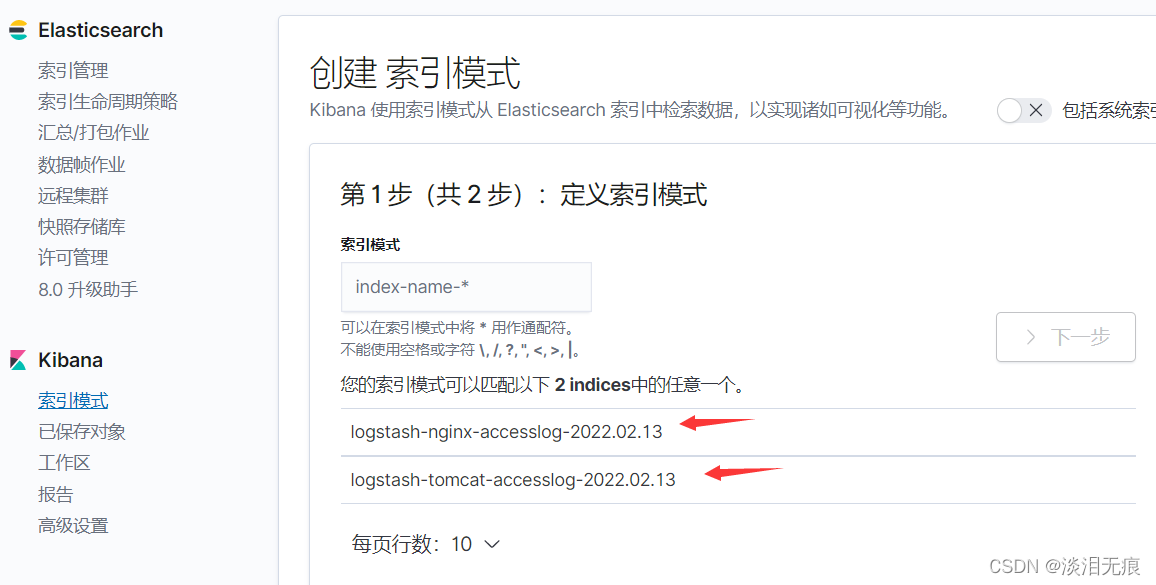
输入索引名
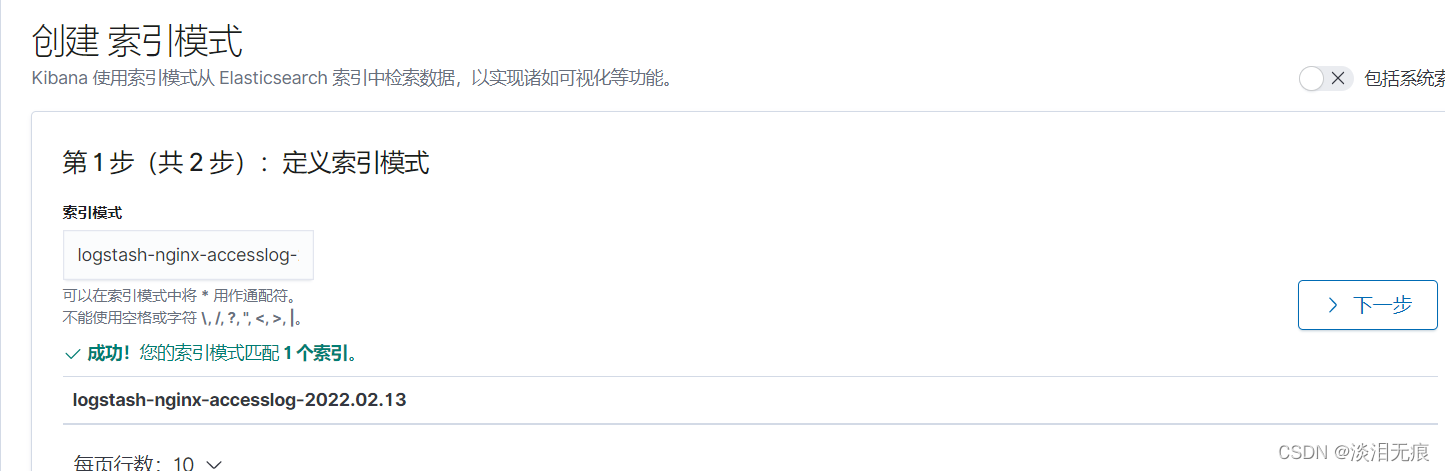
选择按照时间排序

选择这个查看索引对应的日志信息
选择索引,选择查看的时间段查看日志信息

2.2 在logstash服务器下载地图信息,让kibana生成地图
先去网址下载最新地图数据(需要注册账户才能下载数据):geolite2
点击这个会跳到注册界面
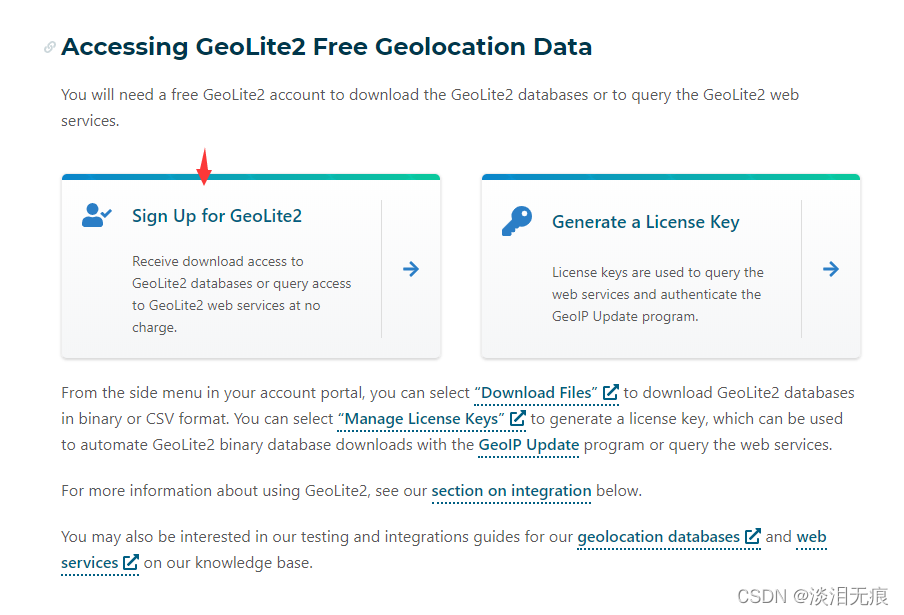
注册完成后,点击这个下载数据

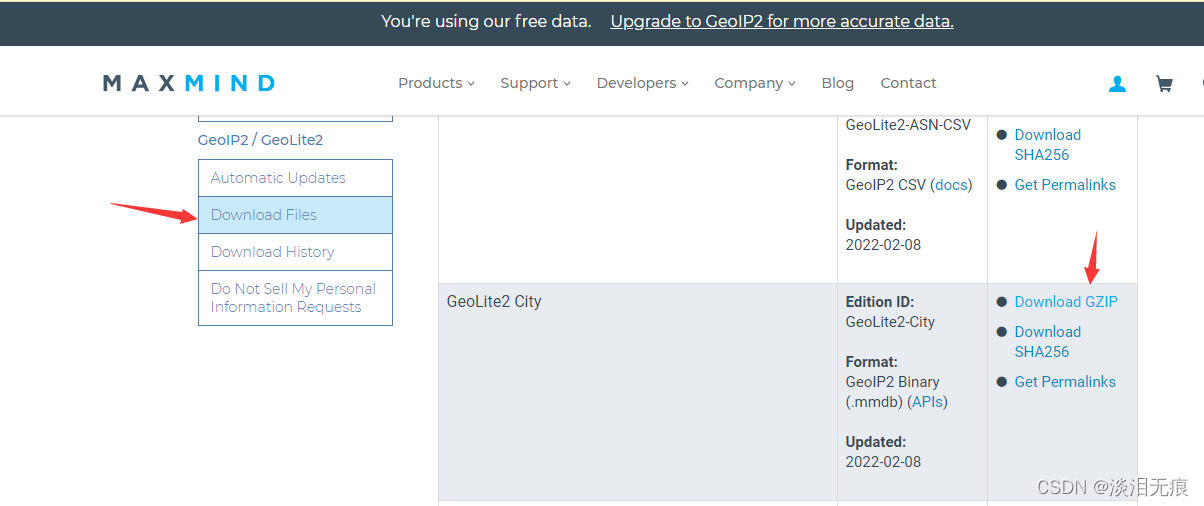
logstash服务器重新配置输出格式
将下载好的GeoLite2-City_20220208.tar.gz包放到logstash目录下
mv GeoLite2-City_20220208.tar.gz /etc/logstash/
cd /etc/logstash/
tar xf GeoLite2-City_20220208.tar.gz
cd /etc/logstash/GeoLite2-City_20220208
ls  查看文件名

vi /etc/logstash/conf.d/nginx.conf  修改文件
input {


  redis {


    host => "192.168.116.132"
    password => "test1234"
    db => 1
    data_type => "list"
    key => "nginx-192.168.116.130"
    type => "nginx-accesslog"
    codec => "json"
  }
}
#修改下面
filter {


  if [type] == "nginx-accesslog"  {


     json {


                source => "message"
        }
     geoip {


                source => "clientip"
                target => "geoip"
                database  =>  "/etc/logstash/GeoLite2-City_20220208/GeoLite2-City.mmdb"
                add_field => [ "[geoip][coordinates]", "%{[geoip][longitude]}" ]
                add_field => [ "[geoip][coordinates]", "%{[geoip][latitude]}"  ]
        }
    mutate {


      convert => [ "[geoip][coordinates]", "float"]
   }
 }
}
output {


  if [type] == "nginx-accesslog" {


        elasticsearch {


                hosts => ["192.168.116.133"]
                index => "logstash-nginx-accesslog-%{+YYYY.MM.dd}"
         }}
}

vi /etc/logstash/conf.d/tomcat.conf  修改文件
input {


  redis {


    host => "192.168.116.132"
    password => "test1234"
    db => 1
    data_type => "list"
    key => "tomcat-192.168.116.130"
    type => "tomcat-accesslog"
    codec => "json"
  }
}
#修改下面
filter {


  if [type] == "tomcat-accesslog"  {


     json {


                source => "message"
        }
     geoip {


                source => "client"
                target => "geoip"
                database  =>  "/etc/logstash/GeoLite2-City_20220208/GeoLite2-City.mmdb"
                add_field => [ "[geoip][coordinates]", "%{[geoip][longitude]}" ]
                add_field => [ "[geoip][coordinates]", "%{[geoip][latitude]}"  ]
        }
    mutate {


      convert => [ "[geoip][coordinates]", "float"]
   }
 }
}
output {


  if [type] == "tomcat-accesslog" {


        elasticsearch {


                hosts => ["192.168.116.133"]
                index => "logstash-tomcat-accesslog-%{+YYYY.MM.dd}"
         }}
}

测试语法
/usr/share/logstash/bin/logstash -f /etc/logstash/conf.d/nginx.conf -t
/usr/share/logstash/bin/logstash -f /etc/logstash/conf.d/tomcat.conf -t
systemctl restart logstash  重启服务
2.3 访问tomcat,nginx网站生成新的日志,查看kibana是否有地图数据
因为geolite2用的是公网IP定位,所以不会有地图数据生成
在filebeat服务器上修改日志为公网IP,手动刷新日志
将老的日志的客户端IP替换为公网IP
tail -n 5 /var/log/nginx/access.log >/root/nginx_access.log
sed -i 's/"clientip":"192.168.116.1"/"clientip":"223.5.5.5"/' /root/nginx_access.log
tail -n 5 /usr/local/tomcat/logs/localhost_access_log.2022-02-13.txt >/root/tomcat_access.log
sed -i 's/"client":"192.168.116.1"/"client":"114.114.114.114"/' /root/tomcat_access.log

将做出来的日志追加到nginx,tomcat的日志中,生成有公网IP访问的日志
cat /root/nginx_access.log >>/var/log/nginx/access.log
cat /root/tomcat_access.log >>/usr/local/tomcat/logs/localhost_access_log.2022-02-13.txt
在kinaba查看日志,可以看到生成了有外网IP的日志
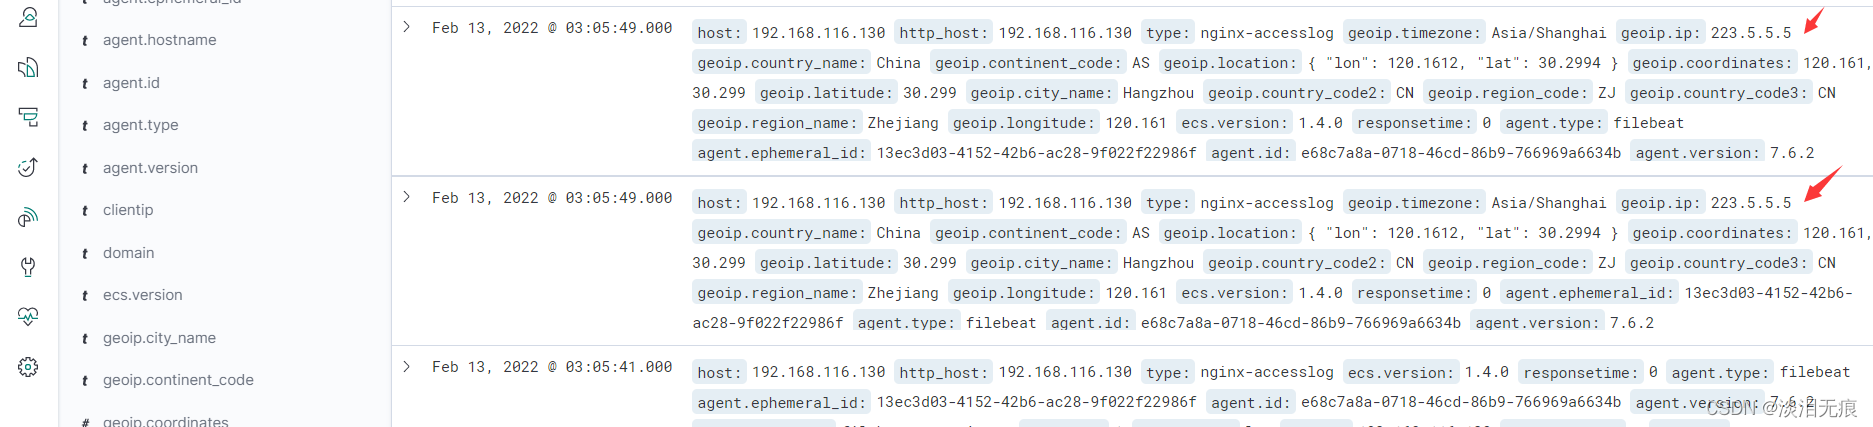
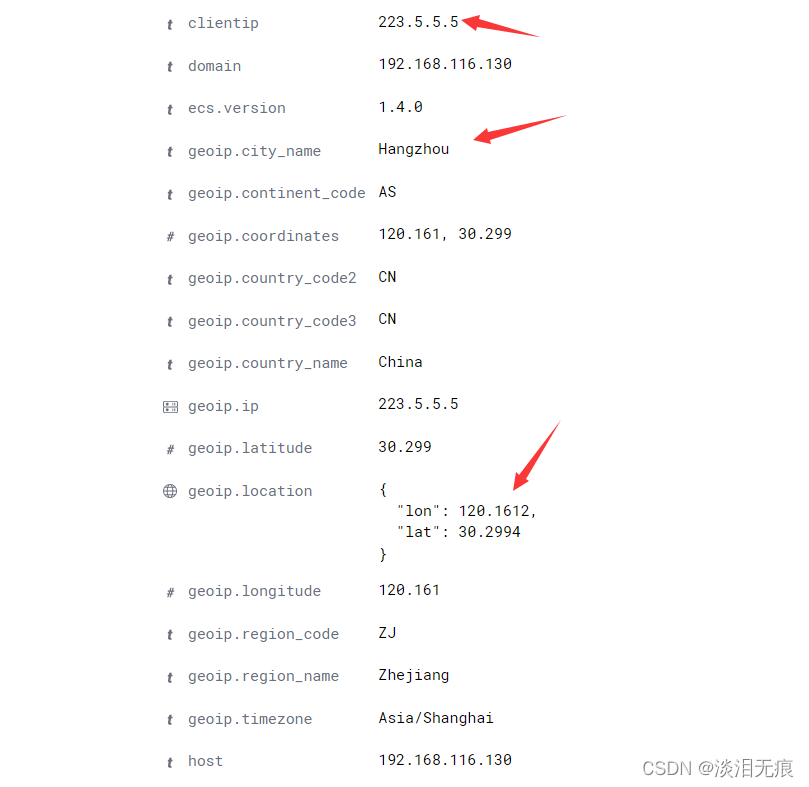
点击下拉
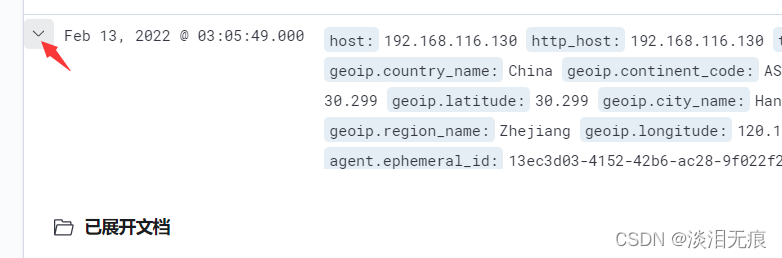
可以看到城市,经纬度等信息
2.4 在kinaba生成地图视图
选择
在右边选择添加图层,选择文档
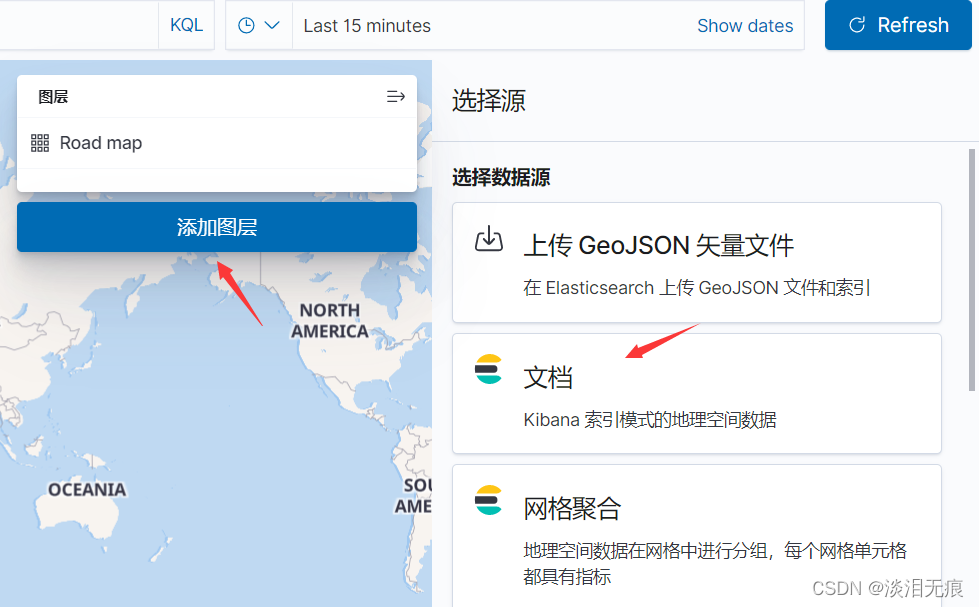
选中索引

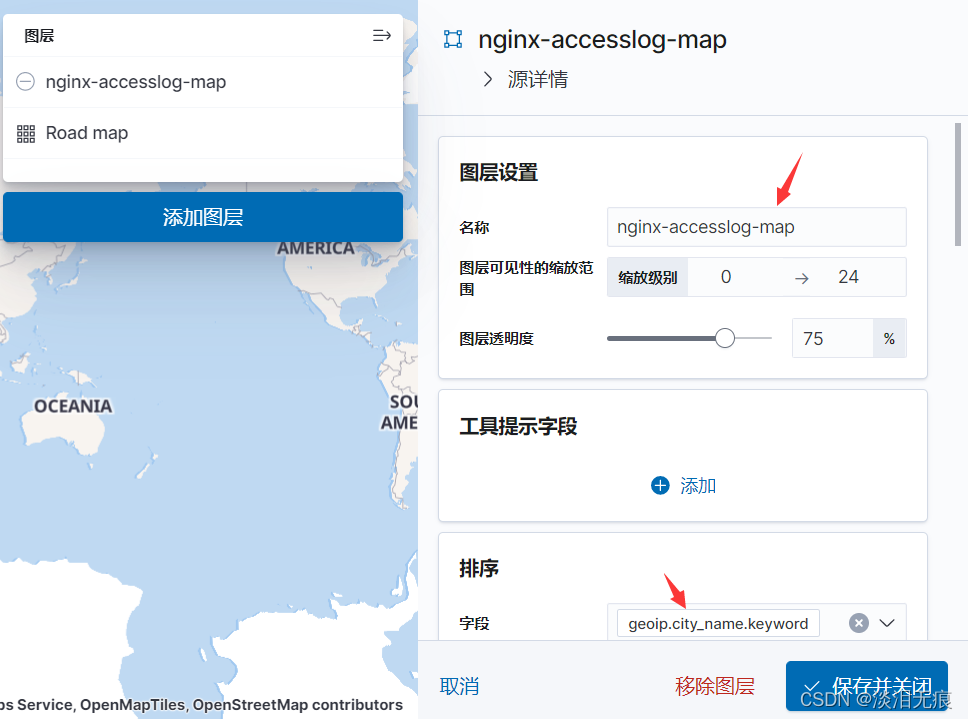
输入图层名字,选择查看的字段为geoip.city_name.keyword
默认只显示最近15分钟内容
注意:日志时间如果太晚,修改为1天内查看
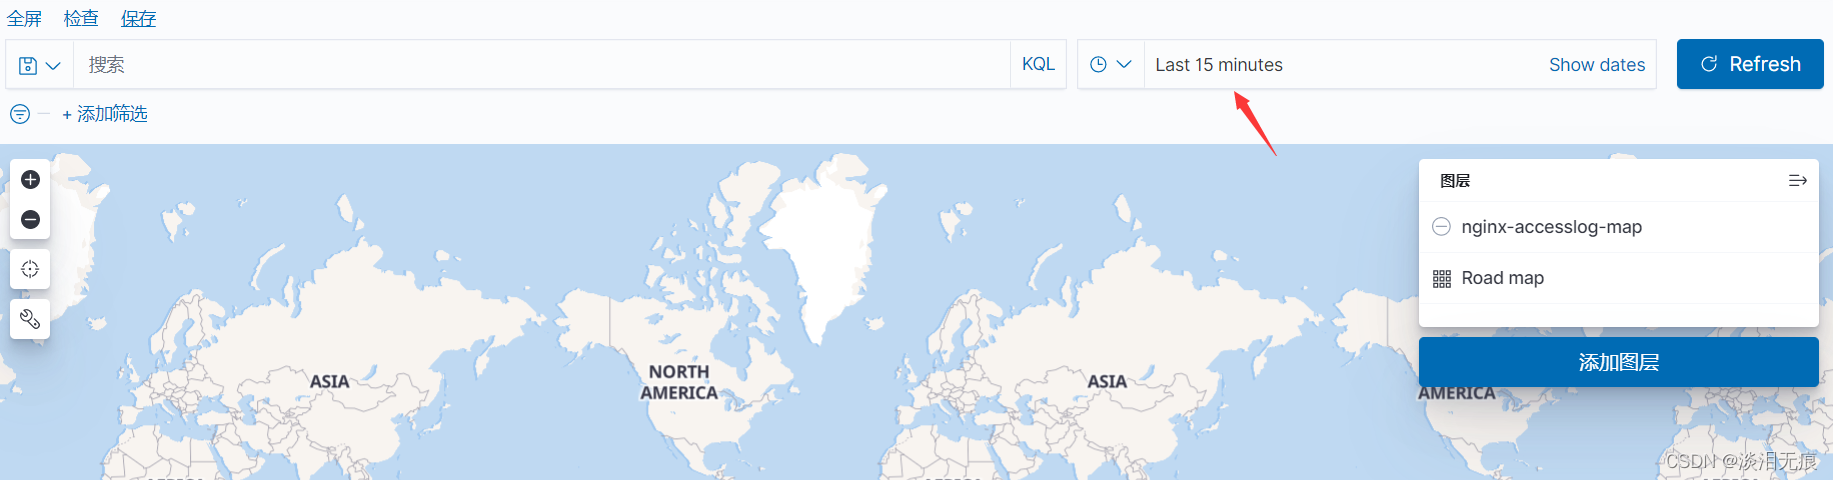
放大后可以看到城市名字
