Axios网络请求、跨域代理服务器配置
Axios网络请求库√
Axios 是一个基于 promise 的网络请求库
1.安装
npm i axios --save
2.引入
import axios from "axios";
3.使用模板
传参提示:
params传参是将参数放入url中
data传参是将参数放入请求体中
axios.get("http://localhost:5000/students").then(
 (response) => {


   console.log("成功" , response.data);
 },
 (error) => {


   console.log("失败" , error.message);
 }
);
//--------------------------------------------------
// 方式一:
axios.get(url, {

     params: {

    key:value} }).then(
(response) => {


  console.log("成功" , response.data);
},
(error) => {


  console.log("失败" , error.message);
})
// 方式二:
axios({


  method: "get",
  url: "http://localhost:8080/user",
  params: {

     key: value },
}).then((res) => {


  console.log("获取验证码res:", res);
});


// post--------------------------------------------------
 axios.post(url, data[, config]).then((res) => {

     })
axios({


  method: "post",
  url: "",
  data: ,
}).then()
// data可以用params替代


// 实例:******
axios({


  method: "post",
  url: "http://localhost:8080/user",
  params: {


	key:value,
  },
}).then(
  (response) => {


    console.log("返回信息", response.data);
    if (response.data.code === 200) {


      ElMessage.success("注册成功");
    } else {


      ElMessage.error(`注册失败,错误信息: ${

      response.data.msg}`);
    }
  },
  (error) => {


    ElMessage.error("注册请求失败");
    console.log("注册请求失败", error.data.message);
  }
);

config = {


      baseURL: '',//请求的基本地址
      timeout: 1000,//超时时间
      url: '',//请求路径
      method: '',//请求方法
      headers: {

    },//设置请求头
      params: {

    },//请求参数,放在URL上
      data: {

    } //请求参数,放在请求体
    }
vue发送请求的插件库 vue-resource (vue3不支持该插件库)
vue-resource是对xhr(XMLHttpRequest)的封装,用法和axios相同
插件库的使用
1.命令行安装
npm i vue-resource --save
2.main.js引入插件, 并通过use使用插件
import vueResource from vue-resource"

Vue.use(vueResource);
3.运用this.$http.等价于axios网络请求库的axios
this.$http.get("http://localhost:5000/students").then(
 (response) => {


   console.log("成功" , response.data);
 },
 (error) => {


   console.log("失败" , error.message);
 }
);
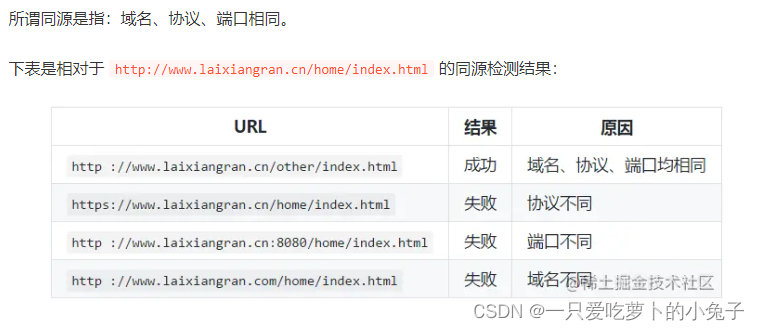
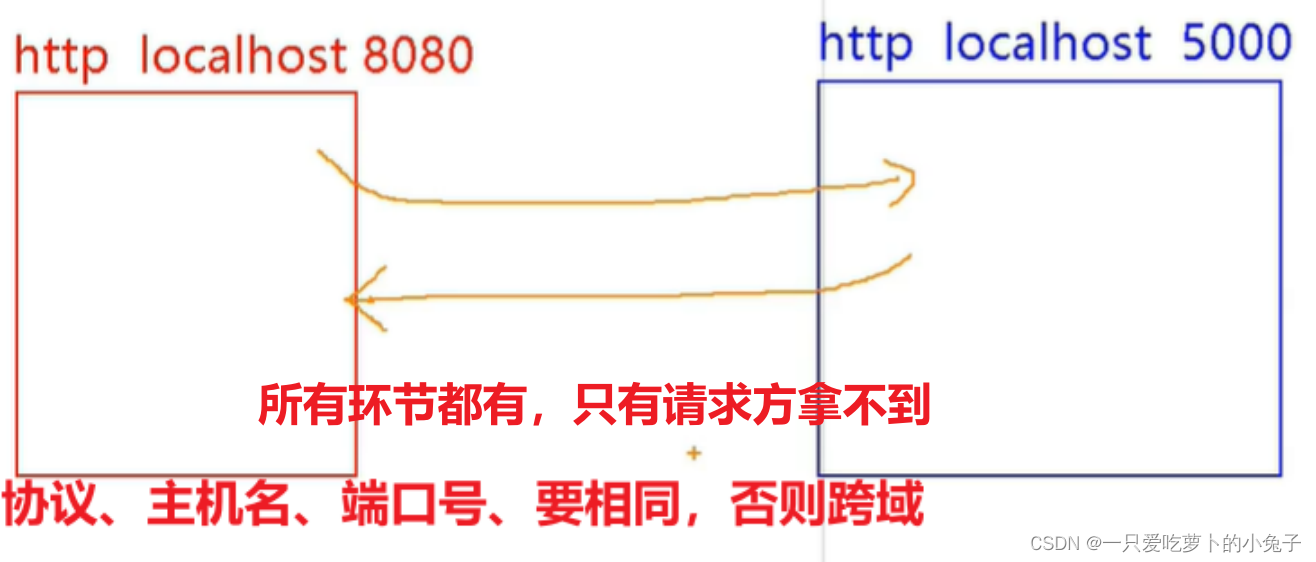
注意: 同源策略(不满足需要用到代理服务器)
不满足同源策略, 会引起跨域问题
解决办法
1.cors解决跨域(这才是真正解决跨域) — 后端人员做
加特殊响应头, 让浏览器知道这是服务器运行的
2.jsonp
通过script src
用的少, 而且要前后端人员互相配合,
还只能解决get, 旁的不行
3.代理服务器
(后端熟的人用 nginx)我们用vue-cli
用文件vue.config.js
开发时如何配置代理? devserver.proxy
代理服务器配置
写法一
简单,
但是只能有一个代理, 不能灵活控制
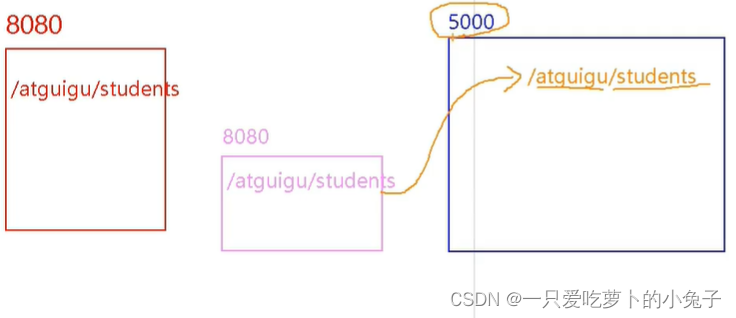
①vue.config.js配置开发代理服务器
这个服务器的端口默认8080, 这里要写的是发送目标(的协议,主机,端口 – 写到端口就可以了)
  devServer: {


    proxy: 'http://localhost:5000'
  }
②请求的是这个代理服务器, 端口要改改成开发代理服务器
      axios.get("http://localhost:8080/students").then(
        (response) => {


          console.log("成功" , response.data);
        },
        (error) => {


          console.log("失败" , error.message);
        }
      );

根目录是public, vue图标实例
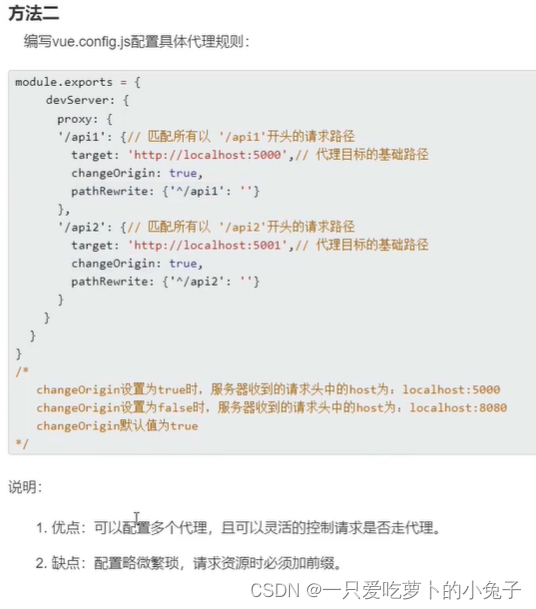
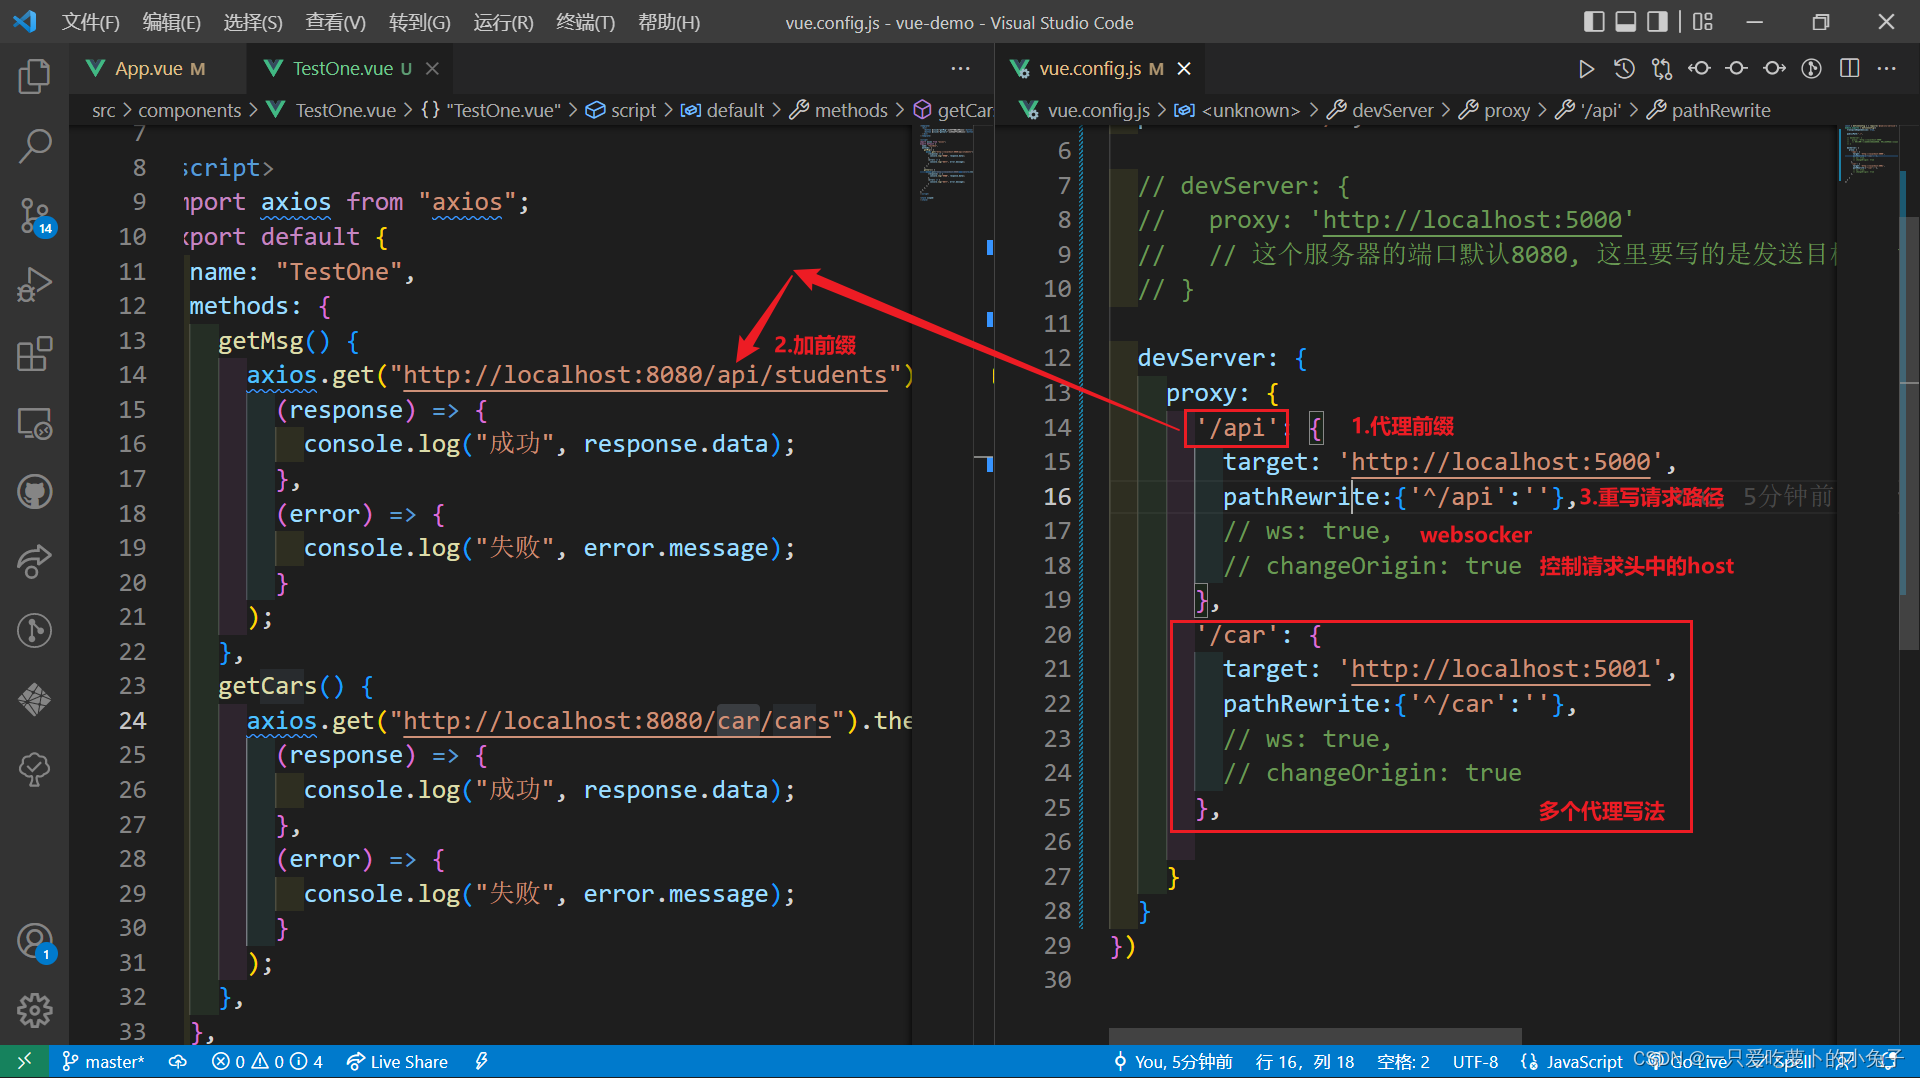
写法二 √
格式
  devServer: {


    proxy: {


      '/api': {


        target: '<url>',
        pathRewrite:{

    '^/api':''},
        ws: true,
        changeOrigin: true
      },
      '/foo': {


        target: '<other_url>'
      }
    }
  }
‘/api’指定前缀(前缀写在端口号后面), 需要重设路径
target指定发送目标,
请求前缀是’/api’, 那么就发送请求到target
changeOrigin设置成true:发送请求头中host会设置成target
多代理实例图
总结