今天学习mediapipe检测手势识别
mediapipe还有很多其他很多有趣的应用,后面都是会慢慢学习到的。
import cv2
import mediapipe as mp
import time

cap = cv2.VideoCapture(0)
cap.set(3, 1280)  # 设置宽
cap.set(4, 720)  # 设置高

mpHands = mp.solutions.hands  # 检测手的类

# 检测
mpHandDetesctor = mpHands.Hands(static_image_mode=False,  # 要检测是静态图片还是动态的?视频和影响摄像头是动态的,图片是静态的。
                                max_num_hands=2,  # 检测最多的手的个数
                                model_complexity=1,  # 模型复杂度,只能是0或者1,值越大越精准
                                min_detection_confidence=0.5,  # 最小的置信度,0~1,值越大,检测越严格,值越小,误检测越高
                                min_tracking_confidence=0.5)  # 最终的严谨度,0~1,值越大,追踪越严谨,值越小,误检测越高
# 画图的工具
mpHandDrawer = mp.solutions.drawing_utils

pointStyle = mpHandDrawer.DrawingSpec(color=(255, 0, 0,), thickness=10)  # landmark的样式
linStyle = mpHandDrawer.DrawingSpec(color=(0, 255, 0,), thickness=5)  # 连线的样式

finger_top_idx = [4, 8, 12, 16, 20]  # 指尖的位置的下标

# 计算FPS
prevTime, currTime = 0, 0

while True:
    ret, img = cap.read()
    if img is None or ret == False:
        print("video is over...")
        break

    img = cv2.flip(img, 1)  # 左右互换,这样的话,我们的摄像头就不是左右和我们视觉的左右是相反的了,就像是一面镜子,看着比较舒服。
    H, W, C = img.shape

    # 手部侦测是处理RGB的图片,但是opencv读取到的图片都是BGR的,需要做个转换
    imgRGB = cv2.cvtColor(img, cv2.COLOR_BGR2RGB)

    # 使用 mediapipe 来整手势识别
    result = mpHandDetesctor.process(imgRGB)

    # 显示手上21个点的位置和坐标,有x,y,z三个值的信息
    # print(result.multi_hand_landmarks)

    # 显示出结果
    if result.multi_hand_landmarks:
        for one_hand in result.multi_hand_landmarks:  # 遍历每一个手的坐标信息
            # 第一种方式:只画点
            # mpHandDrawer.draw_landmarks(image=img, landmark_list=one_hand)
            # 第二种方式:画出连线
            # mpHandDrawer.draw_landmarks(image=img, landmark_list=one_hand, connections=mpHands.HAND_CONNECTIONS)
            # 第三种方式:画出其他样式,点的样式和线条的样式,在原始图像上画
            mpHandDrawer.draw_landmarks(image=img, landmark_list=one_hand, connections=mpHands.HAND_CONNECTIONS,
                                        landmark_drawing_spec=pointStyle,
                                        connection_drawing_spec=linStyle)

            # 拿到对应点的坐标才能做下层应用啊,
            for i, lm in enumerate(one_hand.landmark):
                lm_x, lm_y = int(W * lm.x), int(H * lm.y)
                print("i:{}, x:{}, y:{}, z:{}".format(i, lm_x, lm_y, lm.z))
                cv2.putText(img=img, text=str(i), org=(lm_x, lm_y-10), fontFace=cv2.FONT_HERSHEY_SIMPLEX,
                            fontScale=0.5, color=(0, 0, 255), thickness=1)  # 将标号画出来

                if i in finger_top_idx:  # 每个指尖的位置都放大且突出来显示
                    cv2.circle(img, center=(lm_x, lm_y), radius=10, color=(0, 0, 255), thickness=cv2.FILLED)

    # 粗略计算FPS,经过测试发现,没有手势的时候是大概在30左右,但是有手势存在的时候是20左右了,有所下降
    currTime = time.time()
    fps = 1 / (currTime - prevTime)
    prevTime = currTime
    cv2.putText(img=img, text=str("fps:{}".format(int(fps))), org=(30, 30), fontFace=cv2.FONT_HERSHEY_SIMPLEX,
                fontScale=1, color=(0, 0, 255), thickness=1)  # 将标号画出来

    cv2.imshow('Image', img)
    if cv2.waitKey(1) & 0xFF == ord('q'):  # 按下q键清空所有的保留的点,重新展示一个新的图像
        break

cv2.destroyAllWindows()
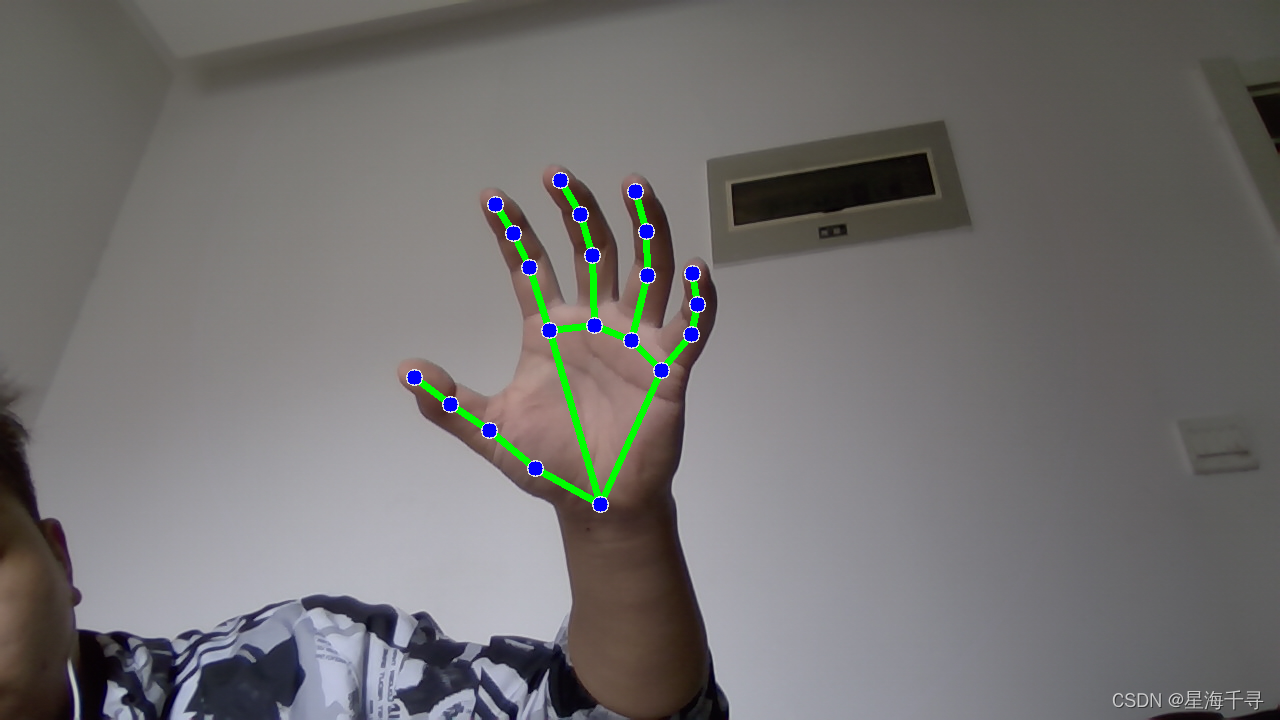
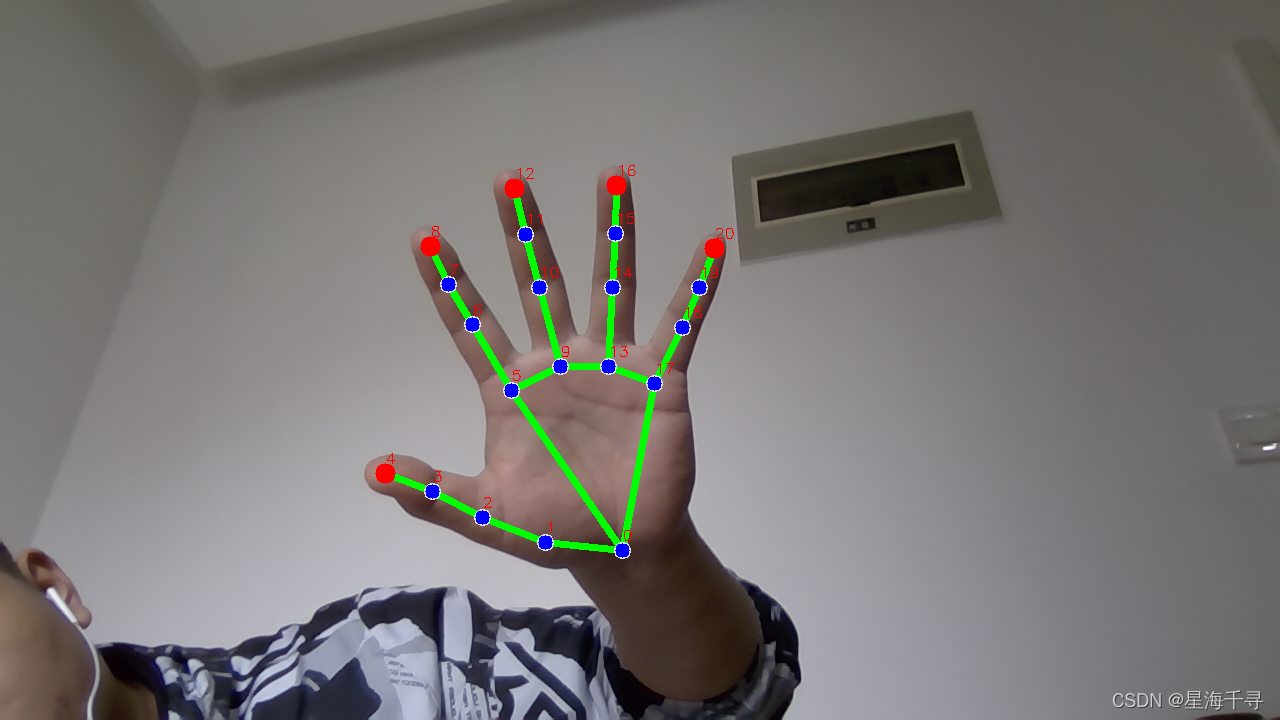
效果如下: