一、环境搭建
- 从零配置深度学习环境参考:ubuntu18.04+ Annaconda+CUDA10.2+CuDNN7.6.5
- 使用anaconda创建虚拟环境
conda create -n open-mmlab3d python=3.8
conda activate open-mmlab3d
- 安装torch
先从官网上下载轮子,然后直接安装
pip install torch-1.9.0+cu102-cp38-cp38-linux_x86_64.whl
pip install torchvision-0.10.0+cu102-cp38-cp38-linux_x86_64.whl
- 安装tensorflow (方便在训练过程中使用TensorBoard)
pip install tensorflow-gpu==2.2.0
- 安装mmcv (下面命令中的
cu102/torch1.9.0对应我安装的cuda和torch的版本号)
pip install mmcv-full -f https://download.openmmlab.com/mmcv/dist/cu102/torch1.9.0/index.html
- 安装mmdetection
pip install git+https://github.com/open-mmlab/mmdetection.git
- 安装mmsegmentation
pip install git+https://github.com/open-mmlab/mmsegmentation.git
- 安装mmdetecion3d
git clone https://github.com/open-mmlab/mmdetection3d.git
cd mmdetection3d
python setup.py develop
- 测试是否安装成功
import torch
torch.cuda.is_available()
import mmcv
import mmdet
import mmdet3d
二、测试demo
- 下载预训练模型
模型下载地址
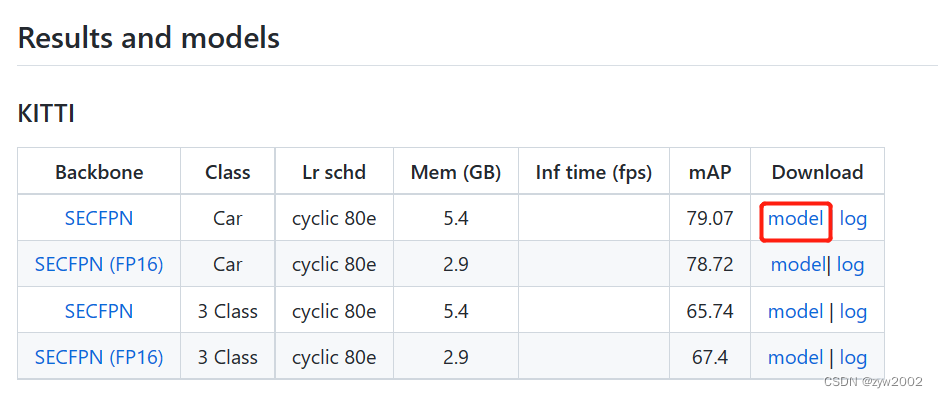
在项目根目录下新建my_checkpoints文件夹,并把下载好的文件hv_second_secfpn_6x8_80e_kitti-3d-car_20200620_230238-393f000c.pth放到该文件夹下。 - 测试命令
python demo/pcd_demo.py demo/data/kitti/kitti_000008.bin configs/second/hv_second_secfpn_6x8_80e_kitti-3d-car.py my_checkpoints/hv_second_secfpn_6x8_80e_kitti-3d-car_20200620_230238-393f000c.pth - 测试结果
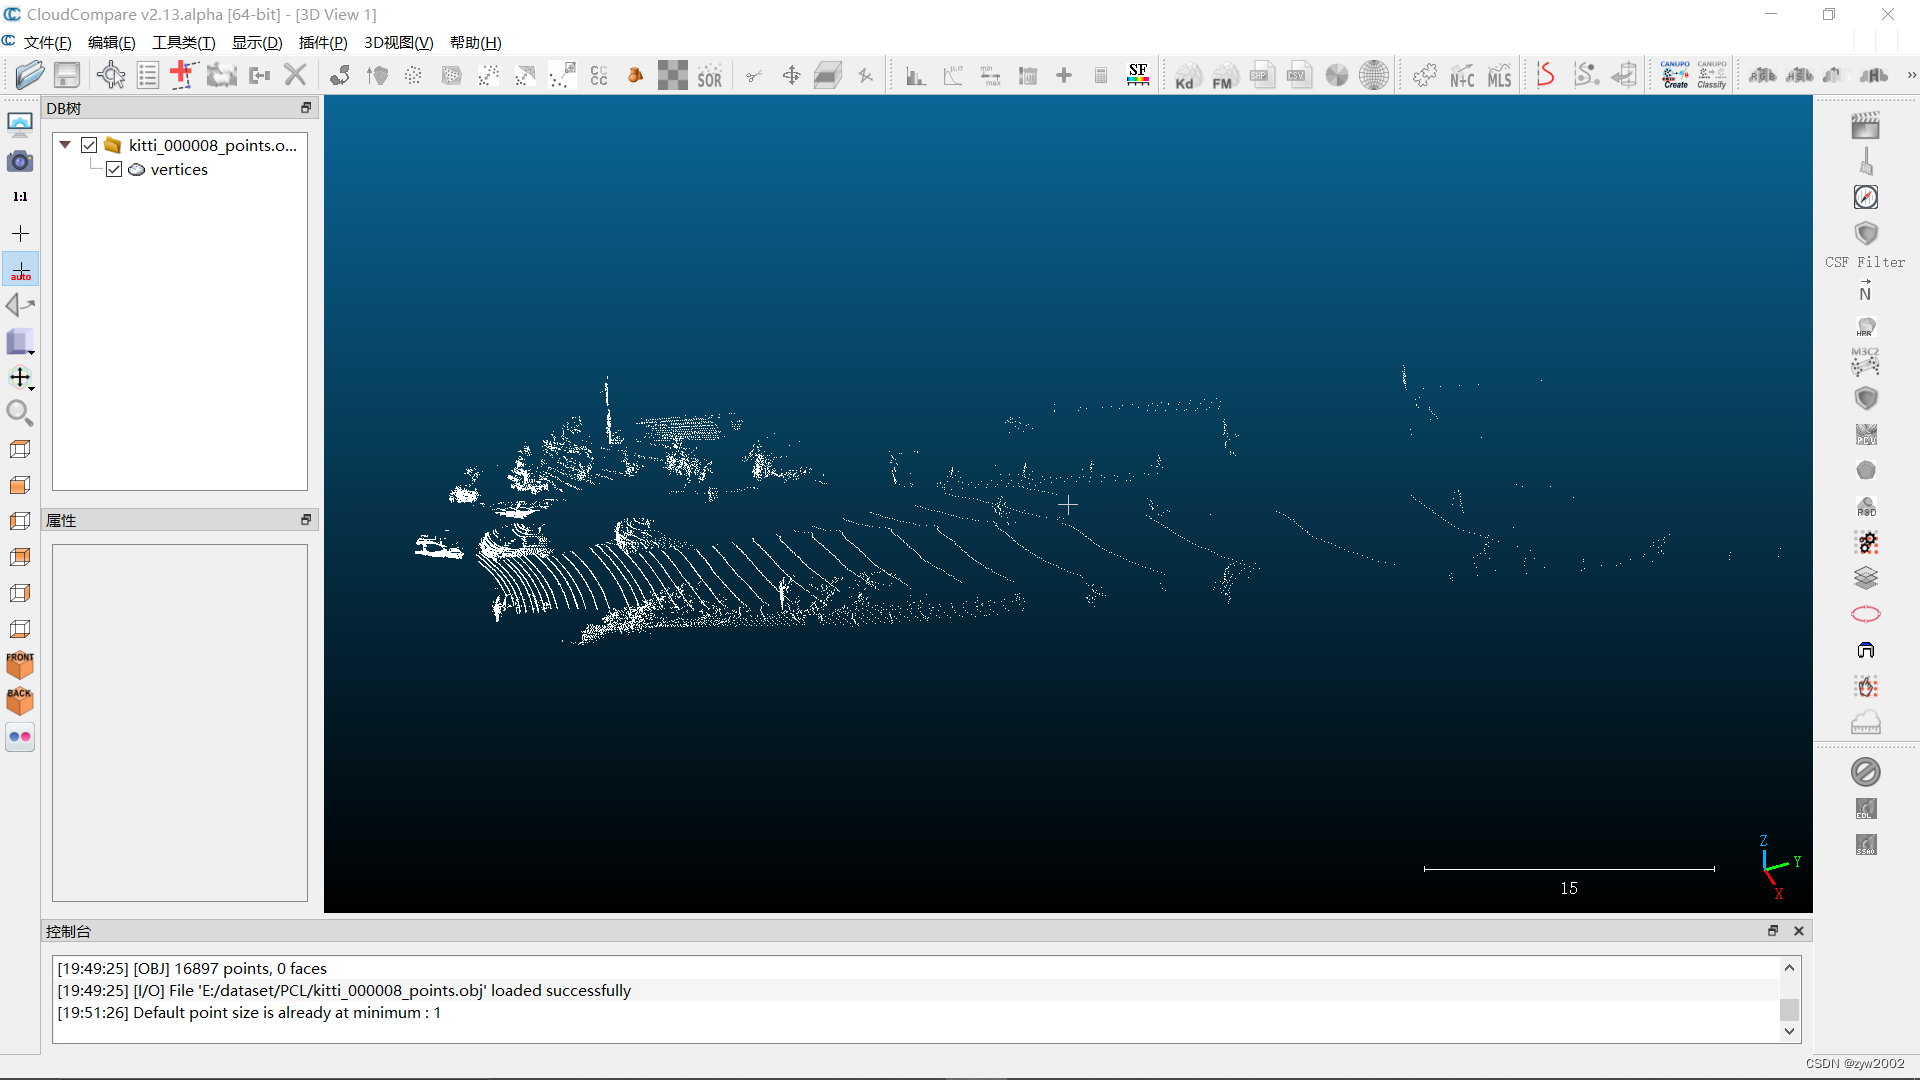
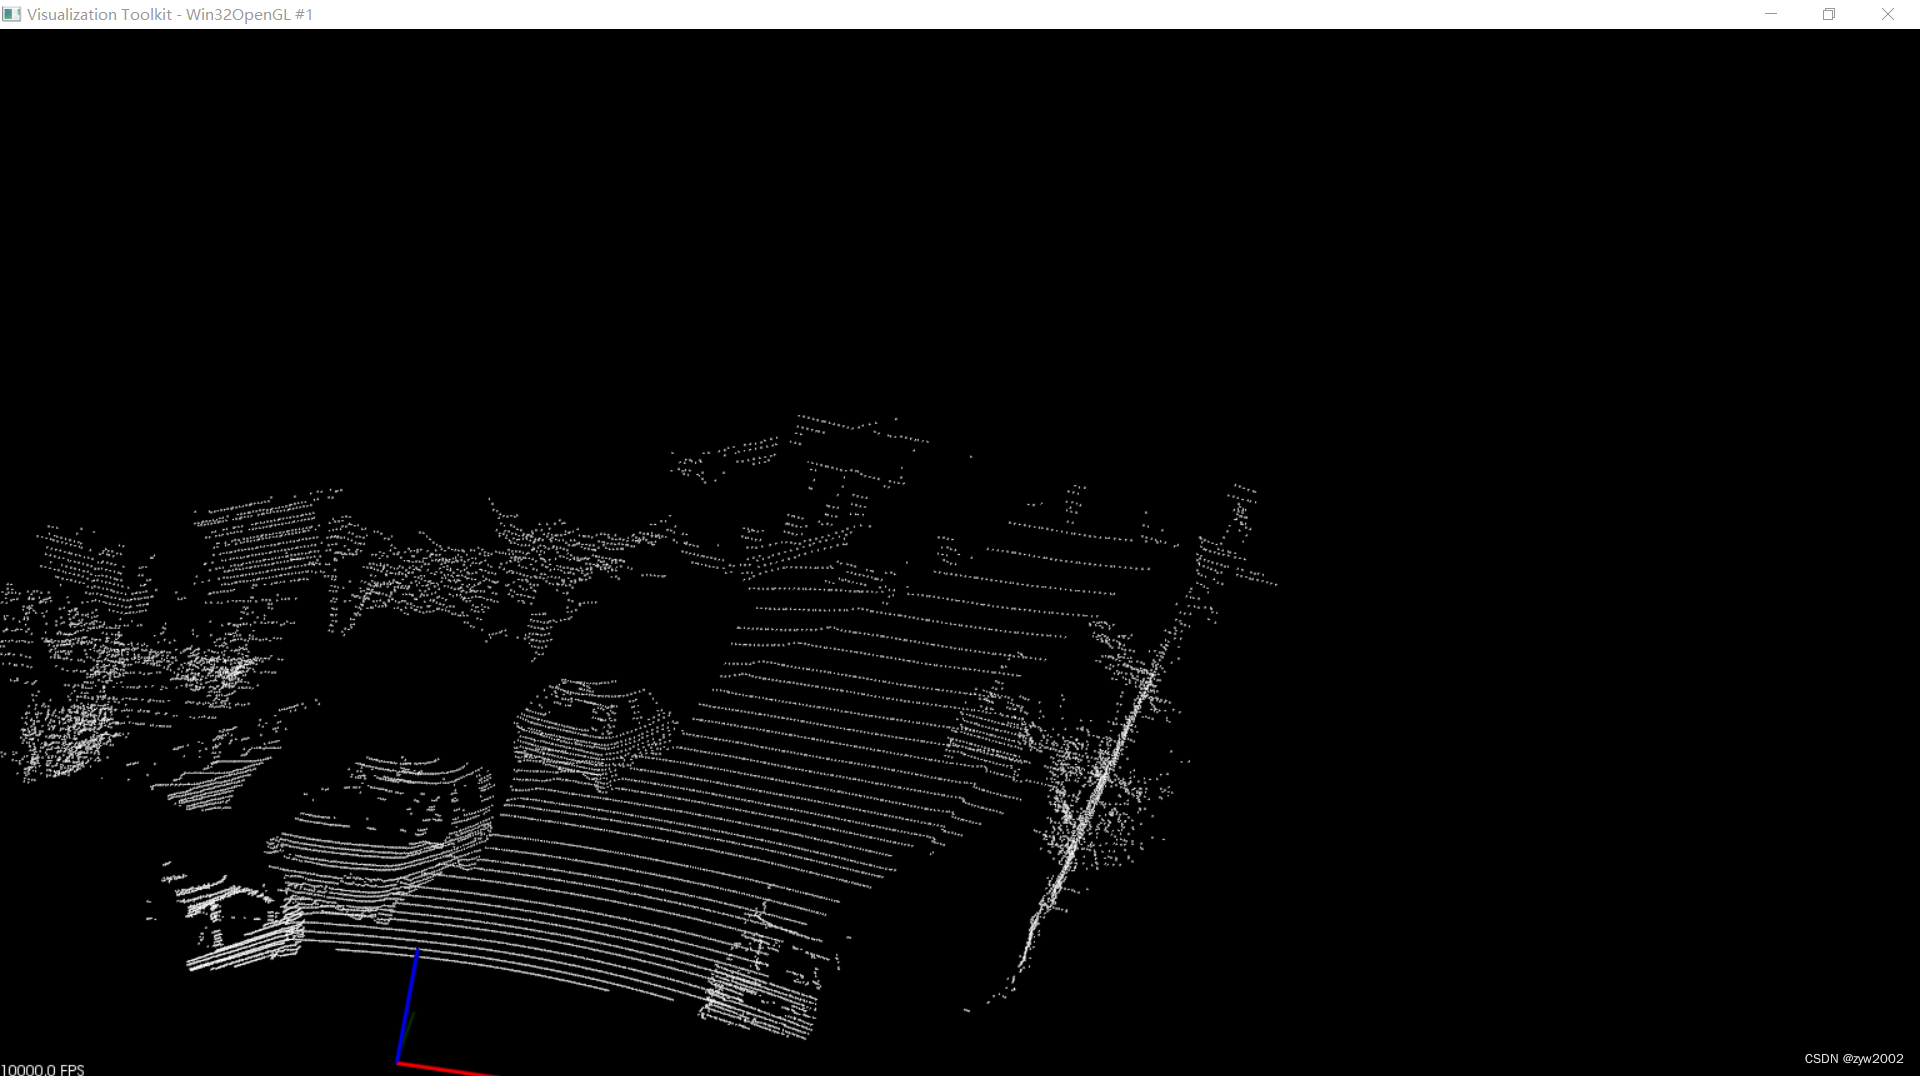
在demo/kitti_000008文件夹下多出来两个.obj文件。

- 结果可视化
KITTI数据集解析和可视化
三、数据预处理
- kitti 数据集下载和准备
KITTI数据集解析和可视化 - 数据集预处理
python tools/create_data.py kitti --root-path ./data/kitti --out-dir ./data/kitti --extra-tag kitti
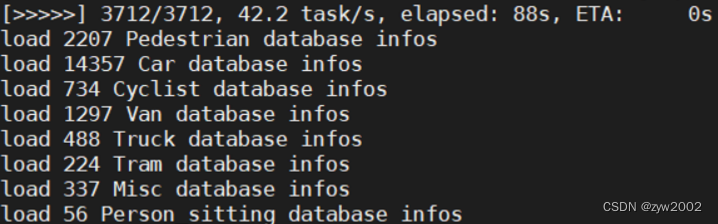
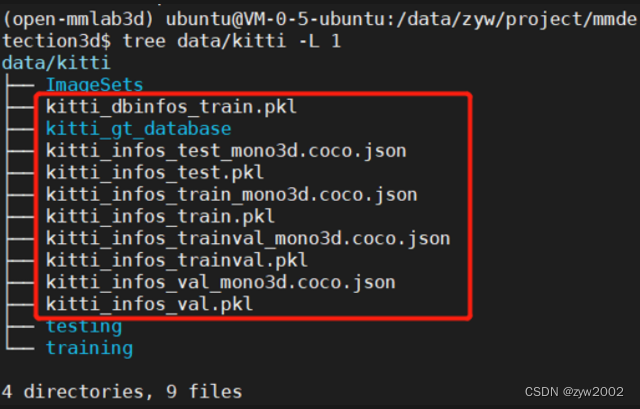
数据预处理完之后,会生成一些文件,保存在./data/kitti目录下:
Debug记录
报错如下:
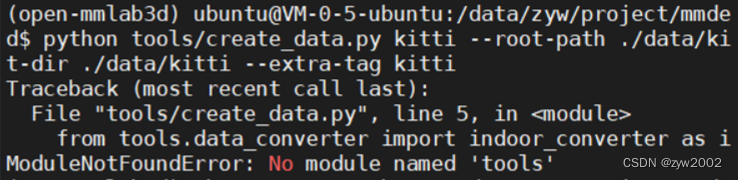
解决方案:
重新编译mmdetection3d
python setup.py develop
然后再执行数据预处理的命令。
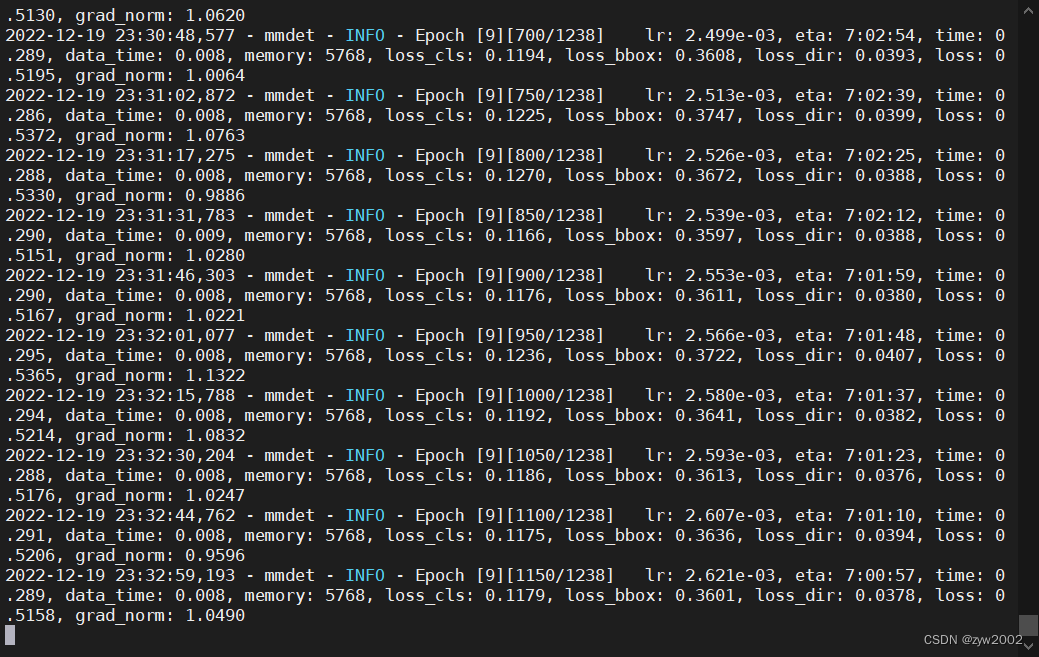
四、训练
python tools/train.py configs/pointpillars/hv_pointpillars_secfpn_6x8_160e_kitti-3d-3class.py
Debug记录
报错如下:
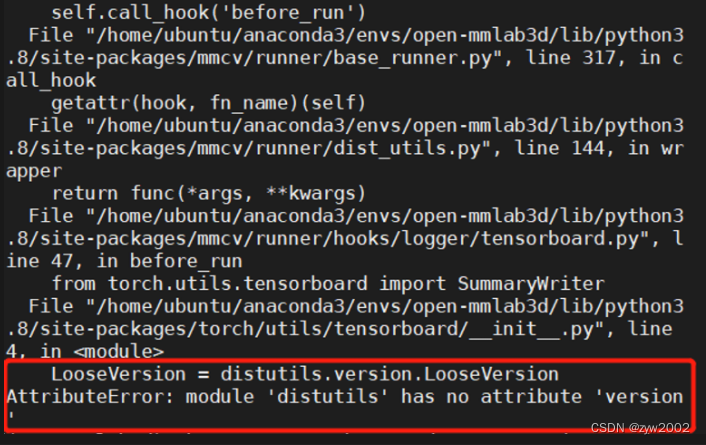
解决方案:
pip install setuptools==59.5.0
参考
https://github.com/open-mmlab/mmdetection3d/blob/master/docs/zh_cn/getting_started.md
https://blog.csdn.net/weixin_41010198/article/details/116133545