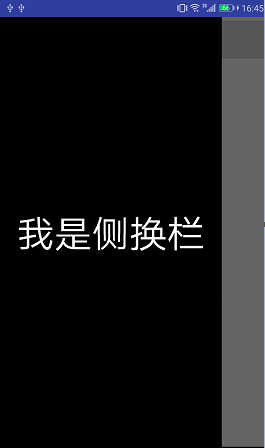
详细见:http://www.runoob.com/w3cnote/android-tutorial-drawerlayout.html
布局代码:
<android.support.v4.widget.DrawerLayout xmlns:android="http://schemas.android.com/apk/res/android"
    xmlns:tools="http://schemas.android.com/tools"
    android:id="@+id/drawer_layout"
    android:layout_width="match_parent"
    android:layout_height="match_parent">

    <FrameLayout
        android:id="@+id/ly_content"
        android:layout_width="match_parent"
        android:layout_height="match_parent">
        <TextView
            android:layout_width="wrap_content"
            android:layout_height="wrap_content"
            android:text="主界面"
            android:textColor="#000000"
            android:textSize="50dp"
            android:layout_gravity="center"/>
        <Button
            android:id="@+id/button"
            android:layout_width="match_parent"
            android:layout_height="60dp"
            android:text="按钮"
            android:textSize="30dp"/>
    </FrameLayout>

    <fragment
        android:layout_width="match_parent"
        android:layout_height="match_parent"
        android:layout_gravity="start"
        android:name="com.example.drawerlayout.LeftFragment"
        tools:layout="@layout/left_fragment"
        android:tag="LEFT"/>
</android.support.v4.widget.DrawerLayout>
MainActivity
package com.example.drawerlayout;

import android.support.v4.widget.DrawerLayout;
import android.support.v7.app.AppCompatActivity;
import android.os.Bundle;
import android.view.Gravity;
import android.view.View;
import android.widget.Button;

public class MainActivity extends AppCompatActivity {
    private DrawerLayout drawerlayout;
    private Button button;


    @Override
    protected void onCreate(Bundle savedInstanceState) {
        super.onCreate(savedInstanceState);
        setContentView(R.layout.activity_main);
        intiView();
    }

    private void intiView() {
        drawerlayout=(DrawerLayout)findViewById(R.id.drawer_layout);
        button=(Button)findViewById(R.id.button);
        //drawerlayout.setDrawerLockMode(DrawerLayout.LOCK_MODE_LOCKED_CLOSED,Gravity.START);//设置手势不能打开或者关闭侧滑栏

        button.setOnClickListener(new View.OnClickListener() {
            @Override
            public void onClick(View v) {
                drawerlayout.openDrawer(Gravity.START);//设置打开指定侧滑栏
            }
        });


        drawerlayout.addDrawerListener(new DrawerLayout.DrawerListener() {

            //抽屉滑动过程中调用的方法
            //slideOffset 是(0-1)
           /* drawerView   调用drawerView.getTag().equals("START")判断触发菜单事件的是哪个菜单
            需要给滑动的侧栏设置 android:tag="LEFT"或者 android:tag="RIGHT"*/


            @Override
            public void onDrawerSlide(View drawerView, float slideOffset) {
                if(drawerView.getTag().equals("START")){
                    drawerlayout.setDrawerLockMode(DrawerLayout.LOCK_MODE_LOCKED_OPEN,Gravity.START);
                }
            }

            //抽屉打开时,调用的方法
            @Override
            public void onDrawerOpened(View drawerView) {

            }

            //抽屉关闭时,调用方法
            @Override
            public void onDrawerClosed(View drawerView) {

            }

/**
             * 当抽屉滑动状态改变的时候被调用
             * 状态值是STATE_IDLE(闲置--0), STATE_DRAGGING(拖拽的--1), STATE_SETTLING(固定--2)中之一。
             * 抽屉打开的时候,点击抽屉,drawer的状态就会变成STATE_DRAGGING,然后变成STATE_IDLE
             */

            @Override
            public void onDrawerStateChanged(int newState) {

            }
        });

    }


}

