一、什么是Spring?
Spring Framework 是一个开源的Java/Java EE全功能栈(full-stack)的应用程序框架,以Apache License 2.0开源许可协议的形式发布,也有.NET平台上的移植版本。该框架基于 Expert One-on-One Java EE Design and Development(ISBN 0-7645-4385-7)一书中的代码,最初由Rod Johnson和Juergen Hoeller等开发。Spring Framework提供了一个简易的开发方式,这种开发方式,将避免那些可能致使底层代码变得繁杂混乱的大量的属性文件和帮助类。维基百科-SpringFrameWork
###总结来说就是:###
- Spring 是一个开源框架。
- Spring 为简化企业级应用开发而生. 使用 Spring 可以使简单的 JavaBean 实现以前只有 EJB 才能实现的功能。
- Spring 是一个 IOC(DI) 和 AOP 容器框架。
###具体描述:###
- 轻量级:Spring 是非侵入性的 - 基于 Spring 开发的应用中的对象可以不依赖于 Spring 的 API。
- 依赖注入(DI — dependency injection、IOC)。
- 面向切面编程(AOP — aspect oriented programming)。
- 容器: Spring 是一个容器, 因为它包含并且管理应用对象的生命周期。
- 框架: Spring 实现了使用简单的组件配置组合成一个复杂的应用. 在 Spring 中可以使用 XML 和 Java 注解组合这些对象。
- 一站式:在 IOC 和 AOP 的基础上可以整合各种企业应用的开源框架和优秀的第三方类库 (实际上Spring 自身也提供了展现层的 SpringMVC 和 持久层的 Spring JDBC)。
##二、写HelloWorld前的一些准备工作## ------- ###1.Eclipse安装spring插件(MyEclipse可以跳过此步骤)### ####(1)访问Spring的官网下载Spring Tool Suite [点我下载SpringToolSuite](https://spring.io/tools/sts/all) 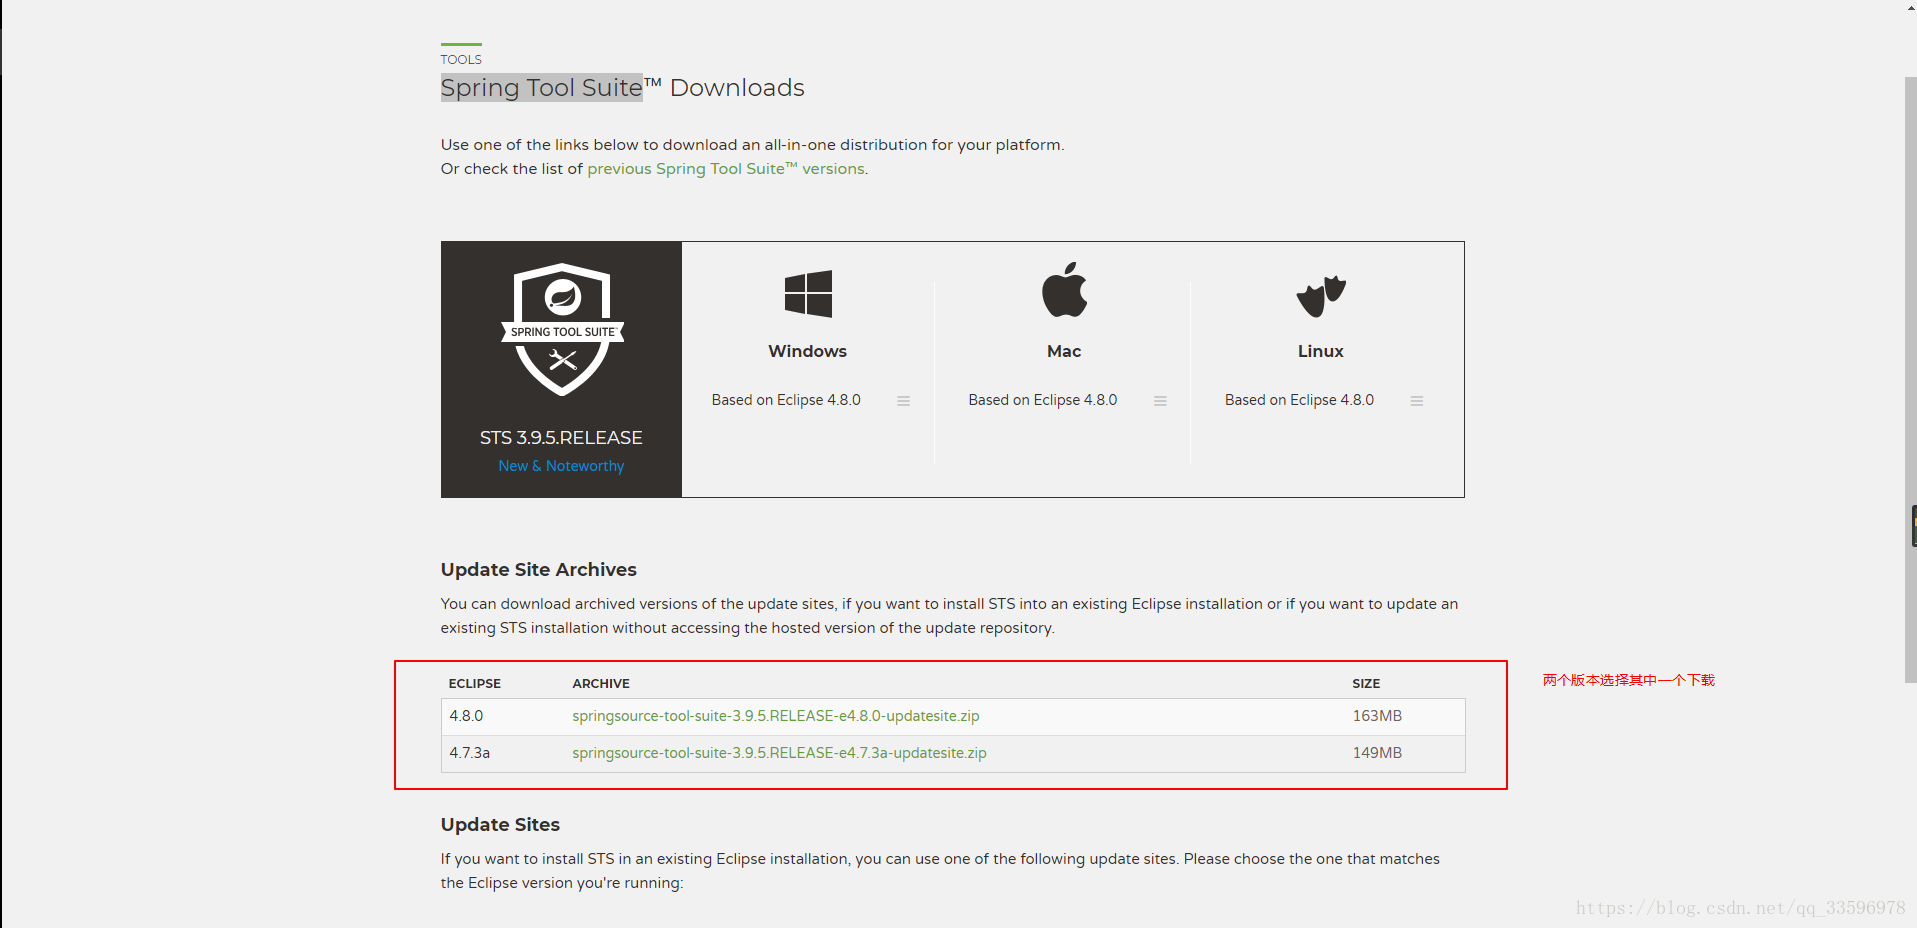 ####(2)下载之后不用解压,使用Eclipse进行安装。在Eclipse中的菜单栏点击**Help**-->**Install New Software**
##三、开始编写Spring的第一个程序HelloWorld## ------ ###注意: 如果是使用`MyEclipse`进行开发的朋友可以直接`右键需要导入Spring的项目`-->`ConConfigure Facet`-->`Install Spring Facet`即可,不需要执行下面的(1)(2)步。
##(1)下载相关的JAR包
##(2)把包导入到新建的Web项目中
-
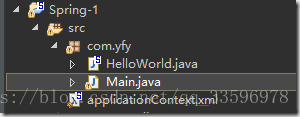
新建项目,添加一个lib文件,把刚才下载的包中的下面这些包拷贝进去,全选jar包,右键`Build Path` ---〉`Add to Build Path`<center>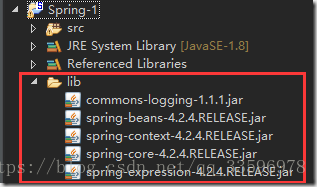</center><center>**(下面的spring开头的包能够在`spring-framework-4.1.5.RELEASE-dist`压缩包中的`libs`文件夹中找到)**</center> - 新建下面3个文件
HelloWorld.java
Main.java
applicationContext.xml
(三个文件的摆放位置如图所示,包名可以随便修改)
##(3)编写相关类的代码
** HelloWorld.java 代码:**
public class HelloWorld {

	private String user;

	public HelloWorld() {
		System.out.println("HelloWorld's constructor...");
	}

	public void setUser(String user) {
		System.out.println("setUser:" + user);
		this.user = user;
	}

	public HelloWorld(String user) {
		this.user = user;
	}

	public void hello(){
		System.out.println("Hello: " + user);
	}

}
applicationContext.xml
<?xml version="1.0" encoding="UTF-8"?>
<beans xmlns="http://www.springframework.org/schema/beans"
	xmlns:xsi="http://www.w3.org/2001/XMLSchema-instance"
	xmlns:util="http://www.springframework.org/schema/util"
	xmlns:p="http://www.springframework.org/schema/p"
	xsi:schemaLocation="http://www.springframework.org/schema/beans http://www.springframework.org/schema/beans/spring-beans.xsd
		http://www.springframework.org/schema/util http://www.springframework.org/schema/util/spring-util-4.0.xsd">

	<!-- 配置一个 bean -->
	<bean id="helloWorld" class="com.spring.helloworld.HelloWorld">
		<!-- 为属性赋值 -->
		<property name="user" value="Jerry"></property>
	</bean>
</bean>
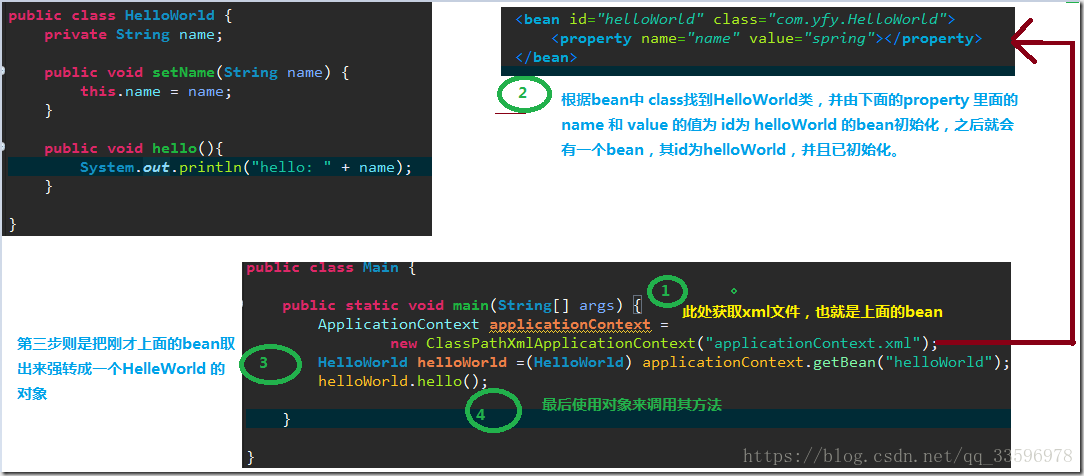
Main.java
public static void main(String[] args) {
//1. 创建 Spring 的 IOC 容器
		ClassPathXmlApplicationContext ctx = new ClassPathXmlApplicationContext("applicationContext.xml");
		//2. 从 IOC 容器中获取 bean 的实例
		HelloWorld helloWorld = (HelloWorld) ctx.getBean("helloWorld");
		//根据类型来获取 bean 的实例: 要求在  IOC 容器中只有一个与之类型匹配的 bean, 若有多个则会抛出异常.
		//一般情况下, 该方法可用, 因为一般情况下, 在一个 IOC 容器中一个类型对应的 bean 也只有一个.
//		HelloWorld helloWorld1 = ctx.getBean(HelloWorld.class);
		//3. 使用 bean
		helloWorld.hello();
}
运行结果:

分析: