1.apache:
企业中常用的web服务,用来提供http://(超文本传输协议)
2.apache的安装部署:
yum install httpd -y	##apache软件
yum install httpd-manual	##apache的手册
systemctl start httpd
systemctl enable httpd
firewall-cmd --list-all		##列出火墙信息
firewall-cmd --permanent --add-service=http	##永久允许http
firewall-cmd --reload		##火墙重新加载策略

/var/www/html ##apache的/目录,默认发布目录
/var/www/html/index.html ##apache的默认发布文件
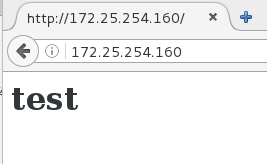
vim /var/www/html/index.html
<h1> hello world </h1>
:wq
测试:
http://172.25.254.160
http://172.25.254.160/manual


3.apache的基础信息
主配置目录:	/etc/httpd/conf
主配置文件:	/etc/httpd/conf/httpd.conf
子配置目录:	/etc/httpd/conf.d/
子配置文件:	/etc/httpd/conf.d/*.conf
默认发布目录:	/var/www/html
默认发布文件:	index.html
默认端口:	80
默认安全上下文:	httpd_sys_content_t
程序开启默认用户:	apache
apache日志:	/etc/httpd/logs/*
修改默认发布文集:
默认发布文集就是访问apache时没有指定文件名称时默认访问的文件
这个文件可以指定多个,有访问顺序
vim /etc/httpd/conf/httpd.conf
164 	DirectoryIndex index.html test.html


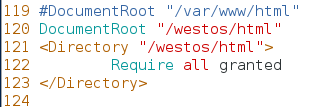
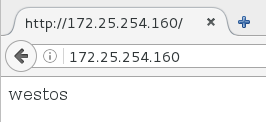
修改默认发布目录
120 DocumentRoot "/westos/html"
121 <Directory "/westos/html">
	Require all granted
    </Directory>
semanage fcontext -a -t httpd_sys_content_t '/westos(/.*)?'
restorecon -RvvF /westos/

4.apache的虚拟主机
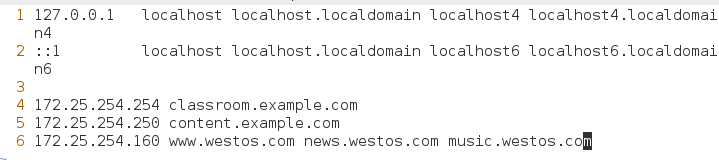
vim /etc/hosts
172.25.254.160 www.westos.com news.westos.com music.westos.com
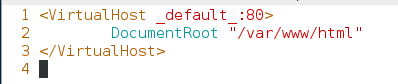
vim /etc/httpd/conf.d/adefault.conf
<VirtualHost _default_:80>
	DocumentRoot "/var/www/html"
</VirtualHost>
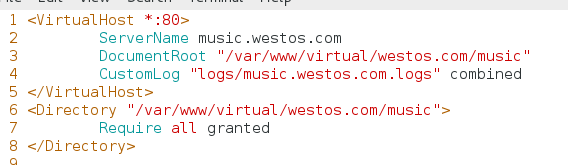
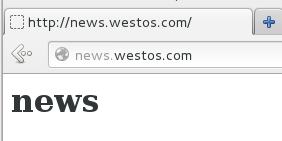
vim /etc/httpd/conf.d/news.conf
<VirtualHost *:80>
	ServerName news.westos.com
	DocumentRoot "/var/www/virtual/westos.com/news"
	CustomLog "logs/news.westos.com.logs" combined
</VirtualHost>
<Directory "/var/www/virtual/westos.com/news">
	Require all granted
</Directory>

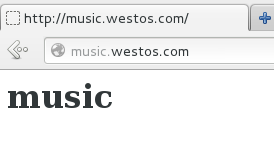
cp news.conf music.conf
vim music.conf
:%s/news/music/g
vim /var/www/virtual/westos.com/news/index.html
news
vim /var/www/virtual/westos.com/music/index.html
music

5.apache内部的访问控制
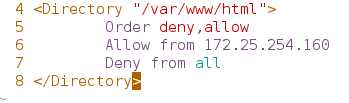
1.针对于主机的访问控制
<Directory "/var/www/html">
	Order deny,allow
	Allow from 172.25.254.160
	Deny from all
</Directory>

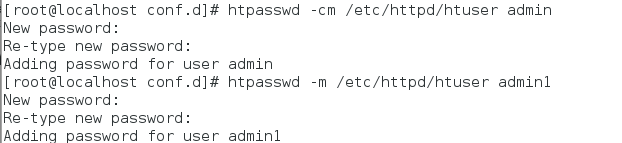
2.用户方式的访问控制
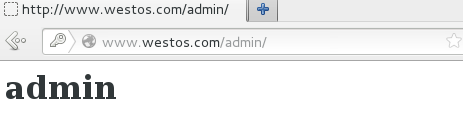
htpasswd -cm	/etc/httpd/htuser admin
再次创建用户是用:
htpasswd -m /etc/httpd/htuser admin1
mkdir /var/www/html/admin
vim /var/www/html/admin/index.html


vim adefault.conf
<Directory "/var/www/html/admin">
	AuthUserFile /etc/httpd/htuser
	AuthName "Please input your username and password"
	AuthType basic			##基础验证方式
#	Require	user admin		##指定用户可登陆
	Require valid-user		##通过验证用户可登陆
</Directory>


apache可执行语言
1.html
2.php
yum install php -y
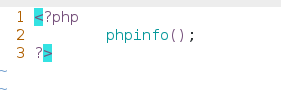
vim /var/www/html/index.php
<?php
phpinfo();
?>

systemctl restart httpd
测试
172.25.254.160/index.php


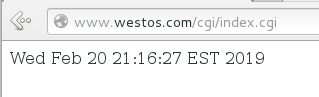
3.cgi
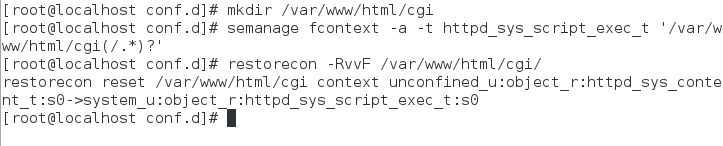
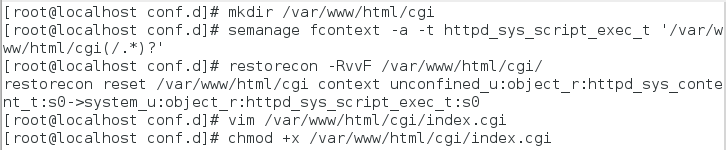
mkdir /var/www/html/cgi
semange fcontent -a -t httpd_sys_script_exec_t '/var/www/html/cgi(/.*)?'
restorecon -RvvF /var/www/html/cgi/
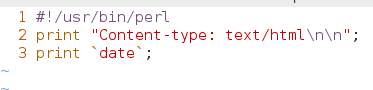
vim /var/www/html/cgi/index.cgi
#!/usr/bin/perl
print "Content-type: text/html\n\n";
print `date`;
chmod +x /var/www/html/cgi/index.cgi
/var/www/html/cgi/index.cgi   ##执行脚本保证运行正常

vim adefault.conf
<Directory "/var/www/html/cgi">
	Options +ExecCGI
	AddHandler cgi-script .cgi
</Directory>

systemctl restart httpd

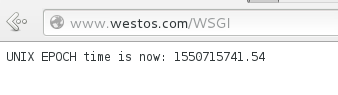
4.wsgi
yum install mod_wsgi -y

vim /var/www/html/cgi/westos.wsgi
import time

def application (environ, start_response):
  response_body = 'UNIX EPOCH time is now: %s\n' % time.time()
  status = '200 OK'
  response_headers = [('Content-Type', 'text/plain'),
                      ('Content-Length', '1'),
                      ('Content-Length', str(len(response_body)))]
  start_response(status, response_headers)
  return [response_body]

vim /etc/httpd/conf.d/adefault.conf
<VirtualHost _default_:80>
	DocumentRoot "/var/www/html"
	WSGIScriptAlias /WSGI	/var/www/html/cgi/westos.wsgi
</VirtualHost>

systemctl restart httpd

7.https
yum install mod_ssl -y                    ## 可使用https
yum install crypto-utils -y		## 可修改安全证书
genkey www.westos.com


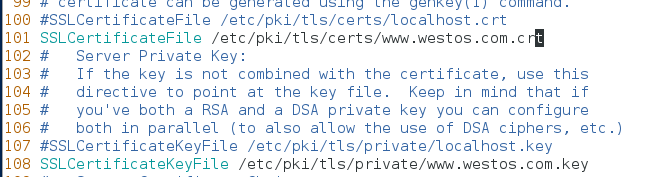
vim /etc/httpd/conf.d/ssl.conf
101 SSLCertificateFile /etc/pki/tls/verts/www.westos.com.crt
109 SSLCertificateKeyFile /etc/pki/tls/private/www.westos.com.key
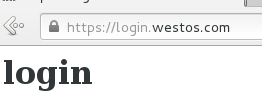
测试:https://www.westos.com


8.设定https虚拟主机并设定网页重写
vim /etc/httpd/conf.d/login.html
<VirtualHost *:80>
	ServerName "login.westos.com"
	RewriteEngine on
	RewriteRule ^(/.*)$ https://%{HTTP_HOST}$1 [redirect=301]
</VirtualHost>
<VirtualHost *:443>
	ServerName "login.westos.com"
	DocumentRoot "/var/www/virtual/westos.com/login"
	CustomLog logs/login.log	combined
	SSLEngine on
	SSLCertificateFile /etc/pki/tls/certs/www.westos.com.crt
	SSLCertificateKeyFile /etc/pki/tls/private/www.westos.com.key
</VirtualHost>
<Directory "/var/www/virtual/westos.com/login">
	Require all granted
</Directory>

mkdir /var/www/virtual/westos.com/login
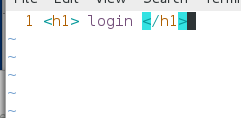
vim /var/www/virtual/westos.com/login/index.html
vim /etc/hosts
172.25.254.160 login.westos.com

^(/.*)$		##客户在浏览器地址栏中输入的所有字符
https://	##强制客户加密访问
%{HTTP_HOST}	##客户请求主机
$1		##"$1"表示 ^(/.*)$的值
squid 服务
9.vpn代理上网
首先得有一个主机可以上网 并与测试主机在同一个网段
在可上网主机中:
yum install squid -y
vim /etc/squid/squid.conf
56 http_access allow all         ##允许其他主机使用此代理

62 cache_dir ufs /var/spoll/squid 100 16 256   ##打开缓存目录


在测试主机中:
在浏览器中Edit-Preferences-Advanced-Network-Settings
Manual proxy configuration:
HTTP Proxy: 172.25.254.160 Port 3128
Use this proxy server for all protocols


10 反向代理
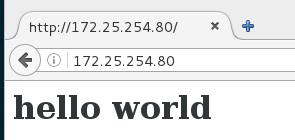
当访问80时代理显示160内容
在80中设置:
yum install squid -y
vim /etc/squid/squid.conf
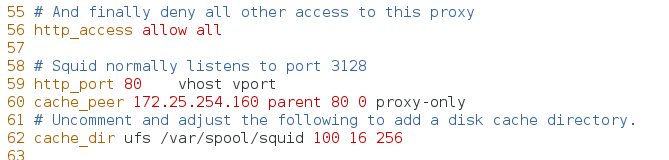
56 http_access allow all
59 http_port 80 vhost vport ##虚拟主机 虚拟端口 当访问80/80端口时 用代理服务
60 cache_peer 172.25.254.160 parent 80 0 proxy-only ##160作为父级 访问160/80端口 0没有其他代理
62 cache_dir ufs /var/spoll/squid 100 16 256
11 设置轮换
vim /etc/squid/squid.conf
60 cache_peer 172.25.254.160 parent 80 0 proxy-only originserver name=web1 round-robin weight=2 ##访问两次后换
61 cache_peer 172.25.254.100 parent 80 0 proxy-only originserver name=web1 round-robin
cache_peer_domain web1 web2 www.westos.com

12 论坛上线
systemctl start mariadb
unzip Discuz_X3.2_SC_UTF8.zip
cd upload/
chmod 777 -R config/
chmod 777 -R data/

semanage fcontext -l | grep httpd
semanage fcontext -a -t httpd_sys_rw_content_t '/var/www/html/upload(/.*)?'

restorecon -FvvR /var/www/html/upload/
chmod 777 uc_* -R


