前言
大家对于MySQL的逻辑备份工具mysqldump应该都比较了解,相对于mysqldump,本文介绍一款由MySQL ,Facebook 等公司的开发维护另外一套逻辑备份恢复工具---mydumper/myloader目前已经开发到0.9.1 版本。
mydumper 具有如下特性
1 支持多线程导出数据,速度比mysqldump快。
2 支持一致性备份,使用FTWRL(FLUSH TABLES WITH READ LOCK)会阻塞DML语句,保证备份数据的一致性。
3 支持将导出文件压缩,节约空间。
4 支持多线程恢复。
5 支持以守护进程模式工作,定时快照和连续二进制日志
6 支持按照指定大小将备份文件切割。
7 数据与建表语句分离。
原理
参考一张图 介绍mydumper的工作原理

mydumper的主要工作步骤
1 主线程 FLUSH TABLES WITH READ LOCK, 施加全局只读锁,以阻止DML语句写入,保证数据的一致性
2 读取当前时间点的二进制日志文件名和日志写入的位置并记录在metadata文件中,以供即使点恢复使用
3 START TRANSACTION WITH CONSISTENT SNAPSHOT; 开启读一致事务
4 启用N个(线程数可以指定,默认是4)dump线程导出表和表结构
5 备份非事务类型的表
6 主线程 UNLOCK TABLES,备份完成非事务类型的表之后,释放全局只读锁
7 dump InnoDB tables, 基于事物导出InnoDB表
8 事物结束
mydumper工具安装的错误处理
- 安装mysqldumper之前需要安装一下依赖,mysql-devel会依赖mariadb-libs,mariadb-libs存在启动mysql服务就启动不起来,所以不要这个依赖

-
yum install glib2-devel zlib-devel pcre-devel zlib gcc-c++ gcc cmake -y -
下载
-
wget https://launchpadlibrarian.net/225370879/mydumper-0.9.1.tar.gz tar -zxvf mydumper-0.9.1.tar.gz cd mydumper-0.9.1/ -
执行cmake . .表示源文件路径 - cmake参考路径CMake 入门1/5:基于阿里云 ECS搭建体验环境
-
[root@localhost mydumper-0.9.1]# cmake . -- The C compiler identification is GNU 4.8.5 -- The CXX compiler identification is GNU 4.8.5 -- Check for working C compiler: /usr/bin/cc -- Check for working C compiler: /usr/bin/cc -- works -- Detecting C compiler ABI info -- Detecting C compiler ABI info - done -- Check for working CXX compiler: /usr/bin/c++ -- Check for working CXX compiler: /usr/bin/c++ -- works -- Detecting CXX compiler ABI info -- Detecting CXX compiler ABI info - done -- MySQL not found. -- Found ZLIB: /usr/lib64/libz.so (found version "1.2.7") -- Found PkgConfig: /usr/bin/pkg-config (found version "0.27.1") -- checking for one of the modules 'glib-2.0' -- checking for one of the modules 'gthread-2.0' -- checking for module 'libpcre' -- found libpcre, version 8.32 -- Found PCRE: /usr/include CMake Warning at docs/CMakeLists.txt:9 (message): Unable to find Sphinx documentation generator -- ------------------------------------------------ -- MYSQL_CONFIG = MYSQL_CONFIG-NOTFOUND -- CMAKE_INSTALL_PREFIX = /usr/local -- BUILD_DOCS = ON -- WITH_BINLOG = OFF -- RUN_CPPCHECK = OFF -- Change a values with: cmake -D<Variable>=<Value> -- ------------------------------------------------ -- CMake Error: The following variables are used in this project, but they are set to NOTFOUND. Please set them or make sure they are set and tested correctly in the CMake files: MYSQL_INCLUDE_DIR (ADVANCED) used as include directory in directory /usr/local/mydumper-0.9.1 used as include directory in directory /usr/local/mydumper-0.9.1 used as include directory in directory /usr/local/mydumper-0.9.1 -- Configuring incomplete, errors occurred! See also "/usr/local/mydumper-0.9.1/CMakeFiles/CMakeOutput.log". -
错误信息如下:
-
我安装mysql的方式为二进制包安装
-
CMake Error: The following variables are used in this project, but they are set to NOTFOUND. Please set them or make sure they are set and tested correctly in the CMake files: MYSQL_INCLUDE_DIR (ADVANCED) used as include directory in directory /usr/local/mydumper-0.9.1 used as include directory in directory /usr/local/mydumper-0.9.1 used as include directory in directory /usr/local/mydumper-0.9.1 -
出现上述错误,是由于没有配置MYSQL_INCLUDE_DIR目录。
-
如果是编译安装到非缺省路径,可以将mysql安装路径添加到/etc/profile(全局级别)或者家目录~/.bash_profile(用户级别)后source生效
-
配置MySQL的目录就可以解决 vim /etc/profile export MYSQL_INCLUDE_DIR=/usr/local/mysql-5.7.18 export PATH=$MYSQL_INCLUDE_DIR/bin:$PATH source /etc/profile -
编译安装
-
make && make install - 查看版本报错
-
[root@localhost mydumper-0.9.1]# mydumper -V mydumper: error while loading shared libraries: libmysqlclient.so.20: cannot open shared object file: No such file or directory -
解决方法, ldd是list, dynamic, dependencies的缩写, 意思是, 列出动态库依赖关系 -
ldd /usr/local/bin/mydumper -
显示
-

-
LD_DEBUG=libs /usr/local/bin/mydumper -v -

-
没有找到 libmysqlclient.so.18
-
LD_DEBUG作用:https://blog.51cto.com/tech110/388132
-
////////////////////////////////////////////
-
linux中locate命令可以快速定位我们需要查找的文件,但是在yum中,locate的安装包名为mlocate(yum list | grep locate可以查看),安装方法:
-
yum -y install mlocate
-
updatedb
-
locate 文件名
-
////////////////////////////////////////////
-
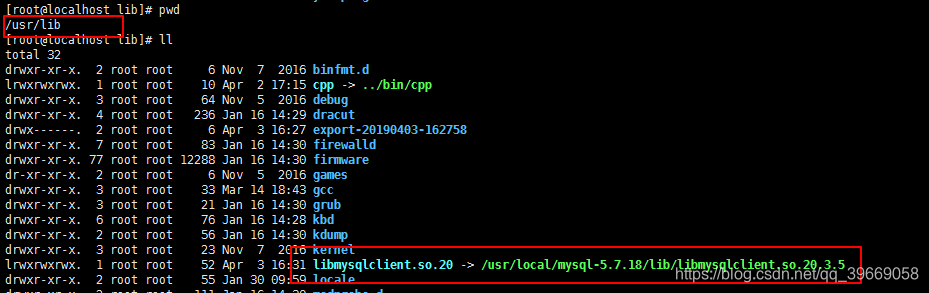
locate libmysqlclient.so.20 -

-

-
然后将/usr/local/mysql-5.7.18/lib/libmysqlclient.so.20.3.5 软件接到/usr/lib/下就行了
-
建立软连接就行了
-
ln -s 源文件 目标文件
-
ln -s /usr/local/mysql-5.7.18/lib/libmysqlclient.so.20.3.5 /usr/lib/libmysqlclient.so.20
-
-
在次执行
-
mydumper -V 如果还是报错的话就执行ldconfig命令之后在执行mydumper -V就行了
-

-
工具安装完之后就开始使用了
mydumper和myloader的使用
-
mydumper参数
-
-B, --database 要备份的数据库,不指定则备份所有库 -T, --tables-list 需要备份的表,名字用逗号隔开 -o, --outputdir 备份文件输出的目录 -s, --statement-size 生成的insert语句的字节数,默认1000000 -r, --rows 将表按行分块时,指定的块行数,指定这个选项会关闭 --chunk-filesize -F, --chunk-filesize 将表按大小分块时,指定的块大小,单位是 MB -c, --compress 压缩输出文件 -e, --build-empty-files 如果表数据是空,还是产生一个空文件(默认无数据则只有表结构文件) -x, --regex 是同正则表达式匹配 'db.table' -i, --ignore-engines 忽略的存储引擎,用都厚分割 -m, --no-schemas 不备份表结构 -k, --no-locks 不使用临时共享只读锁,使用这个选项会造成数据不一致 --less-locking 减少对InnoDB表的锁施加时间(这种模式的机制下文详解) -l, --long-query-guard 设定阻塞备份的长查询超时时间,单位是秒,默认是60秒(超时后默认mydumper将会退出) --kill-long-queries 杀掉长查询 (不退出) -b, --binlogs 导出binlog -D, --daemon 启用守护进程模式,守护进程模式以某个间隔不间断对数据库进行备份 -I, --snapshot-interval dump快照间隔时间,默认60s,需要在daemon模式下 -L, --logfile 使用的日志文件名(mydumper所产生的日志), 默认使用标准输出 --tz-utc 跨时区是使用的选项,不解释了 --skip-tz-utc 同上 --use-savepoints 使用savepoints来减少采集metadata所造成的锁时间,需要 SUPER 权限 --success-on-1146 Not increment error count and Warning instead of Critical in case of table doesn't exist -h, --host 连接的主机名 -u, --user 备份所使用的用户 -p, --password 密码 -P, --port 端口 -S, --socket 使用socket通信时的socket文件 -t, --threads 开启的备份线程数,默认是4 -C, --compress-protocol 压缩与mysql通信的数据 -V, --version 显示版本号 -v, --verbose 输出信息模式, 0 = silent, 1 = errors, 2 = warnings, 3 = info, 默认为 2 -
myloader使用参数
-
-d, --directory 备份文件的文件夹 -q, --queries-per-transaction 每次事物执行的查询数量,默认是1000 -o, --overwrite-tables 如果要恢复的表存在,则先drop掉该表,使用该参数,需要备份时候要备份表结构 -B, --database 需要还原的数据库 -e, --enable-binlog 启用还原数据的二进制日志 -h, --host 主机 -u, --user 还原的用户 -p, --password 密码 -P, --port 端口 -S, --socket socket文件 -t, --threads 还原所使用的线程数,默认是4 -C, --compress-protocol 压缩协议 -V, --version 显示版本 -v, --verbose 输出模式, 0 = silent, 1 = errors, 2 = warnings, 3 = info, 默认为2 -
备份多线程单表,必须启用-r指定行数拆分单表为多个文件,会生成多个文件
-
mydumper -u xxx -p xxx -h xxx -P 3307 -B lgjdb -T yyd_users,liangtab -t 4 -r 3000000 -o /root/lgj -c -C -l 200 &
-
mydumper -u root -p 123456 -h 192.168.184.135 -P 3306 -B test -T stu -t 4 -r 3000000 -o /usr/local/bak -c -C -l 200 &
-
还原数据
-
myloader -u xxx -p xxx -h xxx -P 3307 -B lgjdb -d /root/lgj
-
myloader -u root -p 123456 -h 192.168.184.135 -P 3306 -B test -d /usr/local/bak -o
参考该链接: