首先,在IDEA新建Maven项目。

将Module名改为spring_demo:

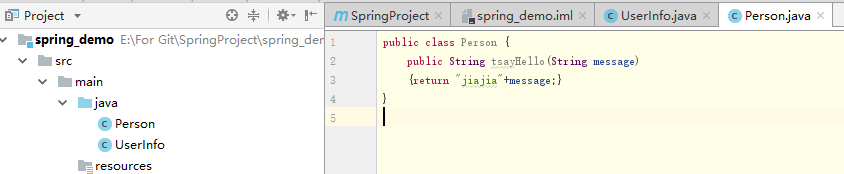
新建一个类:

在该类中写入get set方法:

再建一个类:
接下来,再test.java中新建一个package"com.bit:
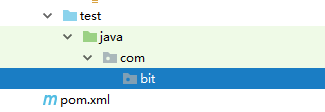
在bit中新建一个类:

需要给java也建一个包bit.com:

并把两个类放进去。
想用UserInfo去调用Person类中的sayHello方法,可以在UserInfo中写入以下代码:
 public static void main(String[] args) {
        Person person=new Person();
        String result= person.sayHello("ohh");
        System.out.println(result);
    }

运行结果是正常的,可是这样UserInfo必须new一个Person对象才行,可以这么说,UserInfo依赖于Person类。需要进行解耦,让类和类之间的关系不要那么密切。(一旦出现“new”关键字,就会进行四步操作:
- 开辟内存空间
- 初始化成员变量
- 在堆中创建对象
- 把堆中创建的对象赋值给栈中的一个引用变量,也比较浪费资源。)
那么怎么进行解耦呢,抛开Spring,可以用Interface。
如果有个接口中有public String sayHello(String message),UserInfo实现这个接口那么就能调用这个方法。Person实现这个接口那么就能有这个方法。所以宁愿实现接口,也不要继承类,否则就会有类与类之间的依赖关系。
下面引进Spring的概念。Spring是用来控制类与类之间关系的。
Spring:是容器,是技术,也是框架。
Spring的核心是IOC+AOP
IOC(DI):Inversation Of Control(Dependency Injecction)
控制反转/依赖注入。
IOC伴随着DI。
类A与类B之间有关系,当类A需要调用类B的某个方法时,Spring会new类A,也会new类B,并且把类A和类B的关系组合好,需要时会把关系交给Client。本来,类A依赖于类B,即类B具有控制权,(因为如果不把方法给类A,类A就调不了),而Spring会将控制权反转,Spring具有控制权(就相当于刚刚的接口),能管理类A与类B之间的关系。
先把类A交给Spring管理:
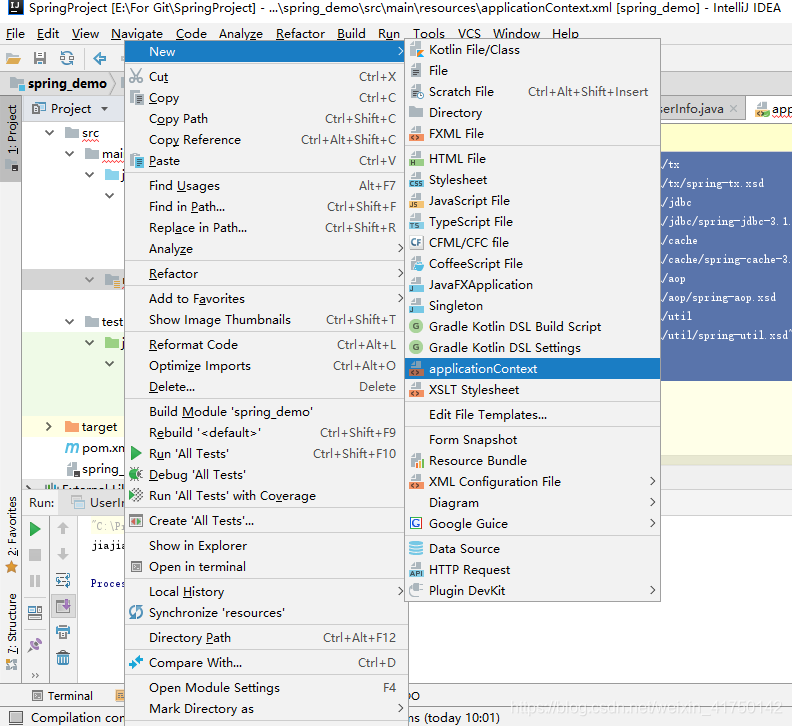
1.添加Spring核心配置文件:
在resources中新建一个XML:applicationContext.xml。

在网上搜索applicationContext.xml,可参考:https://www.cnblogs.com/zipon/p/5773735.html
<beans xmlns="http://www.springframework.org/schema/beans" xmlns:context="http://www.springframework.org/schema/context" xmlns:xsi="http://www.w3.org/2001/XMLSchema-instance" xmlns:aop="http://www.springframework.org/schema/aop"
    xmlns:tx="http://www.springframework.org/schema/tx" xmlns:p="http://www.springframework.org/schema/p" xmlns:util="http://www.springframework.org/schema/util" xmlns:jdbc="http://www.springframework.org/schema/jdbc"
    xmlns:cache="http://www.springframework.org/schema/cache"
    xsi:schemaLocation="
    http://www.springframework.org/schema/context
    http://www.springframework.org/schema/context/spring-context.xsd
    http://www.springframework.org/schema/beans
    http://www.springframework.org/schema/beans/spring-beans.xsd
    http://www.springframework.org/schema/tx
    http://www.springframework.org/schema/tx/spring-tx.xsd
    http://www.springframework.org/schema/jdbc
    http://www.springframework.org/schema/jdbc/spring-jdbc-3.1.xsd
    http://www.springframework.org/schema/cache
    http://www.springframework.org/schema/cache/spring-cache-3.1.xsd
    http://www.springframework.org/schema/aop
    http://www.springframework.org/schema/aop/spring-aop.xsd
    http://www.springframework.org/schema/util
    http://www.springframework.org/schema/util/spring-util.xsd">
将以上写入xml配置文件。末尾还需要加上
接下来,把配置文件末尾的.tld去掉。

这个文件头是可以被保存的,以后都可以用。
Ctrl+A,Ctrl+C后选择“new”:

在files中点加号,修改名称,并Ctrl+V拷进去:

添加成功了:
2.添加jar包。
<!--需要添加Spring的核心包:
Spring core
Spring beans
spring context
spring aop-->
访问mvnrepository.com:
选择最新版本里使用人数最多的,这里用5.1.5RELEASE版本:

接下来,添加Context、beans、AOP的注意版本需要保持一致。
此时的pom.xml如下所示:
<?xml version="1.0" encoding="UTF-8"?>
<project xmlns="http://maven.apache.org/POM/4.0.0"
         xmlns:xsi="http://www.w3.org/2001/XMLSchema-instance"
         xsi:schemaLocation="http://maven.apache.org/POM/4.0.0 http://maven.apache.org/xsd/maven-4.0.0.xsd">
    <modelVersion>4.0.0</modelVersion>

    <groupId>com.bit</groupId>
    <artifactId>SpringProject</artifactId>
    <version>1.0-SNAPSHOT</version>

    <dependencies>
        <dependency>
            <groupId>junit</groupId>
            <artifactId>junit</artifactId>
            <version>RELEASE</version>
            <scope>test</scope>
        </dependency>


<!--需要添加Spring的核心包:
Spring core
Spring beans
spring context
spring aop-->

    <!-- https://mvnrepository.com/artifact/org.springframework/spring-core -->
    <dependency>
        <groupId>org.springframework</groupId>
        <artifactId>spring-core</artifactId>
        <version>5.1.5.RELEASE</version>
    </dependency>

        <!-- https://mvnrepository.com/artifact/org.springframework/spring-core -->
        <dependency>
            <groupId>org.springframework</groupId>
            <artifactId>spring-core</artifactId>
            <version>5.1.5.RELEASE</version>
        </dependency>


        <!-- https://mvnrepository.com/artifact/org.springframework/spring-beans -->
        <dependency>
            <groupId>org.springframework</groupId>
            <artifactId>spring-beans</artifactId>
            <version>5.1.5.RELEASE</version>
        </dependency>

        <!-- https://mvnrepository.com/artifact/org.springframework/spring-aop -->
        <dependency>
            <groupId>org.springframework</groupId>
            <artifactId>spring-aop</artifactId>
            <version>5.1.5.RELEASE</version>
        </dependency>

    </dependencies>
</project>
再看applicationContext.xml,仍有爆红,这些都是不需要的,删除即可。
    xmlns:tx="http://www.springframework.org/schema/tx"

xmlns:jdbc="http://www.springframework.org/schema/jdbc"


 http://www.springframework.org/schema/tx
    http://www.springframework.org/schema/tx/spring-tx.xsd

   http://www.springframework.org/schema/jdbc
    http://www.springframework.org/schema/jdbc/spring-jdbc-3.1.xsd
这时没有错了,可以配置一下:在右上角点击Configure application context ,再点create:

点击OK即可。配置文件就写好了。
3.用Spring管理类和类之间的关系及初始化。
applicationContext.xml就是Spring。
所有的对象都叫bean。
先来看看Person类的初始化,有Spring就不用new了。在applicationContext.xml中写入:
<!--相当于Person p=new Person();-->
<bean id="p" class="com.bit.bean.Person"/>;
(注意xml中的注释格式是 )这样一来,在Person中必须有个默认的构造方法。如果说在Person类中有
  private String pname;
    public void Person(String name)
    {this.pname=name;

    }
这么一个构造方法,那么无参构造就会被覆盖,那么这时用Spring管理就找不到无参构造了,所以默认的构造方法必须写上:
  public void Person()
    {}
Spring的API有ApplicationContext.
接下来,开始单元测试,在ObjectTest写以下代码:
package com.bit;

import com.bit.bean.Person;
import com.bit.bean.UserInfo;
import org.junit.Before;
import org.junit.Test;
import org.springframework.context.ApplicationContext;
import org.springframework.context.support.ClassPathXmlApplicationContext;

public class ObjectTest {
    //拿到Spring的API
    //Servlet的API(ServletConfig,ServletContext...)

    private ApplicationContext applicationContext=null;
    @Before
public void testInitial()
{

    applicationContext=new ClassPathXmlApplicationContext("applicationContext.xml");
    //读取类路径下的这个文件


}

@Test
    public void testMethod()
{
Person person=(Person)applicationContext.getBean("p");
//返回的是个Object类

    System.out.println(person.sayHello(“ohh"));

}
}
点击Test左边的绿色按钮即可运行,结果为:

这样,对象就在Spring容器中创建好了,接下来考虑的是如何放到客户端Client的问题,这个操作叫”注入”。(DI)
注入的过程是不依赖Spring框架的。
1.通过set方法注入。
需要先在Person类中写入set、get方法。再在Spring中写入:
 <bean id="p" class="com.bit.bean.Person">
    <property name="pname" value="ming"/>
    </bean>
接下来,在单元测试中写入:
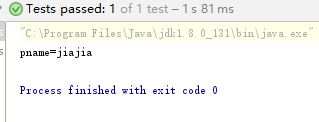
System.out.println("pname="+person.getPname());
运行结果为:

这种DI是通过set方法注入的,因此类中必须有set方法。
构造器(默认无参构造)和set方法是必须的。
2.通过构造方法注入
首先要有这个构造方法:(此时去掉set方法)
public  Person(String name)
    {this.pname=name;  }
在Spring中写入:
<bean id="p" class="com.bit.bean.Person">
   <constructor-arg name="name" value="lbb"/>

   </bean>
单元测试结果为:

修改成功。
而如果Person中有很多属性,并写好构造方法,比如:
    private String pname;
    private String pname1;
    private String pname2;
    private String pname3;
    private int pAge1;

    public Person(String pname, String pname1, String pname2, String pname3, int pAge1) {
        this.pname = pname;
        this.pname1 = pname1;
        this.pname2 = pname2;
        this.pname3 = pname3;
        this.pAge1 = pAge1;
    }
如果参数个数和类型很多时,匹配比较麻烦,不建议用。
接下来,为UserInfo类配置Spring,UserInfo中有String类型的username属性,因此在Spring中写入:
    <bean id="p" class="com.bit.bean.Person">
    </bean>
            <bean id="userInfo" class="com.bit.bean.UserInfo">
                <property name="username" value="zhangsan">
            </bean>
在UserInfo中写入: 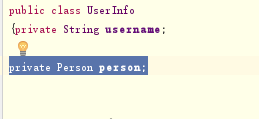
可使两个类产生联系。并提供Person类的get、set方法。
在Spring中添加<property name="person" ref="p">
这里的ref与之前Person对应的bean id是一致的。

在单元测试中写入:
    UserInfo userInfo=(UserInfo) applicationContext.getBean("userInfo");
    System.out.println("pname="+ userInfo.getPerson().getPname());
运行结果为:
在Maven的使用中需要注意一点,在Project Structure中的Module有该有的依赖才行,而不是只看IDEA右侧的Maven(是项目的依赖,而不是模块的 )。


接下来,进行maven的依赖配置。
先在java中新建一个包bean2:

在bean2中新建一个类bean1,给它若干个属性和set、get方法,以实现
属性注入
:
package com.bit.bean2;

//属性的注入

import java.util.List;
import java.util.Map;
import java.util.Set;

public class Bean1 {

    private String strValue;
    private int intValue;
    private String[] arrayValue;
    private List listvalue;
    private Map Mapvalue;
    private Set SetValue;
public Bean1(){}

    public String getStrValue() {
        return strValue;
    }

    public void setStrValue(String strValue) {
        this.strValue = strValue;
    }

    public int getIntValue() {
        return intValue;
    }

    public void setIntValue(int intValue) {
        this.intValue = intValue;
    }

    public String[] getArrayValue() {
        return arrayValue;
    }

    public void setArrayValue(String[] arrayValue) {
        this.arrayValue = arrayValue;
    }

    public List getListvalue() {
        return listvalue;
    }

    public void setListvalue(List listvalue) {
        this.listvalue = listvalue;
    }

    public Map getMapvalue() {
        return Mapvalue;
    }

    public void setMapvalue(Map mapvalue) {
        Mapvalue = mapvalue;
    }

    public Set getSetValue() {
        return SetValue;
    }

    public void setSetValue(Set setValue) {
        SetValue = setValue;
    }
}
在resources中新建一个xml(可以把之前的xml拷贝粘贴)。并在右上的Configure application context中选择Create new application context…
能看到两个xml都加进来了:

在Spring中写入:
<bean id="bean1" class="com.bit.bean2.Bean1">
        <!--


        <property name="strValue">
            <value>123</value>
        </property>


 <!--在xml中都是String类型,或者写成-->
        <property name="strValue" value="123"/>


    <property name="listvalue">
        <list>
            <value>list1</value>
            <value>list2</value>
            <value>llist3</value>
        </list>
    </property>


<property name="setValue">
    <set>
        <value>setValue1</value>
        <value>setValue2</value>
    </set>
</property>


        <property name="mapvalue">
            <map>
                <entry key="key1" value="value1"/>
            </map>
        </property>


<property name="arrayValue">
    <list>
        <value>array1</value>
    </list>
</property>


        <property name="intValue" value="123">
        </property>

    </bean>
这里涉及了 Map、String、Set、List等类型的属性注入, 可参考这篇博客:https://www.cnblogs.com/liuyongbo/p/10974025.html
接下来进行单元测试,看属性是否注入成功。
首先,要注意这里的ClassPathXmlApplicationContext
看它的构造方法:
   public ClassPathXmlApplicationContext(String... configLocations) throws BeansException {
        this(configLocations, true, (ApplicationContext)null);
    }
其中有一个构造方法的参数是数组类型。比如有10个xml文件,只需要读其中两个的时候,就要用这个构造方法。
那么在Spring中写入:
public class ObjectTest {
    //拿到Spring的API
    //Servlet的API(ServletConfig,ServletContext...)

    private ApplicationContext applicationContext=null;
    @Before
public void testInitial()
{

    applicationContext=new ClassPathXmlApplicationContext(new String[] {"applicationContext2.xml"});
    //读取类路径下的这个文件
    }

@Test
    public void testMethod()

Bean1 bean1=(Bean1) applicationContext.getBean("bean1");
System.out.println("strValue="+bean1.getStrValue());
System.out.println("intValue="+bean1.getIntValue());
System.out.println("arrayValue="+bean1.getArrayValue());
System.out.println("setValue="+bean1.getSetValue());
System.out.println("mapvalue="+bean1.getMapvalue());
System.out.println("listValue="+bean1.getListvalue());
}
}
运行结果为:

注意到,在Spring中写的是<property name="intValue" value="123"> </property> 而intValue的属性是int类型的,Bean1类中的get方法返回的也是整型,说明Spring能把这里的字符串转成整型。不能转化的类型是:
Date。
在Bean1类中写入:
  public Date getDataValue() {
        return dataValue;
    }

    public void setDataValue(Date dataValue) {
        this.dataValue = dataValue;
    }

    private Date dataValue;
在Spring中添加:
 <property name="dataValue" value="2019-08-01">
        </property>
在单元测试中加:
System.out.println("dataValue="+bean1.getDataValue());
出错了:

Caused by: org.springframework.beans.ConversionNotSupportedException: Failed to convert property value of type ‘java.lang.String’ to required type ‘java.util.Date’ for property ‘dataValue’;
因为不同用户对时间的定义(格式)是不同的,所以Date类是需要自己管理的。写一个转化器,并写入Spring。
在Bean2中新建一个类:

继承 PropertyEditorSupport类并覆写方法setAsText:

注意:覆写方法时自动生成的super.setAsText(text)要去掉。
package com.bit.bean2;

import java.beans.PropertyEditor;
import java.beans.PropertyEditorSupport;
import java.io.DataInputStream;
import java.text.ParseException;
import java.text.SimpleDateFormat;
import java.util.Date;
import java.util.logging.SimpleFormatter;


//将String通过pattern样式转换成Date
public class DateConvert extends PropertyEditorSupport {

@Override
    public void setAsText(String text) throws IllegalArgumentException {
        System.out.println("text value="+text);
        SimpleDateFormat simpleDateFormat=new SimpleDateFormat("yyyy-MM-dd");
     try {
         Date  data = simpleDateFormat.parse(text);
         setValue(data);
         //把String类型转换成Date
        } catch (Exception e) {
            e.printStackTrace();
        }


    }
}
接下来要把这个类写入Spring中:
<bean id="dataConvert" class="org.springframework.beans.factory.config.CustomEditorConfigurer">
     <property name="customEditors">
             <map>
                 <entry key="java.util.Date" value="com.bit.bean2.DateConvert"/>
             </map>
     </property>
    </bean>
cutomEditors这个属性(Map类型的)是有set方法的:
   public void setCustomEditors(Map<Class<?>, Class<? extends PropertyEditor>> customEditors) {
        this.customEditors = customEditors;
    }
在进行属性注入时,key是java.util.Date,value是刚刚写的日期转换类。
单元测试结果为:

新建若干个类:

在Bean2类中写默认的无参构造,并引用Bean3,Bean4,Bean5及他们的set、get方法:
package com.bit.bean2;

public class Bean2
{
    private Bean3 bean3;
    private Bean4 bean4;
    private  Bean5 bean5;

    public Bean2()
    {}

    public Bean3 getBean3() {
        return bean3;
    }

    public void setBean3(Bean3 bean3) {
        this.bean3 = bean3;
    }

    public Bean4 getBean4() {
        return bean4;
    }

    public void setBean4(Bean4 bean4) {
        this.bean4 = bean4;
    }

    public Bean5 getBean5() {
        return bean5;
    }

    public void setBean5(Bean5 bean5) {
        this.bean5 = bean5;
    }
}
在Bean3中写:
package com.bit.bean2;

public class Bean3 {

private int id;
private String username;
private String password;


public Bean3()
{}

    public int getId() {
        return id;
    }

    public void setId(int id) {
        this.id = id;
    }

    public String getUsername() {
        return username;
    }

    public void setUsername(String username) {
        this.username = username;
    }

    public String getPassword() {
        return password;
    }

    public void setPassword(String password) {
        this.password = password;
    }
}
在Bean4中写:
package com.bit.bean2;

public class Bean4 {
private int id;
private String username;
public Bean4(){}

    public int getId() {
        return id;
    }

    public void setId(int id) {
        this.id = id;
    }

    public String getUsername() {
        return username;
    }

    public void setUsername(String username) {
        this.username = username;
    }
}
在Bean5中写:
package com.bit.bean2;

public class Bean5 {
    private int age;

    public int getAge() {
        return age;
    }

    public void setAge(int age) {
        this.age = age;
    }

    public Bean5(){}
}
把这几个类都配置到Spring中(applicationcontext3.xml):
<bean id="bean2" class="com.bit.bean2.Bean2">
        <property name="bean3" ref="bean3"/>
<property name="bean4" ref="bean4"/>
    <property name="bean5" ref="bean5"/>

</bean>


  <bean id="bean3" class="com.bit.bean2.Bean3">
      <property name="id" value="1"/>
      <property name="username" value="jiajia"/>
      <property name="password" value="123"/>
  </bean>


    <bean id="bean4" class="com.bit.bean2.Bean4">
        <property name="username" value="ohh"/>
        <property name="id" value="456"/>
    </bean>

    <bean id="bean5" class="com.bit.bean2.Bean5">
            <property name="age" value="18">
            </property>
</bean>
接下来,进行单元测试,(注意:在init中需要改xml为新建的xml) :
package com.bit;

import com.bit.bean.Person;
import com.bit.bean.UserInfo;
import com.bit.bean2.Bean1;
import com.bit.bean2.Bean2;
import org.junit.Before;
import org.junit.Test;
import org.springframework.context.ApplicationContext;
import org.springframework.context.support.ClassPathXmlApplicationContext;

public class ObjectTest {
    //拿到Spring的API
    //Servlet的API(ServletConfig,ServletContext...)

    private ApplicationContext applicationContext=null;
    @Before
public void testInitial()
{

    applicationContext=new ClassPathXmlApplicationContext(new String[] {"applicationContext3.xml"});
    //读取类路径下的这个文件
    }

@Test
    public void testMethod()
{Bean2 bean2=(Bean2) applicationContext.getBean("bean2");
System.out.println("--------------Bean3--------------");
System.out.println(bean2.getBean3().getId());
System.out.println(bean2.getBean3().getUsername());
System.out.println(bean2.getBean3().getPassword());
System.out.println("--------------Bean4--------------");
System.out.println(bean2.getBean4().getId());
System.out.println(bean2.getBean4().getUsername());
System.out.println("------------Bean5---------------");
System.out.println(bean2.getBean5().getAge());
}
}
运行结果为:

发现在xml中的bean有公共属性id和username,可以把公共属性提出来:
 <bean id="abstractBean" abstract="true">
        <property name="id" value="1"/>
        <property name="username" value="jiajia"/>
    </bean>
这时bean2和bean3变为:
 <bean id="bean3" class="com.bit.bean2.Bean3" parent="abstractBean">
      <property name="password" value="123"/>
  </bean>
<bean id="bean4" class="com.bit.bean2.Bean4" parent="abstractBean">
    </bean>
如果想把bean2引用bean3、bean4、bean5的ref…去掉,需要在

default-autowire=“byName” 根据名称匹配自动导入。(不建议这样用,只有property的name值和引用的id值(即ref的值)一致时才可以自动导入,比如property name=“bean3” ref=“bean3” ,而bean3也是这么写的:
,如果改成了,则导入失败。
用byName,会导致不知道当前bean引用的是什么。)
可以用"byType",与名称无关。
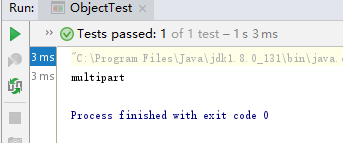
下面看Spring中bean机制是单例还是多例。在单元测试中写:
Bean5 bean5=(Bean5)applicationContext.getBean("bean5"); Bean5 bean51=(Bean5)applicationContext.getBean("bean5"); if(bean5==bean51) System.out.println("singleton"); else System.out.println("multipart");
运行结果为:

说明默认情况下是单例的,可以改成多例。
<bean id="bean5" class="com.bit.bean2.Bean5" scope="prototype">
运行结果为:
新建一个包并在包下建一个类:不用resource中的所有xml了,使用注解进行配置:

package com.bit.bean3;


import com.bit.bean.Person;
import org.springframework.context.annotation.Bean;
import org.springframework.context.annotation.ComponentScan;
import org.springframework.context.annotation.Configuration;

@Configuration

//扫描包
@ComponentScan(basePackages = "com.bit.bean")
public class springConfig {
    @Bean(name="person")
    //相当于<bean id="person" class="com.bit.bean.Person">
    public Person person()
    {Person person=new Person();
    return person; }
}
进行单元测试:
public class ObjectTest
{

    private AnnotationConfigApplicationContext context;


    @Before
    public void initTest()
    {
        context=new AnnotationConfigApplicationContext(springConfig.class);
    }

    @Test
    public void Test()
    {
   Person person=(Person) context.getBean("person");;
        System.out.println(person.sayHello("ahhhhhh"));
    }


}
运行结果为:
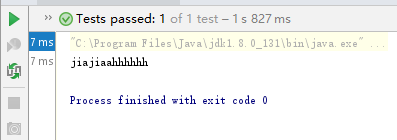
成功。
