Before, I simply implemented some specific functions. I have been studying the official cases these days, learning the Lyra beginner project and the Action RPG project, and also learned the use of many functions from it, and have a preliminary understanding of the basic architecture design.
Next, I will introduce some basic settings, so that friends who are new to ue like me can learn together.
GameInstace game instance
GameInstace is a high-level management object of a running game. It is generated when the game is created and is automatically destroyed when the game instance is closed. A game can have multiple GameInstaces.
Switching levels will not destroy GameInstance, so the information that needs to be transmitted when switching levels can be transmitted through GameInstance.
In the game, GameInstace can be used as a global class, stored in the global location, and can be obtained by obtaining GameInstace in the blueprint.
Excerpted from: https://blog.csdn.net/Highning0007/article/details/123042719
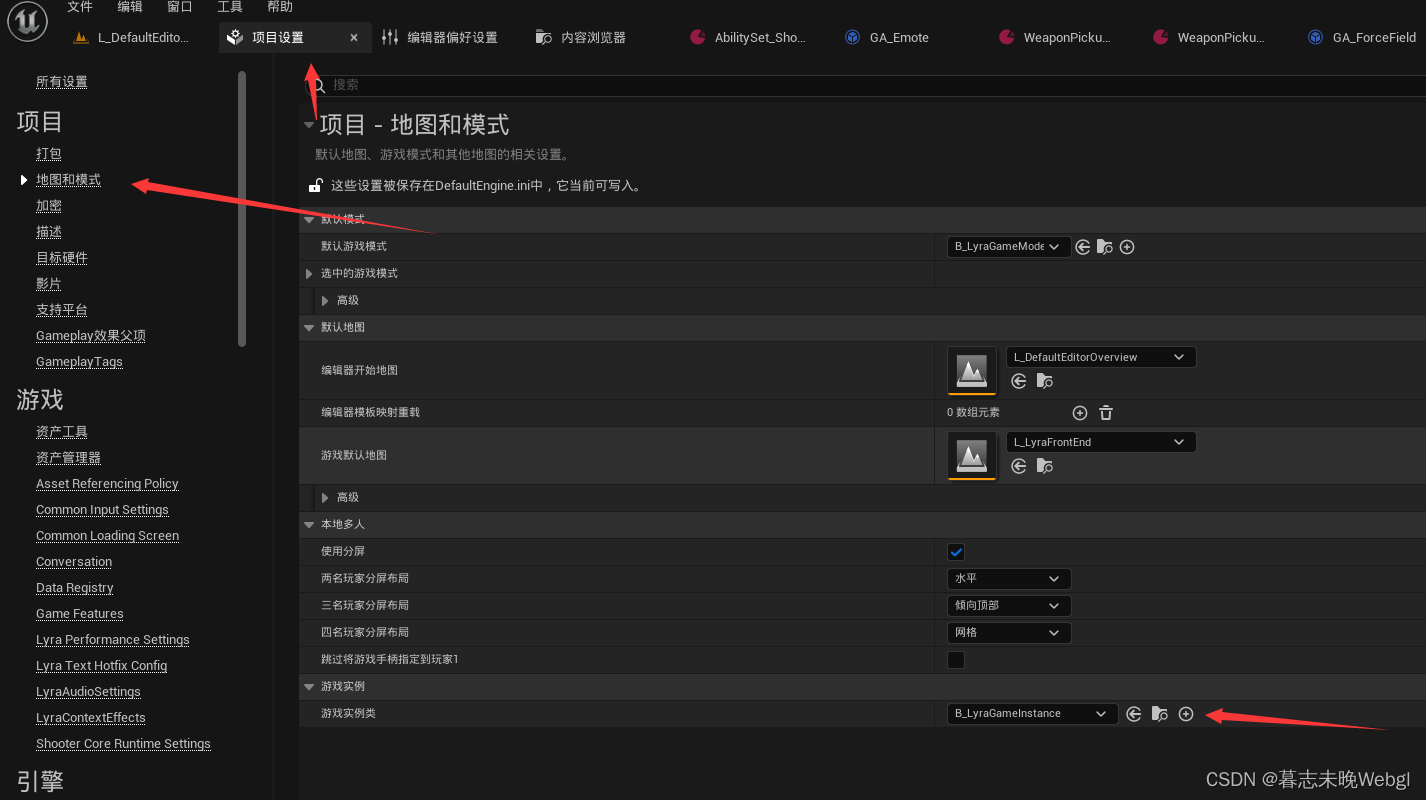
Set the GameInstace of the project, we can set GameInstance in the project, find the game instance class in the map and mode, and set the game instance class of your own project
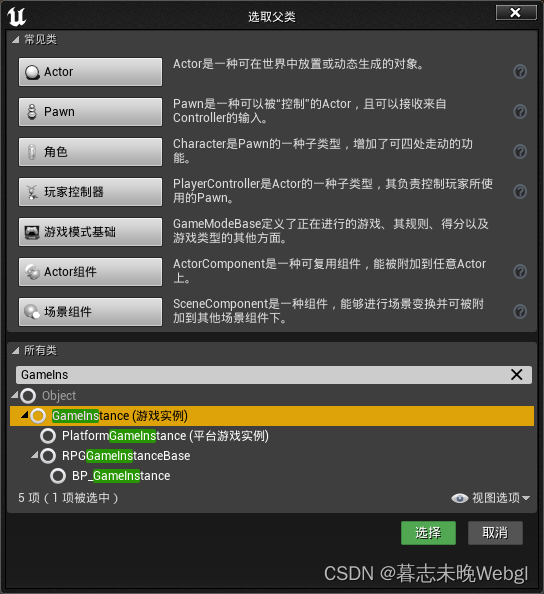
To create your own game instance, you can find the parent class of the game instance by adding a blueprint class and searching for GameInstance in all classes, and create your own GameInstance class based on it
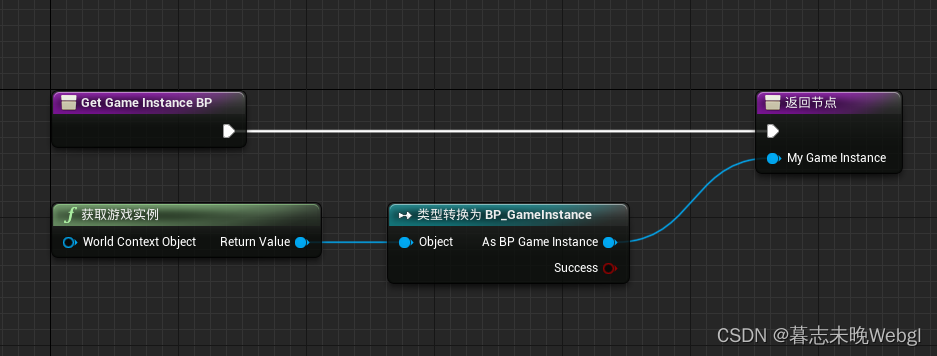
To get the game instance in the blueprint, you can get the game instance object by getting the game instance node, get data or set the data from it, or directly create
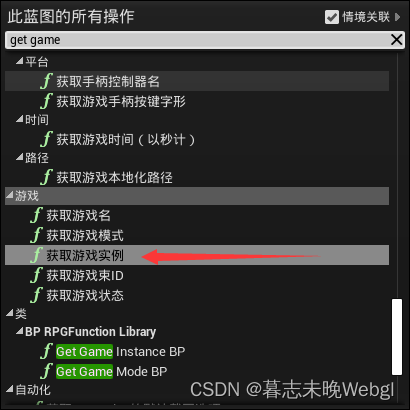
a global get function in the blueprint function library to get the instance of the type you set yourself, so that you don't need to convert it to the corresponding type every time you get the game instance
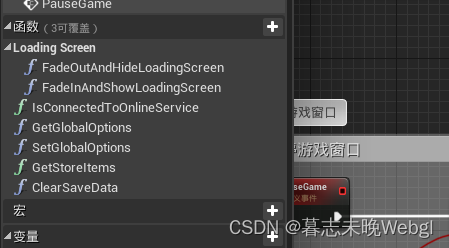
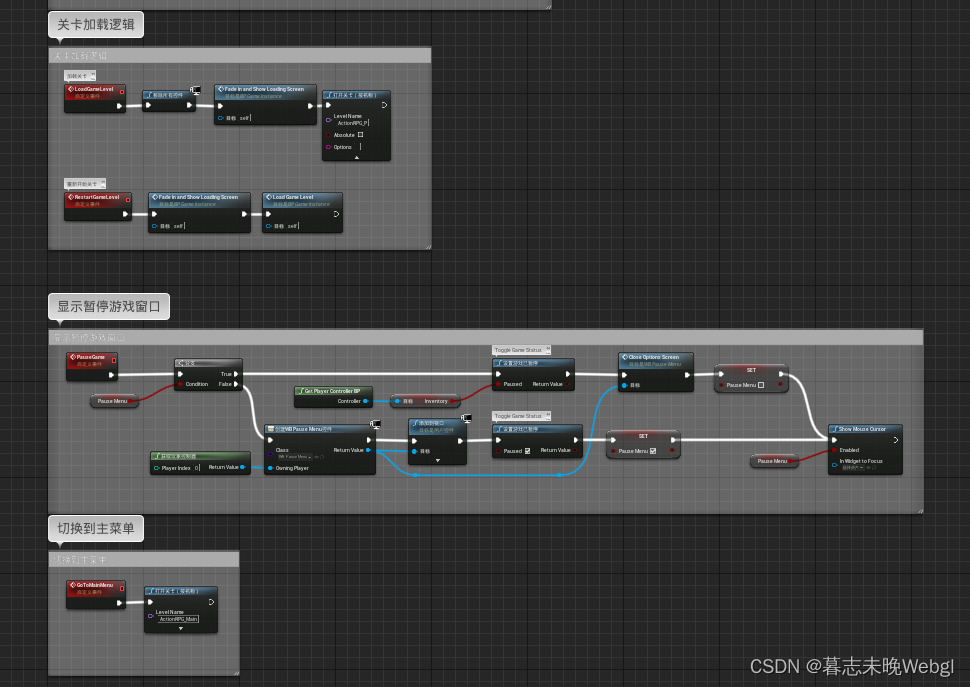
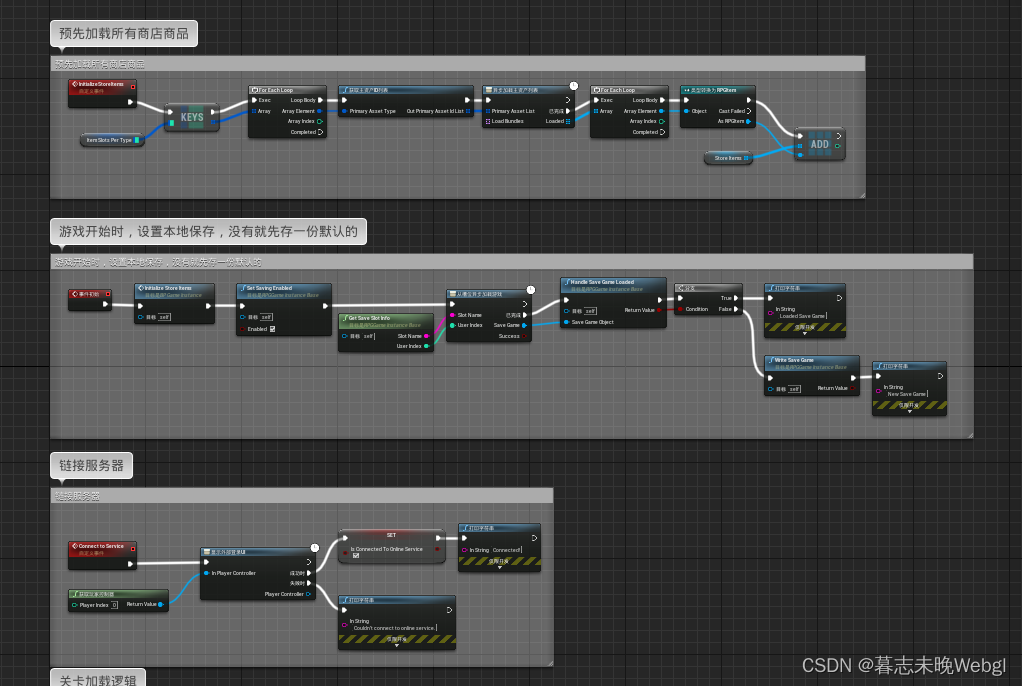
In the official case action RPG project, GameInstance mainly saves some data assets for use by characters and ui, obtains global settings, and provides an interface for setting global settings. In the event graph, there is logic for card switching, game pause logic, and when the game starts, a local storage is set by default, and the data structure used in the game is preloaded. The link server function seems to have not been
implemented
.
GameMode game mode
GameMode defines the gameplay and rules of the game. For example, you can set the generation of monsters in the game mode, the rules for winning the game, and so on. In the project settings, you can set the default mode of the game.
You can use a single GameMode to apply to multiple different levels, for example, multiple game copies can adapt to a GameMode.
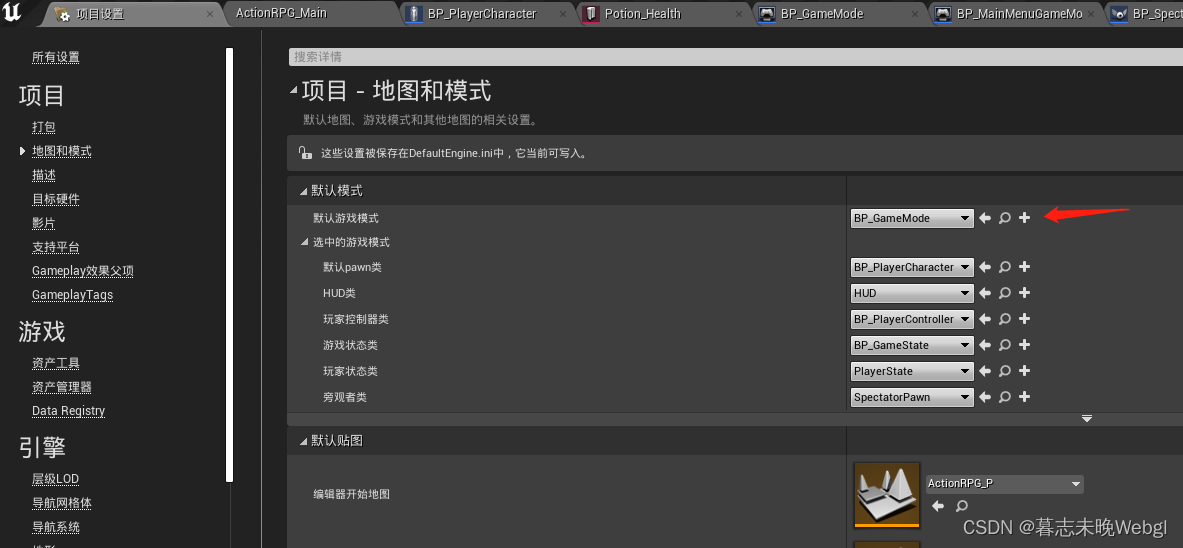
In the level, you can override the game mode and define the game mode of the current level in the world scene settings. In the

selected game mode, the default pawn class is the player control class generated by default. Generally, it will not be set directly here, but will be generated in the player controller.
The default HUD class, HUD refers to "head-up display" or two-dimensional screen display, which is commonly used in many games. Examples include displaying health bars, ammo indicators, gun crosshairs, etc. Each player controller usually comes with one of these displays. This is generally not set directly, because the HUD used by normal projects is ever-changing and needs to be created in real time.
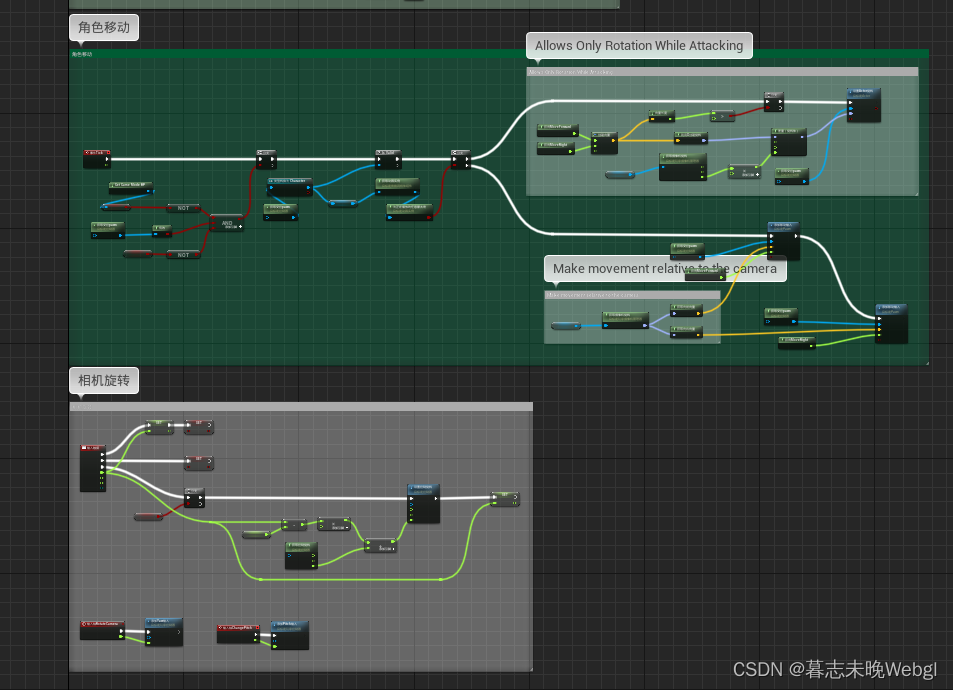
The player control class, as you can tell from the name, mainly assists in controlling the player, which will be explained later.
The game state class GameState contains the state of the game, which can include a list of networked players, scores, the positions of pieces in a board game, or a list of tasks to complete in an open world setting. The game state exists on the server and all clients, and can be replicated freely to keep all machines up to date.
PlayerState Class A playerstate is the state of a game player, such as a human player or a bot that simulates a player. Non-player AI that exists as part of the game will not have player state. Examples of data that would be appropriate in a player state include the player's name or score, the rating of an in-game MOBA, etc., or whether the player is currently carrying a flag in a CTF game. Player states for all players exist on all machines (unlike player controllers) and can be copied freely to keep them in sync.
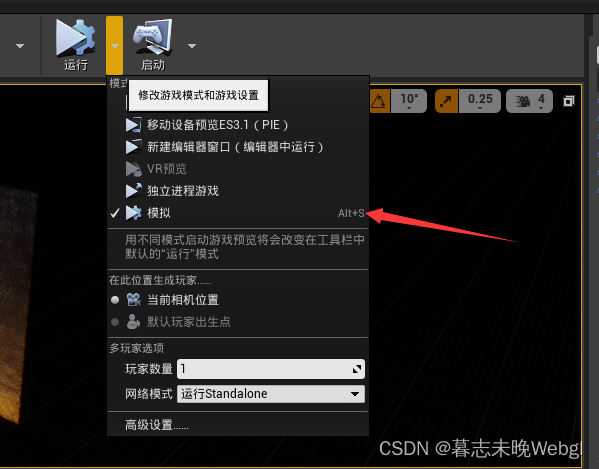
The spectator class is actually used as a third party to observe the data debugging in the scene. It is used as an additional camera controller. If the simulation is selected at runtime, the spectator class will be used to enter the scene to control the camera.
The following figure is the official framework relationship structure diagram
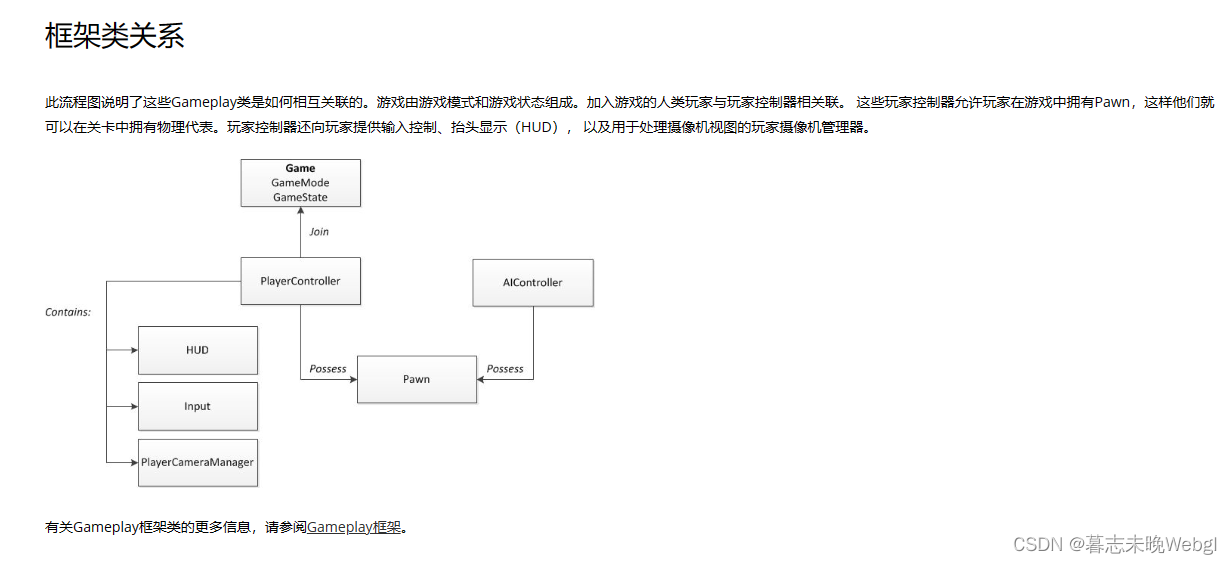
. Next, let’s take a look at what is implemented in the game mode in the official demo action RPG. In the
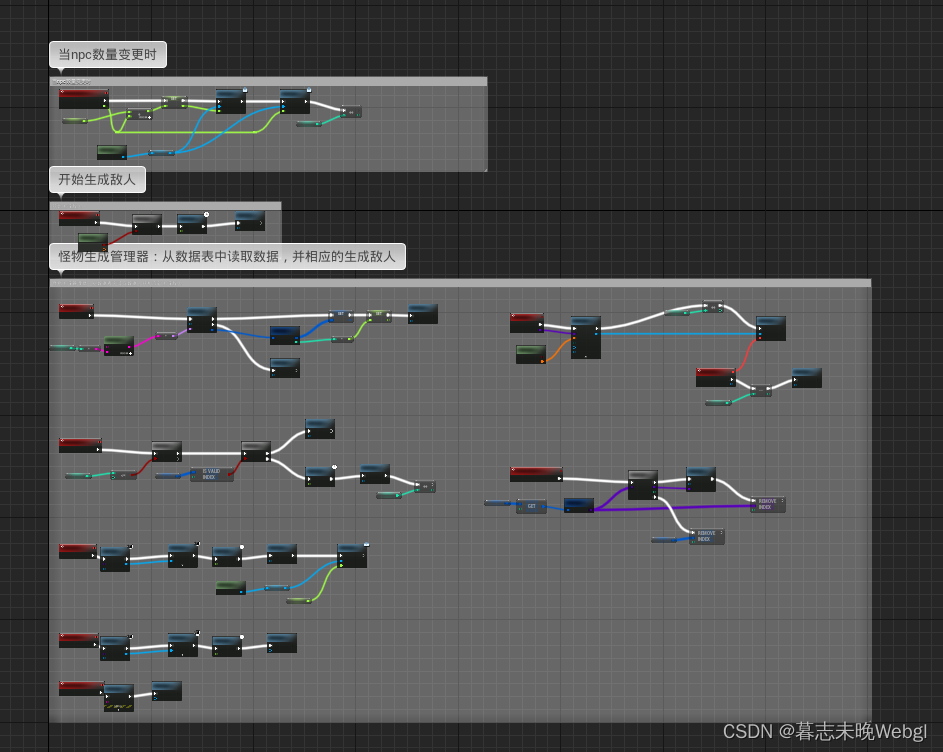
main menu scene, the game mode simply implements adding ui to the viewport, and initializes the global settings, and saves them locally. In the battle scene, the event graph plays the opening animation, displays the remaining game events, starts the game, ends the game, and restarts the game. There is also a graph in GameMode to handle the logic of
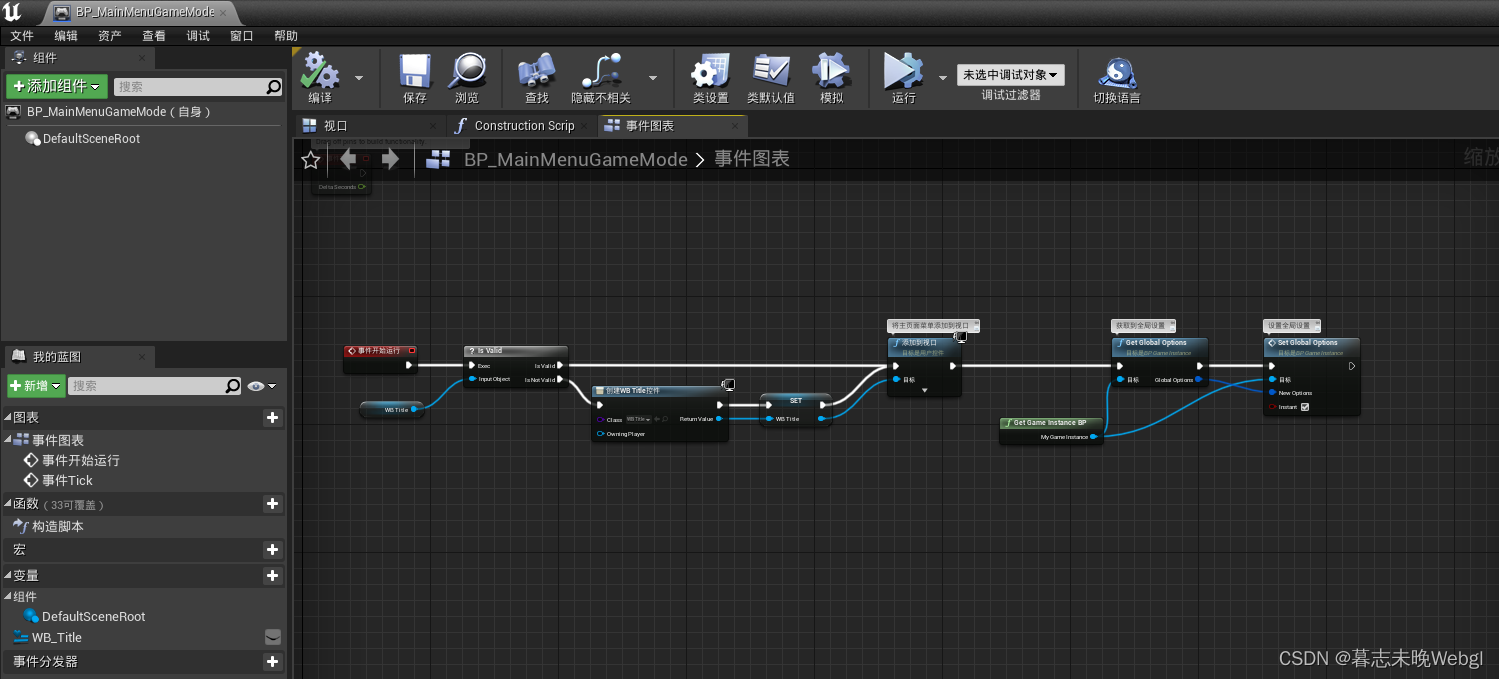
enemy
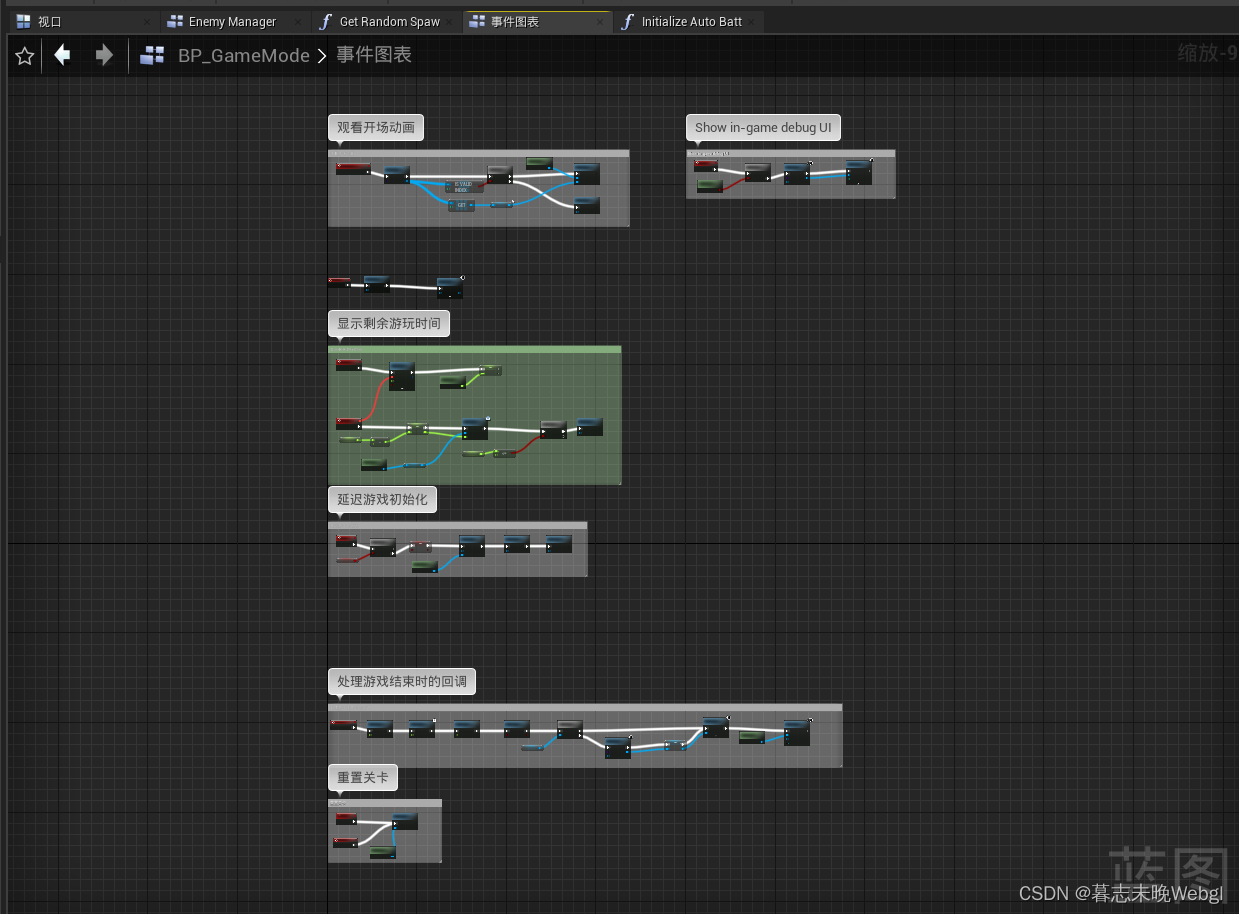
generation
PlayerController player controller
The player controller is the medium through which we communicate with the characters in the game. We need to control the characters in the game through the player controller. Therefore, many operations need to be realized through the player controller.
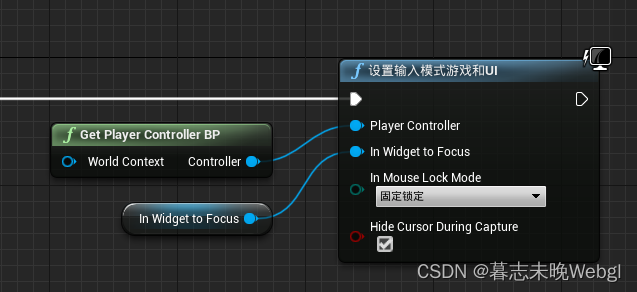
For example, the operation input needs to be input through the player controller. If you open the ui interface in the game, at this time, you will no longer be able to control the character attack, movement and other operations in the game, all need to be realized through the player controller.
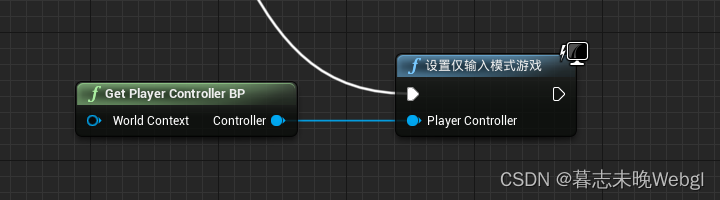
For example, if you need to operate the player, you actually need to set the player input mode game.
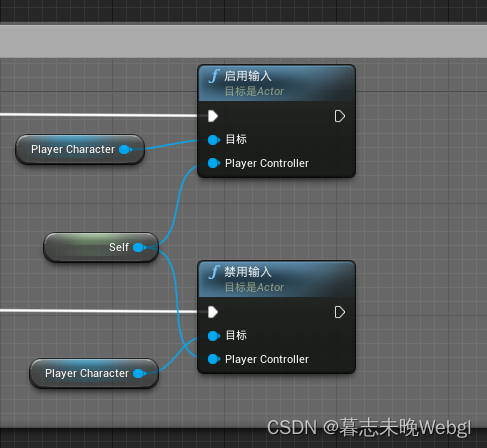
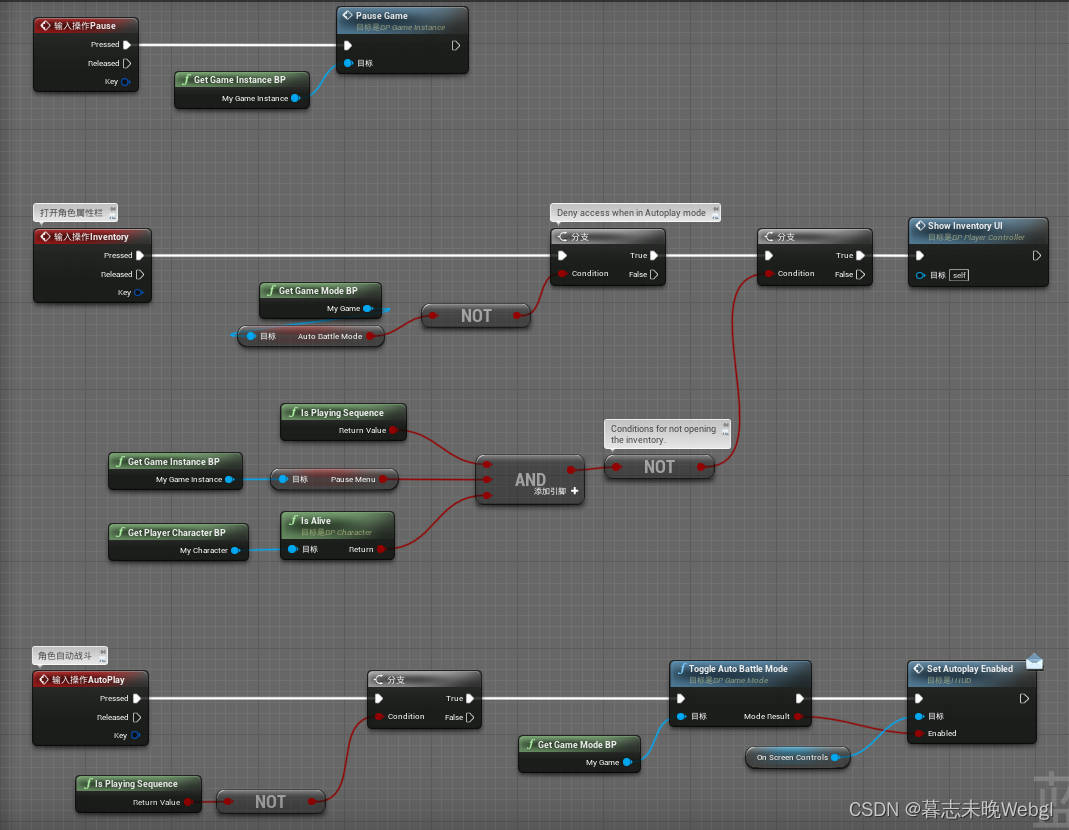
You can also set the player controller to not accept any input, such as entering the automatic mode.
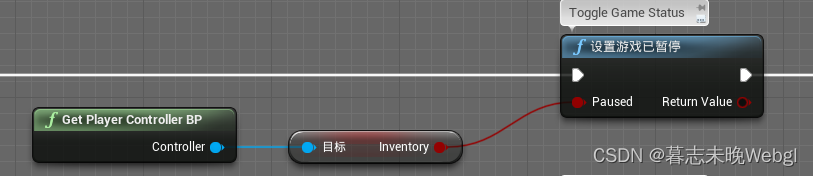
游戏是否暂停,你也需要通过玩家控制器实现
如果你只允许UI相应用户输入
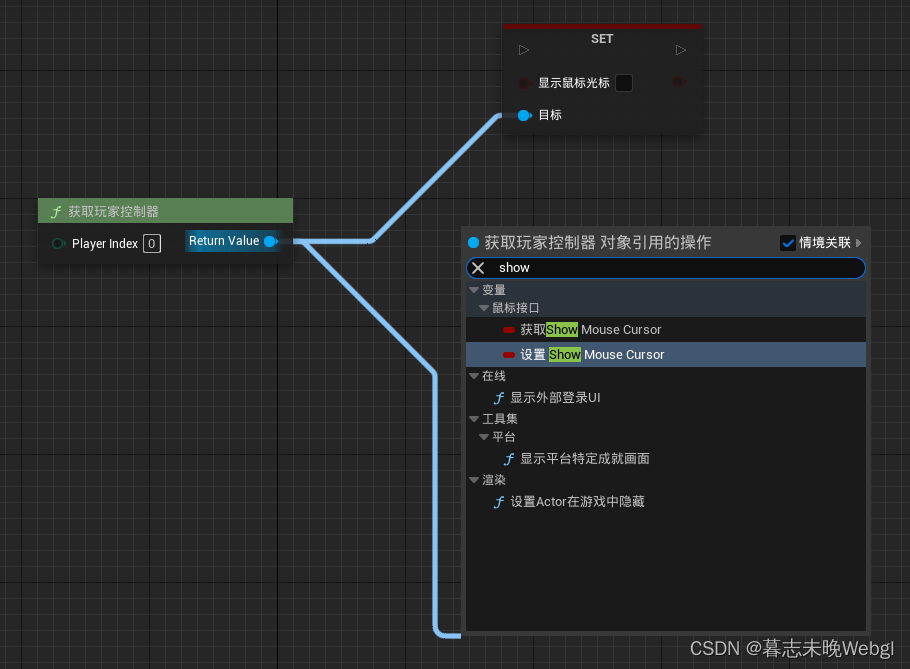
你也可以设置鼠标光标是否显示
你可以在玩家控制器中获取到控制的角色对象
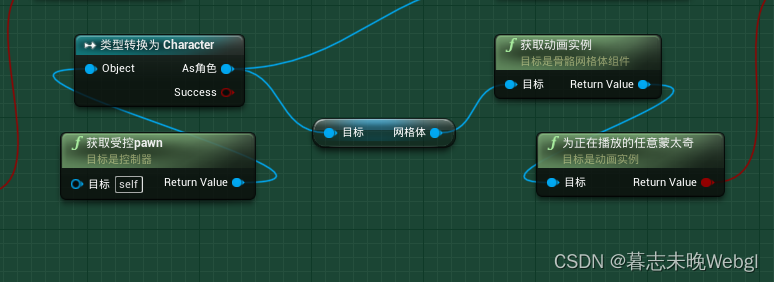
你甚至可以将角色的移动和朝向直接写在角色控制器里面
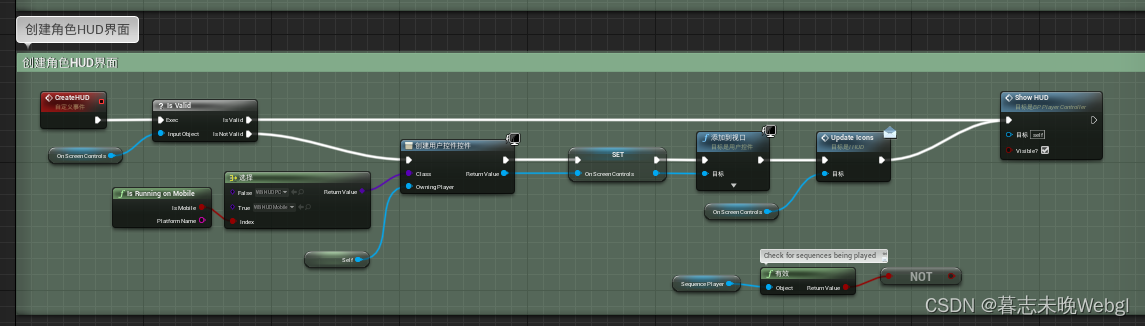
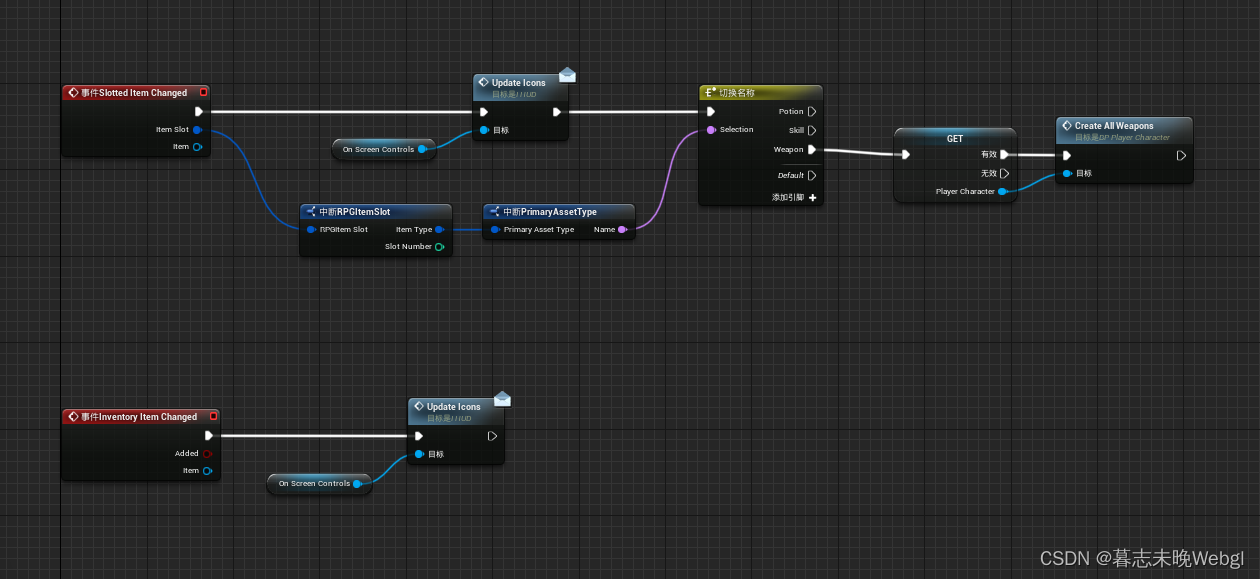
在官方案例动作RPG项目中,将玩家查看的HUD界面放到了角色控制器中
还有暂停游戏,打开角色属性栏,设置角色自动战斗
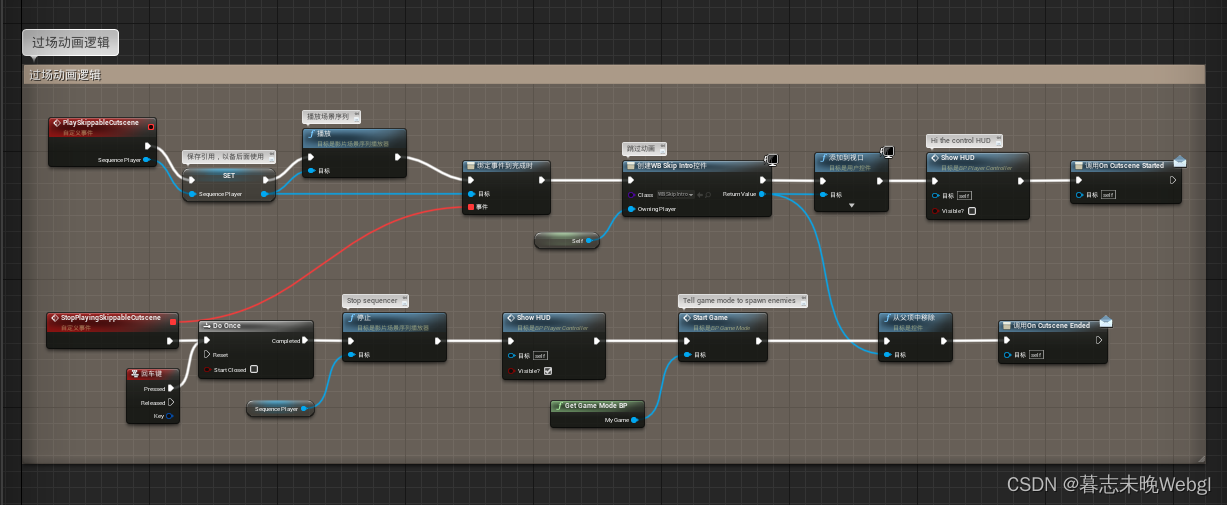
还有过场动画的播放和停止事件(播放停止以后,将创建HUD,战斗模式开始新的游戏,让GameMode生成怪物)
还有打开背包事件的逻辑

以及背包更新,或者修改了装备的更新,都会去更新HUD(On Screen Controls 变量),还调用了角色身上的创建所有持有武器事件,创建所有持有武器事件放到控制角色身上的原因是删除的时候,可以直接根据角色去删除,不需要通过PlayerController去实现。
PlayerCameraManager camera manager
PlayerCameraManager is used to manage the camera for a specific player. It defines final viewing properties for use by other systems such as renderers. The PlayerCameraManager functions like a "virtual eye" for viewing the world. It can directly calculate the final camera properties, and can also be blended between other objects or Actors that affect the camera (blend from one CameraActor to another).
Excerpted from the official website https://docs.unrealengine.com/5.2/zh-CN/cameras-in-unreal-engine/
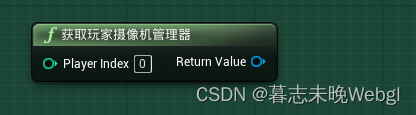
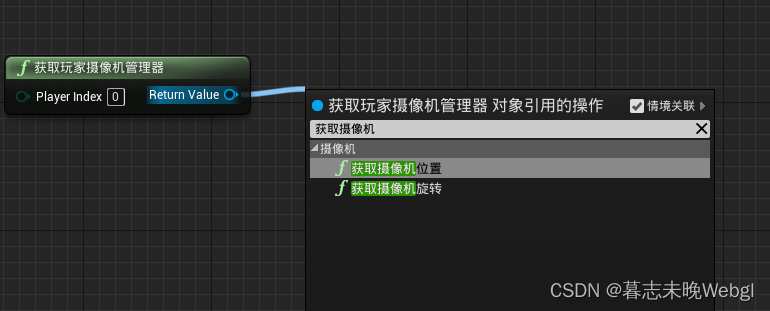
The current camera manager can be obtained through the node
The position and rotation of the current camera can be obtained through the camera manager
AssetManager Asset Manager
The asset manager is a unique global object that can be overridden and customized for different projects. It provides a framework for managing assets by dividing content into chunks that correspond to the context of a project, while maintaining the benefits of Unreal Engine 4's loosely packaged architecture. Unreal will automatically handle the loading and unloading of assets. In some cases, if you need more precise control of assets, you need to use the asset manager.
The asset manager object is a singleton, unique and responsible for the discovery and loading of the main asset.
Excerpt from: https://docs.unrealengine.com/4.27/zh-CN/ProductionPipelines/AssetManagement/
Primary and Secondary Assets
When it comes to asset managers, we have to mention the main asset and the secondary asset. The asset manager can directly operate on it through the main asset ID. The default main asset is only the level asset, and other assets are secondary assets (there is a way to set the secondary asset as the main asset).
The most obvious performance of the main asset in the editor is to hover the mouse over the asset to see if there is any information related to the main asset. The
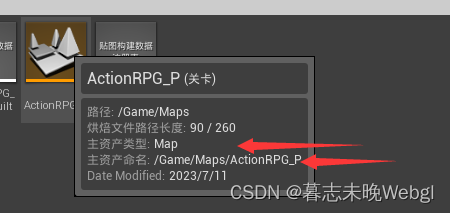
main asset type and the main asset name together form the primary asset ID (PrimaryAssetID)
Create a custom resource manager
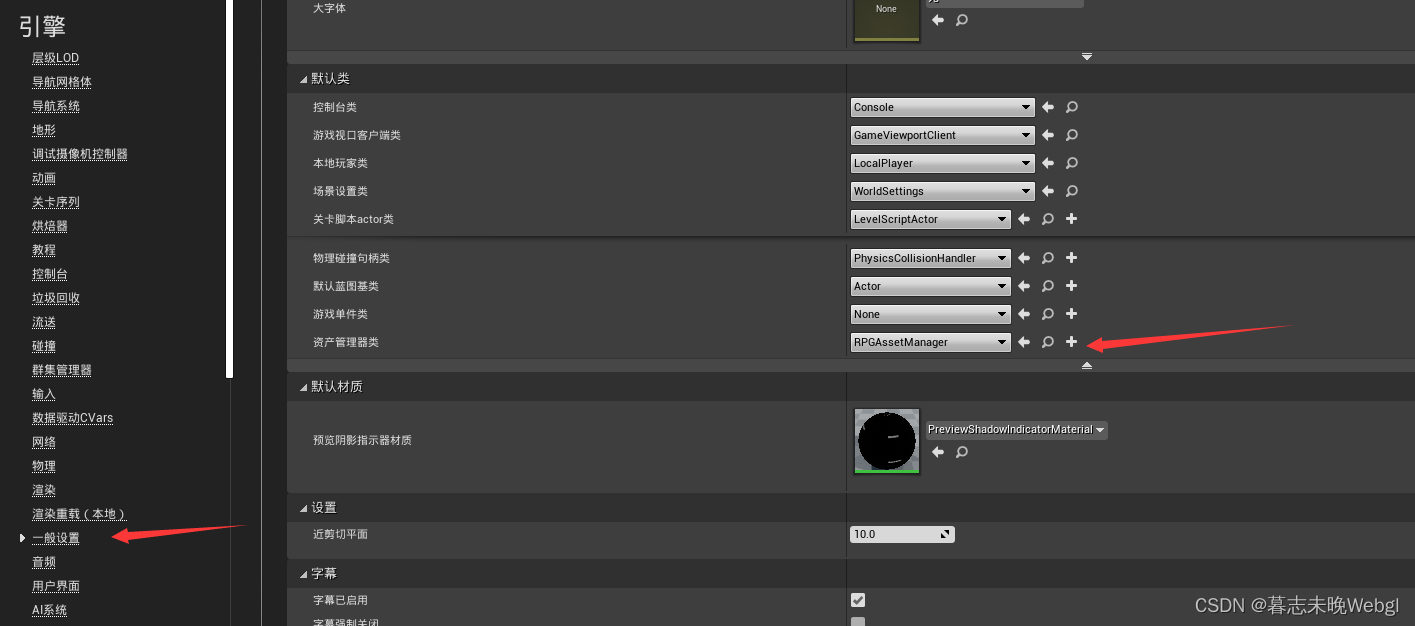
Creating a custom resource manager requires writing code, the class inherits from UAssetManager
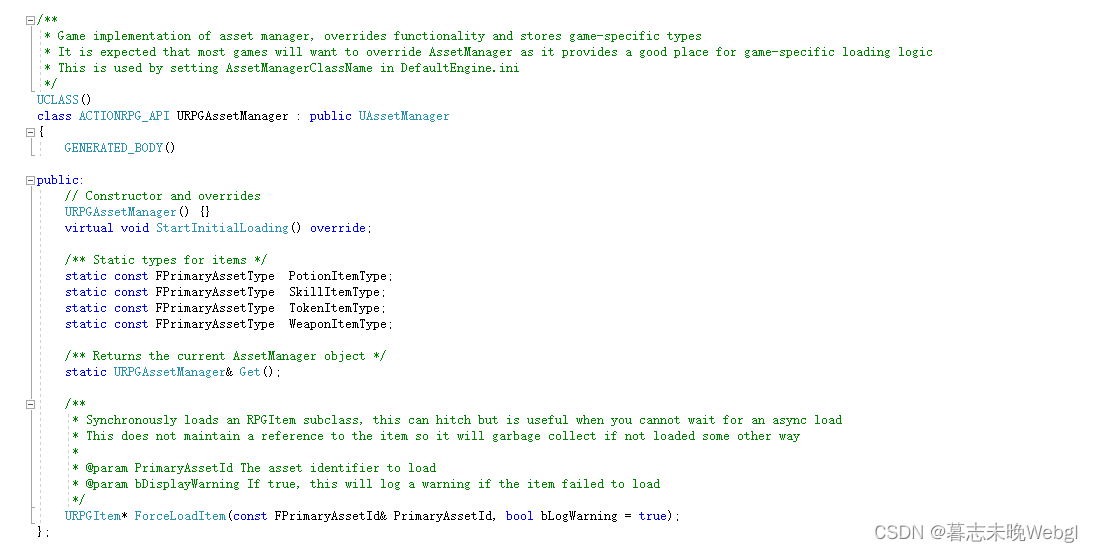
and then in the project settings, find the general setting default class and set the asset management class
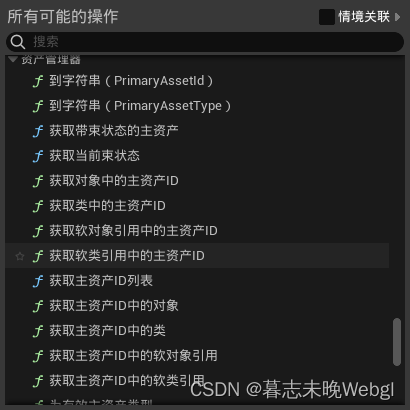
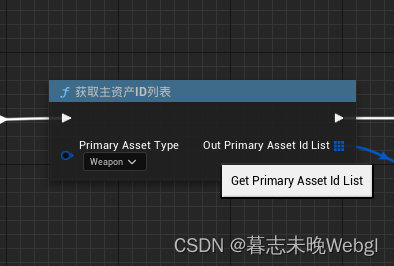
get master asset
Since the asset manager can operate on the main asset, how does the asset manager implement the acquisition operation?
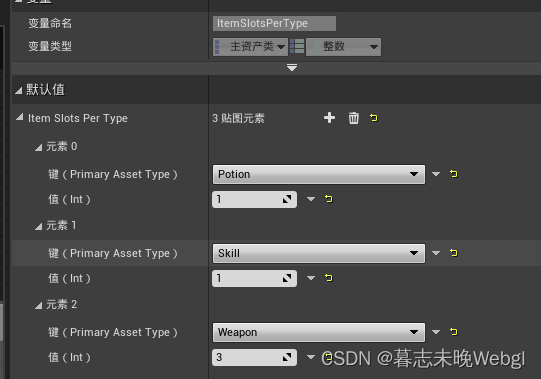
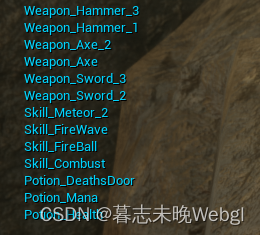
The easiest way is to add the main asset type to be scanned in the project settings, asset manager, and set the corresponding directory. We can customize the name of the main asset type, and then in the blueprint, we can obtain the corresponding resource list by type. In the official project action RPG, it loads three types of assets in the animation instance. You can see that the key is set using the main asset
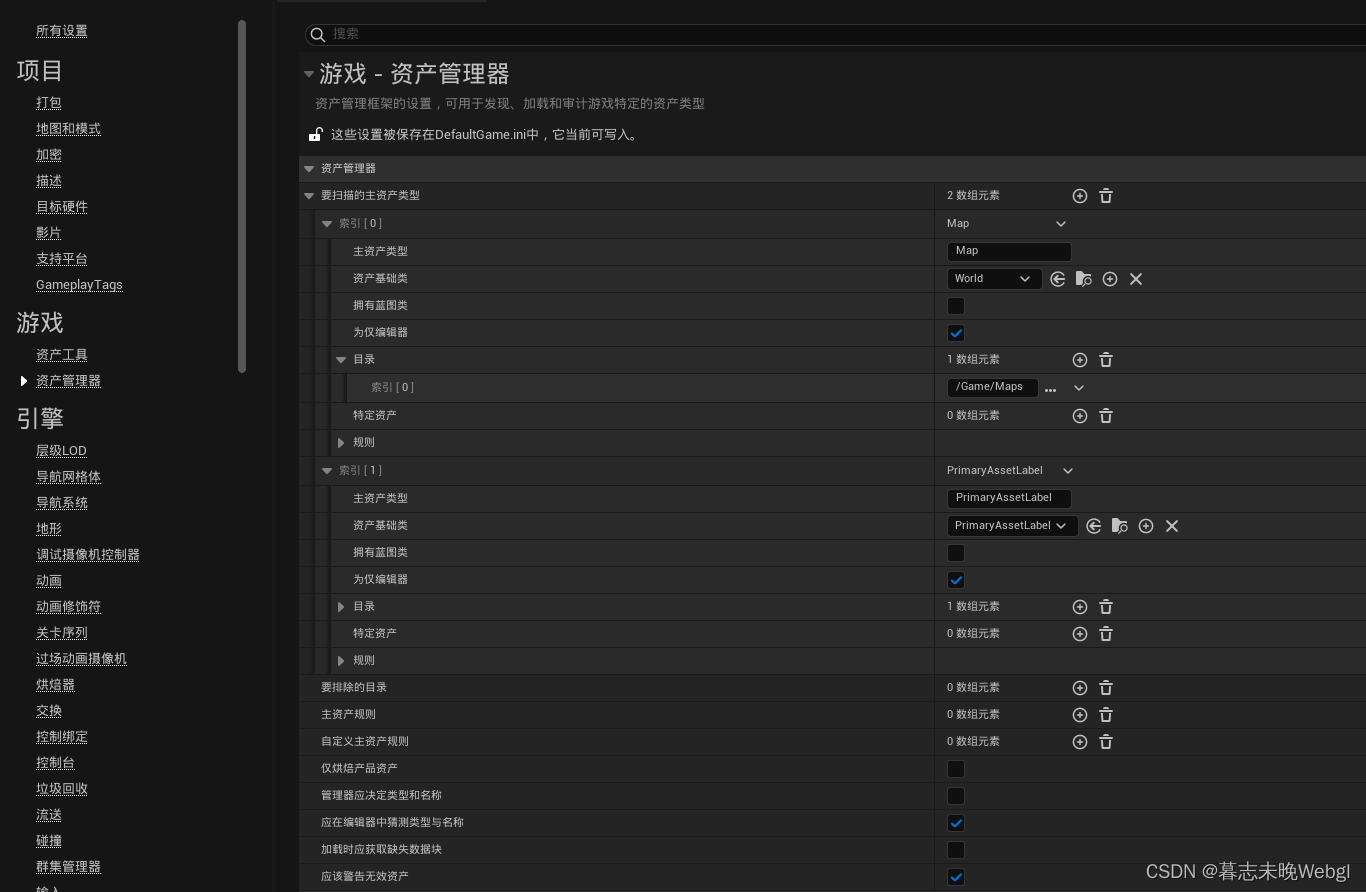
type
.
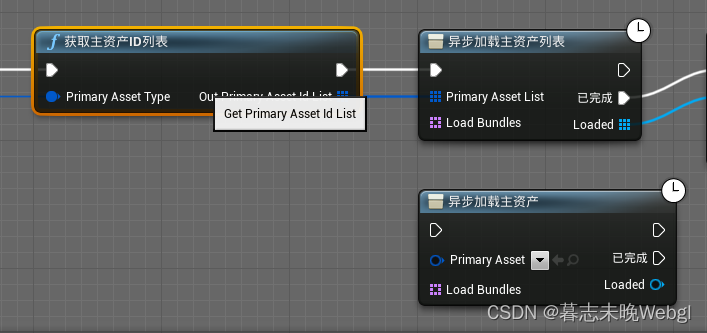
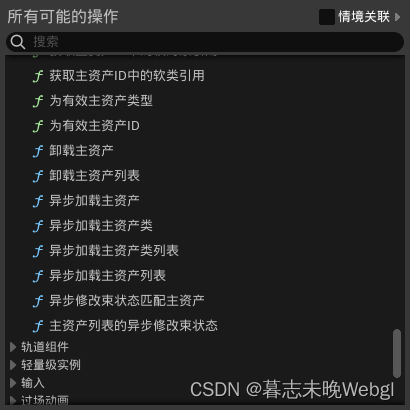
resource manager close operation
As in the previous action RPG,
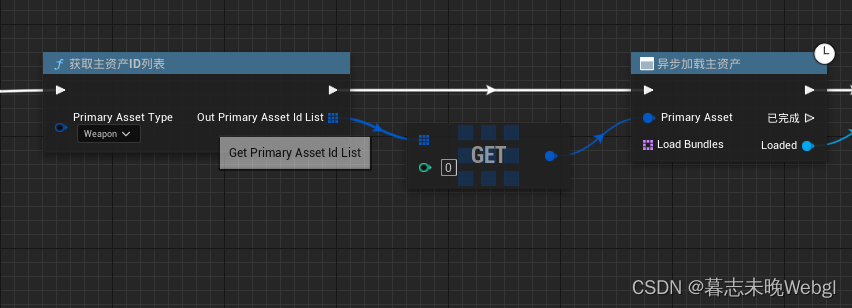
asynchronous loading of the main asset ID list obtained through the main asset type can effectively prevent freezes. Most importantly, if the main asset does not need to be used, we can also uninstall it to reduce memory usage.
The main asset ID contains two contents, which together form the main asset ID, which are the main asset type and the main asset name. The
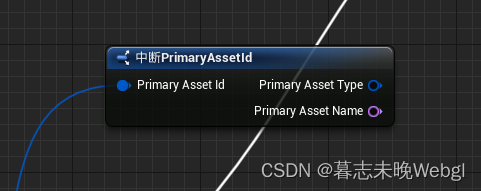
main asset type is the type set in the asset manager, and the name is the current file name
Create a custom master asset
To realize the creation of a custom main asset, you need to create it through C++ code. We can create a custom class based on UPrimaryDataAsset, and must implement the override of the GetPrimaryAssetId method. First, create a C++ class based on PrimaryDataAsset. The first time I compiled it, I directly made a big one. Because I installed a plug-in myself, the compilation has been unable to pass. Finally, open the project with Notepad and delete the plug-in before it can be
opened
.
Then it will automatically open vs and compile the code for you. After the compilation is complete, there will be two files, one ending in .h is a header file, and the other is a resource file in .cpp. We need to override GetPrimaryAssetId in the data asset. Here, I set the main asset type as a variable. First, create a blueprint, and the class inherits the c++ class. In the blueprint, I created three variables, and I can also modify the default main asset
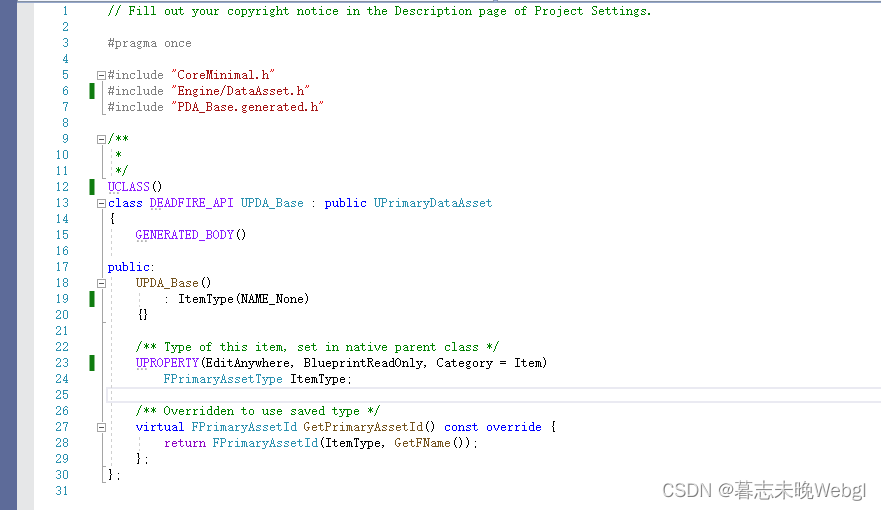
type
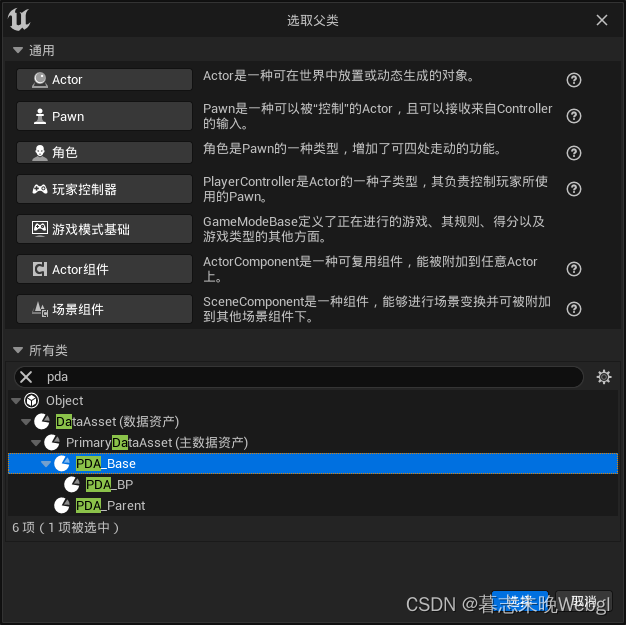
.
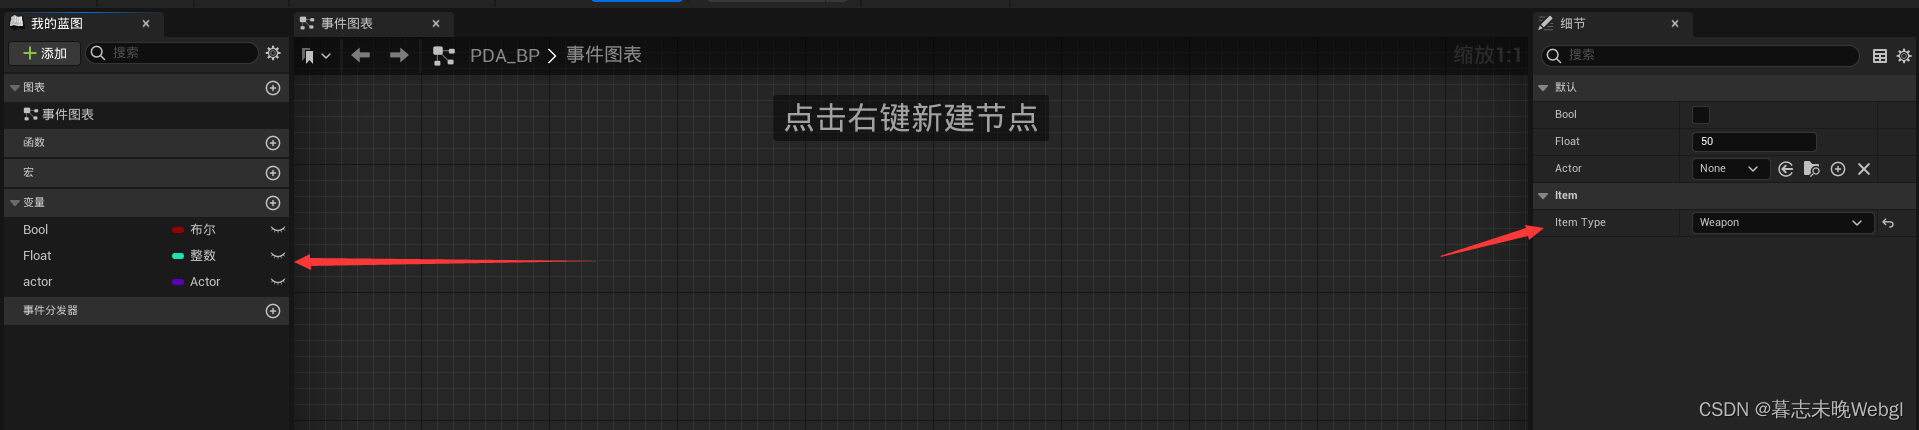
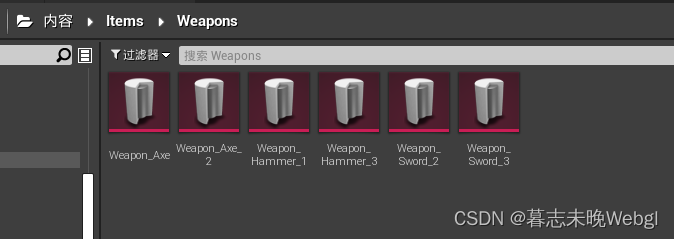
Creating a data asset

Creating a data asset requires you to select a data asset class. A data asset is equivalent to an instance, but the created blueprint cannot be obtained from the resource manager. Then define the relevant data in the data asset and then set the main asset type, asset base class, and directory in the asset manager. In the blueprint, get the main asset ID list, and there will be more custom
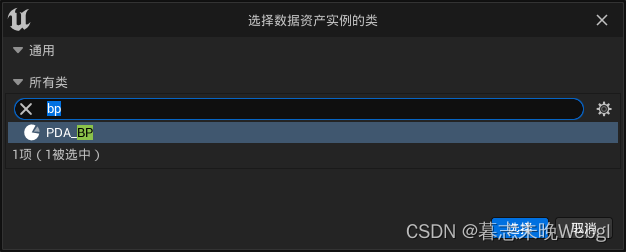
Weapon
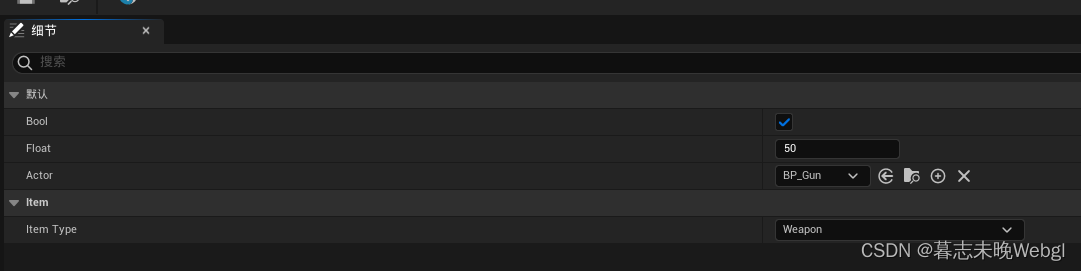
items
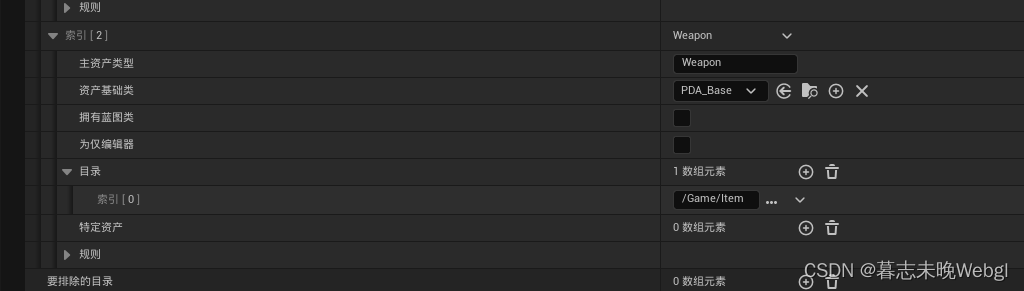
.
Then get the first item and load it asynchronously
After the loading is complete, convert the type to the defined asset type, and print the target class
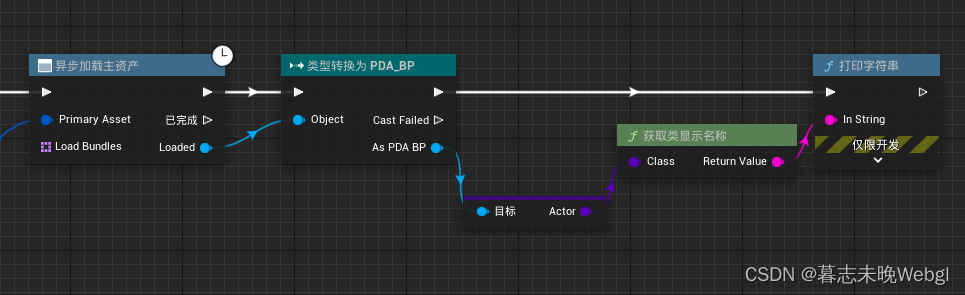
and then run this logic, as long as the class name is printed, it is realized.