여러분, 안녕하세요! 나는 레서팬더 ❤
최근에 많은 이주노동자들이 저에게 와서 말했습니다.일하기 힘들다

매일 많은 반복적인 작업 을 수행하고,
예뉴스 읽기, 이메일 보내기, 날씨 확인, 책갈피 열기, 폴더 정리그리고 더 많은,
자동화된 스크립트를 사용하면 이러한 작업을 수동으로 반복해서 완료할 필요가 없습니다.
매우 편리합니다. 나무가 있습니까? !
그리고 어떤 면에서 Python은 자동화와 동의어입니다.
오늘 와서 함께 배우십시오.
8개의 파이썬 자동화 스크립트로 업무 효율성을 높이세요~ 해피피싱~

1. 웹 뉴스 자동 읽기
이 스크립트는 웹 페이지에서 텍스트를 스크랩한 다음 자동으로 큰 소리로 읽을 수 있으므로 뉴스를 듣고 싶을 때 좋은 선택입니다.
코드는 두 부분으로 나뉘는데, 첫 번째는 크롤러를 통해 웹 페이지의 텍스트를 크롤링하고 두 번째는 읽기 도구를 통해 텍스트를 소리 내어 읽어주는 것입니다.
필요한 타사 라이브러리:
- Beautiful Soup - 크롤링된 웹 페이지에서 정보를 추출하기 위한 클래식 HTML/XML 텍스트 파서
- 요청 - 데이터를 얻기 위해 웹 페이지에 요청을 보내기 위한 사용하기 쉬운 HTTP 도구
- Pyttsx3 - 텍스트를 음성으로 변환하고 속도, 빈도 및 음성을 제어합니다.
import pyttsx3
import requests
from bs4 import BeautifulSoup
voices = engine.getProperty('voices')
newVoiceRate = 130                       ## Reduce The Speech Rate
engine.setProperty('rate',newVoiceRate)
engine.setProperty('voice', voices[1].id)
def speak(audio):
  engine.say(audio)
  engine.runAndWait()
text = str(input("Paste article\n"))
res = requests.get(text)

articles = []
for i in range(len(soup.select('.p'))):
    article = soup.select('.p')[i].getText().strip()
    articles.append(article)
text = " ".join(articles)
speak(text)
# engine.save_to_file(text, 'test.mp3') ## If you want to save the speech as a audio file
engine.runAndWait()

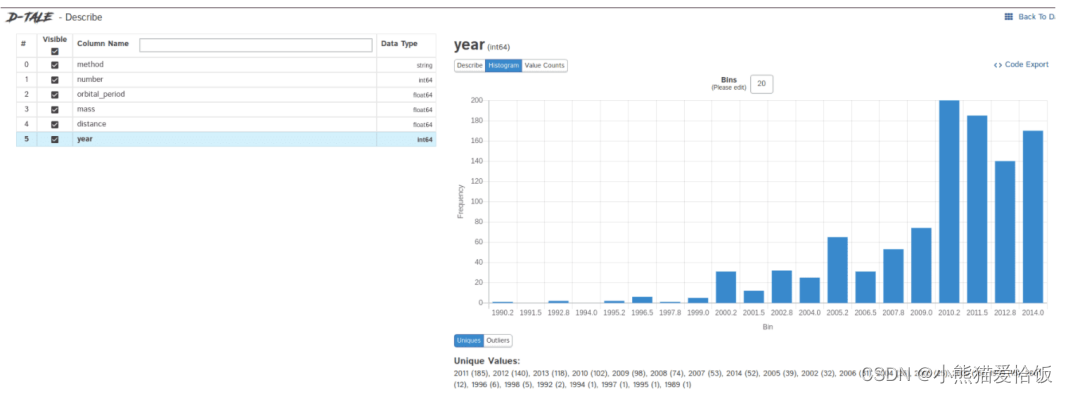
2. 자동화된 데이터 탐색
데이터 탐색은 데이터 과학 프로젝트의 첫 번째 단계입니다. 더 깊은 가치를 분석하려면 데이터의 기본 정보를 이해해야 합니다.
일반적으로 pandas, matplotlib 및 기타 도구를 사용하여 데이터를 탐색하지만 자체적으로 많은 코드를 작성해야 하므로 효율성을 높이고 싶다면 Dtale을 선택하는 것이 좋습니다.
Dtale은 Flask 백엔드와 React 프론트엔드를 결합한 한 줄의 코드로 자동화된 분석 보고서를 제공하므로 Pandas 데이터 구조를 쉽게 보고 분석할 수 있습니다.
Jupyter에서 Dtale을 사용할 수 있습니다.
필요한 타사 라이브러리:
- Dtale - 분석 보고서 자동 생성
### Importing Seaborn Library For Some Datasets
import seaborn as sns

### Printing Inbuilt Datasets of Seaborn Library
print(sns.get_dataset_names())


### Loading Titanic Dataset
df=sns.load_dataset('titanic')

### Importing The Library
import dtale
3. 자동으로 여러 이메일 보내기
이 스크립트를 사용하면 정기적으로 이메일을 일괄적으로 보낼 수 있으며 이메일의 내용과 첨부 파일도 사용자 정의하고 조정할 수 있어 매우 실용적입니다.
메일 클라이언트와 비교할 때 Python 스크립트의 장점은 메일 서비스를 지능적으로 배치로 높은 사용자 정의로 배포할 수 있다는 것입니다.
필요한 타사 라이브러리:
- 이메일 - 이메일 메시지 관리용
Smtlib - SMTP 서버로 전자 메일 보내기 , SMTP 또는 ESMTP 수신기가 있는 인터넷의 모든 컴퓨터에 메일을 보낼 수 있는 SMTP 클라이언트 세션 개체를 정의합니다 .- Pandas - 데이터 분석을 위한 정리 도구;
import smtplib
from email.message import EmailMessage

def send_email(remail, rsubject, rcontent):
    email = EmailMessage()                          ## Creating a object for EmailMessage
    email['from'] = 'The Pythoneer Here'            ## Person who is sending
    email['to'] = remail                            ## Whom we are sending
    email['subject'] = rsubject                     ## Subject of email
    email.set_content(rcontent)                     ## content of email
    with smtplib.SMTP(host='smtp.gmail.com',port=587)as smtp:
        smtp.ehlo()                                 ## server object
        smtp.starttls()                             ## used to send data between server and client
        smtp.login("[email protected]","delta@371") ## login id and password of gmail
        smtp.send_message(email)                    ## Sending email
        print("email send to ",remail)              ## Printing success message

if __name__ == '__main__':
    df = pd.read_excel('list.xlsx')
    length = len(df)+1

    for index, item in df.iterrows():
        email = item[0]
        subject = item[1]
        content = item[2]

4. PDF를 오디오 파일로 변환
스크립트는 pdf를 오디오 파일로 변환할 수 있으며,
원리도 아주 간단하고,
먼저 PyPDF로 pdf의 텍스트를 추출하고,
그런 다음 Pyttsx3를 사용하여 텍스트를 음성으로 변환합니다.
import pyttsx3,PyPDF2
pdfreader = PyPDF2.PdfFileReader(open('story.pdf','rb'))
speaker = pyttsx3.init()
for page_num in range(pdfreader.numPages):
    text = pdfreader.getPage(page_num).extractText()  ## extracting text from the PDF
    cleaned_text = text.strip().replace('\n',' ')  ## Removes unnecessary spaces and break lines
    print(cleaned_text)                ## Print the text from PDF
    #speaker.say(cleaned_text)        ## Let The Speaker Speak The Text
    speaker.save_to_file(cleaned_text,'story.mp3')  ## Saving Text In a audio file 'story.mp3'
    speaker.runAndWait()
speaker.stop()

5. 목록에서 임의의 음악 재생
이 스크립트는 노래 폴더에서 재생할 노래를 무작위로 선택합니다.
os.startfile은 Windows 시스템만 지원합니다.
import random, os
music_dir = 'G:\\new english songs'
songs = os.listdir(music_dir)
song = random.randint(0,len(songs))
print(songs[song])  ## Prints The Song Name
os.startfile(os.path.join(music_dir, songs[0]))

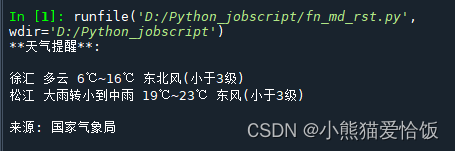
6. 스마트 날씨 정보
기상청 웹사이트는 날씨 데이터를 json 형식으로 직접 반환하는 일기 예보를 얻기 위한 API를 제공합니다. 따라서 json에서 해당 필드를 꺼내십시오.
다음은 지정된 도시(군, 구)의 날씨 URL이며, URL을 직접 열면 해당 도시의 날씨 데이터가 반환됩니다. 예를 들어:
http://www.weather.com.cn/data/cityinfo/101021200.html 상하이 쉬후이 구에 해당하는 날씨 웹사이트.
구체적인 코드는 다음과 같습니다.
mport requests
import json
import logging as log

def get_weather_wind(url):
    r = requests.get(url)
    if r.status_code != 200:
        log.error("Can't get weather data!")
    info = json.loads(r.content.decode())

    # get wind data
    data = info['weatherinfo']
    WD = data['WD']
    WS = data['WS']
    return "{}({})".format(WD, WS)


def get_weather_city(url):
    # open url and get return data
    r = requests.get(url)
    if r.status_code != 200:
        log.error("Can't get weather data!")

    # convert string to json
    info = json.loads(r.content.decode())

    # get useful data
    data = info['weatherinfo']
    city = data['city']
    temp1 = data['temp1']
    temp2 = data['temp2']
    weather = data['weather']
    return "{} {} {}~{}".format(city, weather, temp1, temp2)


if __name__ == '__main__':
    msg = """**天气提醒**:

{} {}
{} {}

来源: 国家气象局
""".format(
    get_weather_city('http://www.weather.com.cn/data/cityinfo/101021200.html'),
    get_weather_wind('http://www.weather.com.cn/data/sk/101021200.html'),
    get_weather_city('http://www.weather.com.cn/data/cityinfo/101020900.html'),
    get_weather_wind('http://www.weather.com.cn/data/sk/101020900.html')
)
    print(msg)
실행 결과는 다음과 같습니다.
7. 긴 URL을 짧은 URL로 변경
때로는 큰 URL이 정말 짜증나기도 합니다.
읽고 공유하기 어려운 이 스크립트는 긴 URL을 짧은 URL로 바꿀 수 있습니다.
import contextlib
from urllib.parse import urlencode
from urllib.request import urlopen
import sys

def make_tiny(url):
 request_url = ('http://tinyurl.com/api-create.php?' +
 urlencode({

    'url':url}))
 with contextlib.closing(urlopen(request_url)) as response:
  return response.read().decode('utf-8')

def main():
 for tinyurl in map(make_tiny, sys.argv[1:]):
  print(tinyurl)

if __name__ == '__main__':
 main()
이 스크립트는 매우 유용합니다.
예를 들어 공식 계정 기사를 차단하는 콘텐츠 플랫폼이 있습니다.
그럼 공식 계정 글의 링크를 짧은 링크로 전환할 수 있고,
그런 다음 그것을 꽂고 우회할 수 있습니다.

8. 다운로드 폴더 정리
세상에서 가장 혼란스러운 것 중 하나는 개발자의 다운로드 폴더,
내부에 지저분한 파일이 많이 있습니다.
이 스크립트는 크기 제한에 따라 다운로드 폴더를 정리합니다.
이전 파일의 제한된 정리.
import os
import threading
import time


def get_file_list(file_path):
#文件按最后修改时间排序
    dir_list = os.listdir(file_path)
    if not dir_list:
        return
    else:
        dir_list = sorted(dir_list, key=lambda x: os.path.getmtime(os.path.join(file_path, x)))
    return dir_list

def get_size(file_path):
    """[summary]
    Args:
        file_path ([type]): [目录]

    Returns:
        [type]: 返回目录大小,MB
    """
    totalsize=0
    for filename in os.listdir(file_path):
        totalsize=totalsize+os.path.getsize(os.path.join(file_path, filename))
    #print(totalsize / 1024 / 1024)
    return totalsize / 1024 / 1024

def detect_file_size(file_path, size_Max, size_Del):
    """[summary]
    Args:
        file_path ([type]): [文件目录]
        size_Max ([type]): [文件夹最大大小]
        size_Del ([type]): [超过size_Max时要删除的大小]
    """
    print(get_size(file_path))
    if get_size(file_path) > size_Max:
        fileList = get_file_list(file_path)
        for i in range(len(fileList)):
            if get_size(file_path) > (size_Max - size_Del):
                print ("del :%d %s" % (i + 1, fileList[i]))
                #os.remove(file_path + fileList[i])
오늘의 글은 여기까지~
저는 레드팬더에요 다음글에서 만나요 (✿◡‿◡)
