1.下载mybatis,现在eclipse里都可以直接下载了不需要单独下载,如果你喜欢当然单独下载也行。
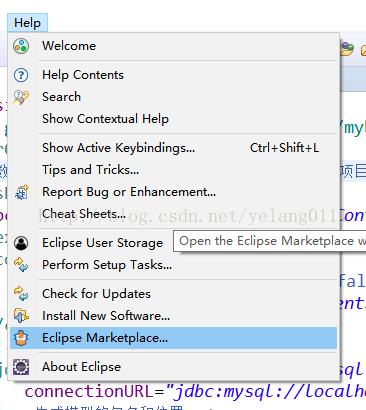
进入Eclipse Marketplace
【Help】 -> 【Eclipse Marketplace...】
2.搜索MyBatis点击下载安装就行了
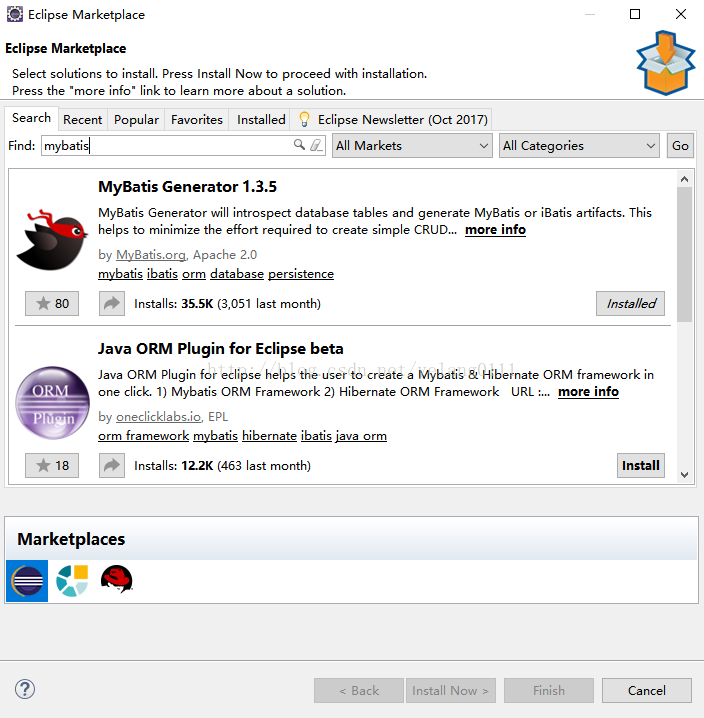
点击【Install】即开始安装,安装完成后重启Eclipse
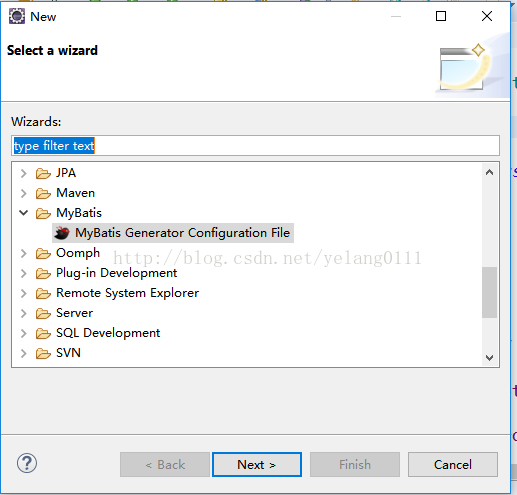
3.查看插件
【File】 -> 【New】-> 【Other..】
如下,即表示插件已安装成功
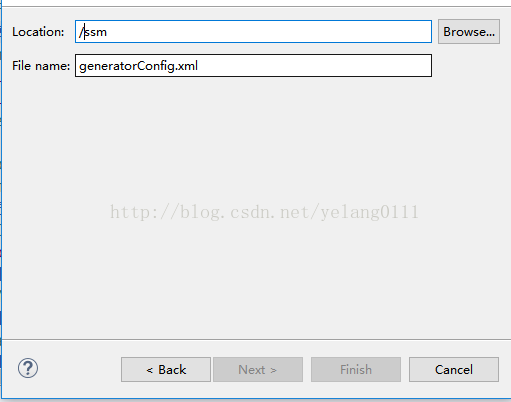
4.如下面的ssm是你想项目路径,下面一个不用选择下一步就行
5.要配置generatorConfig.xml。注释我都写在了配置里根据自己需要改下就行。
<?xml version="1.0" encoding="UTF-8" ?>
<!DOCTYPE generatorConfiguration PUBLIC "-//mybatis.org//DTD MyBatis Generator Configuration 1.0//EN" "http://mybatis.org/dtd/mybatis-generator-config_1_0.dtd" >
<generatorConfiguration>
    <!-- 数据库驱动包位置这里的位置指的是物理位置不是在项目中的位置 -->
    <classPathEntry
        location="G:\Study\practice\ssm\WebContent\WEB-INF\lib\mysql-connector-java-5.1.7-bin.jar" />
    <context id="context1">
        <commentGenerator>
            <!-- 是否去除自动生成的注释 true:是 : false:否 -->
            <property name="suppressAllComments" value="true"/>
        </commentGenerator>
        <!-- 数据库链接URL、用户名、密码 -->
        <jdbcConnection driverClass="com.mysql.jdbc.Driver"
            connectionURL="jdbc:mysql://localhost:3306/springmvc" userId="root" password="root" />
        <!-- 生成模型的包名和位置 -->
        <javaModelGenerator targetPackage="cn.yelang.pojo" targetProject="ssm/src" />
        <!-- 生成的映射文件报名和位置 -->
        <sqlMapGenerator targetPackage="cn.yelang.pojo" targetProject="ssm/src" />
        <!-- 生成DAO的包名和位置 -->
        <javaClientGenerator targetPackage="cn.yelang.dao" targetProject="ssm/src" type="XMLMAPPER" />
        <!-- 要生成的那些表(更改tableName 和domainObjectName 就可以了) -->
        <!-- tableName是数据库中表名 domainObjectName在项目中要显示表名-->
        <!-- 如果想同时生成多个表的内容只需要把下面<table></table>复制改下表名就行 -->
        <table schema="ssm1" tableName="ITEMS" domainObjectName="Items" enableCountByExample="false" enableUpdateByExample="false"
            enableDeleteByExample="false" enableSelectByExample="false" selectByExampleQueryId="false">
        </table>
         <table schema="ssm1" tableName="User" domainObjectName="User" enableCountByExample="false" enableUpdateByExample="false"
            enableDeleteByExample="false" enableSelectByExample="false" selectByExampleQueryId="false">
        </table>

    </context>
</generatorConfiguration>
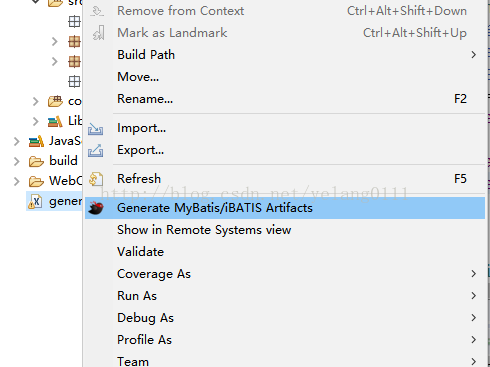
6.单击右建运行
7.在你项目里就能看到生成的相应文件了,如果没有F5刷新一下。