1.前言
使用Docker镜像部署Nginx代理的多个Tomcat集群
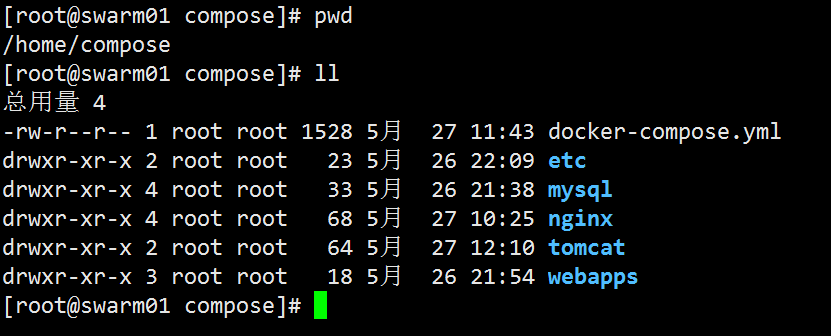
目录结构如下:
docker-compose.yml
etc
└── localtime      #文件
mysql
├── conf          #目录
│   └── my.cnf    #文件
└── mysqldb       #目录
nginx
├── conf.d        #目录
│   └── test.conf #文件
├── Dockerfile    #文件
├── logs          #目录
└── nginx.conf    #文件
tomcat
├── Dockerfile    #文件
└── server.xml    #文件
webapps

# webapps 用于放置tomcat项目使用
# mysqldb 数据将会存放在 mysql/mysqldb中
my.cnf文件如下:
[client]
port = 3306
socket = /var/lib/mysql/mysql.sock
default-character-set = utf8
[mysql]
port = 3306
socket = /var/lib/mysql/mysql.sock
default-character-set = utf8
[mysqld]
port = 3306
basedir = /var/lib/mysql
datadir = /var/lib/mysql
socket = /var/lib/mysql/mysql.sock
character-set-server = utf8
skip-external-locking
slow-query-log = on
long_query_time = 1
slow_query_log_file = /var/lib/mysql/slow.log

sql_mode=NO_ENGINE_SUBSTITUTION,STRICT_TRANS_TABLES,NO_ZERO_DATE,NO_ZERO_IN_DATE,ERROR_FOR_DIVISION_BY_ZERO,NO_AUTO_CREATE_USER

log-error=/var/lib/mysql/mysql.log
pid-file=/var/lib/mysql/mysql.pid
nginx.conf文件如下:
user  nginx;
worker_processes  1;

#error_log  /var/log/nginx/error.log warn;
pid        /var/run/nginx.pid;

events {
    worker_connections  1024;
}

http {
    include       mime.types;
    default_type  application/octet-stream;

    log_format  main  '$remote_addr - $remote_user [$time_local] "$request" '
                      '$status $body_bytes_sent "$http_referer" '
                      '"$http_user_agent" "$http_x_forwarded_for"';

    #access_log  /var/log/nginx/access.log  main;

    sendfile        on;
    #tcp_nopush     on;

    keepalive_timeout  65;

    gzip  on;
    gzip_http_version 1.0;
    gzip_comp_level 6;
    gzip_proxied any;
    gzip_types text/plain  text/javascript application/x-javascript text/css  text/xml image/jpg  application/xml  image/jpeg image/gif image/png;
    gzip_vary on;
    gzip_disable        "Dalvik\.";
    gzip_disable "MSIE [1-6].(?!.*SV1)";

    include /usr/local/nginx/conf.d/*.conf;
}
test.conf文件如下:
upstream example {
   server tomcat01:8080;
   server tomcat02:8080;
   server tomcat03:8080;
}

server {
    listen  80;
    # listen  443 ssl;
    server_name  localhost;

    access_log  logs/test_access.log main;
    error_log   logs/test_error.log ;

    location / {
      proxy_pass http://example;
      proxy_set_header X-Real-IP $remote_addr;
      proxy_set_header X-Forwarded-For $proxy_add_x_forwarded_for;
    }

    location ~ \.(html|css|js|jpg|png|gif)$ {
       root /opt/webapps/ROOT;
    }
}
service.xml文件如下:
<?xml version="1.0" encoding="UTF-8"?>
<!--
  Licensed to the Apache Software Foundation (ASF) under one or more
  contributor license agreements.  See the NOTICE file distributed with
  this work for additional information regarding copyright ownership.
  The ASF licenses this file to You under the Apache License, Version 2.0
  (the "License"); you may not use this file except in compliance with
  the License.  You may obtain a copy of the License at
      http://www.apache.org/licenses/LICENSE-2.0
  Unless required by applicable law or agreed to in writing, software
  distributed under the License is distributed on an "AS IS" BASIS,
  WITHOUT WARRANTIES OR CONDITIONS OF ANY KIND, either express or implied.
  See the License for the specific language governing permissions and
  limitations under the License.
-->
<!-- Note:  A "Server" is not itself a "Container", so you may not
     define subcomponents such as "Valves" at this level.
     Documentation at /docs/config/server.html
 -->
<Server port="8005" shutdown="SHUTDOWN">
  <Listener className="org.apache.catalina.startup.VersionLoggerListener" />
  <!-- Security listener. Documentation at /docs/config/listeners.html
  <Listener className="org.apache.catalina.security.SecurityListener" />
  -->
  <!--APR library loader. Documentation at /docs/apr.html -->
  <Listener className="org.apache.catalina.core.AprLifecycleListener" SSLEngine="on" />
  <!-- Prevent memory leaks due to use of particular java/javax APIs-->
  <Listener className="org.apache.catalina.core.JreMemoryLeakPreventionListener" />
  <Listener className="org.apache.catalina.mbeans.GlobalResourcesLifecycleListener" />
  <Listener className="org.apache.catalina.core.ThreadLocalLeakPreventionListener" />

  <!-- Global JNDI resources
       Documentation at /docs/jndi-resources-howto.html
  -->
  <GlobalNamingResources>
    <!-- Editable user database that can also be used by
         UserDatabaseRealm to authenticate users
    -->
    <Resource name="UserDatabase" auth="Container"
              type="org.apache.catalina.UserDatabase"
              description="User database that can be updated and saved"
              factory="org.apache.catalina.users.MemoryUserDatabaseFactory"
              pathname="conf/tomcat-users.xml" />
  </GlobalNamingResources>

  <!-- A "Service" is a collection of one or more "Connectors" that share
       a single "Container" Note:  A "Service" is not itself a "Container",
       so you may not define subcomponents such as "Valves" at this level.
       Documentation at /docs/config/service.html
   -->
  <Service name="Catalina">

    <!--The connectors can use a shared executor, you can define one or more named thread pools-->
    <!--
    <Executor name="tomcatThreadPool" namePrefix="catalina-exec-"
        maxThreads="150" minSpareThreads="4"/>
    -->


    <!-- A "Connector" represents an endpoint by which requests are received
         and responses are returned. Documentation at :
         Java HTTP Connector: /docs/config/http.html
         Java AJP  Connector: /docs/config/ajp.html
         APR (HTTP/AJP) Connector: /docs/apr.html
         Define a non-SSL/TLS HTTP/1.1 Connector on port 8080
    -->
    <Connector port="8080" protocol="HTTP/1.1"
               connectionTimeout="20000"
               redirectPort="8443" />
    <!-- A "Connector" using the shared thread pool-->
    <!--
    <Connector executor="tomcatThreadPool"
               port="8080" protocol="HTTP/1.1"
               connectionTimeout="20000"
               redirectPort="8443" />
    -->
    <!-- Define a SSL/TLS HTTP/1.1 Connector on port 8443
         This connector uses the NIO implementation. The default
         SSLImplementation will depend on the presence of the APR/native
         library and the useOpenSSL attribute of the
         AprLifecycleListener.
         Either JSSE or OpenSSL style configuration may be used regardless of
         the SSLImplementation selected. JSSE style configuration is used below.
    -->
    <!--
    <Connector port="8443" protocol="org.apache.coyote.http11.Http11NioProtocol"
               maxThreads="150" SSLEnabled="true">
        <SSLHostConfig>
            <Certificate certificateKeystoreFile="conf/localhost-rsa.jks"
                         type="RSA" />
        </SSLHostConfig>
    </Connector>
    -->
    <!-- Define a SSL/TLS HTTP/1.1 Connector on port 8443 with HTTP/2
         This connector uses the APR/native implementation which always uses
         OpenSSL for TLS.
         Either JSSE or OpenSSL style configuration may be used. OpenSSL style
         configuration is used below.
    -->
    <!--
    <Connector port="8443" protocol="org.apache.coyote.http11.Http11AprProtocol"
               maxThreads="150" SSLEnabled="true" >
        <UpgradeProtocol className="org.apache.coyote.http2.Http2Protocol" />
        <SSLHostConfig>
            <Certificate certificateKeyFile="conf/localhost-rsa-key.pem"
                         certificateFile="conf/localhost-rsa-cert.pem"
                         certificateChainFile="conf/localhost-rsa-chain.pem"
                         type="RSA" />
        </SSLHostConfig>
    </Connector>
    -->

    <!-- Define an AJP 1.3 Connector on port 8009 -->
    <Connector port="8009" protocol="AJP/1.3" redirectPort="8443" />


    <!-- An Engine represents the entry point (within Catalina) that processes
         every request.  The Engine implementation for Tomcat stand alone
         analyzes the HTTP headers included with the request, and passes them
         on to the appropriate Host (virtual host).
         Documentation at /docs/config/engine.html -->

    <!-- You should set jvmRoute to support load-balancing via AJP ie :
    <Engine name="Catalina" defaultHost="localhost" jvmRoute="jvm1">
    -->
    <Engine name="Catalina" defaultHost="localhost">

      <!--For clustering, please take a look at documentation at:
          /docs/cluster-howto.html  (simple how to)
          /docs/config/cluster.html (reference documentation) -->
      <!--
      <Cluster className="org.apache.catalina.ha.tcp.SimpleTcpCluster"/>
      -->

      <!-- Use the LockOutRealm to prevent attempts to guess user passwords
           via a brute-force attack -->
      <Realm className="org.apache.catalina.realm.LockOutRealm">
        <!-- This Realm uses the UserDatabase configured in the global JNDI
             resources under the key "UserDatabase".  Any edits
             that are performed against this UserDatabase are immediately
             available for use by the Realm.  -->
        <Realm className="org.apache.catalina.realm.UserDatabaseRealm"
               resourceName="UserDatabase"/>
      </Realm>

      <Host name="localhost"  appBase="webapps"
            unpackWARs="true" autoDeploy="true">

        <!-- SingleSignOn valve, share authentication between web applications
             Documentation at: /docs/config/valve.html -->
        <!--
        <Valve className="org.apache.catalina.authenticator.SingleSignOn" />
        -->

        <!-- Access log processes all example.
             Documentation at: /docs/config/valve.html
             Note: The pattern used is equivalent to using pattern="common" -->
        <Valve className="org.apache.catalina.valves.AccessLogValve" directory="logs"
               prefix="localhost_access_log" suffix=".txt"
               pattern="%h %l %u %t "%r" %s %b" />

      </Host>
    </Engine>
  </Service>
</Server>
2.部署和构建
2.1、使用Dockerfile构建nginx镜像
FROM centos:centos7
MAINTAINER fendo
RUN yum -y install pcre-devel openssl-devel net-tools gcc gcc-c++ zlib zlib-devel \
    make openssl
ADD http://nginx.org/download/nginx-1.14.0.tar.gz /tmp/
WORKDIR  /tmp
RUN tar -zxvf nginx-1.14.0.tar.gz
RUN cd /tmp/nginx-1.14.0 \
    && ./configure --prefix=/usr/local/nginx \
     --with-http_ssl_module \
     --with-http_gzip_static_module \
     --with-http_realip_module \
    && make && make install
RUN mkdir -p /usr/local/nginx/logs \
    && groupadd -g 1001 nginx \
    && useradd -g 1001 -u 1001 -s /sbin/nologin -M nginx

CMD ["/usr/local/nginx/sbin/nginx", "-g", "daemon off;"]
2.2、使用Dockerfile构建tomcat镜像
FROM centos:centos7
MAINTAINER fendo

RUN yum install -y wget

RUN wget -P /usr/local  https://mirrors.cnnic.cn/apache/tomcat/tomcat-8/v8.0.52/bin/apache-tomcat-8.0.52.tar.gz
RUN wget --no-cookies --no-check-certificate --header "Cookie: gpw_e24=http%3A%2F%2Fwww.oracle.com%2F; oraclelicense=accept-securebackup-cookie" -P /usr/local "http://download.oracle.com/otn-pub/java/jdk/8u171-b11/512cd62ec5174c3487ac17c61aaa89e8/jdk-8u171-linux-x64.tar.gz"

WORKDIR  /usr/local
RUN mv jdk-8u171-linux-x64.tar.gz jdk-8u171-linux-x64.tar
RUN mv apache-tomcat-8.0.52.tar.gz apache-tomcat-8.0.52.tar
RUN tar -zxvf apache-tomcat-8.0.52.tar
RUN tar -zxvf jdk-8u171-linux-x64.tar
COPY server.xml /usr/local/apache-tomcat-8.0.52/conf/server.xml

#设置环境变量
ENV JAVA_HOME /usr/local/jdk1.8.0_171
ENV CLASSPATH $JAVA_HOME/lib/dt.jar:$JAVA_HOME/lib/tools.jar
ENV CATALINA_HOME /usr/local/apache-tomcat-8.0.52
ENV PATH $PATH:$JAVA_HOME/bin:$JAVA_HOME/jre/bin:$CATALINA_HOME/lib:$CATALINA_HOME/bin

EXPOSE 8080
ENTRYPOINT ["/usr/local/apache-tomcat-8.0.52/bin/catalina.sh", "run"]
#ENTRYPOINT /usr/local/apache-tomcat-8.0.52/bin/startup.sh && tail -f /usr/local/apache-tomcat-8.0.52/logs/catalina.out
2.3、mysql镜像使用docker hub 镜像
2.4、docker-compose.yml文件
version: '3'
services:
  # web-server
  nginx:
    build:
      context: ./nginx
      dockerfile: Dockerfile
    ports:
      - "80:80"
      - "443:443"
    links:
      - tomcat01:tomcat01
      - tomcat02:tomcat02
      - tomcat03:tomcat03
    volumes:
      - ./webapps:/opt/webapps
      - ./nginx/logs:/usr/local/nginx/logs
      - ./etc/localtime:/etc/localtime
      - ./nginx/nginx.conf:/usr/local/nginx/conf/nginx.conf:ro
      - ./nginx/conf.d/:/usr/local/nginx/conf.d/:ro
    depends_on:
      - mysql
      - tomcat01
      - tomcat02
      - tomcat03
  # tomcat
  tomcat01:
    hostname: tomcat01
    build: ./tomcat
    links:
      -  mysql:mysql
    volumes:
      - ./webapps:/usr/local/apache-tomcat-8.0.52/webapps
      - ./etc/localtime:/etc/localtime

  tomcat02:
    hostname: tomcat02
    build: ./tomcat
    links:
      -  mysql:mysql
    volumes:
      - ./webapps:/usr/local/apache-tomcat-8.0.52/webapps
      - ./etc/localtime:/etc/localtime

  tomcat03:
    hostname: tomcat03
    build: ./tomcat
    links:
      -  mysql:mysql
    volumes:
      - ./webapps:/usr/local/apache-tomcat-8.0.52/webapps
      - ./etc/localtime:/etc/localtime

  # mysql
  mysql:
    hostname: mysql
    image: mysql:latest
    ports:
     - "3307:3306"
    volumes:
      - ./mysql/conf/my.cnf:/etc/mysql/conf.d/my.cnf
      - ./mysql/mysqldb:/var/lib/mysql
      - ./etc/localtime:/etc/localtime:ro
    environment:
      - MYSQL_ROOT_PASSWORD=root
3.测试项目
在webapps目录下创建index.jsp文件,内容如下:
<%@ page language="java" contentType="text/html; charset=utf-8"  import="java.net.InetAddress"
    pageEncoding="utf-8"%>
<!DOCTYPE html PUBLIC "-//W3C//DTD HTML 4.01 Transitional//EN" "http://www.w3.org/TR/html4/loose.dtd">
<html>
<head>
<meta http-equiv="Content-Type" content="text/html; charset=utf-8">
<title>Nginx+Tomcat负载均衡</title>
</head>
<body>
     <%
         InetAddress addr = InetAddress.getLocalHost();
         out.println("主机地址:"+addr.getHostAddress());
         out.println("主机名:"+addr.getHostName());
      %>
</body>
</html>
然后在compose目录下启动docker
docker-compose up

如果出现以上提示说明启动成功,查看启动状态
[root@swarm01 compose]# docker-compose ps
       Name                     Command               State                     Ports
-------------------------------------------------------------------------------------------------------
compose_mysql_1      docker-entrypoint.sh mysqld      Exit 1
compose_nginx_1      /usr/local/nginx/sbin/ngin ...   Up       0.0.0.0:443->443/tcp, 0.0.0.0:80->80/tcp
compose_tomcat01_1   /bin/sh -c /usr/local/apac ...   Up       8080/tcp
compose_tomcat02_1   /bin/sh -c /usr/local/apac ...   Up       8080/tcp
compose_tomcat03_1   /bin/sh -c /usr/local/apac ...   Up       8080/tcp
[root@swarm01 compose]#
然后访问http://192.168.182.110/


每次访问的主机名都不一样说明负载均衡成功!!!
完整示例: https://download.csdn.net/download/u011781521/10440466
参考:https://www.cnblogs.com/bigberg/p/8516026.html