Spring Security
Spring Security 的前身是 Acegi Security ,是 Spring 项目组中用来提供安全认证服务的框架。
实际上,在 Spring Boot 出现之前,Spring Security 就已经发展了多年了,但是使用的并不多,安全管理这个领域,一直是 Shiro 的天下。
自从有了 Spring Boot 之后,Spring Boot 对于 Spring Security 提供了 自动化配置方案,可以零配置使用 Spring Security。
使用
创建Spring Boot项目并引入Spring Security依赖
<dependency>
    <groupId>org.springframework.boot</groupId>
    <artifactId>spring-boot-starter-security</artifactId>
</dependency>
创建HelloController
import org.springframework.web.bind.annotation.GetMapping;
import org.springframework.web.bind.annotation.RestController;

@RestController
public class HelloController {
    @GetMapping("/hello")
    public String hello() {
        return "hello";
    }
}
我们查看控制台会有一行如下日志

这个就是Spring Security 为默认用户 user 生成的临时密码,是一个 UUID 字符串。
启动项目访问http://localhost:8080/hello接口,可以看到自动重定向到登录页面
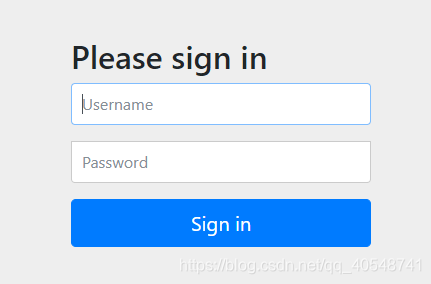
输入默认用户名user和控制台打印的密码后 ,登录成功就可以访问到 /hello 接口了。
在 Spring Security 中,默认的登录页面和登录接口,都是 /login ,只不过一个是 get 请求(登录页面),另一个是 post 请求(登录接口)。
我们下载Spring Security源码,搜索UserDetailsServiceAutoConfiguration类在getOrDeducePassword方法可以看到打印密码的地方,isPasswordGenerated 方法返回 true,会打印密码
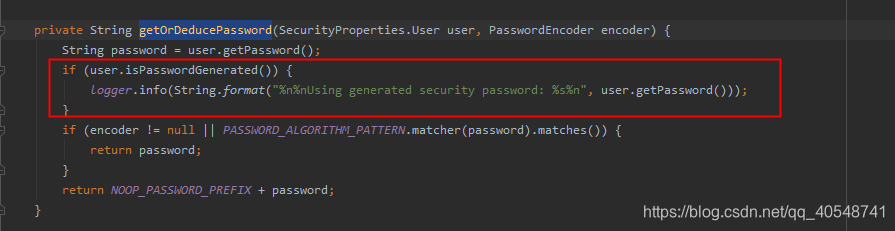
然后点击去查看user.getPassword(),可以看到,默认的用户名就是 user,默认的密码则是 UUID,而默认情况下,passwordGenerated 也为 true。

默认的密码有一个问题就是每次重启项目都会变
我们可以在application.properties 中配置默认的用户名密码
我们查看刚才默认用户名密码配置类SecurityProperties

看到@ConfigurationProperties注解我们就很清晰了,只需要以 spring.security.user 为前缀定义用户名密码即可:
spring.security.user.name=admin
spring.security.user.password=admin123
这里我们先不着急启动,先看下SecurityProperties中User对象setPassword方法
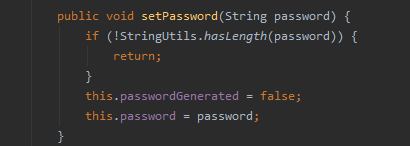
可以看到在设置密码的同时会把passwordGenerated设置为false,设置为 false 之后,控制台就不会打印默认的密码了。
此时重启项目,就可以使用自己定义的用户名/密码登录了。
我们也可以在配置类中配置用户名/密码。
首先我们自定义 SecurityConfig 继承自 WebSecurityConfigurerAdapter,重写里边的 configure 方法。
import org.springframework.context.annotation.Bean;
import org.springframework.context.annotation.Configuration;
import org.springframework.security.config.annotation.authentication.builders.AuthenticationManagerBuilder;
import org.springframework.security.config.annotation.web.configuration.WebSecurityConfigurerAdapter;
import org.springframework.security.crypto.password.NoOpPasswordEncoder;
import org.springframework.security.crypto.password.PasswordEncoder;

@Configuration
public class SecurityConfig extends WebSecurityConfigurerAdapter {

    @Bean
    PasswordEncoder passwordEncoder() {
        return NoOpPasswordEncoder.getInstance();
    }

    @Override
    protected void configure(AuthenticationManagerBuilder auth) throws Exception {
        auth.inMemoryAuthentication()
                .withUser("zhangsan")
                .password("zhangsan123").roles("admin");
    }
}
这里暂时先不给密码进行加密,返回 NoOpPasswordEncoder。
configure 方法中,通过 inMemoryAuthentication 来开启在内存中定义用户,withUser 中是用户名,password 中则是用户密码,roles 中是用户角色。
如果需要配置多个用户,用 and 相连。
配置完成后,再次启动项目,Java 代码中的配置会覆盖掉 配置 文件中的配置,此时再去访问 http://localhost:8080/hello 接口,就会发现只有 Java 代码中的用户名/密码才能访问成功。