第一步:
首先我们去npm官网注册一个账号。
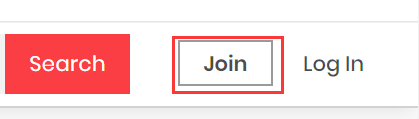
如果你的username一直不能注册成功,可以在你的username前面加一个~,就可以注册成功了。

第二步:
1.新建一个项目
2.生成package.json文件
npm initpackage name: (testpublish) //包名,可更改,也可以使用默认(直接回车)
version: (1.0.0) 0.0.1 //版本,可更改,也可以使用默认(直接回车)
description: 演示上传npm包 //项目描述,方便别人了解你的模块作用,搜索的时候也有用
entry point: (index.js) //指定了程序的主入口文件,可更改,也可以使用默认(直接回车)
test command: //测试命令(直接回车)
git repository: //git仓库(直接回车)
keywords: //一个字符串数组,方便别人搜索到本模块,可更改,也可以使用默认(直接回车)
author: Heath //作者,可更改,也可以使用默认(直接回车)
license: (ISC) //你可以在https://spdx.org/licenses/这个地址查阅协议列表 ,可更改,也可以使用默认(直接回车)
3.新建index.js文件
因为上面生成package时,使用的主文件叫index.js,所以我们这边新建index.js文件。
这边我们随便写一个用户名脱敏的功能:
module.exports.$hideName = function (name) {
    var length = name.length;
    var temp = "";
    for (var i = 0; i < length - 2; i++) {
        temp += "*";
    }
    if (length <= 2) {
        name = name.substring(0, 1) + "*";
    } else {
        name = name.substring(0, 1) + temp + name.substring(length - 1, length);
    }
    return name;
};
4.新建README.md文件
README.md文件是一个项目的入门手册,里面介绍了整个项目的使用、功能等等
# testpublish
演示上传npm包

# 快速上手
## 安装
```shell
npm install testpublish
```
## 全局注册(在main.js文件里注册)
```javascript
import testpublish from 'testpublish';
global.testpublish = testpublish;
```
## 局部注册(在你所使用的vue里注册)
```javascript
import testpublish from 'testpublish';
```
## 例子
姓名脱敏
```javascript
let str = testpublish.$hideName("张三");
```


#目录
* [1.姓名脱敏](#hideName)

```
<h6 id="hideName">1.姓名脱敏</h6>

```javascript
//返回字符串
let str = testpublish.$hideName("张三");
```
三、上传npm包
1.npm登录
npm login1.1如果登录时出现下面错误时

这个原因是因为你使用的是淘宝镜像,所以只要切npm路径就可以了。
npm config set registry http://registry.npmjs.org/1.2如果登录时出现下面错误时
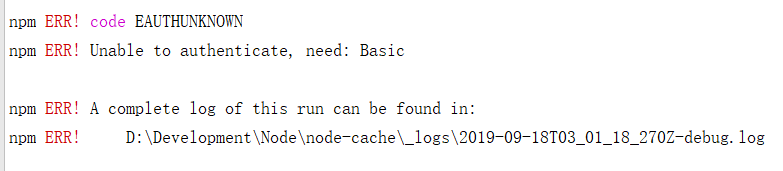
这个问题应该是用户名前面没有加~的原因
2.上传
npm publish如果上传时出现下面错误

这个是因为包名冲突,也就是npm上已经有了这个包,所以我们只需要在package上改一下名字(比如我就改成了demonstration-publish这个包名)
{
  "name": "demonstration-publish",
  "version": "0.0.1",
  "description": "演示上传npm包",
  "main": "index.js",
  "scripts": {
    "test": "echo \"Error: no test specified\" && exit 1"
  },
  "author": "Heath",
  "license": "ISC"
}
改为包名后,npm publish一下就可以了。
登录npm官网,即可看到你刚才上传上去的包。

四、更新包
因为改成更改了包名,所以我们需要更改README.md文件
# demonstration-publish
演示上传npm包

# 快速上手
## 安装
```shell
npm install demonstration-publish
```
## 全局注册(在main.js文件里注册)
```javascript
import publish from 'demonstration-publish';
global.publish = demonstration-publish;
```
## 局部注册(在你所使用的vue里注册)
```javascript
import publish from 'demonstration-publish';
```
## 例子
姓名脱敏
```javascript
let str = publish.$hideName("张三");
```


#目录
* [1.姓名脱敏](#hideName)

```
<h6 id="hideName">1.姓名脱敏</h6>

```javascript
//返回字符串
let str = testpublish.$hideName("张三");
```
修改版本号后,上传就可以了
{
  "name": "demonstration-publish",
  "version": "0.0.2",//这边修改为0.0.2
  "description": "演示上传npm包",
  "main": "index.js",
  "scripts": {
    "test": "echo \"Error: no test specified\" && exit 1"
  },
  "author": "Heath",
  "license": "ISC"
}
//执行
npm publish
五、使用自己上传上去的npm包
首先我们打开一个vue项目,然后执行下面命令,包名demonstration-publish改为你们上传上去的包名。
npm install demonstration-publish安装完后,你可以在node_module里看到这个包。

<!--/* eslint-disable */-->
<template>
  <div>
    {{name}}
  </div>
</template>

<script>
  import publish from 'demonstration-publish';//引入包
  export default {
    name: 'test',
    data () {
      return {
        title: '测试我们上传的包',
        name: '张珊珊'
      }
    },
    methods: {//方法
    },
    created(){//渲染前执行
      document.title = this.title;
      this.name = publish.$hideName(this.name);
    },
    mounted(){//渲染后执行
    },
    computed: {},
  }
</script>
<!-- Add "scoped" attribute to limit CSS to this component only -->
<style scoped>

</style>
以上就是所有过程,有什么不理解的,欢迎大家评论。