参考
大佬的视频教程:nestjs session案例
大佬的博客地址:小满nestjs(第九章 nestjs Session)
在学习某些知识时如果有大佬的视频教程与文档真的是太爽了,能够学习到好多新知识。
nest后台
session
session 是服务器 为每个用户的浏览器创建的一个会话对象 这个session 会记录到 浏览器的 cookie 用来区分用户
我们使用的是nestjs 默认框架express 他也支持express 的插件 所以我们就可以安装express的session
如果以后需要什么插件完全可以在npm里搜索express,毕竟express已经很久了,生态十分完善。
安装
npm i express-session --save
因为是基于ts的项目还需要装一个声明依赖
npm i @types/express-session -D
关于express-session找到了一篇不错的文章:深入浅出 Express 中间件 Express-session
注册session中间件
在main.ts中引入并注册
import * as session from 'express-session'
app.use(session())
参数配置
参数
 cookie: {


  // Cookie Options
  // 默认为{ path: '/', httpOnly: true, secure: false, maxAge: null }
 /**
  * maxAge: 设置给定过期时间的毫秒数(date)
  * expires: 设定一个utc过期时间,默认不设置,http>=1.1的时代请使用maxAge代替之(string)
  * path: cookie的路径(默认为/)(string)
  * domain: 设置域名,默认为当前域(String)
  * sameSite: 是否为同一站点的cookie(默认为false)(可以设置为['lax', 'none', 'none']或 true)
  * secure: 是否以https的形式发送cookie(false以http的形式。true以https的形式)true 是默认选项。 但是,它需要启用 https 的网站。 如果通过 HTTP 访问您的站点,则不会设置 cookie。 如果使用的是 secure: true,则需要在 express 中设置“trust proxy”。
  * httpOnly: 是否只以http(s)的形式发送cookie,对客户端js不可用(默认为true,也就是客户端不能以document.cookie查看cookie)
  * signed: 是否对cookie包含签名(默认为true)
  * overwrite: 是否可以覆盖先前的同名cookie(默认为true)*/
  },

  // 默认使用uid-safe这个库自动生成id
  genid: req => genuuid(),

  // 设置会话的名字,默认为connect.sid
  name: 'value',

  // 设置安全 cookies 时信任反向代理(通过在请求头中设置“X-Forwarded-Proto”)。默认未定义(boolean)
  proxy: undefined,

  // 是否强制保存会话,即使未被修改也要保存。默认为true
  resave: true,

  // 强制在每个响应上设置会话标识符 cookie。 到期重置为原来的maxAge,重置到期倒计时。默认值为false。
  rolling: false,

  // 强制将“未初始化”的会话保存到存储中。 当会话是新的但未被修改时,它是未初始化的。 选择 false 对于实现登录会话、减少服务器存储使用或遵守在设置 cookie 之前需要许可的法律很有用。 选择 false 还有助于解决客户端在没有会话的情况下发出多个并行请求的竞争条件。默认值为 true。
  saveUninitialized: true,

  // 用于生成会话签名的密钥,必须项
  secret: 'secret',

  // 会话存储实例,默认为new MemoryStore 实例。
  store: new MemoryStore(),

  // 设置是否保存会话,默认为keep。如果选择不保存可以设置'destory'
  unset: 'keep'
配置
import {

     NestFactory } from '@nestjs/core';
import {

     AppModule } from './app.module';
import {

     VersioningType } from '@nestjs/common';

import * as session from 'express-session';

async function bootstrap() {


  const app = await NestFactory.create(AppModule);
  //启用版本控制
  app.enableVersioning({


    type: VersioningType.URI,
  });
  //注册中间件
  app.use(
    session({


      secret: 'abcd',
      name: 'abcd.session',
      rolling: true,
      cookie: {

     maxAge: null },
    }),
  );
  await app.listen(5000);
}
bootstrap();
验证码
安装
npm install svg-captcha -S
文档
相关配置官方文档很详细,可以自行查看:svg-captcha
import {

     Body, Controller, Get, Post, Req, Res } from '@nestjs/common';
import {

     UserService } from './user.service';

//引入验证码
import * as svgCaptcha from 'svg-captcha';

@Controller('user')
export class UserController {


  constructor(private readonly userService: UserService) {

    }

  //创建验证码
  @Get('code')
  createCaptcha(@Req() req, @Res() res) {


    //验证码
    const captcha = svgCaptcha.create({


      size: 5, //字符的个数
      fontSize: Math.floor(Math.random() * 10) + 40, //生成40~50大小的验证码
      width: 120, //宽度
      height: 32, //高度
      ignoreChars: '0oO1ilI',
      noise: 2, // 干扰线
      color: true,
      background: '#eee',
    });
    //存储验证码记录到session
    req.session.code = captcha.text;
    //设置返回值类型,并返回
    res.type('image/svg+xml');
    res.send(captcha.data);
  }

  //校验验证码是否正确
  @Post('create')
  createUser(@Req() req, @Body() body) {


    if (req.session.code === body?.code) {


      return {


        code: 200,
        message: '验证码正确',
      };
    } else {


      return {


        code: 200,
        message: '验证码错误',
      };
    }
  }
}
常见的 http-content-type 类型

vue3前台
文章中使用了fetch进行请求接口,fetch不熟,这里使用axios
处理跨域
vite.config.ts
import {

     defineConfig } from 'vite';
import vue from '@vitejs/plugin-vue';

// https://vitejs.dev/config/
export default defineConfig({


    plugins: [vue()],
    server: {


        proxy: {


            '/api': {


                target: 'http://localhost:5000/',
                changeOrigin: true,
                rewrite: path => path.replace(/^\/api/, '')
            }
        }
    }
});
vue文件
<template>
    <div style="width:500px;margin-left: 600px;">
        <el-form label-position="right" label-width="100px" :model="form">
            <el-form-item label="验证码">
                <div style="display:flex;">
                    <el-input v-model="form.code" />
                    <img :src="codeSrc" class="code-img" @click="getCode" />
                </div>
            </el-form-item>
            <el-form-item>
                <el-button type="primary" @click="submit">提交</el-button>
            </el-form-item>
        </el-form>
    </div>
</template>

<script setup lang="ts">
import {

     reactive, ref } from 'vue';
import axios from 'axios';
import {

     ElMessage } from 'element-plus';

const form = reactive({


    code: undefined
});

const codeSrc = ref<string>('http://localhost:5000/user/code');

const submit = () => {


    axios.post('/api/user/create', {


        code: form.code
    }).then(({

      data: d }) => {


          ElMessage.info(d.message);
    });
};
const getCode = () => {


    codeSrc.value = codeSrc.value + '?' + new Date().getTime();
};
</script>

<style lang="scss" scoped>
.code-img {


    width: 120px;
    height: 32px;
    cursor: pointer;
    margin-left: 10px;
}
</style>
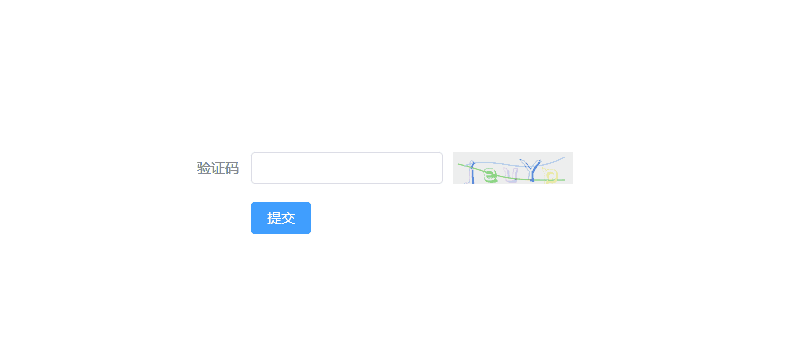
效果图