nginx访问控制模块
1、基于IP的访问控制:http_access_module
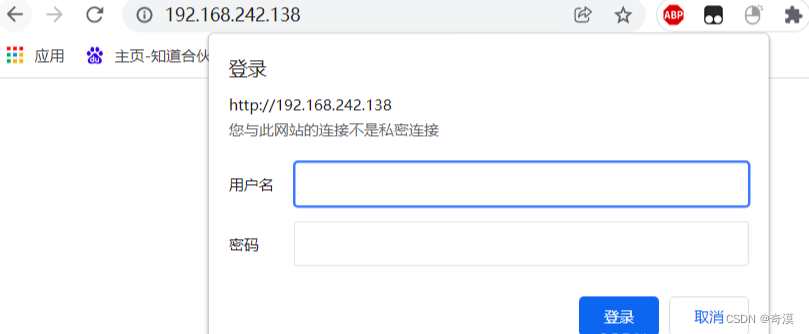
2、基于用户的信任登录:http_auth_basic_module
基于IP的访问控制
基于IP的访问控制有四种情况:允许所有人访问、拒绝所有人访问、拒绝某个允许所有、允许某个决绝所有。注意:不能配置允许所有决绝某个,否则拒绝失效,也不能拒绝所有允许某个,否则允许失效。
配置语法:
配置语法
语法:allow address|CIDR|unix:|all;
默认:模默认无
CONTEXT(应用域):http,server、location、limit_except

语法:deny address|CIDR|unix:|all;
默认:默认无
应用域:http,server,location、limit_except
配置测试:
允许所有人访问
[root@localhost ~]# vim /etc/nginx/conf.d/rewrite.conf
server {
        listen 80;
        server_name www.hjf777.com;
        location / {
        root /html;
        index index.html;
        allow all;
        }
}
[root@localhost ~]#
[root@localhost ~]# tree /html/
/html/
└── index.html
用192.168.242.134机器访问
[root@localhost ~]# curl 192.168.242.138
123
用192.168.242.140机器访问
[root@localhost ~]# curl 192.168.242.138
123
拒绝所有人访问
[root@localhost ~]# vim /etc/nginx/conf.d/rewrite.conf
server {
listen 80;
server_name www.hjf777.com;
location / {
root /html;
index index.html;
deny all;
}
}
[root@localhost ~]# tree /html/
/html/
└── index.html
用192.168.242.134机器访问
[root@localhost ~]# curl 192.168.242.138
<html>
<head><title>403 Forbidden</title></head>
<body>
<center><h1>403 Forbidden</h1></center>
<hr><center>nginx/1.20.2</center>
</body>
</html>
用192.168.242.140机器访问
[root@localhost ~]# curl 192.168.242.138
<html>
<head><title>403 Forbidden</title></head>
<body>
<center><h1>403 Forbidden</h1></center>
<hr><center>nginx/1.20.2</center>
</body>
</html>
允许某个访问拒绝所有
[root@localhost ~]# vim /etc/nginx/conf.d/rewrite.conf
server {
        listen 80;
        server_name www.hjf777.com;
        location / {
        root /html;
        index index.html;
        allow 192.168.242.134;
        deny all;
        }
}
[root@localhost ~]# tree /html/
/html/
└── index.html
用192.168.242.134机器访问
[root@localhost ~]# curl 192.168.242.138
123
用192.168.242.140机器访问
[root@localhost ~]# curl 192.168.242.138
<html>
<head><title>403 Forbidden</title></head>
<body>
<center><h1>403 Forbidden</h1></center>
<hr><center>nginx/1.20.2</center>
</body>
</html>
拒绝某个访问允许所有
[root@localhost ~]# vim /etc/nginx/conf.d/rewrite.conf
server {
listen 80;
server_name www.hjf777.com;
location / {
root /html;
index index.html;
deny 192.168.242.134;
allow all;
}
}
[root@localhost ~]# tree /html/
/html/
└── index.html
用192.168.242.134机器访问
[root@localhost ~]# curl 192.168.242.138
<html>
<head><title>403 Forbidden</title></head>
<body>
<center><h1>403 Forbidden</h1></center>
<hr><center>nginx/1.20.2</center>
</body>
</html>
用192.168.242.140机器访问
[root@localhost ~]# curl 192.168.242.138
123基于用户的信任登录
配置语法:
Syntax:auth_basic string | off;
default:auth_basic off;
Context:http,server,location,limit_except

Syntax:auth_basic_user_file file;
default:默认无
Context:http,server,location,limit_except
file:存储用户名密码信息的文件。
配置示例:
[root@localhost ~]# vim /etc/nginx/conf.d/rewrite.conf
server {
        listen 80;
        server_name www.hjf777.com;
        location / {
        root /html;
        index index.html;
        auth_basic "welcome!";    #设置开启auth_basic指令   “welcome”自定义,写什么都可以
        auth_basic_user_file /etc/nginx/auth_conf;     #指定密码文件
        }
}      注意:密码文件可以放在任意目录下,前提是nginx对其有权限,所有建议放在nginx的工作目录下
[root@localhost ~]# yum install -y httpd-tools
....
[root@localhost ~]# htpasswd -cm /etc/nginx/auth_conf hjf
New password:
Re-type new password:
Adding password for user hjf
[root@localhost ~]# cat /etc/nginx/auth_conf
hjf:$apr1$h0ZsB8Ux$as3.Cx943iojJs3HFYTKI.
-c  创建一个新文件
-m  强制对密码进行MD5加密(默认)。
访问测试:
局限性
(1)用户信息依赖文件方式
(2)操作管理机械,效率低下
解决方法
(1)Nginx结合LUA实现高效验证
(2)Nginx和LDAP打通,利用nginx-auth-ldap模块
(3)Nginx只做中间代理,具体认证交给应用。