kubeflow 1.6.1 单机搭建
不配置https证书,进去也会到处报错,建议配置HTTPS,但是我配置了https 进去还是报错,不会弄了
manifest 形式搭建(失败)
先决条件
- Kubernetes (up to 1.21) with a default StorageClass
我用 kubeasz 搭建的二进制的 k8s,然后用创建了nfs 的 StorageClass,参考了这位博主的搭建过程 - kustomize (version 3.2.0) (download link)
要求下载3.2.0,你别使用其他版本,不过官方正在进行 V4 版本的更改
wget https://github.com/kubernetes-sigs/kustomize/releases/download/v3.2.0/kustomize_3.2.0_linux_amd64
mv kustomize_3.2.0_linux_amd64 kustomize
chmod u+x kustomize
mv kustomize /bin/
- kubectl
安装kubeflow
我是安装的: kubeflow 1.6.1
k8s版本,1.24.2,安装之后必须 设置一个StorageClass ,并设置为默认
系统:Linux Centos 7.9.2009
git clone https://github.com/kubeflow/manifests.git
cd manifests # 记得切换到1.6.1
while ! kustomize build example | kubectl apply -f -; do echo "Retrying to apply resources"; sleep 10; done
查看 访问端口,通过 公网IP + port 访问
kubectl get svc -n istio-system

这个时候你登陆上去,但是会报错,查看下面的报错解决方案
k8s 1.25 以上升级 istio
manifests 中自带安装的 istio 是1.14 的
首先 istio 1.15 to work with k8s 1.25,兼容性可以查看这儿。所以升级 istio,在文件夹的 manifests-1.6.1/common/istio-1-14/README.md 中有介绍怎么升级
export MANIFESTS_SRC=/media/manifests
export ISTIO_OLD=$MANIFESTS_SRC/common/istio-1-14
export ISTIO_NEW=$MANIFESTS_SRC/common/istio-1-15
cp -a $ISTIO_OLD $ISTIO_NEW
ISTIO_VERSION="1.15.2"
wget "https://github.com/istio/istio/releases/download/${ISTIO_VERSION}/istio-${ISTIO_VERSION-linux-amd64.tar.gz"
tar xvfz istio-${ISTIO_VERSION}-linux-amd64.tar.gz
mv istio-${ISTIO_VERSION}/bin/istioctl /bin/
cd $ISTIO_NEW
istioctl profile dump demo > profile.yaml
export PATH="$MANIFESTS_SRC/scripts:$PATH"
istioctl manifest generate -f profile.yaml -f profile-overlay.yaml > dump.yaml
chmod +x split-istio-packages
split-istio-packages -f dump.yaml # 记得要现在pip3 install ruamel.yaml==0.16.12
mv $ISTIO_NEW/crd.yaml $ISTIO_NEW/istio-crds/base
mv $ISTIO_NEW/install.yaml $ISTIO_NEW/istio-install/base
mv $ISTIO_NEW/cluster-local-gateway.yaml $ISTIO_NEW/cluster-local-gateway/base
遇到的问题
解决MySQL 和 minio 的Pending状态
通过kubectl -n kubeflow get pvc mysql-pv-claim -o yaml 可以看到 mysql-pv-claim 中没有 storageClassName,
在目录 /media/manifests/apps/pipeline/upstream/third-party/mysql/base下找到 mysql-pv-claim.yaml 在 spec 其中增加 storageClassName: "managed-nfs-storage",名称为你创建的名称,先 delete ,然后
kubectl apply -f mysql-pv-claim.yaml -n kubeflow
CrashLoopBackOff
修复好上面的之后,另外的几个 CrashLoopBackOff的pod 会 自动恢复 running
登陆界面 Cannot load dashboard menu link
在这儿apps/centraldashboard/upstream/base/deployment.yaml 总增加环境变量 NODE_TLS_REJECT_UNAUTHORIZED = "0"
配置https 证书
客户端输入域名,通过DNS将域名解析成为服务器ip,找到代理服务器,因为http协议服务所占用的端口默认为80端口,所以会访问服务器的80端口,然后再通过代理服务器将请求转发到不同的服务器以及端口中
方法一(不管用)
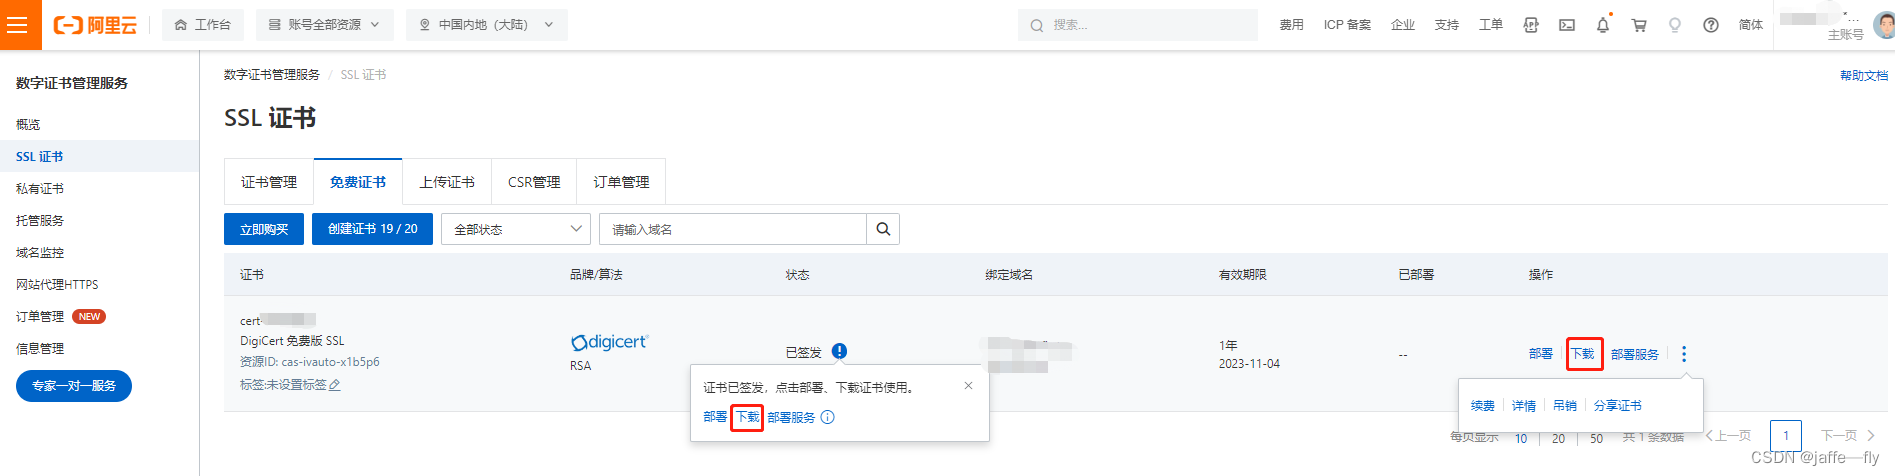
xxxx 是在阿里云买了一个域名,之后再免费申请的证书,通过之后就可以下载。
为域名创建secret,名字必须为istio-ingressgateway-certs才能保证Ingress gateway自动加载该证书配置;
kubectl create -n istio-system secret tls istio-ingressgateway-certs --key xxxx.key --cert xxxxx.pem
kubectl describe secrets istio-ingressgateway-certs -n istio-system
Name:         istio-ingressgateway-certs
Namespace:    istio-system
Labels:       <none>
Annotations:  <none>

Type:  kubernetes.io/tls

Data
====
tls.crt:  3834 bytes
tls.key:  1675 bytes
kubectl -n kubeflow edit gateways.networking.istio.io kubeflow-gateway
apiVersion: networking.istio.io/v1beta1
kind: Gateway
metadata:
  name: kubeflow-gateway
  namespace: kubeflow
spec:
  selector:
    istio: ingressgateway
  servers:
  - hosts:
    - xxxxx # 你的域名
    port:
      name: http
      number: 80
      protocol: HTTP
    tls:
      httpsRedirect: true
  - hosts:
    - xxxxx # 你的域名
    port:
      name: https
      number: 443 #就是istio-ingressgateway pod暴漏的端口,对应的是service的targetPort
      protocol: HTTPS
    tls:
      credentialName: istio-ingressgateway-certs
      mode: SIMPLE
kubectl -n istio-system edit service istio-ingressgateway
spec:
  allocateLoadBalancerNodePorts: true
  clusterIP: 10.68.204.100
  clusterIPs:
  - 10.68.204.100
  externalIPs:
  - xxxxx # 公网ip
  externalTrafficPolicy: Cluster
  internalTrafficPolicy: Cluster
  ipFamilies:
  - IPv4
  ipFamilyPolicy: SingleStack
  ports:
  - name: status-port
    nodePort: 31573
    port: 15021
    protocol: TCP
    targetPort: 15021
  - name: http2
    nodePort: 32509
    port: 80
    protocol: TCP
    targetPort: 8080
  - name: https
    nodePort: 32717 #Node 暴露出来的Port
    port: 443 # Service暴露出来的Port
    protocol: TCP
    targetPort: 8443 #Container上暴露的Port
  - name: tcp
    nodePort: 31544
    port: 31400
    protocol: TCP
    targetPort: 31400
  - name: tls
    nodePort: 30500
    port: 15443
    protocol: TCP
    targetPort: 15443
  selector:
    app: istio-ingressgateway
    istio: ingressgateway
  sessionAffinity: None
  type: LoadBalancer
可以通过node 节点上 32717 访问到 service 上的443 会 转发到pod上暴露的8443,
这样你可以通过 https://域名:32717/访问到 界面,但是进去之后 还是有Cannot load dashboard menu link的报错吗,这个时候就不能去设置环境变量解决问题了
juju 部署 kubeflow
安装
等待所有pod 都正常running ,我直接在阿里云开的美国服务器,国内镜像下载麻烦
进入 dashboard
1,Logout from the current session with the exit command
2,Re-establish connection to the machine using ssh with SOCKS proxy enabled through the -D 9999 parameter. As in the example below:
打开win 的 cmd 端操作
ssh -D 9999 ubuntu@<machine_public_ip>
3,On your computer, go to Settings > Network > Network Proxy, and enable SOCKS proxy pointing to: 127.0.0.1:9999
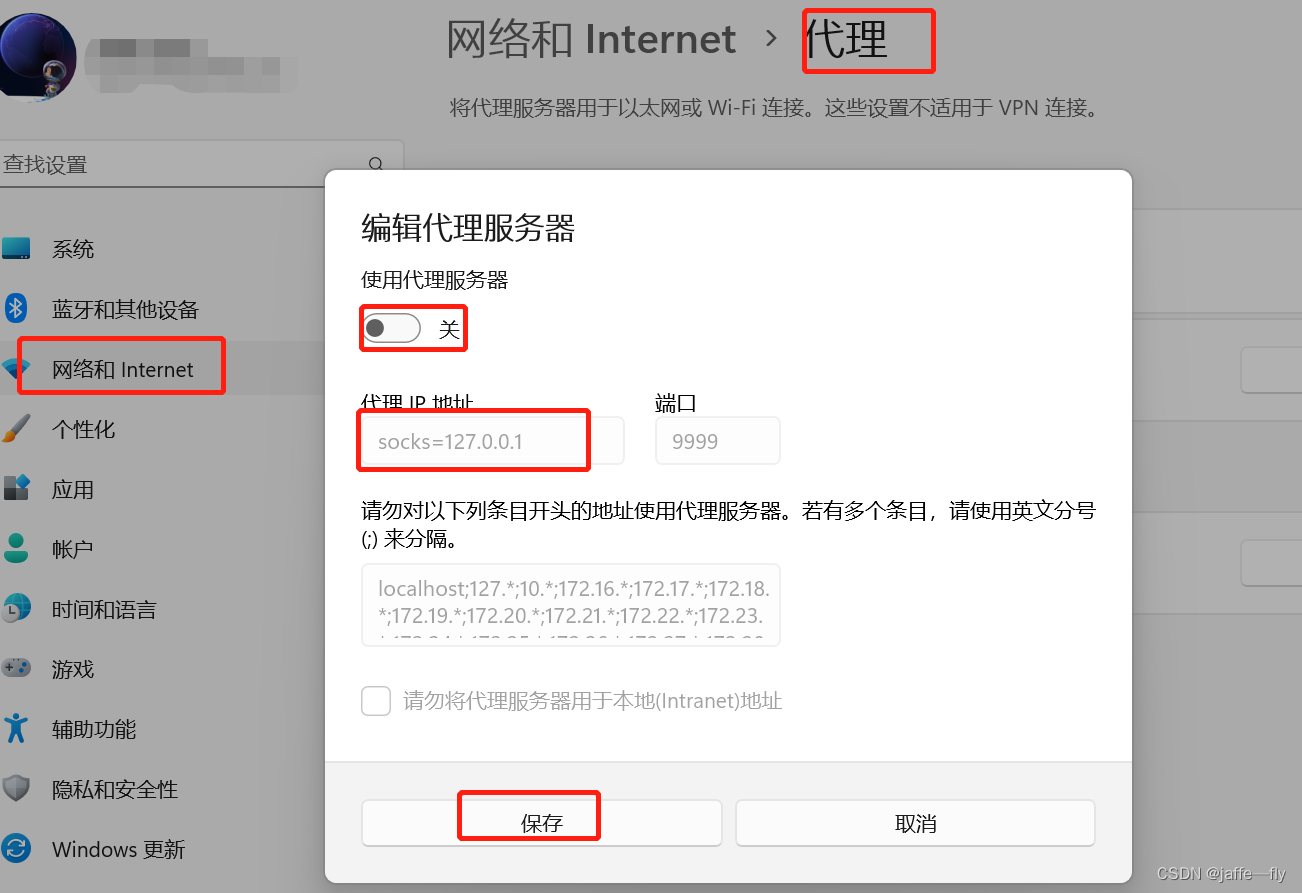
4,On a new browser window, access the link given in the previous step, appended by .nip.io, for example: http://10.64.140.43.nip.io
资料及参考
vmware 中 配置 https 证书,这个我没成功,各位成功的话反馈一下
如何玩转Kubeflow Pipelines:https://developer.aliyun.com/article/986636
https://juejin.cn/post/7124944761726697502
https://www.arrikto.com/blog/kubeflow-fundamentals-part-6-working-with-jupyter-lab-notebooks/
https://nip.io/
https://blog.csdn.net/luo15242208310/article/details/100653453
安装 certbot 1.31.0 :https://certbot.eff.org/instructions?ws=webproduct&os=centosrhel7