起因:我之前发的关于LEMP的搭建的文章,已经有3年9个月了,各个软件的版本更新了比较多。最主要的是,CentOS系统终止了,我也完全更换到了Debian系统之上。这里重新搭建了一下,主要是计划结合frp,构件一个piwigo照片管理器。对其中的问题,做一下记录。
1. 之前在CentOS系统上搭建的文章链接:Centos7.6_1810安装LEMP过程详解(nginx1.14.2+php7.3.1+MariaDB10.3.12)_lggirls的博客-CSDN博客
2.Mariadb的安装。
采用apt命令直接安装就可以是 10.5.15版。主要是对其进行设置,开启数据库通过远程登录进行管理的功能。
apt update
apt install mariadb-server
#安装结束,进行配置
mysql_secure_installation
root@Home:~# mysql -u root
##以下为mysql环境下的操作
mysql> select User, host from mysql.user ;   #查看一下当前的账户信息
mysql> GRANT ALL PRIVILEGES ON *.* TO root@'%'  IDENTIFIED BY '147258369' ; #设定root可远程登录
mysql> select User, host from mysql.user ; 再查看一下当前的账户信息,增加了一个 root   %
mysql> quit ;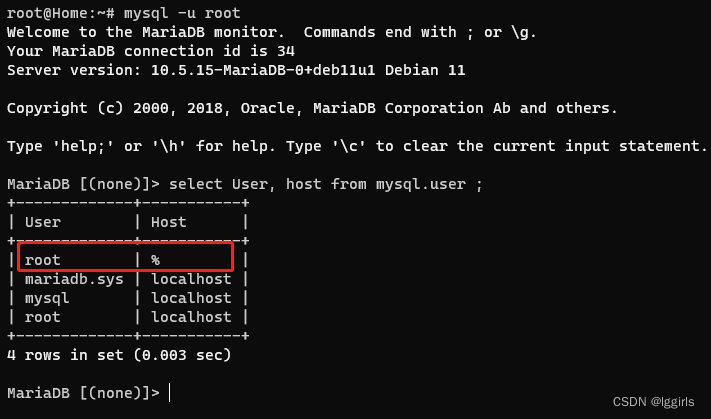
3. nginx稳定版的安装
当前nginx最常用的是1.18版,但稳定版已经发布到1.22.1了。对于系统没有最前沿要求的,可以继续apt直接装就可以了。要安装最新版,还是要按照官方说明进行前置环境的安装,然后才可以。
###以下命令是在debian11 最小化安装环境进行,没有sudo命令,直接以root账户操作的!!!
##先安装一些必要的软件。主要是下载工具,key、验证文件、源地址文件的导入工具等
 apt install curl gnupg2 ca-certificates lsb-release debian-archive-keyring

## 下载key文件,并导入
curl https://nginx.org/keys/nginx_signing.key | gpg --dearmor | tee /usr/share/keyrings/nginx-archive-keyring.gpg >/dev/null

## 对下载的文件的验证
gpg --dry-run --quiet --no-keyring --import --import-options import-show /usr/share/keyrings/nginx-archive-keyring.gpg

## 设置稳定版nginx的安装源的地址
echo "deb [signed-by=/usr/share/keyrings/nginx-archive-keyring.gpg] http://nginx.org/packages/debian `lsb_release -cs` nginx" | tee /etc/apt/sources.list.d/nginx.list

## 进行声明,告诉debian11系统,按照我们所设定的安装包来进行安装
echo -e "Package: *\nPin: origin nginx.org\nPin: release o=nginx\nPin-Priority: 900\n"     | tee /etc/apt/preferences.d/99nginx

## 真正的安装
apt update
apt install nginx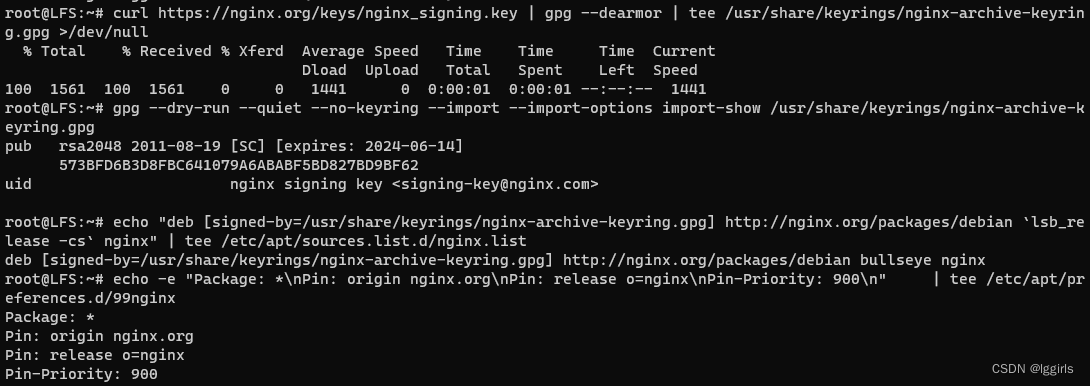

4. PHP8.1.12的安装。
其实写这个文章时,8.2已经发布了。但考虑到后继安装软件对环境的要求,还是决定安8.1。
## 彻底地卸载之前安装的某个软件,采用 purge 参数
apt purge php7.*

## 安装一些必要的东西
apt update
apt install ca-certificates apt-transport-https software-properties-common lsb-release -y
curl -sSL https://packages.sury.org/php/README.txt |  bash -x
# Ondrej PPA 库的安装
add-apt-repository ppa:ondrej/php

##正式安装 php8.1 php8.1-fpm
apt update
apt install php8.1 pbp8.1-fpm
5. Nginx 打开对php的支持
这一步做完,才能使得nginx感知和使用php8.1-fpm功能.
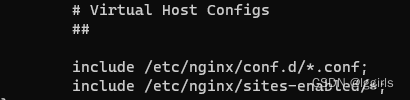
nginx在debian11系统上的运行环境配置文件: /etc/nginx/nginx.conf 可以增加mode等,其中指明了虚拟机的配置文件的地址。(一个nginx虚拟机,可以理解为一套网站的全部内容,是一个网站的根目录)
我们这里只配置其默认的自带网站的内容。
## 编辑以下默认配置文件即可
vim /etc/nginx/sites-enabled/default

#主需要修改的部分如下:
        # pass PHP scripts to FastCGI server
        #
        location ~ \.php$ {
                 include /etc/nginx/fastcgi_params;
                 fastcgi_pass unix:/run/php/php8.1-fpm.sock;
                 fastcgi_index index.php;
                 fastcgi_param SCRIPT_FILENAME
                 /usr/share/nginx/html$fastcgi_script_name;
        }

# 还要在网站的 根目录指定行下的部分,增加一个 index.php
其实就是去掉 php配置段落前的注释符号,并修改以下php版本号,指定文件位置。
重启nginx : systemctl restart nginx 重启php8.1-fpm : systemctl restart php8.1-fpm
特别注意:在centos系统中,需要对php的一个配置文件 www.conf 进行配置,一般位置为 :/etc/php-fpm.d/www.conf, 要将下列部分中的www-data改为nginx
user = www-data
group = www-data
listen.owner = www-data
listen.group = www-data
Debian11 系统中则需要查看配置文件 /etc/nginx/nginx.conf 的第一句
如果 是 www-data,则不用修改,如果是 nginx,则需要修改,也可以直接修改第一行的值为www-data.

debian11 中,php-fpm 的 www.conf 文件的地址:/etc/php/8.1/fpm/pool.d/www.conf
6.测试:
在 默认网站目录 /var/www/html/ 中新建一个 info.php 文件,内容:
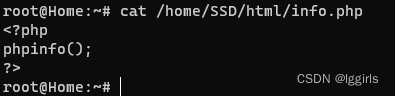
http://nginx-ip/info.php