背景(未完待续)
环境:node.js软件 、Vs code、vite、elemnt-plus、windicss(样式框架)

第一节课
1、首先,使用npm 命令构建项目( vscode安装的插件 vscode中文显示插件 2、高亮提示插件volar 3、vue 3 sni 代码提示)
a. npm -v 查看node.js 版本
b. npm config get registry 查看注册镜像是不是国内的,如果不是则执行以下命令注册成国内的。
c. npm config set registry=https://registry.npmmirror.com 切换成国内镜像
代理地址淘宝 registry=https://registry.npmmirror.com
d. 初始化工程 npm init vue@latest shop-admin -- --template vue
提示
cd shop-admin
npm install
npm run dev (启动项目)
按提示步骤依次运行
e、引入elemnt-plus 插件
安装: npm install element-plus --save
main.js引入
import ElementPlus from 'element-plus'
import 'element-plus/dist/index.css'
app.use(ElementPlus)
f、引入样式框架windicss工具库
中文地址:https://cn.windicss.org/
打开指引--vite 安装
npm i -D vite-plugin-windicss windicss
g、WindiCSS IntelliSense代码提示插件vs code 里面安装

第二课、vue路由安装
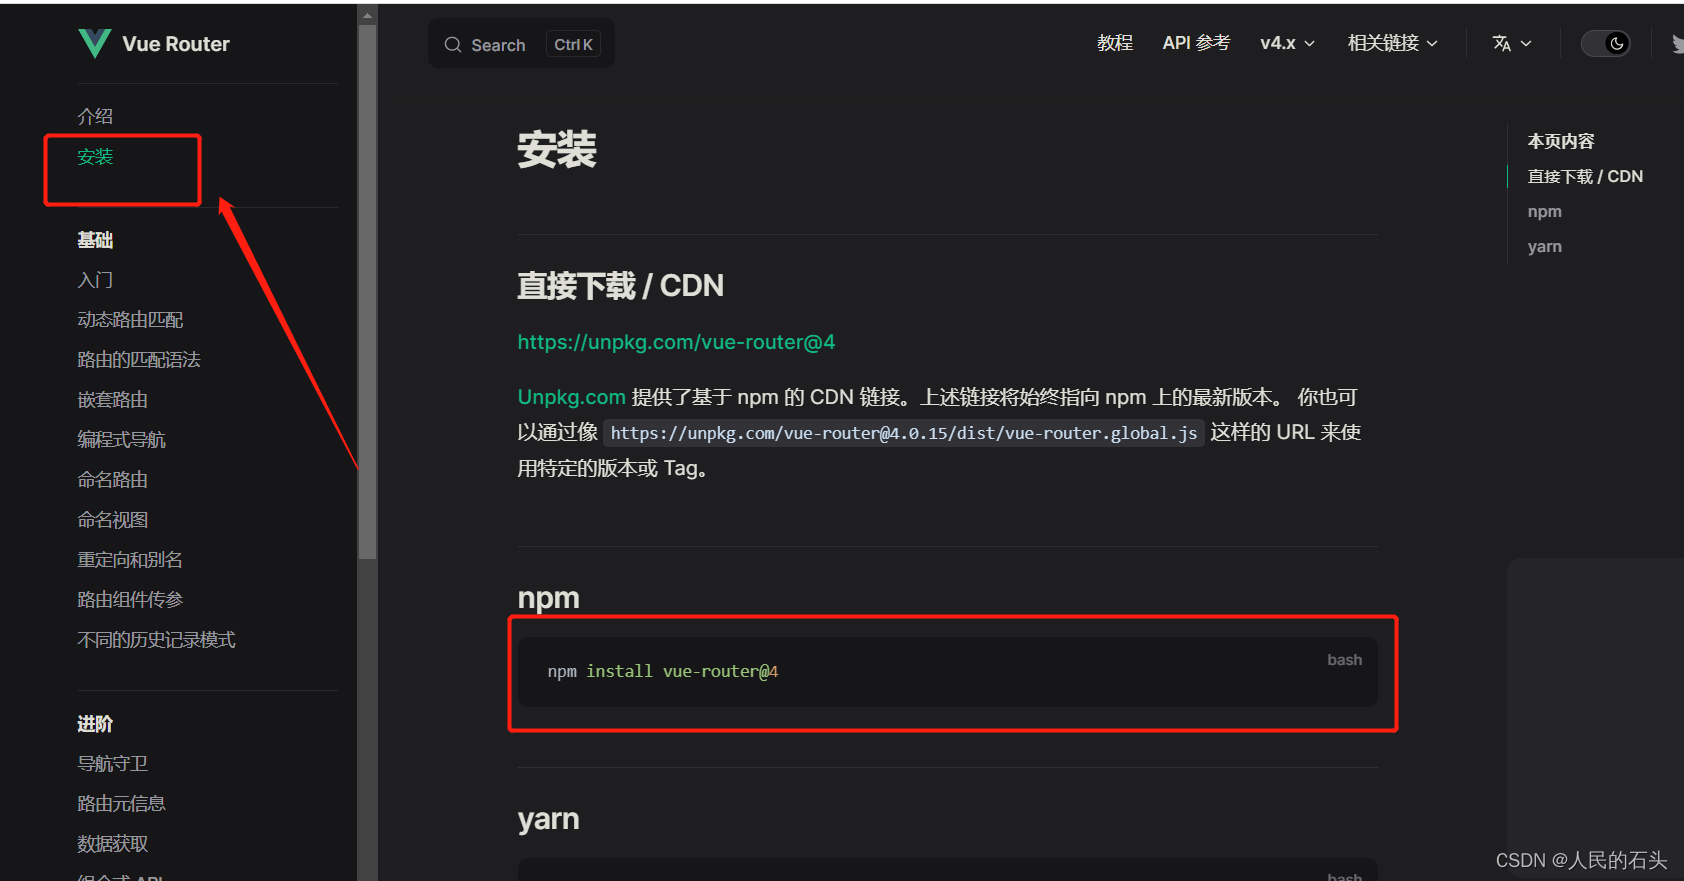
新建router文件,配置如下代码
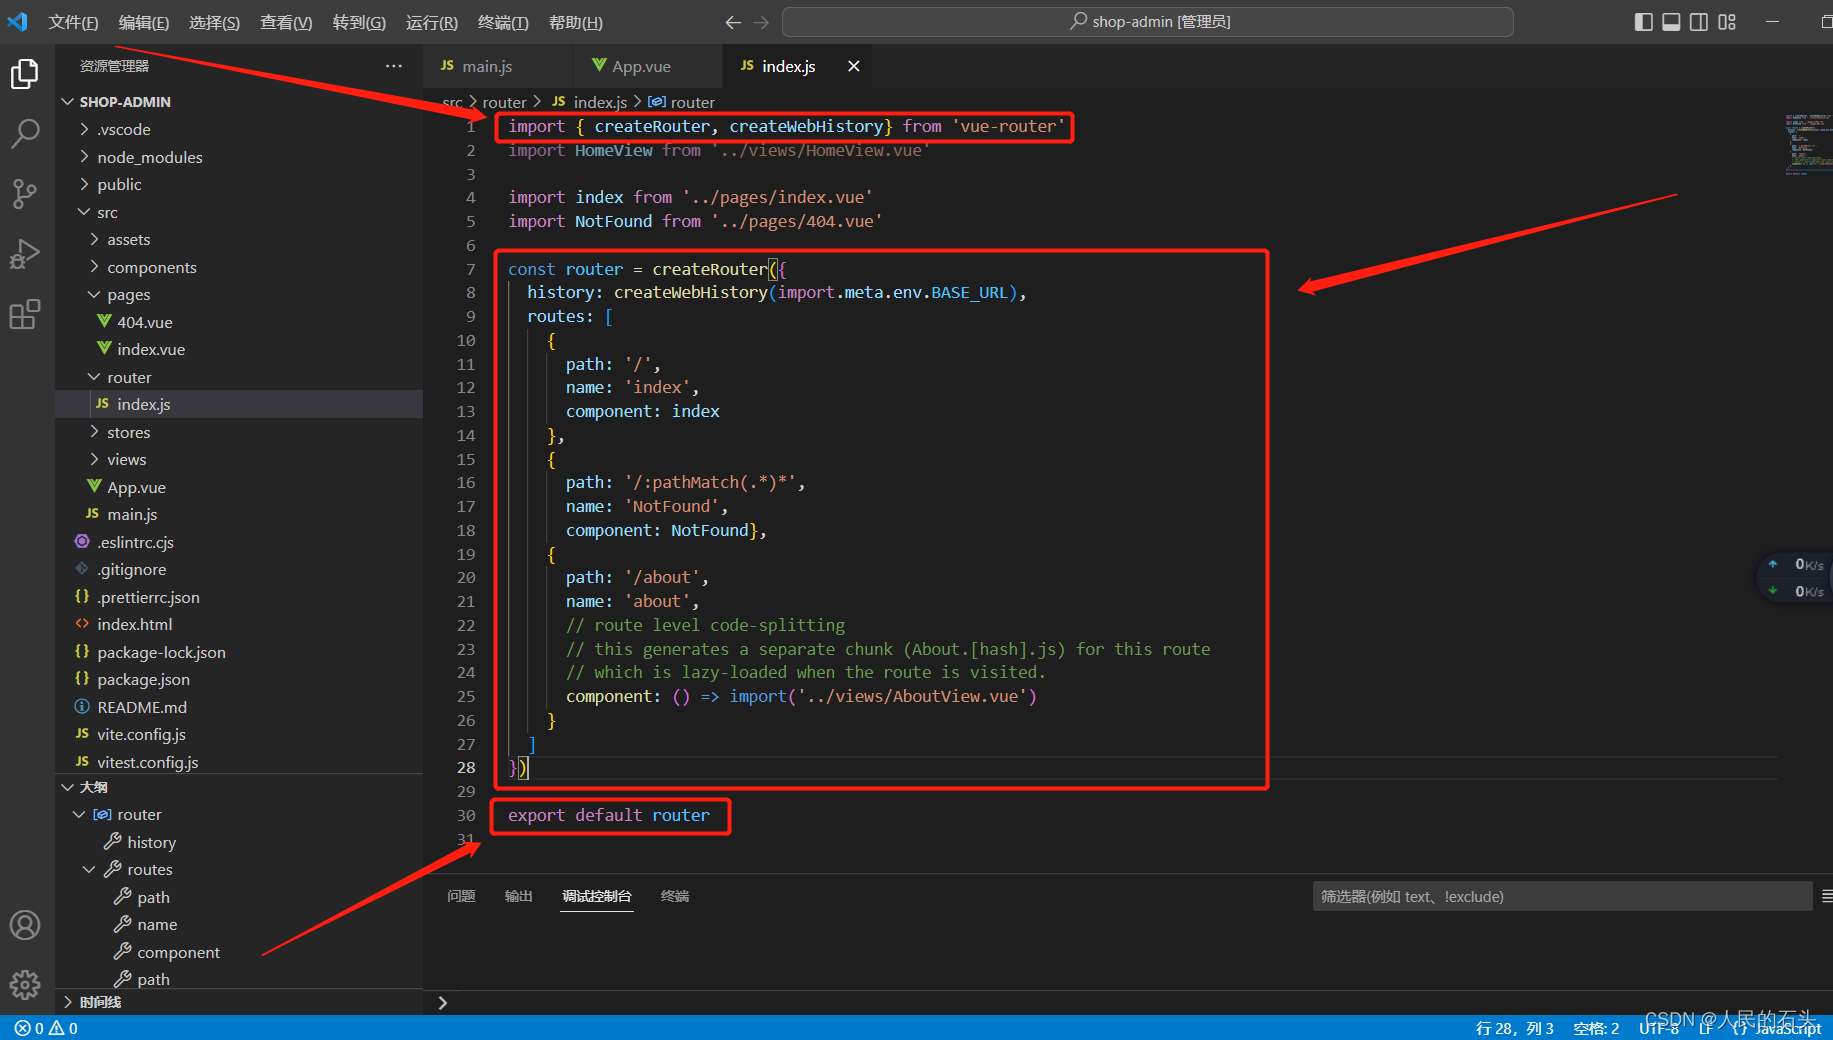
然后在main.js中引入

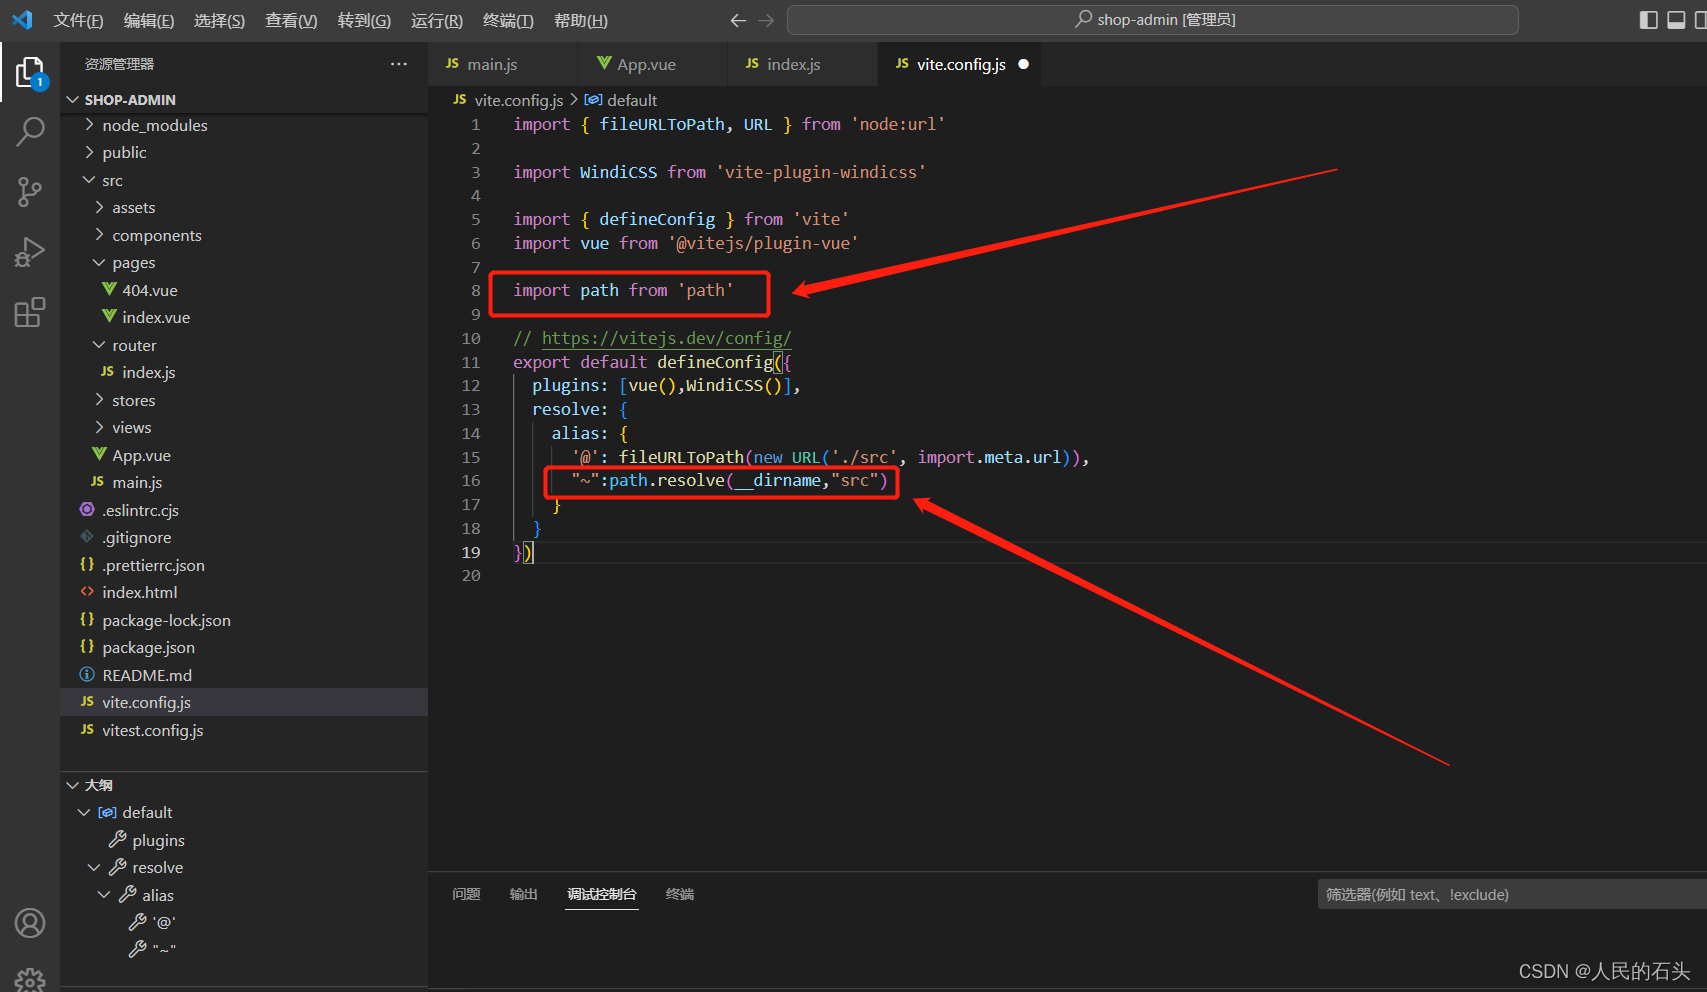
为了方便查找src目录,在vite.config.js中配置别名。
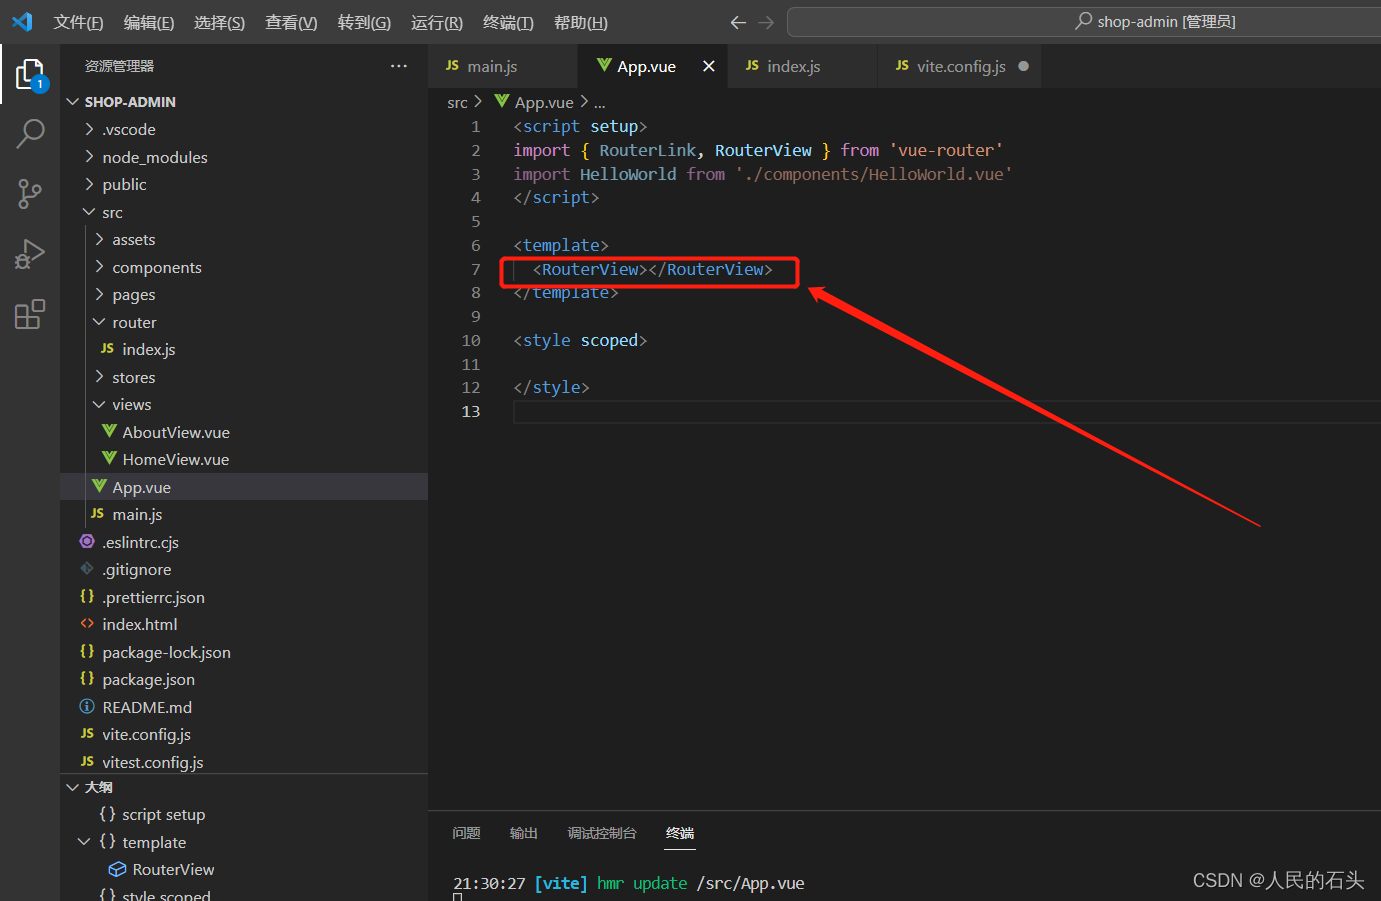
在App.vue引入
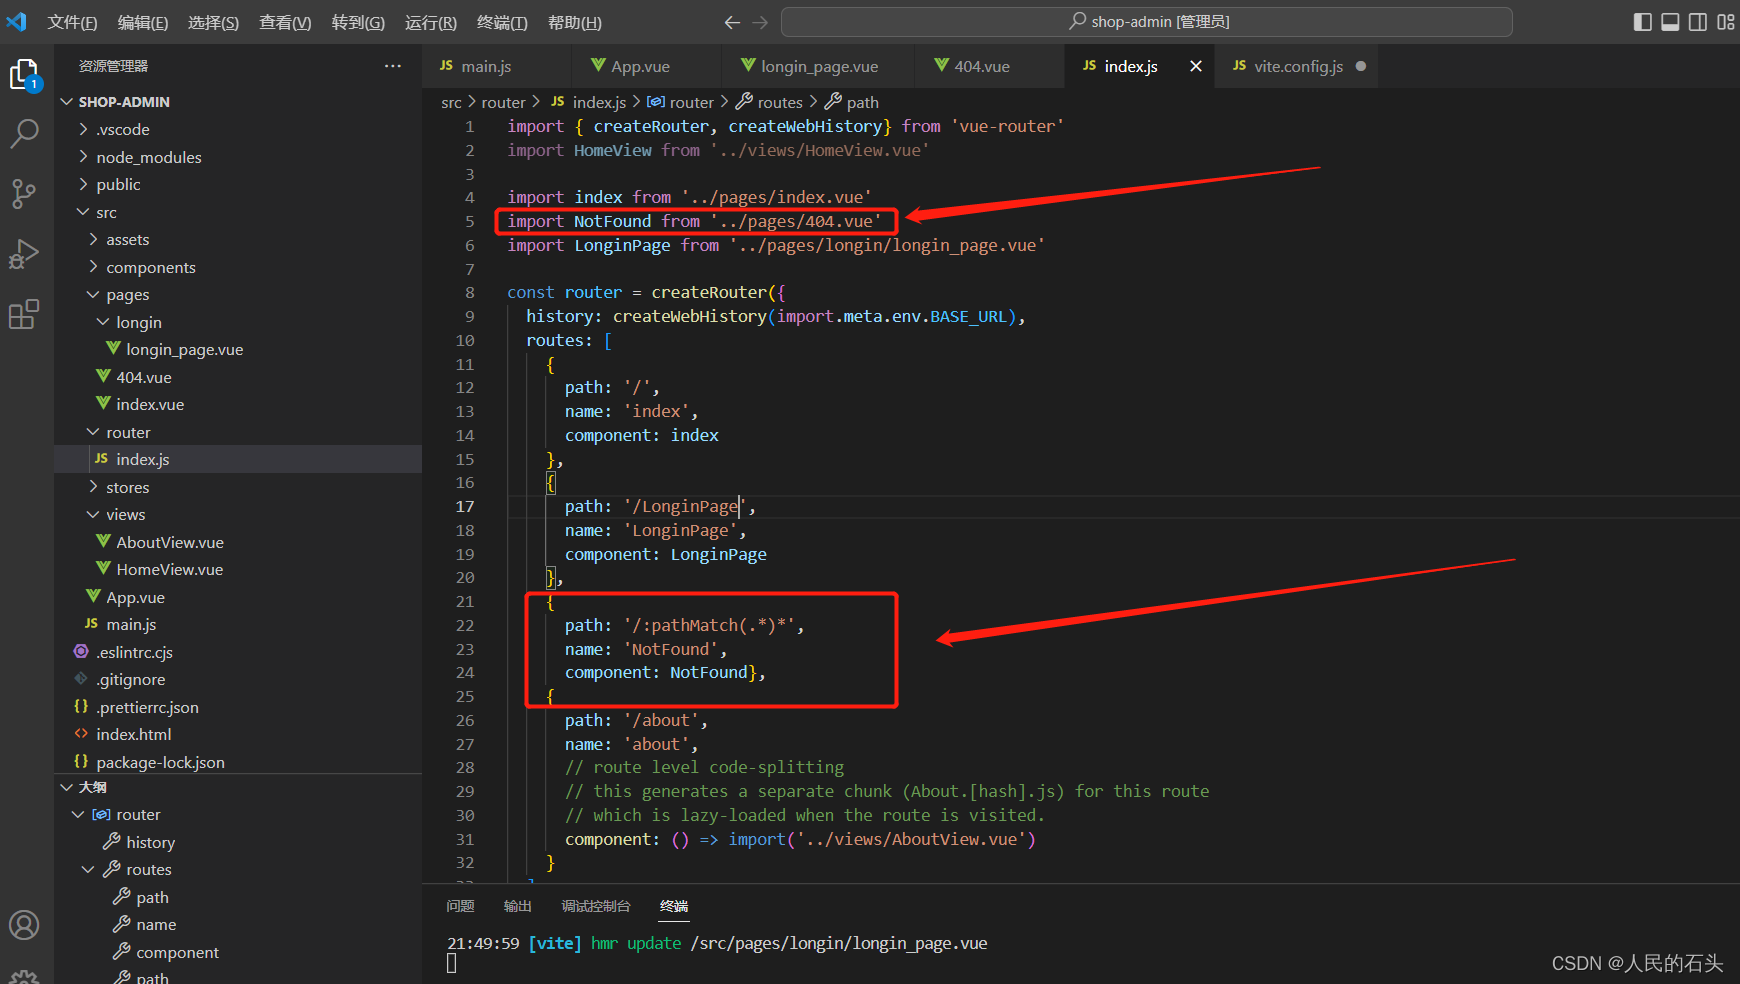
第三课 、404页面

在路由中配置
第四课、登录页面开发
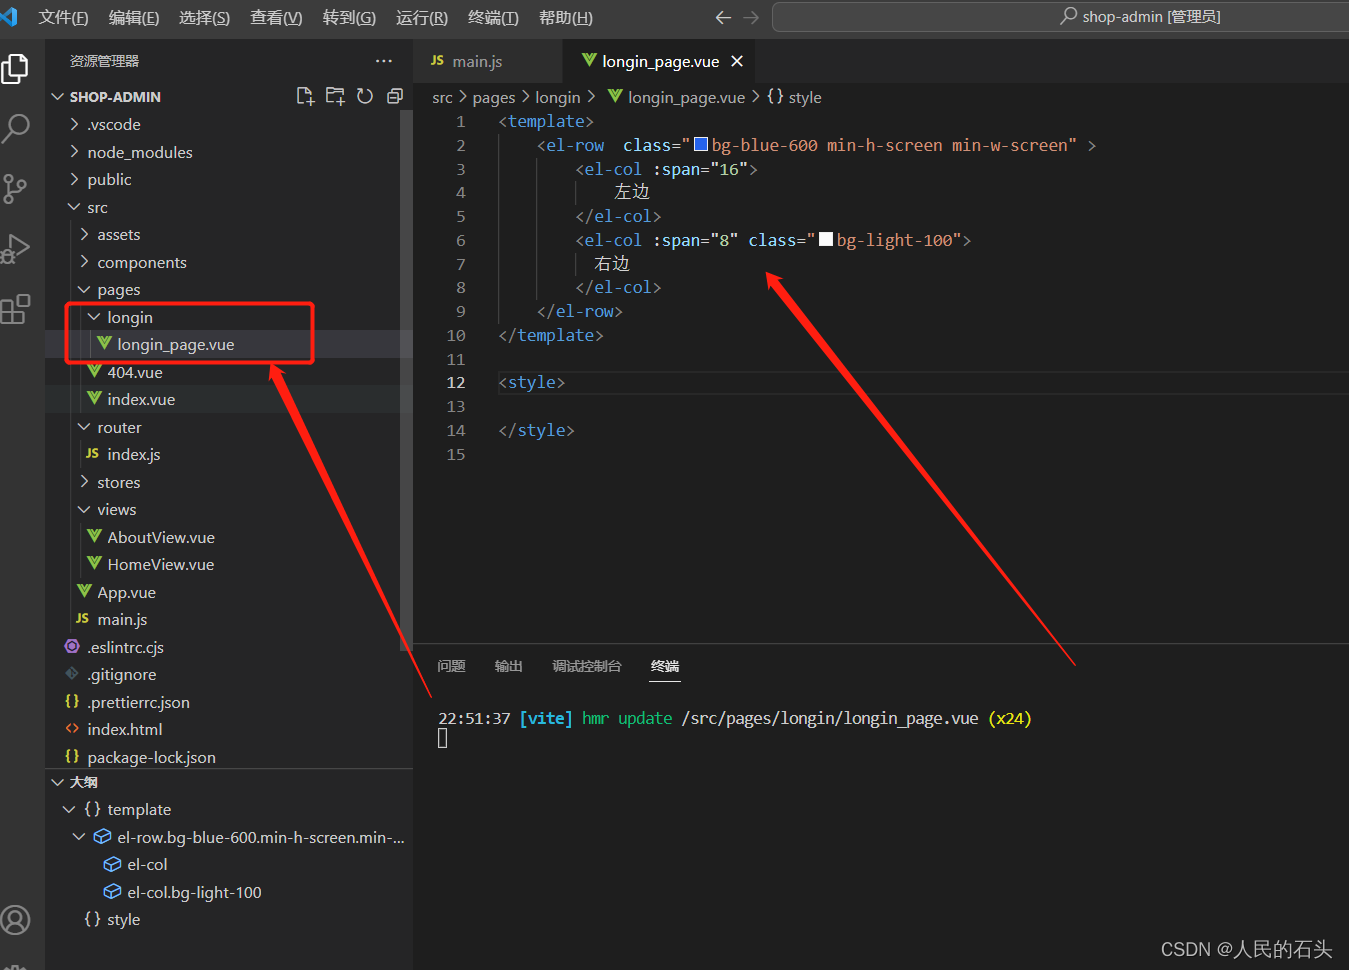
<template>
    <el-row class="min-h-screen min-w-screen bg-indigo-500">


        <el-col :lg="16" :md="12" class="login_left_md">
            <div class="flex-col">
                <div>欢迎光临</div>
                <div>此站点是《vue3 + vite实战商城后台开发》视频课程的演示地址</div>
            </div>
        </el-col>

        <el-col :lg="8" :md="12" class="login_module">

            <h2 class="font-bold text-3xl text-gray-800">欢迎回来</h2>
            <div class="">
                <span class="h-1 w-16 bg-gray-200"></span>
                <span>账号密码登录</span>
                <span class="h-[1px] w-16 bg-gray-200"></span>
            </div>

            <el-form :rules="rules" :model="form" ref="formRef" class="w-[250px]">

                <el-form-item prop="username">
                    <!-- 指定校验 prop="username"  -->
                    <el-input v-model="form.username" placeholder="请输入用户名">
                        <template #prefix>
                            <el-icon>
                                <User />
                            </el-icon>
                        </template>
                    </el-input>
                </el-form-item>

                <!-- 指定校验 prop="password"  -->
                <el-form-item prop="password">
                    <el-input v-model="form.password" placeholder="请输入密码" type="password" show-password>
                        <template #prefix>
                            <el-icon>
                                <Lock />
                            </el-icon>
                        </template>
                    </el-input>
                </el-form-item>
                <el-form-item>
                    <el-button round color="#626aef" class="w-[250px]" type="primary" @click="onSubmit">登 录</el-button>
                </el-form-item>
            </el-form>
        </el-col>

    </el-row>
</template>

<script setup>
import { ref, reactive } from 'vue'
import { User, Lock } from '@element-plus/icons-vue'
import { login } from '~/api/manager'
import { ElNotification } from 'element-plus'
import { useRouter } from 'vue-router'


const router = useRouter()
// do not use same name with ref
const form = reactive({
    username: "",
    password: ""
})

// 校验规则
const rules = {
    username: [
        {
            required: true,
            message: '用户名不能为空',
            trigger: 'blur'
        },
        {
            min: 3,
            max: 10,
            message: '用户名长度必须为3-10',
            trigger: 'blur'
        }],
    password: [
        {
            required: true,
            message: '用户名不能为空',
            trigger: 'blur'
        },
        {
            min: 3,
            max: 10,
            message: '用户名长度必须为3-10',
            trigger: 'blur'
        }
    ]
}

const formRef = ref(null)


// 登录按钮
const onSubmit = () => {
    formRef.value.validate((valid) => {
        if (!valid) {
            return false
        }
        login(form.username, form.password)
            .then(res => {
                console.log(res.data.data);

                // 提示成功
                ElNotification({
                    message: "登录成功",
                    type: 'success',
                    duration: 3000
                })

                // 存储token和用户相关信息,下节课讲

                // 跳转到后台首页
                router.push("/index")
            })
            .catch(err => {
                ElNotification({
                    message: err.response.data.msg || "请求失败",
                    type: 'error',
                    duration: 3000
                })
            })
    })

}

</script>

<style scoped>
.login_module {
    @apply bg-light-50 flex items-center justify-center flex-col;
}

.login_module>div {
    @apply flex items-center justify-center my-5 text-gray-300 space-x-2;
}

.login_left_md {
    @apply flex items-center justify-center;
}

.login_left_md>div>div:first-child {
    @apply font-bold text-5xl text-light-50 mb-4
}

.login_left_md>div>div:last-child {
    @apply text-gray-200 text-sm;
}
</style>
源码地址