前言
最近完成了暑假的最后一个任务——天气预报,特此记录博客总结。根据iPhone中天气App的功能大致可以将仿写的App分为四个界面——首页,搜索界面,添加界面,浏览界面,同时在天气预报中调用了较多的API,具体使用方法可以看这篇博客——【iOS】json数据解析以及简单的网络数据请求,这里不再说明
一、首页
对于首页,笔者将北京作为城市数组的第一个元素,后续可以通过搜索界面与添加界面对首页的城市进行添加
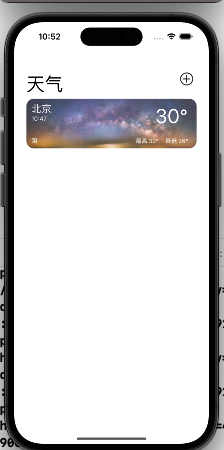
这里需要注意的是,因为我们的天气是实时变化的,所以我们只需要得到添加的城市名,然后通过城市名来得到实时的天气
另外需要注意的是因为我们的每个城市的天气的背景图片是不同的,然而我们自定义cell的在其出列时就已经被设置好,后面再去在- (UITableViewCell *)tableView:(UITableView *)tableView cellForRowAtIndexPath:(NSIndexPath *)indexPath;方法中设置背景图片就会将自定义cell中原本自定义的控件覆盖掉。
所以需要如下代码设置我们的背景图片:
    NSString *imageName = [NSString stringWithFormat:@"%ld.jpg", (indexPath.section + 1)];
    UIImage *image = [UIImage imageNamed:imageName];

    // 创建一个 UIImageView,并设置其内容为图片
    UIImageView *imageView = [[UIImageView alloc] initWithImage:image];
    imageView.frame = cell.contentView.bounds;
    imageView.contentMode = UIViewContentModeScaleAspectFill;
    imageView.clipsToBounds = YES;

    // 将 UIImageView 添加到 cell.contentView 的底部
    [cell.contentView insertSubview:imageView atIndex:0];
这样就做到了我们的背景图片不会覆盖我们cell中的控件,当然我们也可以在我们的对应的TableViewCell函数中设置我们的背景图片,只不过这样设置的背景图片比较单一,所以这里在- (UITableViewCell *)tableView:(UITableView *)tableView cellForRowAtIndexPath:(NSIndexPath *)indexPath;方法中进行设置。
二、搜索界面
首先我们来看一下我们搜索界面的效果
可以看到我们的搜索结果会根据输入的文字进行实时变化
笔者这里使用的搜索栏是UISearchBar,我们在h文件中添加对应协议使用监听,即可实现我们的搜索的实时变化
- (void)searchBar:(UISearchBar *)searchBar textDidChange:(NSString *)searchText; // called when text changes (including clear)
三、添加界面
我们先来看一下效果

可以看到我们这里利用搜索界面打开对应城市区县的天气之后点击添加按钮,相应的城市或区县就会被添加到首页,这里实际上使用了我们的通知传值,同样的,如果存在相同城市,那么就添加失败。具体有关通知传值的方法可以看这篇博客——【iOS】多界面传值
//添加界面
- (void)addCity {


    int boo = 0;
    for (id object in _hasCityArray) {

    //判断是否存在相同城市
        if ([object isEqualToString:_cityID]) {


            boo = 1;
            break;
        }
    }
    if (boo == 0) {

    //不存在
        [_dictionary setValue:_cityID forKey:@"key"];
        [[NSNotificationCenter defaultCenter] postNotificationName:@"notice" object:nil userInfo:_dictionary];
        NSLog(@"%@", _cityID);
        [self dismissViewControllerAnimated:YES completion:nil];
    } else {

    //存在
        self.alert = [UIAlertController alertControllerWithTitle:@"提示" message:@"该城市已存在" preferredStyle:UIAlertControllerStyleAlert];
        UIAlertAction *confirmAction = [UIAlertAction actionWithTitle:@"确认" style:UIAlertActionStyleDefault handler:^(UIAlertAction * _Nonnull action) {


        }];
        [self.alert addAction:confirmAction];
        [self presentViewController:self.alert animated:YES completion:nil];
    }
}

//首页界面
[[NSNotificationCenter defaultCenter] addObserver:self selector:@selector(receiveNotice:)
name:@"notice" object:nil];

- (void)receiveNotice:(NSNotification *)send {


    [_cityIDArray addObject:send.userInfo[@"key"]];
    [self createData];
}
另外在这里笔者使用了SVGKit第三方库,因为在笔者调用的API中图标是以SVG的格式给出的,但是原生的Xcode并不支持SVG格式的图片,因此需要用到第三方库SVGKit,具体怎么使用第三方库在这篇博客【iOS】Cocoapods的安装以及使用中已经讲解过如何使用。
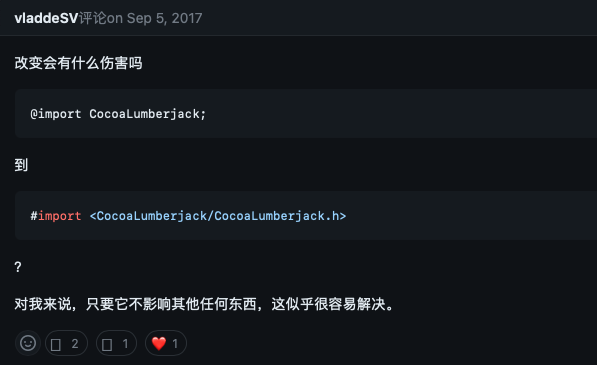
但是需要注意的一点是我们导入的SVGKit无法直接使用,会出现如下的问题 "Module 'CocoaLumberjack' not found" using CocoaPods,这是CocoaPods本身的问题,如何解决这个问题,笔者在这篇回答中找到了答案——Build problem “Module ‘CocoaLumberjack’ not found” using CocoaPods #543
笔者在这里给出部分API的调用代码供大家参考
- (void)creatUrl_Days {


//    //1.创建请求地址
    NSString *urlString = [NSString stringWithFormat:@"https://devapi.qweather.com/v7/weather/7d?location=%@&key=4c75fbc6961d404289bf6b44d9009576", _cityID];


    //处理字符
    urlString = [urlString stringByAddingPercentEncodingWithAllowedCharacters:[NSCharacterSet URLQueryAllowedCharacterSet]];
    //创建URL
    NSURL *url = [NSURL URLWithString:urlString];
    NSLog(@"%@", urlString);

    //2.创建请求类
    NSURLRequest *request = [NSURLRequest requestWithURL:url];

    //3.创建会话
    //delegateQueue 表示协议方法在哪个线程中执行
	//    NSURLSession *session = [NSURLSession sharedSession];用于简单的网络请求
    NSURLSession *session = [NSURLSession sessionWithConfiguration:[NSURLSessionConfiguration defaultSessionConfiguration] delegate:self  delegateQueue:[NSOperationQueue mainQueue]];

    //4.根据会话创建任务
    NSURLSessionDataTask *dataTask = [session dataTaskWithRequest:request completionHandler:^(NSData *data, NSURLResponse *response, NSError *error) {


        if (error) {


              // 请求出错处理
          } else {


              NSDictionary *weatherData = [NSJSONSerialization JSONObjectWithData:data options:kNilOptions error:&error];
              int count = 0;
              if (error) {


                  // 解析数据出错处理
              } else {


                  // 解析数据成功
                  NSArray *dailyArray = weatherData[@"daily"];
                  if (dailyArray.count > 0) {


                      for (NSDictionary *currentDayData in dailyArray) {


                          NSString *temperature_Low = currentDayData[@"tempMin"]; // 低
                          NSString *temperature_High = currentDayData[@"tempMax"]; // 低
                          NSString *temperature = [NSString stringWithFormat:@"%@°~%@°", temperature_Low, temperature_High];

                          NSString *timeString = currentDayData[@"fxDate"]; // 时间
                          NSLog(@"%@", timeString);
                          NSString *time = [timeString substringWithRange:NSMakeRange(5, 5)];

                          NSString *icon = currentDayData[@"iconDay"];

                          // 将时间和温度分别添加到数组中
                          [self.dayArray_Days addObject:time];
                          [self.iconArray_Days addObject:icon];
                          [self.temperatureArray_Days addObject:temperature];

//                          NSLog(@"%@的温度为:%@, 图标代码为%@", time, temperature, icon);
//                          break;
                          if (count == 0) {


                              self->_highestT.text = [NSString stringWithFormat:@"最高%@°", temperature_High];
                              self->_lowestT.text = [NSString stringWithFormat:@"最低%@°", temperature_Low];
                              count++;
                              self->_sunRise = currentDayData[@"sunrise"];
                              self->_sunSet = currentDayData[@"sunset"];
                              self->_precip = currentDayData[@"precip"];
                              self->_uvIndex = currentDayData[@"uvIndex"];
                              NSLog(@"%@, %@", self->_sunRise, currentDayData[@"sunrise"]);

                          }

                      }
                      [[NSOperationQueue mainQueue] addOperationWithBlock:^{


                          [self->_tableView2 reloadData];
                          [self->_tableView3 reloadData];
                          [self->_tableView4 reloadData];
                          [self->_tableView5 reloadData];
                          [self->_tableView6 reloadData];
                      }];
                  } else {


                      NSLog(@"无法获取当前时间的天气数据。");
                  }
              }
          }

      }];

      // 启动数据任务
      [dataTask resume];
  }
这里需要注意的是笔者这里将从API得到的数据存到对应的数组中, 然后在将数组中的元素呈现到我们的自定义cell上。
同时这里给出笔者调用的对应的API
每日天气预报
四、浏览界面
笔者这里将首页中的城市都传入了浏览界面,核心思路就是利用我们的UIScrollView,我们先前实现轮播图的思路是在UIScrollView中添加图片实现滚动,我们这里就将图片换成对应城市的视图控制器即可
//首页
- (void)tableView:(UITableView *)tableView didSelectRowAtIndexPath:(NSIndexPath *)indexPath {


    ScrollViewController *t = [[ScrollViewController alloc] init];
    t.cityIDArray = _cityIDArray;
    t.nowPage = indexPath.section;
    t.modalPresentationStyle = 0;
    [self presentViewController:t animated:YES completion:nil];
}

//ScrollViewController添加对应城市视图
for (int i = 0; i < _cityIDArray.count; i++) {


    CGFloat xOffset = i * self.view.bounds.size.width;
    MenuShowViewController *t = [[MenuShowViewController alloc] init];
    t.cityID = _cityIDArray[i];
    NSString *t1 = [NSString stringWithFormat:@"%d.jpg", (i + 1)];
    t.view.layer.contents = (__bridge id _Nullable)([UIImage imageNamed:t1].CGImage);
    t.view.frame = CGRectMake(xOffset, 0, self.view.bounds.size.width, self.view.bounds.size.height);
    [self addChildViewController:t];
    [self.scrollView addSubview:t.view];
    [t didMoveToParentViewController:self];
}
同时笔者这里给出实现pageControl固定在视图底部的实现代码
self.pageControl = [[UIPageControl alloc] initWithFrame:CGRectMake(0, self.view.bounds.size.height -
50, self.view.bounds.size.width, 50)];
self.pageControl.numberOfPages = _cityIDArray.count;
self.pageControl.currentPage = self.nowPage;
self.pageControl.pageIndicatorTintColor = [UIColor grayColor]; // 未选中页码的颜色
self.pageControl.currentPageIndicatorTintColor = [UIColor blackColor]; // 当前选中页码的颜色
[self.view addSubview:self.pageControl];
其实核心就是[self.view addSubview:self.pageControl];,无论我们的ScrollView如何滚动,我们的view是不变的,因此将pageControl添加到view中即可实现分页控件的固定
总结
暑假的App仿写已经全部写完,后面回去学习一些第三方库例如Masonry与AFNetworking