Intel Realsense d435 使用python对深度图进行预处理
本文中主要翻译一下一篇关于深度图预处理过滤器的内容,后面还会有关于距离测量的。
原文中的图像显示,是使用matplotlib.pyplot工具,在本文中,使用opencv来显示深度图》
首先常规操作导入包:
import cv2
import numpy as np
import pyrealsense2 as rs
获取我们所需要的图像,通过摄像头或者本地都可以
pipe = rs.pipeline()
cfg = rs.config()
cfg.enable_stream(rs.stream.depth,640,480,rs.format.z16,30)
cfg.enable_stream(rs.stream.color,640,480,rs.format.bgr8,30)
profile = pipe.start(cfg)

try:
    while True:
        frame = pipe.wait_for_frames()
        depth_frame = frame.get_depth_frame()
        print('capture success')
        if cv2.waitKey(10)&0xff == ord('q'):
            break

finally:
    pipe.stop()
获取成功,在终端打印信息
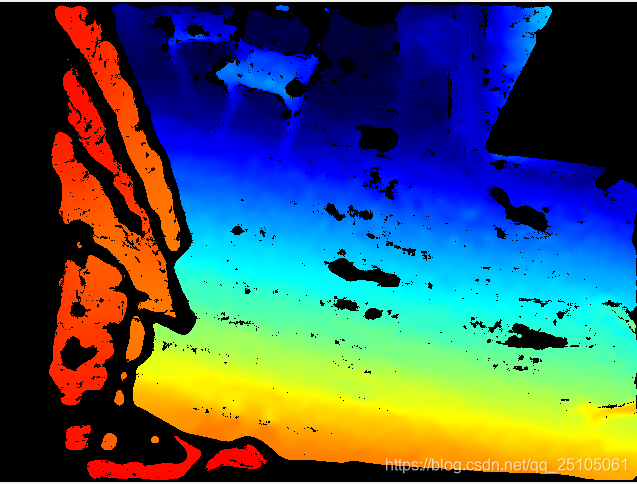
一、深度图像的可视化
使用pyrealsense2库中提供的colorizer来将图像中的深度值转为可以显示的形式:
colorizer = rs.colorizer()
colorizer_depth = np.asanyarray(colorizer.colorize(depth_frame).get_data())
cv2.imshow('colorizer depth',colorizer_depth)
二、应用过滤器
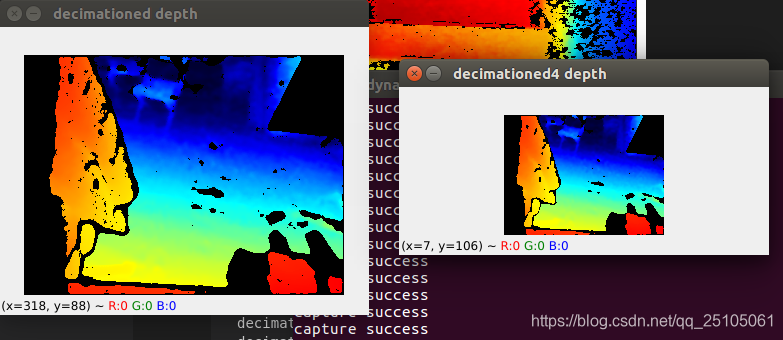
(1)抽取(Decimation)
When using Depth-from-Stereo solution, z-accuracy is related to original spacial resolution.
If you are satisfied with lower spatial resolution, the Decimation Filter will reduce spatial resolution preserving z-accuracy and performing some rudamentary hole-filling.
这段话的意思就是类似与图像处理中的降采样,图像的分辨率会降低(640x480----->320x240),但会讲一些黑色的空洞进行填充。
 		#二、抽取Decimation
        colorizer = rs.colorizer()
        decimation = rs.decimation_filter()
        decimationed_depth = decimation.process(depth_frame)
        colorized_depth = np.asanyarray(colorizer.colorize(decimationed_depth).get_data())
        cv2.imshow('decimationed depth',colorized_depth)

        #可以设置参数类似于迭代次数
        decimation.set_option(rs.option.filter_magnitude,4)
        decimationed_depth = decimation.process(depth_frame)
        colorized_depth = np.asanyarray(colorizer.colorize(decimationed_depth).get_data())
        cv2.imshow('decimationed4 depth',colorized_depth)
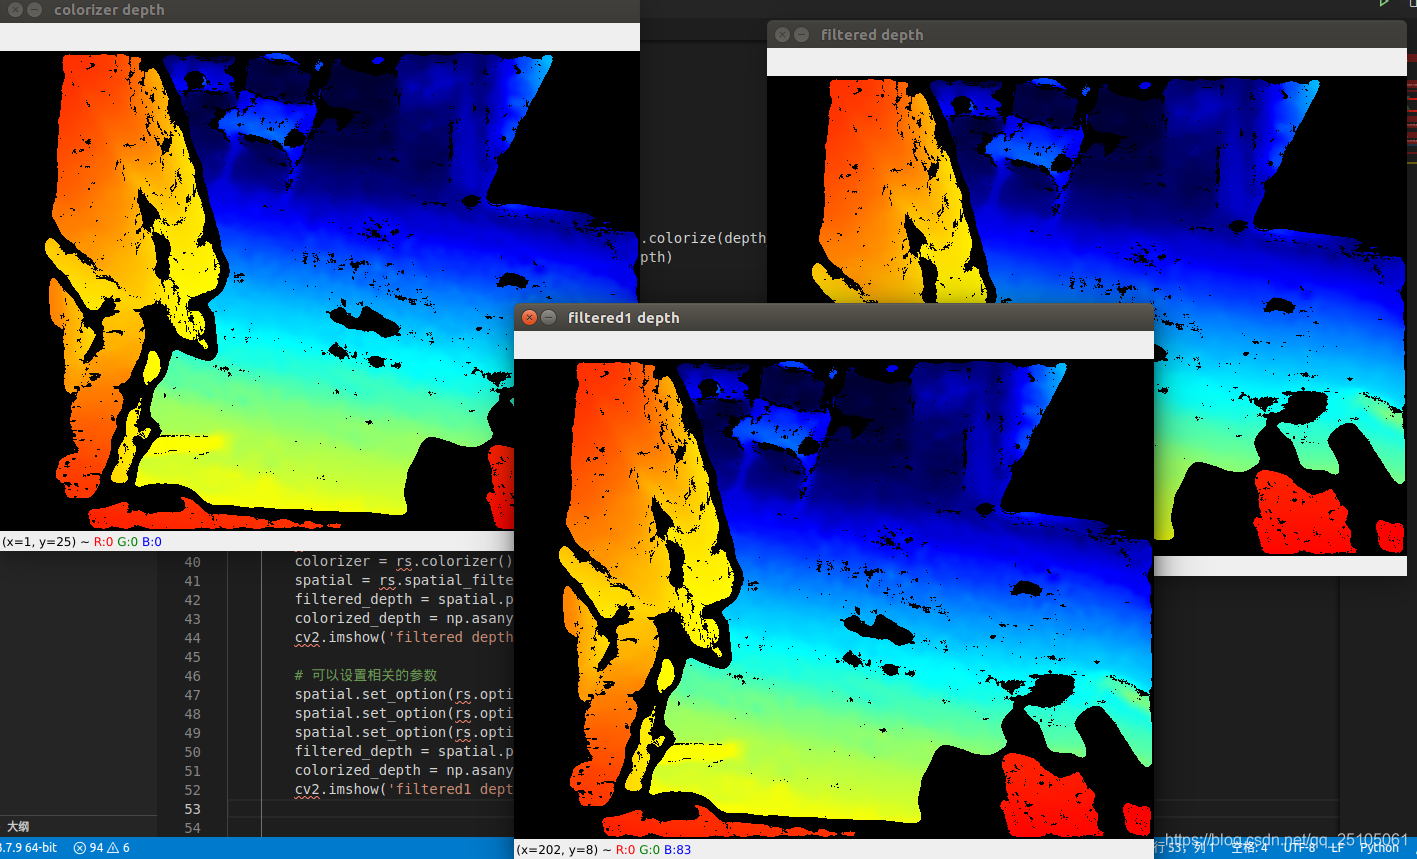
(2)空间过滤器(Spatial Filter)
空间滤波器的论文:
Domain Transform for Edge-Aware Image and Video Processing
#三、空间滤波器(spatial filter)
        colorizer = rs.colorizer()
        spatial = rs.spatial_filter()
        filtered_depth = spatial.process(depth_frame)
        colorized_depth = np.asanyarray(colorizer.colorize(filtered_depth).get_data())
        cv2.imshow('filtered depth',colorized_depth)

        # 可以设置相关的参数
        spatial.set_option(rs.option.filter_magnitude,5)
        spatial.set_option(rs.option.filter_smooth_alpha,1)
        spatial.set_option(rs.option.filter_smooth_delta,50)
        filtered_depth = spatial.process(depth_frame)
        colorized_depth = np.asanyarray(colorizer.colorize(filtered_depth).get_data())
        cv2.imshow('filtered1 depth',colorized_depth)
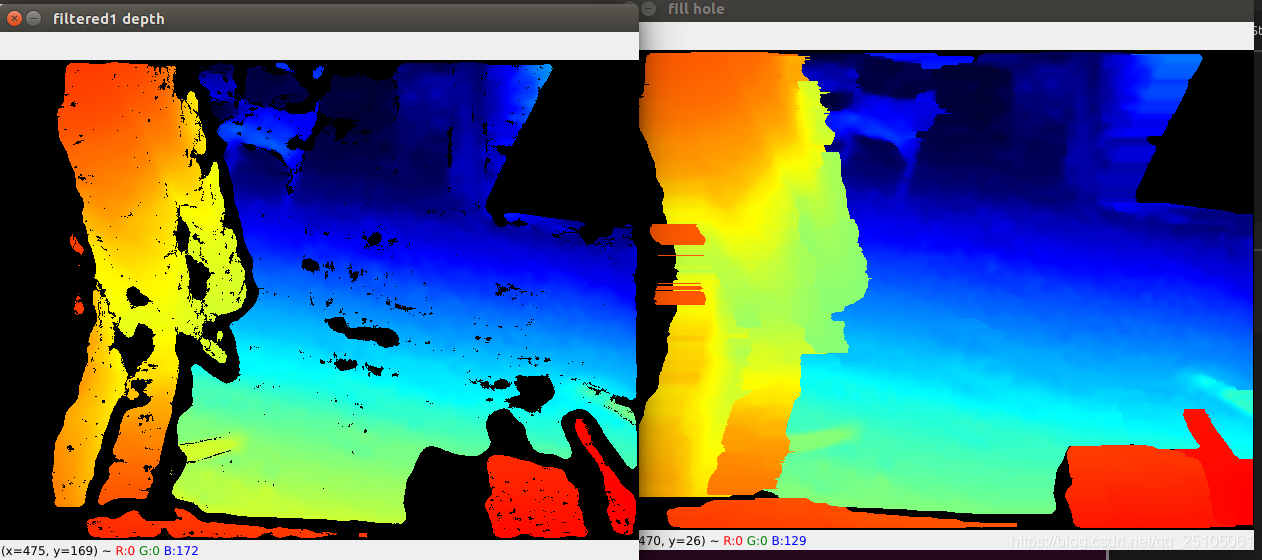
 同时,spatial也提供了一个基本的空洞填充操作:
 		spatial.set_option(rs.option.holes_fill,3)
        filtered_depth = spatial.process(depth_frame)
        colorized_depth = np.asanyarray(colorizer.colorize(filtered_depth).get_data())
        cv2.imshow('fill hole',colorized_depth)
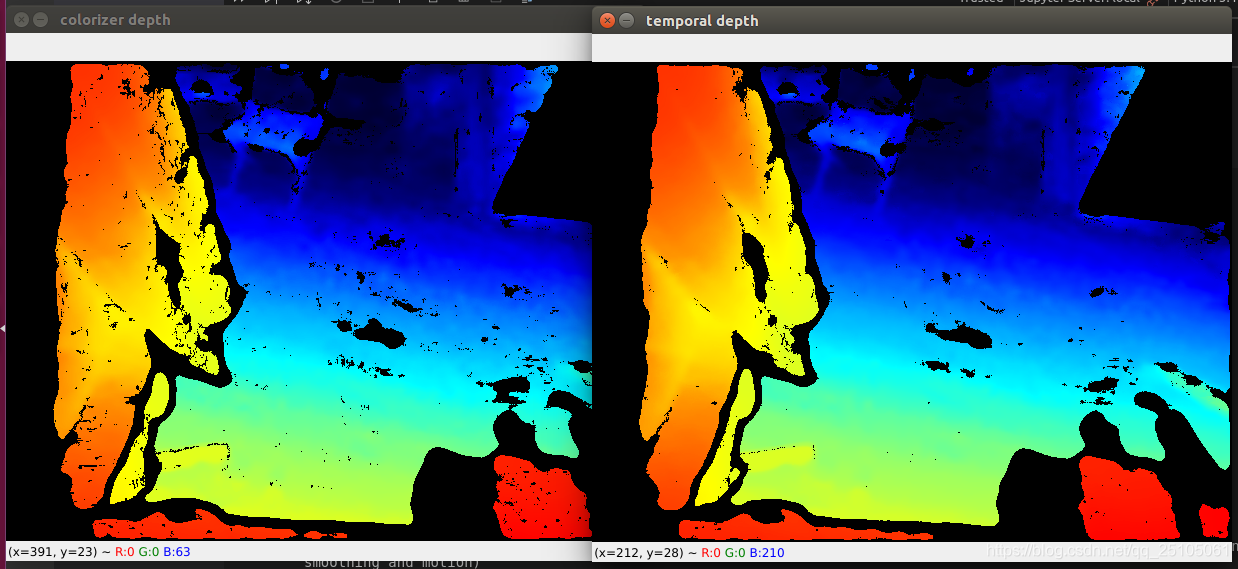
(3)时间过滤器(Temporal Filter)
Our implementation of Temporal Filter does basic temporal smoothing and hole-filling. It is meaningless when applied to a single frame, so let’s capture several consecutive frames:
我们对“时间过滤器”的实现实现了基本的时间平滑和孔填充。 当应用于单个帧时它是没有意义的,因此让我们捕获几个连续的帧:
 #四、时间滤波器(Temporal Filter)
        colorizer = rs.colorizer()

        frames.append(depth_frame)
        i += 1
        if i == 10:
            i = 0
            temporal = rs.temporal_filter()
            print(len(frames))
            for x in range(10):
                temp_filtered = temporal.process(frames[x])
            frames = []
            colorized_depth = np.asanyarray(colorizer.colorize(temp_filtered).get_data())
            cv2.imshow('temporal depth',colorized_depth)
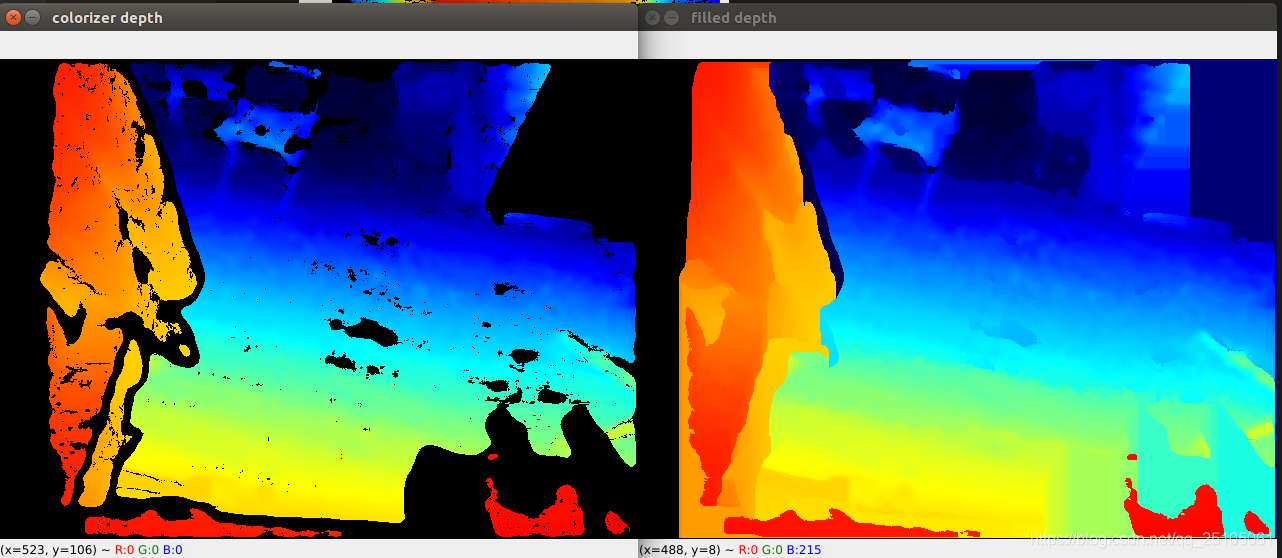
(4)孔填充(Hole Filling)
Hole Filling filter offers additional layer of depth exterpolation:
孔填充过滤器提供了深度外推的附加层:
#五、孔填充(Hole Filling)
        colorizer = rs.colorizer()
        hole_filling = rs.hole_filling_filter()
        filled_depth = hole_filling.process(depth_frame)
        colorized_depth = np.asanyarray(colorizer.colorize(filled_depth).get_data())
        cv2.imshow('filled depth',colorized_depth)
(5)放在一起(Putting Everything Together)
These filters work best when applied sequentially one after another. At longer range, it also helps using disparity_transform to switch from depth representation to disparity form:
依次顺序应用这些过滤器时,效果最佳。 在更大范围内,它还有助于使用disparity_transform从深度表示转换为视差形式:
#六、复合多个滤波器
        colorizer = rs.colorizer()
        depth_to_disparity = rs.disparity_transform(True)
        disparity_to_depth = rs.disparity_transform(False)

        decimation = rs.decimation_filter()
        spatial = rs.spatial_filter()
        temporal = rs.temporal_filter()
        hole_filling = rs.hole_filling_filter()


        frames.append(depth_frame)
        i += 1
        if i == 10:
            i = 0
            for x in range(10):
                frame = frames[x]
                frame = decimation.process(frame)
                frame = depth_to_disparity.process(frame)
                frame = spatial.process(frame)
                frame = temporal.process(frame)
                frame = disparity_to_depth.process(frame)
                frame = hole_filling.process(frame)
            frames = []
            colorized_depth = np.asanyarray(colorizer.colorize(frame).get_data())
            cv2.imshow('more depth filter',colorized_depth)
