文章目录
简介
TensorFlow是一种端到端开源机器学习平台,它提供了一个全面而灵活的生态系统,包含各种工具、库和社区资源,能够助力研究人员推动先进机器学习技术的发展。在TensorFlow机器学习框架下,开发者能够轻松地构建和部署由机器学习提供支持的应用。[2]
Keras是一个高层次神经网络 API,适用于快速构建原型、高级研究和生产。它作为TensorFlow的一个接口,可以兼容多种深度学习框架。Keras 的核心数据结构是 model,一种组织网络层的方式。最简单的模型是 Sequential 顺序模型,它由多个网络层线性堆叠。对于更复杂的结构,你应该使用 Keras 函数式 API,它允许构建任意的神经网络图。 Keras最开始是为研究人员开发的,其目的在于快速实验,具有相同的代码可以在CPU或GPU上无缝切换运行的特点,同时也具有用户友好的API,方便快速地开发深度学习模型的原型。
Keras使用类sklearn的api接口来调用tensorflow,从sklearn机器学习中切换过来,更加容易上手。
Tenforflow2.0后直接内置可keras。
运行硬件
TensorFlow支持在CPU和GPU上运行。GPU(图形处理单元)是一种专门用于加速计算的硬件,它可以大大提高深度学习模型的训练速度。相对而言,CPU(中央处理器)的每个核心具有更强大的处理能力,但它们的数量通常非常有限,因此在处理大数据时它们表现不佳。
TensorFlow GPU和CPU的主要区别在于如何使用硬件来处理计算任务,以及处理速度的差异。在CPU上,TensorFlow利用所有可用的CPU内核并将任务分配给它们,这可能需要几分钟或几小时来完成。在GPU上,TensorFlow使用CUDA(Compute Unified Device Architecture)技术来利用GPU进行并行计算并加速训练过程,因为GPU拥有数百到数千个小型核心,这比CPU的几十个核心要多得多。这使得TensorFlow能够在GPU上实现更快的训练速度和更高的吞吐量,尤其是在处理大规模的深度学习任务时。
另外需要注意的是,如果你的计算机没有安装专门的GPU,则无法使用TensorFlow GPU。在这种情况下,TensorFlow会使用CPU作为默认选项,但是训练过程会比在GPU上慢得多。因此,如果你需要进行大量的深度学习训练任务,建议使用具有至少一张GPU的计算机来加速训练。
总之,TensorFlow GPU和CPU之间的区别在于它们的硬件架构、并行计算能力以及处理速度等方面。当进行大规模的深度学习训练时,使用GPU可以显著提高训练速度和吞吐量,而对于较小的任务或者没有专门GPU的计算机,则应该使用CPU。
cuda和cuddn
CUDA(Compute Unified Device Architecture)是一种由NVIDIA公司开发的并行计算平台和编程模型,它允许开发人员使用标准C/C++语言编写基于GPU的高性能应用程序。CUDA包括一个可编程的内核语言(CUDA C/C++),一个并行计算库(CUDA Toolkit),以及驱动程序和硬件架构,支持对NVIDIA GPU进行高性能并行计算。与CPU相比,GPU在并行处理任务时的性能要高得多,因此CUDA被广泛用于深度学习、科学计算和高性能计算等领域。[2]
cuDNN(CUDA Deep Neural Network library)是NVIDIA CUDA的一个加速库,它提供了一组高度优化的本地函数,用于加速深度神经网络模型的训练和推理。cuDNN主要用于卷积神经网络(CNNs)和递归神经网络(RNNs)等深度学习模型的优化,从而实现更快的训练和推理速度。cuDNN支持多种深度学习框架,包括TensorFlow,PyTorch和Caffe等。[1]
因此,CUDA是一种GPU计算平台和编程模型,cuDNN是其中一个加速库,专门用于加速深度学习模型的训练和推理。这两个技术结合起来,可以实现对GPU的高性能并行计算和深度学习模型的优化,从而提高深度学习任务的整体性能。
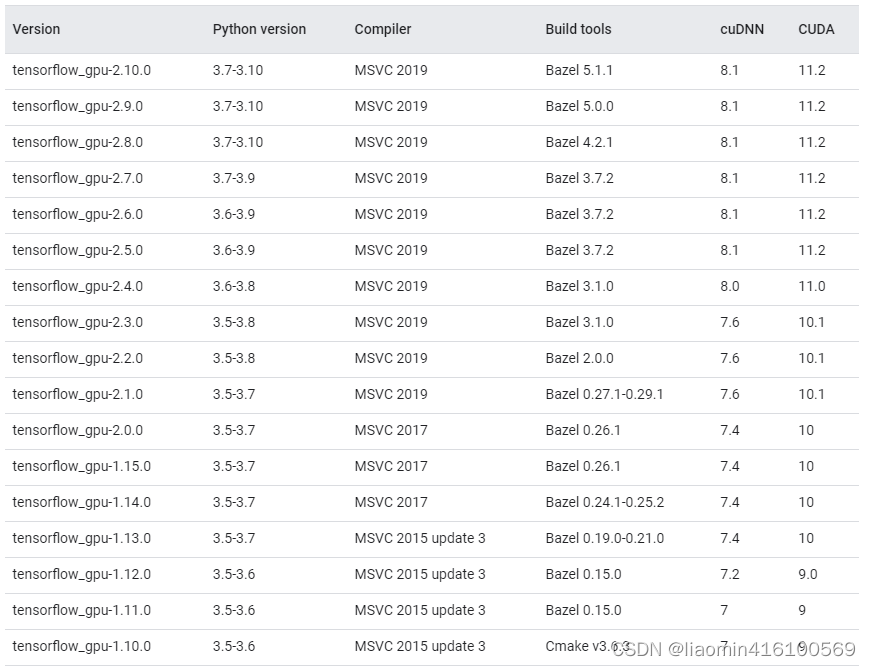
不同的tensorflow版本需要不同的cuda和cuddn版本,google官网可查看
https://tensorflow.google.cn/install/source_windows?hl=en
如果电脑有gpu建议安装tensorflow-gpu,如果电脑没有gpu安装性能较差的tensorflow
打开任务管理器-性能,查看你是否支持gpu
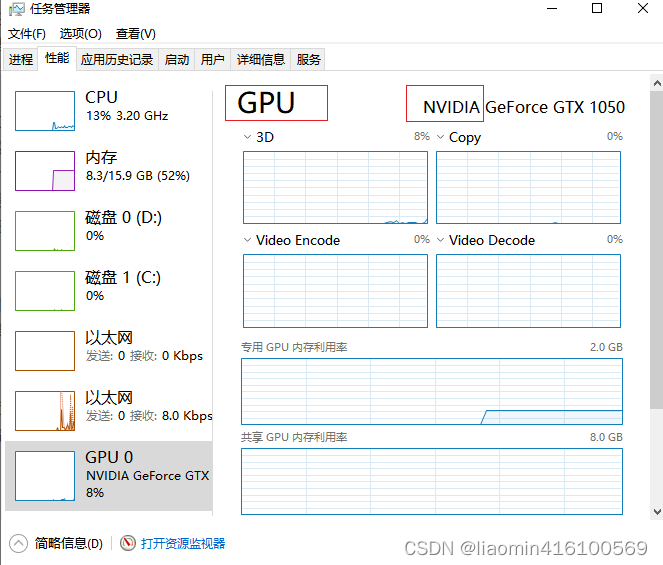
从这里我们可以看到我的cpu是英伟达(nvidia)的gtx1050
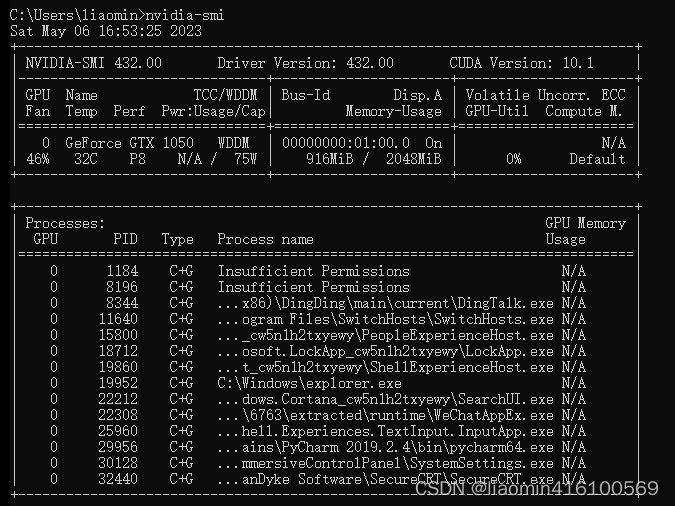
如果电脑已经安装显卡驱动,cuda肯定是自带的,我们可以使用nvidia-smi命令查看
tensorflow安装。
tensorflow版本
tensorflow-gpu需要至少4GB的GPU显存才能运行,并且在训练模型时需要大量的计算资源。而tensorflow-cpu则是专门为CPU设计的版本,能够在CPU上高效地运行,同时不需要GPU显存。一般pc电脑的环境中,建议使用tensorflow-cpu会更加适合。当然,如果你未来有升级GPU的计划,可以考虑使用tensorflow-gpu。
安装Anaconda
首先我们安装Anaconda,教程参考:
打开命令行
同时这里建议使用anaconda的替代方案mamba,因为conda包多了之后安装超级慢,会让你崩溃的,mamba基本匹配pip的速度,官网。
在window上打开powershell,执行web命令下载压缩包
mkdir d:\green\mamba && cd d:\green\mamba
Invoke-Webrequest -URI https://micro.mamba.pm/api/micromamba/win-64/latest -OutFile micromamba.tar.bz2
tar xf micromamba.tar.bz2
比如我的下载这里,直接将解压路径添加到path环境变量中

其他命令就和conda一样了,比如
micromamba env list
micomamba activate base
创建python环境
在其他盘创建一个环境,假设使用python3.7版本
conda create --prefix=d:\condaenv\env_name python=3.7
micromamba create --prefix=d:\condaenv\env_name python=3.7 -c conda-forge
切换
activate d:\condaenv\env_name
(d:\condaenv\env_name) C:\Users\liaomin>python --version
Python 3.7.4
安装tensorflow-gpu
通过版本关系图
可以确定我们可以使用python3.7版本安装tensorflow-gpu 2.0.0以上所有版本,我们选择一个2.6.0
#设置镜像源
conda config --add channels    https://mirrors.tuna.tsinghua.edu.cn/anaconda/pkgs/free/
conda config --add channels    https://mirrors.tuna.tsinghua.edu.cn/anaconda/pkgs/main/
conda config --add channels    https://mirrors.tuna.tsinghua.edu.cn/anaconda/cloud/conda-forge/
#安装tensorflow-gpu
conda install tensorflow-gpu==2.6.0
#或者(建议用mamba)
micomamba install tensorflow-gpu==2.6.0
#如果是cpu版本直接
micomamba install tensorflow==2.6.0
安装完成我们先不急着安装cuddn和cuda可以先写个helloworld测试下
pycharm配置
配置conda环境
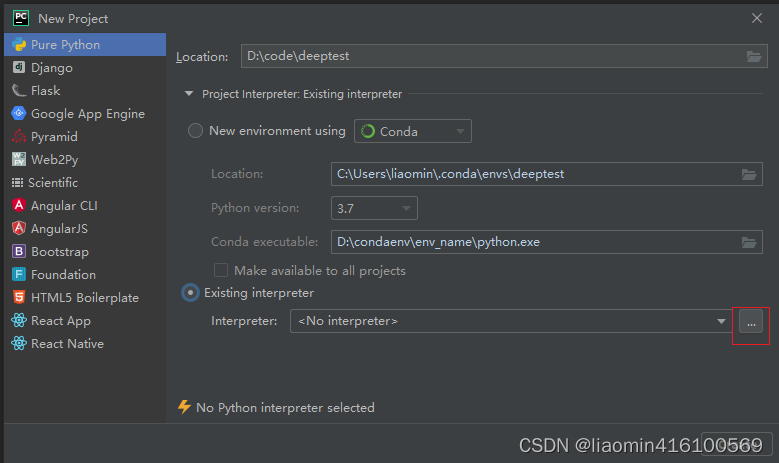
创建一个项目pure python项目,点击project interpreter 选择Existing interpreter,点击右侧的…
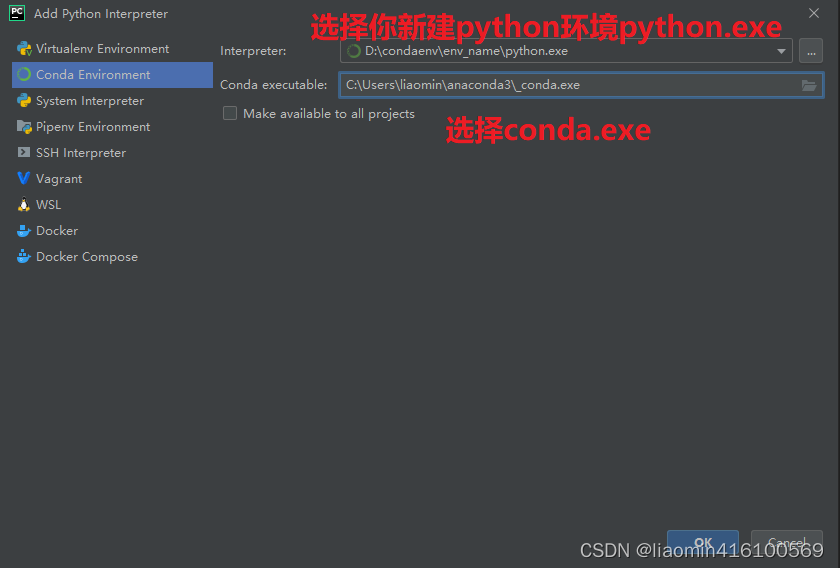
选择conda environment
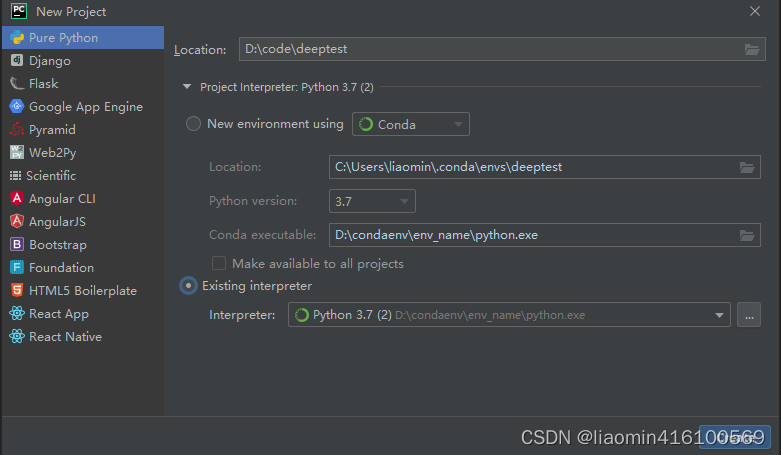
然后点击ok 在interpreter下拉框中选择刚新建的那个
编写一段helloworld代码
import tensorflow as tf

# 创建一个常量张量
x = tf.constant([1, 2, 3])

# 创建一个变量张量
y = tf.Variable([3, 2, 1])

# 计算两个张量的和
z = tf.add(x, y)

# 输出结果
print(z.numpy())
运行,虽然能输出结果[4 4 4],但是有红色警告
2023-05-06 16:43:35.610912: W tensorflow/stream_executor/platform/default/dso_loader.cc:64] Could not load dynamic library 'cudart64_110.dll'; dlerror: cudart64_110.dll not found
#下面这段是安装好cuda后报的错。
2023-05-06 17:37:38.727999: W tensorflow/stream_executor/platform/default/dso_loader.cc:64] Could not load dynamic library 'cudnn64_8.dll'; dlerror: cudnn64_8.dll not found
2023-05-06 17:37:38.728345: W tensorflow/core/common_runtime/gpu/gpu_device.cc:1835] Cannot dlopen some GPU libraries. Please make sure the missing libraries mentioned above are installed properly if you would like to use GPU. Follow the guide at https://www.tensorflow.org/install/gpu for how to download and setup the required libraries for your platform.
Skipping registering GPU devices...
2023-05-06 17:37:38.729310: I tensorflow/core/platform/cpu_feature_guard.cc:142] This TensorFlow binary is optimized with oneAPI Deep Neural Network Library (oneDNN) to use the following CPU instructions in performance-critical operations:  AVX AVX2
To enable them in other operations, rebuild TensorFlow with the appropriate compiler flags.
显然缺少cuda和cudnn,注意这里缺少cudart64_110.dll并不是说cuda就是110版本,实际你11.2安装后也是这个dll。
配置juypternotebook
打开anaconda prompt,并且激活你新穿件的环境,安装jupyter
conda install jupyter notebook
#或者(建议用mamba)
micomamba install jupyter notebook
在pycharm中右键创建一个notebook
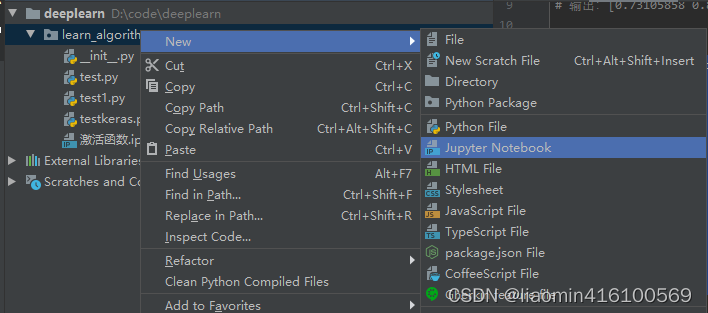
输入之前的helloword代码,选择运行或者调试
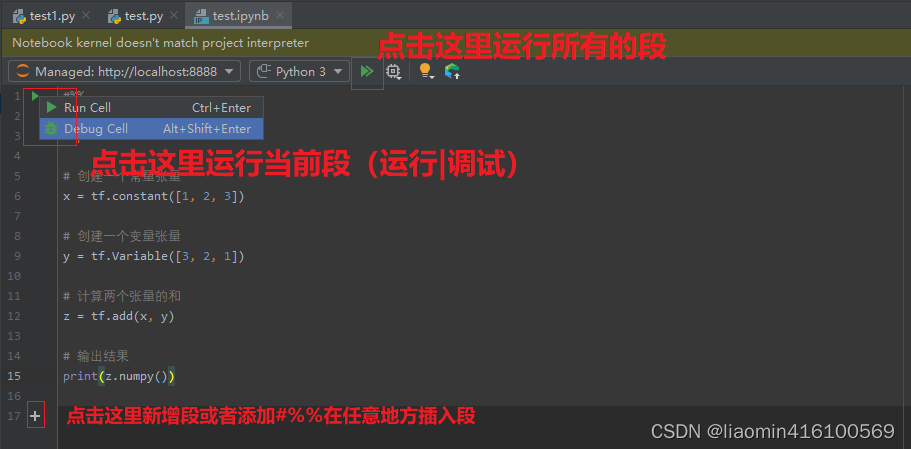
右侧输出结果
安装cuda
通过版本关系图,我们知道tensorflow-gpu 2.6.0需要安装11.2的cuda
如果是cpu版本无需安装
cuda历史版本下载位置,下载对应版本安装
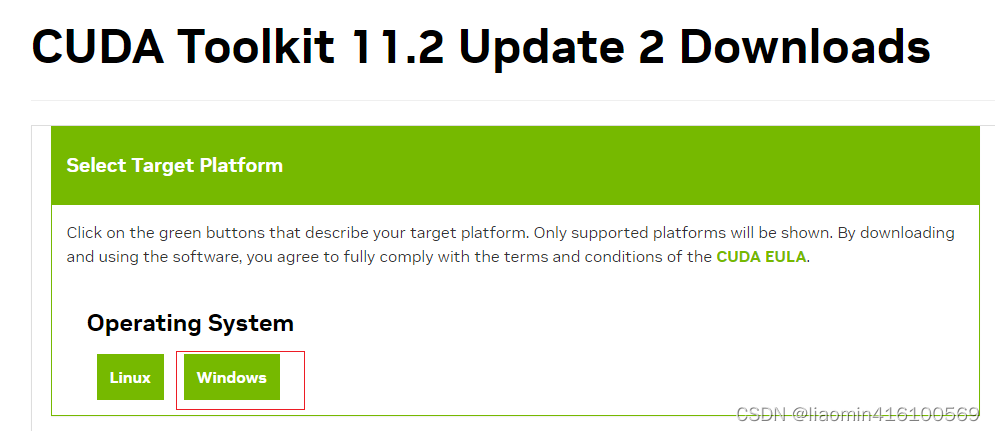
这里有三个版本选择最高的11.2.2

点击进入后 选择window版本
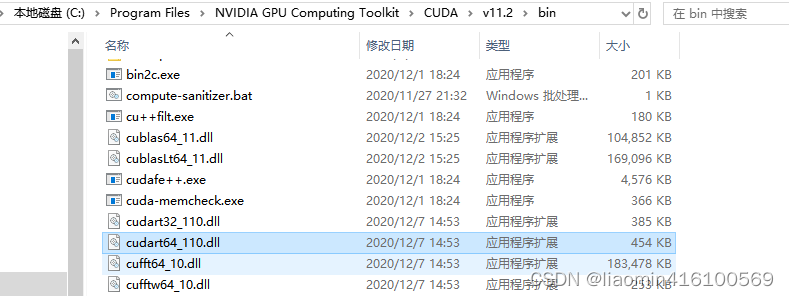
默认安装路径是C:\Program Files\NVIDIA GPU Computing Toolkit\CUDA
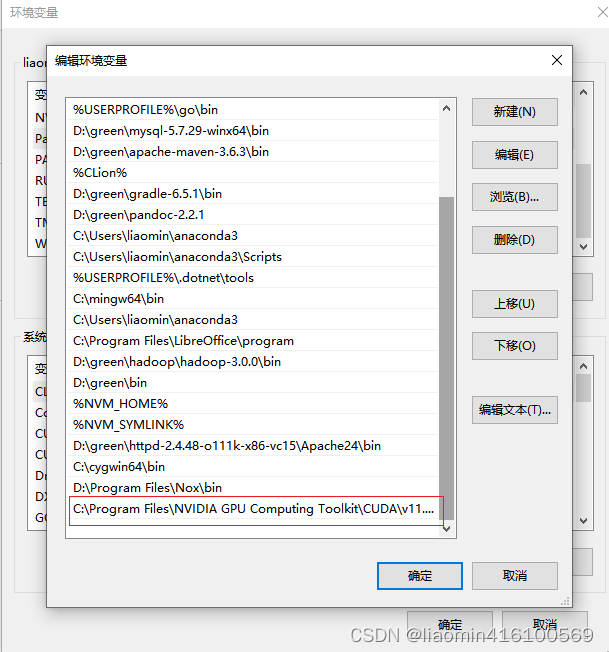
打开电脑设置——>系统——>系统高级设置——>环境变量——>系统变量——>PATH
将C:\Program Files\NVIDIA GPU Computing Toolkit\CUDA\v11.2\bin加入到环境变量PATH中
cmd重新执行nvidia-smi,发现版本更新了
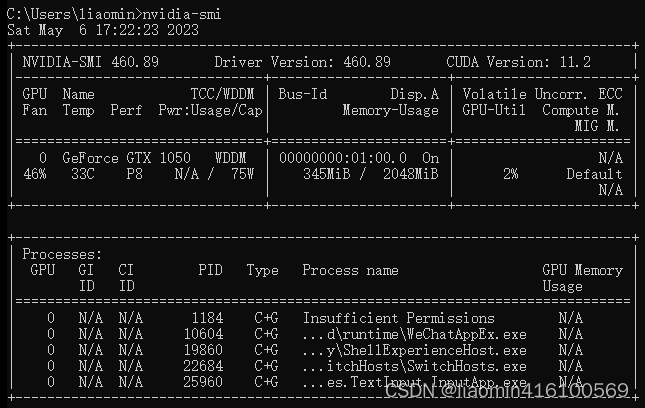
发现之前缺失的cudart64_110.dll确实在C:\Program Files\NVIDIA GPU Computing Toolkit\CUDA\v11.2\bin
安装cudnn
通过版本关系图,我们知道tensorflow-gpu 2.6.0需要安装8.1的cudnn
cudnn历史版本下载位置,下载对应版本8.1,下载cudnn需要注册nvidia
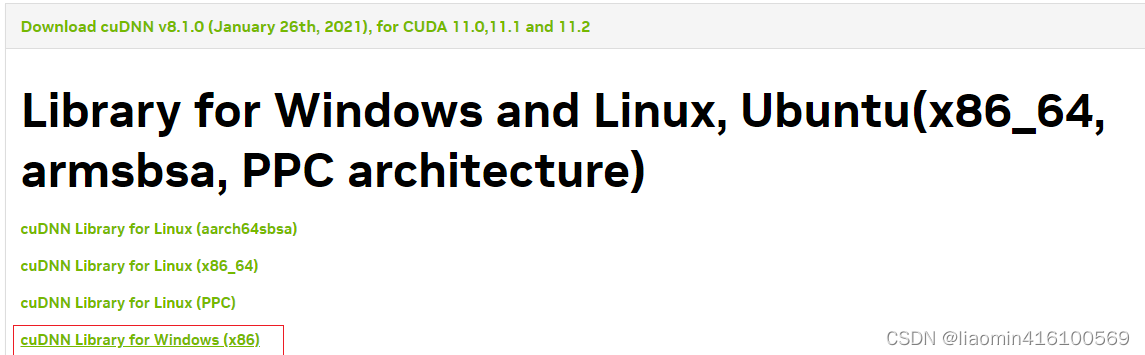
选择cudnn library for window(x86)点击下载
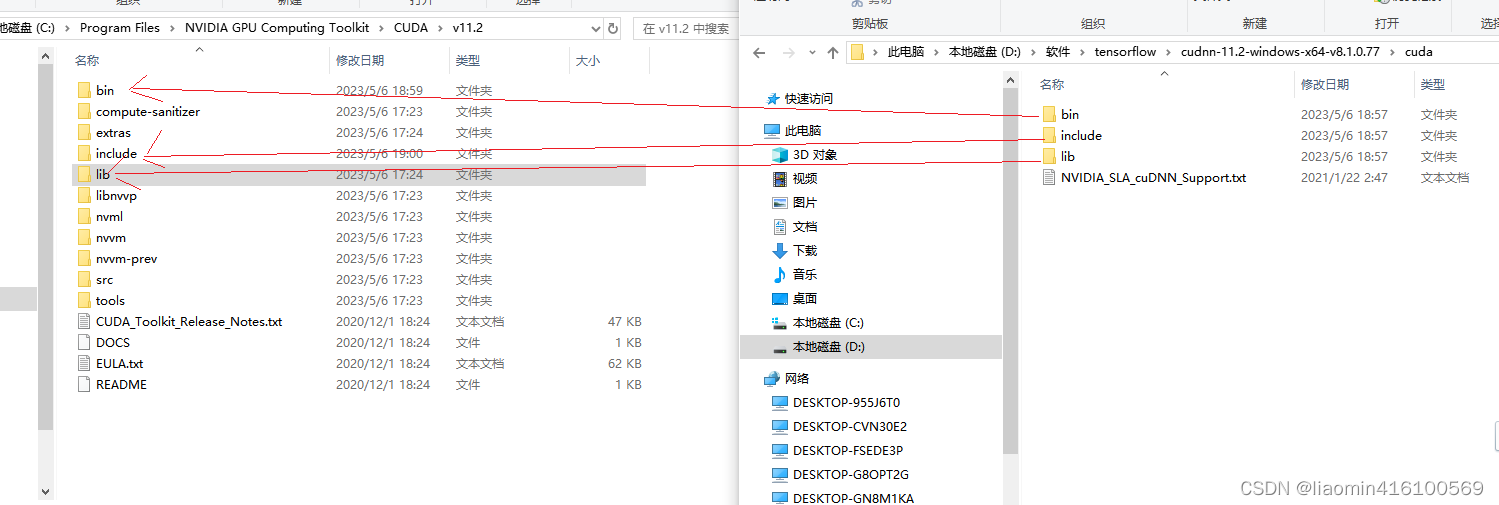
打开cudnn文件夹
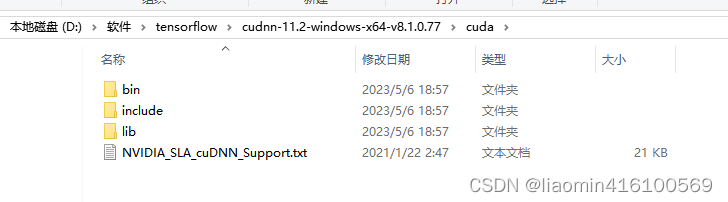
将上述cudnn里面的文件移动或copy到cuda对应文件夹目录下即可!
此时在运行helloworld程序使用gpu正常运行
2023-05-06 19:01:23.403530: I tensorflow/core/platform/cpu_feature_guard.cc:142] This TensorFlow binary is optimized with oneAPI Deep Neural Network Library (oneDNN) to use the following CPU instructions in performance-critical operations:  AVX AVX2
To enable them in other operations, rebuild TensorFlow with the appropriate compiler flags.
2023-05-06 19:01:24.075663: I tensorflow/core/common_runtime/gpu/gpu_device.cc:1510] Created device /job:localhost/replica:0/task:0/device:GPU:0 with 1320 MB memory:  -> device: 0, name: GeForce GTX 1050, pci bus id: 0000:01:00.0, compute capability: 6.1
[4 4 4]
安装blas
TensorFlow 是一个使用 C++ 编写的开源机器学习框架,它支持在 CPU 和 GPU 上运行计算。在 TensorFlow 中,BLAS(Basic Linear Algebra Subprograms)库是用于执行线性代数计算的关键库,例如矩阵乘法和向量加法。由于这些操作在机器学习中非常常见,因此 BLAS 库对于 TensorFlow 的性能和稳定性至关重要。
切换到你的python环境,使用以下命令来安装 BLAS 库:
conda install blas
#或者(建议用mamba)
micomamba install openblas
安装完成后,因为安装的是动态链接库最终仍然会安装在你的anaconda的base环境下,找到动态链接库的位置
C:\Users\你的用户名\anaconda3\pkgs\blas-2.116-blis\Library\bin
将上面的路径添加到环境变量PATH中,如果不添加tensorflow会报错找不到blas
执行以下代码测试
python -c "import tensorflow as tf; print(tf.linalg.matmul(tf.ones([1, 2]), tf.ones([2, 2])))"
运行结果
(d:\condaenv\env_name) C:\Users\liaomin>python -c "import tensorflow as tf; print(tf.linalg.matmul(tf.ones([1, 2]), tf.ones([2, 2])))"
2023-05-10 09:39:23.654612: I tensorflow/core/platform/cpu_feature_guard.cc:142] This TensorFlow binary is optimized with oneAPI Deep Neural Network Library (oneDNN) to use the following CPU instructions in performance-critical operations:  AVX AVX2
To enable them in other operations, rebuild TensorFlow with the appropriate compiler flags.
2023-05-10 09:39:24.372107: I tensorflow/core/common_runtime/gpu/gpu_device.cc:1510] Created device /job:localhost/replica:0/task:0/device:GPU:0 with 1320 MB memory:  -> device: 0, name: GeForce GTX 1050, pci bus id: 0000:01:00.0, compute capability: 6.1
tf.Tensor([[2. 2.]], shape=(1, 2), dtype=float32)
云服务器运行
云服务器提供高性能的CPU和GPU运算服务器,对个人开发者来说非常便宜一般几十块钱半个月的秒杀团很多,可以提供强大的计算能力。对于需要大量计算资源的TensorFlow程序,使用腾讯云服务器可以提高计算效率
云服务器选择
我这里首选autodl(关机不扣费,gpu按小时收费,0.5-2块钱一个小时,而且数据集和镜像【chatglm镜像等】,cuda都安装好了),其次是腾讯云(新用户有秒杀,15天60元还是划算的),对个人友好,可以微信登录,微信支付。
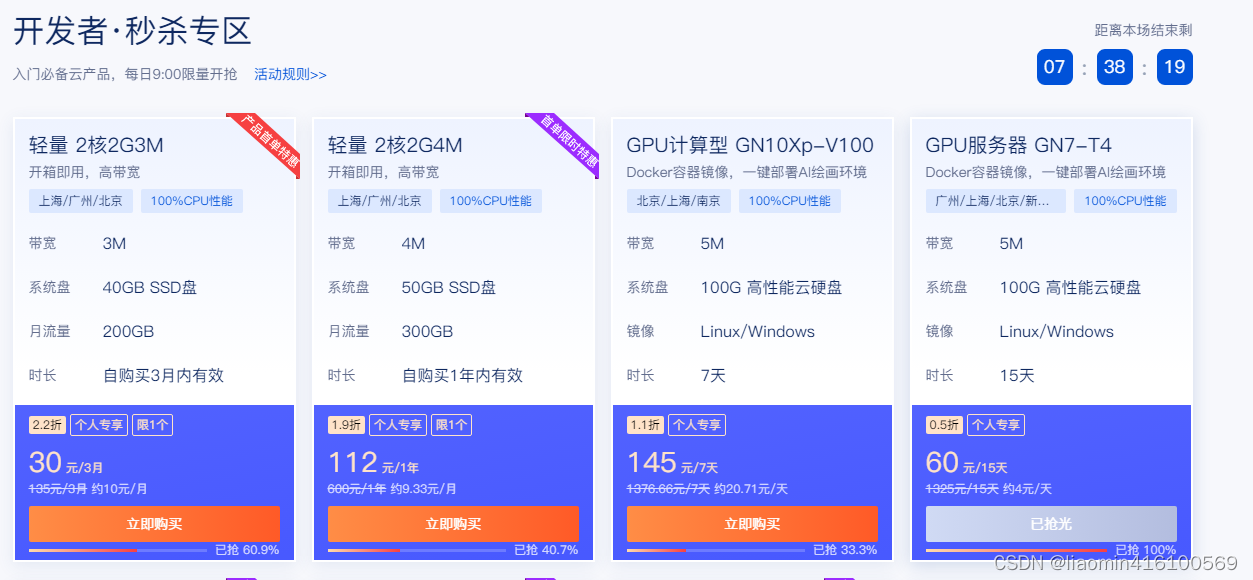
右侧的gpu服务器是gpu 8gb的适合个人学习来跑神经网络。
购买的时候选择系统为:unbuntu的tensorflow版本,我选择的是:TensorFlow 2.8.0 Ubuntu 18.04 GPU基础镜像(预装460驱动),不要选window自己安装环境,麻烦,因为我们的pycharm支持远程ssh编程,用服务器跑,结果显示在pycharm中。
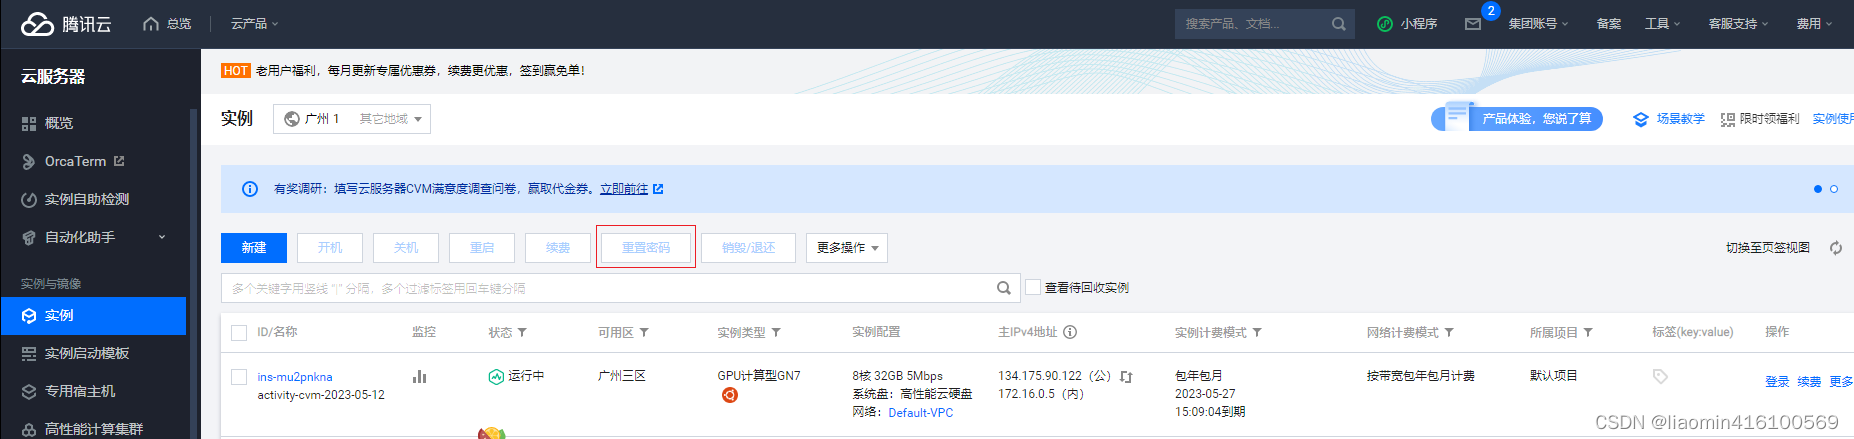
重置你的ubuntu密码(系统默认的账号是ubuntu,不是root),主机会给你配个公网地址

pycharm配置
代码自动同步
我们在/homt/ubuntu用户目录下新建一个deeplearn目录用于映射本地代码
点击tools-deployment-configuation
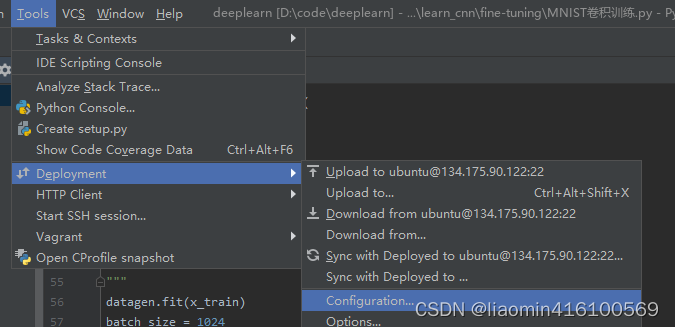
选择sftp,输入账号密码测试连接
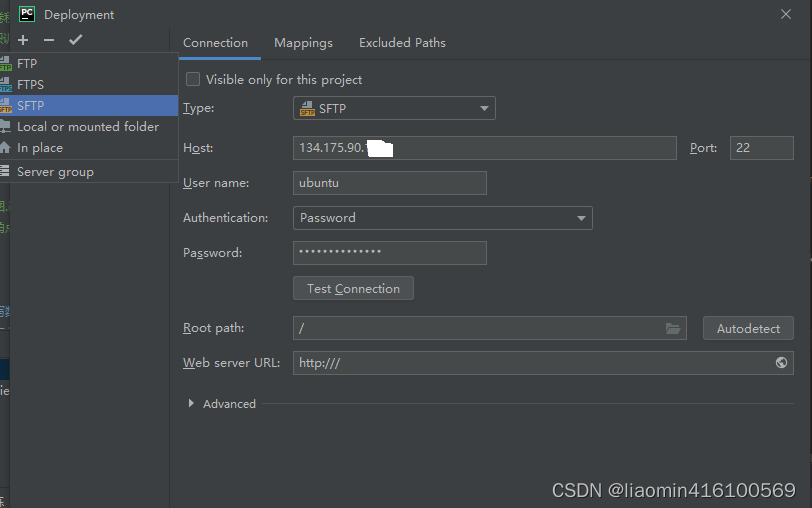
点击mappings目录映射本地目录和远程目录

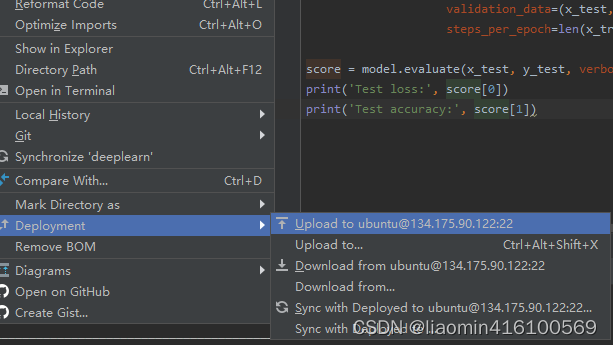
确定后在享有右键deployments->upload 上传代码
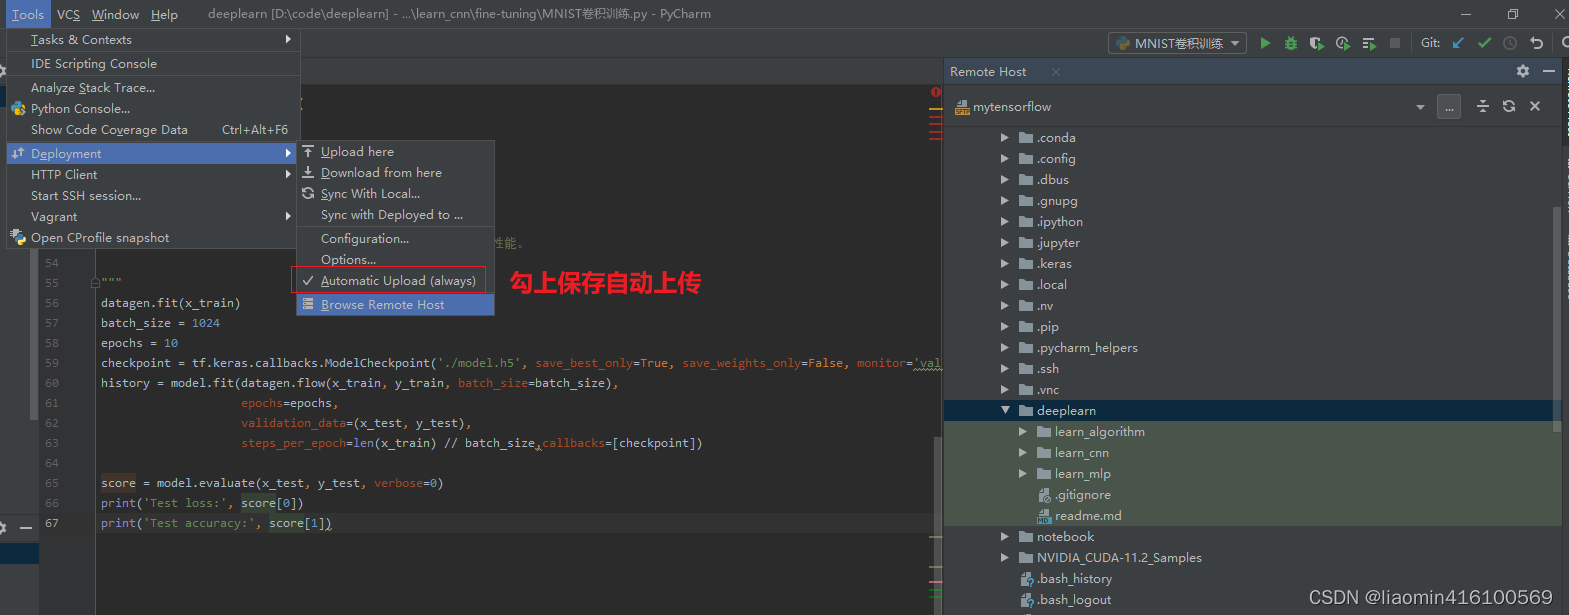
点击tools-deployments-browe remote host查看远程目录是否上传(勾上Automatic upload(always)保存代码自动上传)
远程interpreter
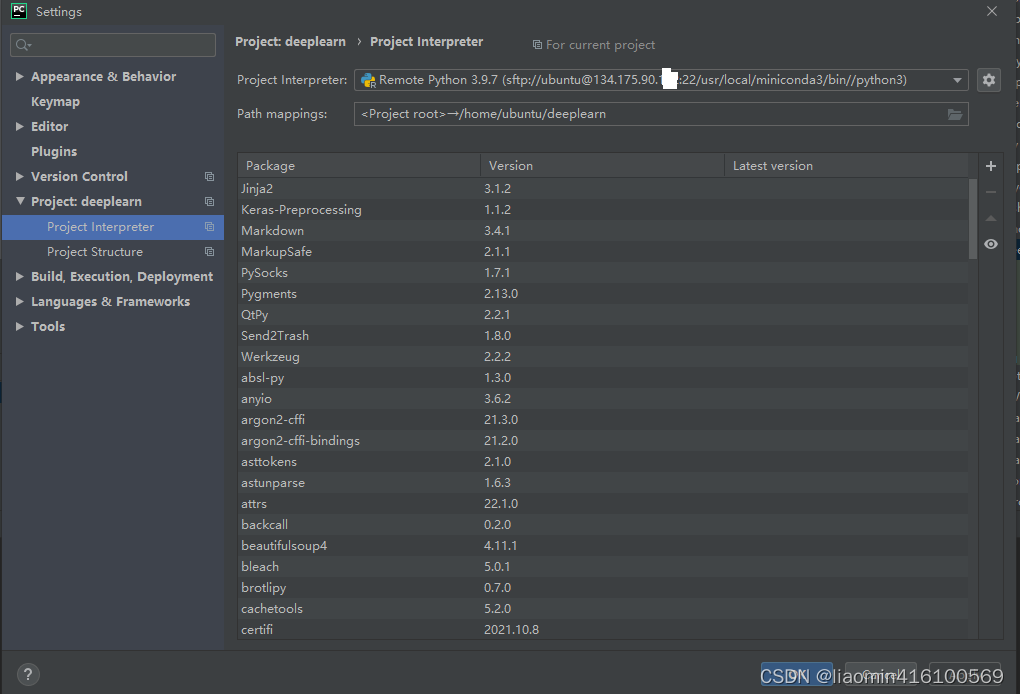
点击File-Settings-Project(项目名)-Project interpreter add一个
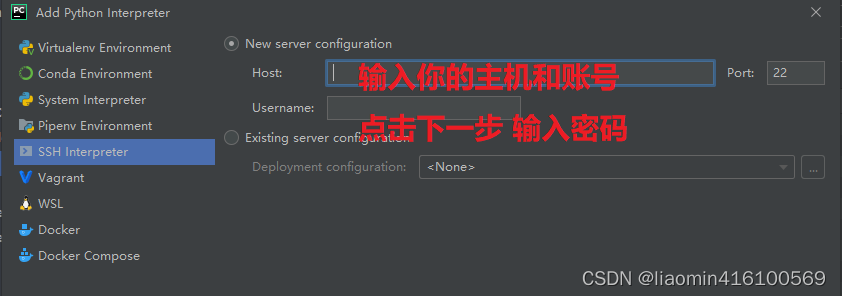
输入密码后下一步进入配置python目录,我们可以使用shell登录到远程服务器执行
ubuntu@VM-0-5-ubuntu:~$ which python3
/usr/local/miniconda3/bin//python3
在interpreter上输入python3的路径即可

确认项目选择了该interpreter
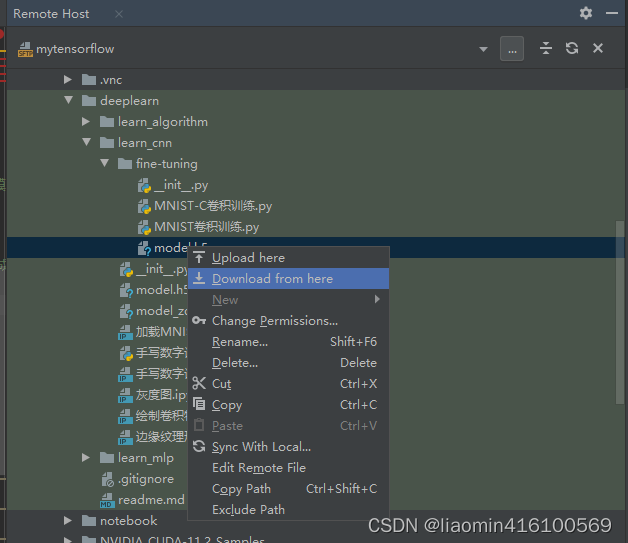
接下来打开神经网络代码,,代码右键运行,可看到运行是ssh运行的
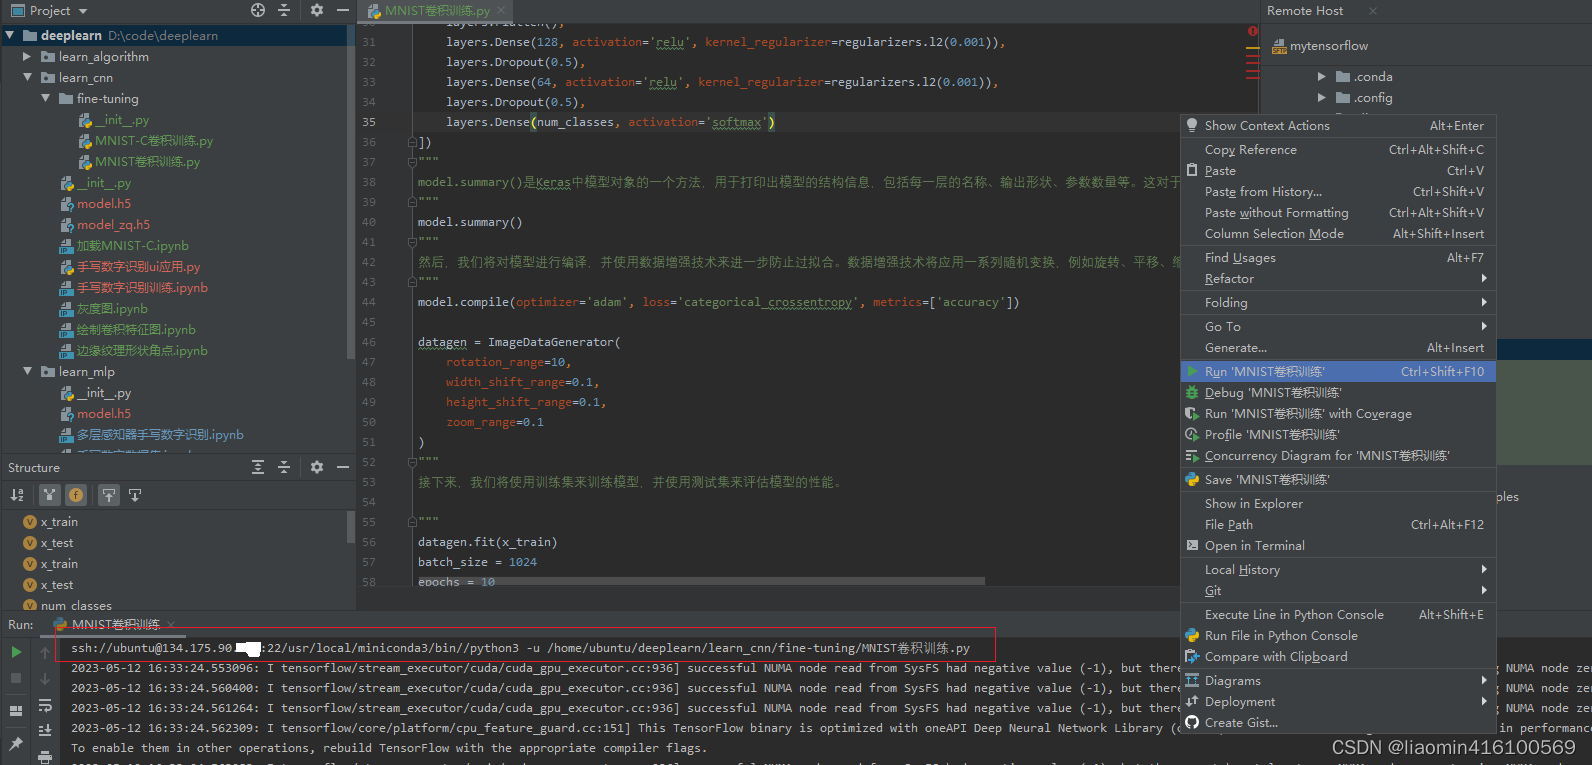
执行后的模型实际上是在远程服务器的可以使用brwoer remote host右键下载下来覆盖本地