前言
在我们上一篇(Unity编辑器开发(四):实战、开发一个AB包编辑器工具)的结尾,我们拥有了如下图中那样的一个编辑器窗口:
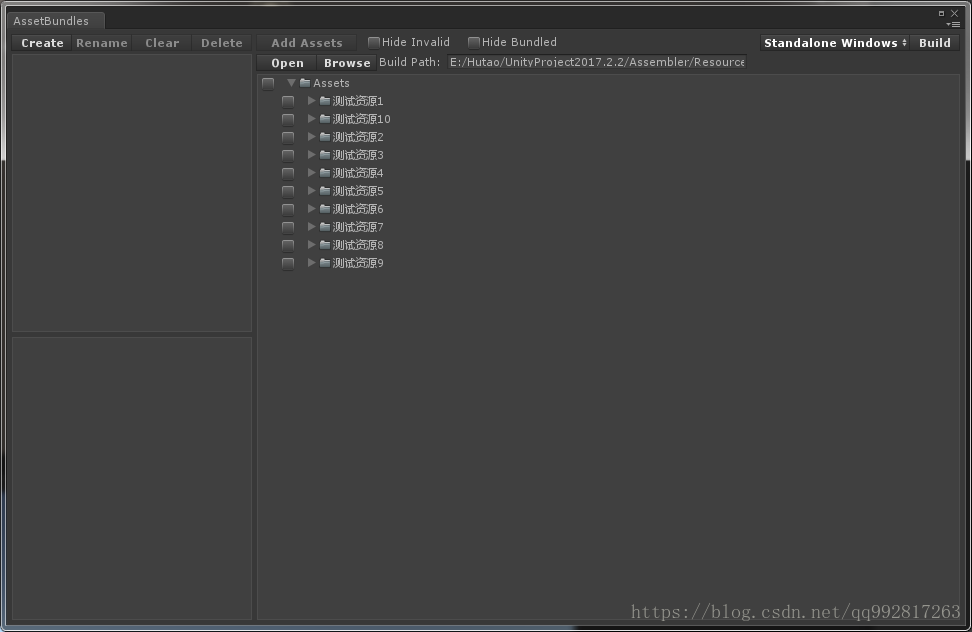
接下来我们来完成最后部分,也就是包括创建AB包,清理AB包,删除AB包,资源打入AB包等操作。
AB包列表区域
回到我们之前完成的窗口左上角的空白区域,这里将会展示我们当前工程中所有设置的AB包名称,怎么做到呢?你没猜错,Unity当然提供了API,我们要做的就是懂得怎么使用这些API罢了。
这里我们依然先要为窗口中可能出现的对象设计他们专属的类,AB包列表区域显示的东西就是当前工程中所有的AB包名称,所以我们要设计一个专属的AB包类对象。
    //【AssetBundleBuildInfo.cs】
    //一个AB包对象
    public class AssetBundleBuildInfo
    {
    }
每一个AB包对象应当包含名称,以及所有打入到其中的资源:
    //【AssetBundleBuildInfo.cs】
    //一个AB包对象
    public class AssetBundleBuildInfo
    {
        /// <summary>
        /// AB包的名称
        /// </summary>
        public string Name
        {
            get;
            set;
        }
        /// <summary>
        /// AB包中的所有资源
        /// </summary>
        public List<AssetInfo> Assets
        {
            get;
            set;
        }

        public AssetBundleBuildInfo(string name)
        {
            Name = name;
            Assets = new List<AssetInfo>();
        }
    }
为了方便管理,我们在新建一个统管所有AB包对象的父级对象,通过他可以检索到任何一个AB包对象:
    //【AssetBundleInfo.cs】
    //AB包配置对象
    public class AssetBundleInfo
    {
        /// <summary>
        /// 当前的所有AB包
        /// </summary>
        public List<AssetBundleBuildInfo> AssetBundles
        {
            get;
            set;
        }

        public AssetBundleInfo()
        {
            AssetBundles = new List<AssetBundleBuildInfo>();
        }
    }
回到我们窗口的主类,不要忘了是哪个(前两篇内容有:AssetBundleEditor.cs),我们定义一个AB包配置对象,然后根据界面的控件顺序,我们来填充“ Create ”按钮的功能,这个按钮位于标题区域。
        //【AssetBundleEditor.cs】
        private AssetBundleInfo _assetBundle;

        private void TitleGUI()
        {
            if (GUI.Button(new Rect(5, 5, 60, 15), "Create", _preButton))
            {
                //新建一个AB包对象,并将之加入到AB包配置信息对象中
                AssetBundleBuildInfo build = new AssetBundleBuildInfo("ab" + System.DateTime.Now.ToString("yyyyMMddHHmmss"));
                _assetBundle.AssetBundles.Add(build);
            }
        }
新建多个AB包之后,我们要将之显示出来,可能到这里你已经猜到怎么做了,没错,方法简单粗暴,直接遍历_assetBundle.AssetBundles,拿到所有AB包对象,一个一个挨着排成按钮塞到界面里就可以了。
在AssetBundlesGUI方法中填充内容(之前我们只写好了一个空框)。
        //【AssetBundleEditor.cs】

        //当前界面中选中的AB包
        private int _currentAB = -1;

        //AB包列表显示区域
        private void AssetBundlesGUI()
        {
            _ABViewRect = new Rect(5, 25, 240, (int)position.height / 2 - 20);
            _ABScrollRect = new Rect(5, 25, 240, _ABViewHeight);
            _ABScroll = GUI.BeginScrollView(_ABViewRect, _ABScroll, _ABScrollRect);
            GUI.BeginGroup(_ABScrollRect, _box);

            _ABViewHeight = 5;

            //整个for循环是我们新加的内容,遍历_assetBundle.AssetBundles将每个AB包创建为一个按钮
            for (int i = 0; i < _assetBundle.AssetBundles.Count; i++)
            {
                //判断当前AB包对象中是否存有资源(也即是判断是否为空AB包)
                string icon = _assetBundle.AssetBundles[i].Assets.Count > 0 ? "PrefabNormal Icon" : "Prefab Icon";
                //遍历到当前选中的AB包对象
                if (_currentAB == i)
                {
                    //在对象位置绘制蓝色背景框(也即是被选中的高亮效果,_LRSelect样式有这种效果)
                    GUI.Box(new Rect(0, _ABViewHeight, 240, 15), "", _LRSelect);
                    //是否正在进行重命名操作
                    if (_isRename)
                    {
                        //重命名操作时,在原地绘制编辑框TextField,并消去AB包名字(content.text = "")
                        GUIContent content = EditorGUIUtility.IconContent(icon);
                        content.text = "";
                        GUI.Label(new Rect(5, _ABViewHeight, 230, 15), content, _prefabLabel);
                        _renameValue = GUI.TextField(new Rect(40, _ABViewHeight, 140, 15), _renameValue);
                        //重命名OK
                        if (GUI.Button(new Rect(180, _ABViewHeight, 30, 15), "OK", _miniButtonLeft))
                        {
                            if (_renameValue != "")
                            {
                                if (!_assetBundle.IsExistName(_renameValue))
                                {
                                    _assetBundle.AssetBundles[_currentAB].RenameAssetBundle(_renameValue);
                                    _renameValue = "";
                                    _isRename = false;
                                }
                                else
                                {
                                    Debug.LogError("Already existed name:" + _renameValue);
                                }
                            }
                        }
                        //重命名NO
                        if (GUI.Button(new Rect(210, _ABViewHeight, 30, 15), "NO", _miniButtonRight))
                        {
                            _isRename = false;
                        }
                    }
                    //未进行重命名操作,在原地绘制为不可编辑的Label控件
                    else
                    {
                        GUIContent content = EditorGUIUtility.IconContent(icon);
                        content.text = _assetBundle.AssetBundles[i].Name;
                        GUI.Label(new Rect(5, _ABViewHeight, 230, 15), content, _prefabLabel);
                    }
                }
                //遍历到非选中的AB包对象
                else
                {
                    //在原地绘制Button控件,当被点击时此AB包对象被选中
                    GUIContent content = EditorGUIUtility.IconContent(icon);
                    content.text = _assetBundle.AssetBundles[i].Name;
                    if (GUI.Button(new Rect(5, _ABViewHeight, 230, 15), content, _prefabLabel))
                    {
                        _currentAB = i;
                        _currentABAsset = -1;
                        _isRename = false;
                    }
                }
                _ABViewHeight += 20;
            }

            _ABViewHeight += 5;
            if (_ABViewHeight < _ABViewRect.height)
            {
                _ABViewHeight = (int)_ABViewRect.height;
            }

            GUI.EndGroup();
            GUI.EndScrollView();
        }
可以看到界面的逻辑也不是很复杂,总结一下就是循环显示所有AB包对象,当发现某个对象处于被选中状态时,就在对象位置绘制蓝色高亮空框,当发现处于重命名操作中时,就在当前选中对象位置绘制可输入新名称的编辑框(只能对当前选中的对象进行重命名操作),然后,然后就没有其他的了。
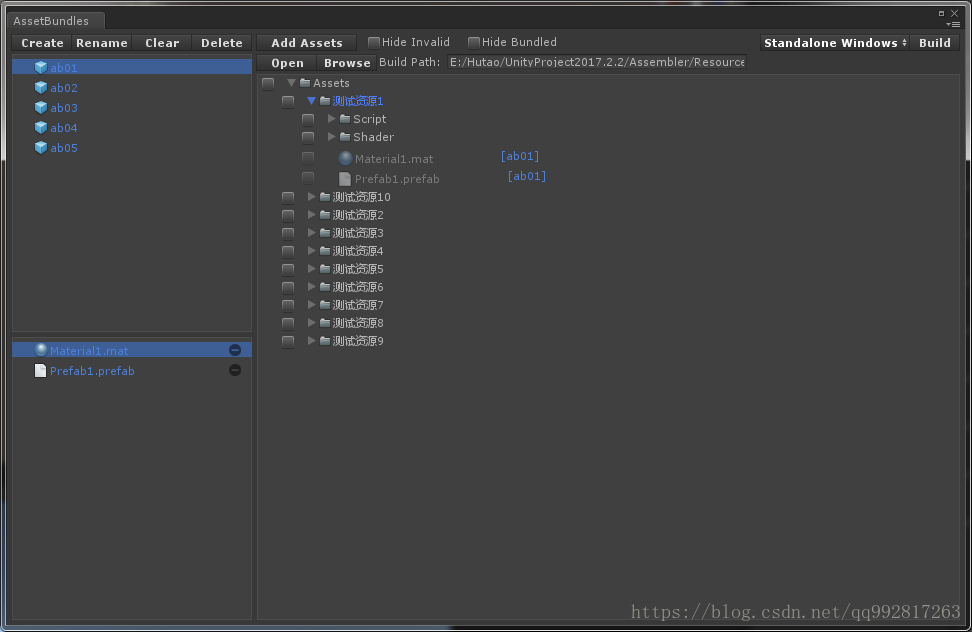
我们看一下窗口效果图。

当前AB包资源列表区域
先来完善左下角的当前AB包资源列表区域(名字又长又怪,说白了就是显示左上方当前选中的AB包对象中的所有资源),然后再填充“ Clear ” 和 “ Delete ”按钮的功能。
这里的显示方式跟左上角区域雷同,直接看代码:
        //【AssetBundleEditor.cs】

        //当前选中的资源对象
        private int _currentABAsset = -1;

        //当前AB包资源列表区域
        private void CurrentAssetBundlesGUI()
        {
            _currentABViewRect = new Rect(5, (int)position.height / 2 + 10, 240, (int)position.height / 2 - 15);
            _currentABScrollRect = new Rect(5, (int)position.height / 2 + 10, 240, _currentABViewHeight);
            _currentABScroll = GUI.BeginScrollView(_currentABViewRect, _currentABScroll, _currentABScrollRect);
            GUI.BeginGroup(_currentABScrollRect, _box);

            _currentABViewHeight = 5;
            //这里是我们加入的内容,判断条件:只有当前选中任意AB包对象后,此区域的内容才生效(_currentAB != -1)
            if (_currentAB != -1)
            {
                //遍历build.Assets(当前选中的AB包对象的资源列表)
                AssetBundleBuildInfo build = _assetBundle.AssetBundles[_currentAB];
                for (int i = 0; i < build.Assets.Count; i++)
                {
                    //同理,遍历到当前选中的资源对象,在原地画蓝色高亮背景框
                    if (_currentABAsset == i)
                    {
                        GUI.Box(new Rect(0, _currentABViewHeight, 240, 15), "", _LRSelect);
                    }
                    //原地绘制Button控件,当点击时,此资源对象被选中
                    GUIContent content = EditorGUIUtility.ObjectContent(null, build.Assets[i].AssetType);
                    content.text = build.Assets[i].AssetName;
                    if (GUI.Button(new Rect(5, _currentABViewHeight, 205, 15), content, _prefabLabel))
                    {
                        _currentABAsset = i;
                    }
                    //在Button控件右方绘制减号Button控件,当点击时,删除此资源对象在当前选中的AB包中
                    if (GUI.Button(new Rect(215, _currentABViewHeight, 20, 15), "", _oLMinus))
                    {
                        build.RemoveAsset(build.Assets[i]);
                        _currentABAsset = -1;
                    }
                    _currentABViewHeight += 20;
                }
            }

            _currentABViewHeight += 5;
            if (_currentABViewHeight < _currentABViewRect.height)
            {
                _currentABViewHeight = (int)_currentABViewRect.height;
            }

            GUI.EndGroup();
            GUI.EndScrollView();
        }
界面的逻辑是不是同样简单到爆,到这里我也不细说了,我们直接看一下效果图:
我们再来填充Clear按钮的功能,点击时,清空当前选中AB包中的所有资源,虽然感觉这个功能没什么用,但既然已经写在这里了,还是把他的功能做出来吧,之前的Clear按钮已经在标题区域中写好,直接在其中调用外链的方法就可以了,这里我直接为AB包对象写了一个扩展方法ClearAsset,调用就清理自身资源。
        //【AssetBundleEditor.cs】
        //标题区域
        private void TitleGUI()
        {
            if (GUI.Button(new Rect(125, 5, 60, 15), "Clear", _preButton))
            {
                if (EditorUtility.DisplayDialog("Prompt", "Clear " + _assetBundle.AssetBundles[_currentAB].Name + " ?", "Yes", "No"))
                {
                    _assetBundle.AssetBundles[_currentAB].ClearAsset();
                }
            }
        }

        //【AssetBundleTool.cs】
        /// <summary>
        /// 清空AB包中的资源
        /// </summary>
        public static void ClearAsset(this AssetBundleBuildInfo build)
        {
            for (int i = 0; i < build.Assets.Count; i++)
            {
                build.Assets[i].Bundled = "";

                AssetImporter import = AssetImporter.GetAtPath(build.Assets[i].AssetPath);
                import.assetBundleName = "";
            }
            build.Assets.Clear();
        }
Delete按钮的功能就是先调用一次Clear的功能,再调用删除的功能。
        //【AssetBundleEditor.cs】
        //标题区域
        private void TitleGUI()
        {
            if (GUI.Button(new Rect(125, 5, 60, 15), "Clear", _preButton))
            {
                if (GUI.Button(new Rect(185, 5, 60, 15), "Delete", _preButton))
            {
                if (EditorUtility.DisplayDialog("Prompt", "Delete " + _assetBundle.AssetBundles[_currentAB].Name + "?This will clear all assets!", "Yes", "No"))
                {
                    _assetBundle.DeleteAssetBundle(_currentAB);
                    _currentAB = -1;
                }
            }
            }
        }

        //【AssetBundleTool.cs】
        /// <summary>
        /// 删除AB包
        /// </summary>
        public static void DeleteAssetBundle(this AssetBundleInfo abInfo, int index)
        {
            abInfo.AssetBundles[index].ClearAsset();
            AssetDatabase.RemoveAssetBundleName(abInfo.AssetBundles[index].Name, true);
            abInfo.AssetBundles.RemoveAt(index);
        }
添加资源至AB包中
标题栏的Add Assets按钮,当选中一个AB包对象后,该按钮激活,点击该按钮可以将右侧资源检索界面中所有勾选的资源添加到当前选中的AB包中。
        //【AssetBundleEditor.cs】
        //所有的有效资源列表
        private List<AssetInfo> _validAssets;

        //标题区域
        private void TitleGUI()
        {
            if (GUI.Button(new Rect(250, 5, 100, 15), "Add Assets", _preButton))
            {
                List<AssetInfo> assets = _validAssets.GetCheckedAssets();
                for (int i = 0; i < assets.Count; i++)
                {
                    _assetBundle.AssetBundles[_currentAB].AddAsset(assets[i]);
                }
            }
        }

        //【AssetBundleTool.cs】
        /// <summary>
        /// 获取所有被选中的有效资源
        /// </summary>
        public static List<AssetInfo> GetCheckedAssets(this List<AssetInfo> validAssetList)
        {
            List<AssetInfo> currentAssets = new List<AssetInfo>();
            for (int i = 0; i < validAssetList.Count; i++)
            {
                if (validAssetList[i].IsChecked)
                {
                    currentAssets.Add(validAssetList[i]);
                }
            }
            return currentAssets;
        }
选择平台与打包
那么到这里其实就已经差不多了,像Hide Invalid这种禁止显示无效资源的开关控件非常简单,就是加一个筛选判断而已,没任何复杂的逻辑,这里就直接跳过了,然后应船长的要求,打包按钮做了一个快捷方式启动,方便一键打包。
        //【AssetBundleEditor.cs】
        //标题区域
        private void TitleGUI()
        {
            //打包路径
            GUI.Label(new Rect(370, 25, 70, 15), "Build Path:");
            _buildPath = GUI.TextField(new Rect(440, 25, 300, 15), _buildPath);
            //打包平台
            BuildTarget buildTarget = (BuildTarget)EditorGUI.EnumPopup(new Rect((int)position.width - 205, 5, 150, 15), _buildTarget, _preDropDown);
            if (buildTarget != _buildTarget)
            {
                _buildTarget = buildTarget;
                EditorPrefs.SetInt("BuildTarget", (int)_buildTarget);
            }
            //打包按钮
            if (GUI.Button(new Rect((int)position.width - 55, 5, 50, 15), "Build", _preButton))
            {
                AssetBundleTool.BuildAssetBundles();
            }
        }

        //【AssetBundleTool.cs】
        /// <summary>
        /// 打包资源
        /// </summary>
        [MenuItem("Window/Build AssetBundles %#T")]
        public static void BuildAssetBundles()
        {
            string buildPath = EditorPrefs.GetString("BuildPath", "");
            if (!Directory.Exists(buildPath))
            {
                Debug.LogError("Please set build path!");
                return;
            }

            BuildTarget target = (BuildTarget)EditorPrefs.GetInt("BuildTarget", 5);

            BuildPipeline.BuildAssetBundles(buildPath, BuildAssetBundleOptions.None, target);
        }
总结
我只分了三篇博客就将内容讲完了,说起来内容不多,但其实真要说也有点急切了,开发编辑器工具最主要就是对于GUI和大量API的使用,很多你需要的功能在做之前最好先找找Unity官方有没有提供现成的API,有的话就不必重复造轮子了,用API没什么不好的(既然你已经选择了使用Unity)。
有很多小细节的地方我可能忽略了,查看一下源码就清晰明了了,在最后,源码奉上。
最近比较懒,懒得上传github了~