写过公司的微信小程序后,还是很有感觉的。有了第一次学习开发的经历,逐渐接受并喜欢那种快速的开发feel。
写了一个摇一摇demo,看看有多简单吧
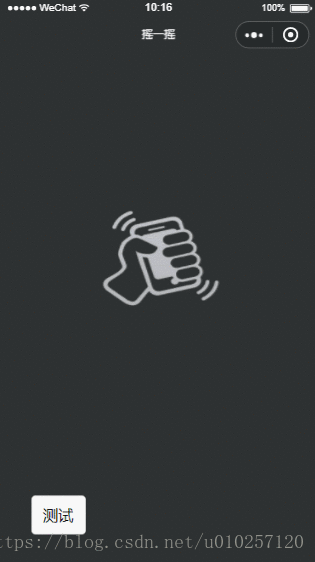
开发的快自然就有成就感哈哈,看下代码吧
1.js部分
// pages/testting/shaky/shaky.js
Page({

  /**
   * 页面的初始数据
   */
  data: {
    hasResutl:-1,
    bar_state:0,
    winWidth:0,
    winHeight:0,
    img_url:"https://www.demomaster.cn/eatbar/public/static/img/yaoyiyao/img_yaoyiyao.png",
    loading:"https://www.demomaster.cn/eatbar/public/static/img/yaoyiyao/small_loading.gif"
  },

  /**
   * 生命周期函数--监听页面加载
   */
  onLoad: function (options) {

  },

  /**
   * 生命周期函数--监听页面初次渲染完成
   */
  onReady: function () {
    var context = wx.createContext()
    context.rect(5, 5, 25, 15)
    context.stroke()
    context.drawImage()
    wx.drawCanvas({
      canvasId: 'myCanvas',
      actions: context.getActions()
    })
  },

  /**
   * 生命周期函数--监听页面显示
   */
  onShow: function () {
    var that = this;
    that.initAnimation();
    //重力加速度
    wx.onAccelerometerChange(function (res) {
      //console.log(res.x)
      //console.log(res.y)
     // console.log(res.z)
      if (res.x > .7 && res.y > .7) {
        // wx.showToast({
        //   title: '摇一摇成功',
        //   icon: 'success',
        //   duration: 2000
        // })
        that.startAnimation();
        that.vibrateShort();
      }
    })
    var that = this;
    //获取系统信息
    wx.getSystemInfo({
      success: function (res) {
        that.setData({
          winWidth: res.windowWidth,
          winHeight: res.windowHeight
        });
      }
    });
    wx.downloadFile({
      url: that.data.img_url,
      success: function (sres) {
        console.log(sres);
      }, fail: function (fres) {

      }
    })
  },
  initAnimation: function () {
    var that = this;
    //实例化一个动画
    this.animation1 = wx.createAnimation({
      // 动画持续时间,单位ms,默认值 400
      duration: 400,
      /**
      * http://cubic-bezier.com/#0,0,.58,1
      * linear 动画一直较为均匀
      * ease 从匀速到加速在到匀速
      * ease-in 缓慢到匀速
      * ease-in-out 从缓慢到匀速再到缓慢
      *
      * http://www.tuicool.com/articles/neqMVr
      * step-start 动画一开始就跳到 100% 直到动画持续时间结束 一闪而过
      * step-end 保持 0% 的样式直到动画持续时间结束 一闪而过
      */
      timingFunction: 'ease',
      // 延迟多长时间开始
     // delay: 100,
      /**
      * 以什么为基点做动画 效果自己演示
      * left,center right是水平方向取值,对应的百分值为left=0%;center=50%;right=100%
      * top center bottom是垂直方向的取值,其中top=0%;center=50%;bottom=100%
      */
      transformOrigin: 'left top 0',
      success: function (res) {
        console.log(res)

      }
    })
    //实例化一个动画
    this.animation2 = wx.createAnimation({
      // 动画持续时间,单位ms,默认值 400
      duration: 400,
      /**
      * http://cubic-bezier.com/#0,0,.58,1
      * linear 动画一直较为均匀
      * ease 从匀速到加速在到匀速
      * ease-in 缓慢到匀速
      * ease-in-out 从缓慢到匀速再到缓慢
      *
      * http://www.tuicool.com/articles/neqMVr
      * step-start 动画一开始就跳到 100% 直到动画持续时间结束 一闪而过
      * step-end 保持 0% 的样式直到动画持续时间结束 一闪而过
      */
      timingFunction: 'ease',
      // 延迟多长时间开始
      // delay: 100,
      /**
      * 以什么为基点做动画 效果自己演示
      * left,center right是水平方向取值,对应的百分值为left=0%;center=50%;right=100%
      * top center bottom是垂直方向的取值,其中top=0%;center=50%;bottom=100%
      */
      transformOrigin: 'left top 0',
      success: function (res) {
        console.log(res)
      }
    })
  },
  /**
  *位移
  */
  startAnimation: function () {
    var that = this
    //x轴位移100px
    var h1 = "35%";
    var h2 = "65%";
    if (this.data.bar_state == 1) {
      h1 = "40%";
      h2 = "40%";
      setTimeout(function () {
        that.setData({
          //输出动画
          bar_state: 0,
          hasResutl:0
        })
        setTimeout(function () {
          that.setData({
            hasResutl: 1
          })
        }, 4000)
      }, 400)
    } else {
      h1 = "25%";
      h2 = "55%";
      this.setData({
        bar_state: 1
      })
      setTimeout(function () {
        that.startAnimation();
      }, 600)
    }
    this.animation1.height(h1).step()
    this.animation2.top(h2).step()
    this.setData({
      //输出动画
      animation1: that.animation1.export(),
      animation2: that.animation2.export()
    })

  },

  /**
   * 生命周期函数--监听页面隐藏
   */
  onHide: function () {

  },

  /**
   * 生命周期函数--监听页面卸载
   */
  onUnload: function () {

  },

  /**
   * 页面相关事件处理函数--监听用户下拉动作
   */
  onPullDownRefresh: function () {

  },

  /**
   * 页面上拉触底事件的处理函数
   */
  onReachBottom: function () {

  },

  /**
   * 用户点击右上角分享
   */
  onShareAppMessage: function () {

  }
})
(有些冗余的测试代码,请忽略)
2.wxml部分
<!--pages/testting/shaky/shaky.wxml-->

<view class='panel_root'>
  <view class='view_top' animation="{{animation1}}">
  <image class='img_top'  src='{{img_url}}'></image>
  <view class='win_line_top' style="display:{{bar_state==1?'block':'none'}}"></view>
  </view>
  <view class='view_bottom' animation="{{animation2}}">
  <view class='win_line_bottom' style="display:{{bar_state==1?'block':'none'}}"></view>
  <image class='img_bottom' src='{{img_url}}'></image>
  <view class='panel_bottom'>
  <view class='panel_content' style="display:{{bar_state==0?'block':'none'}}">
    <view class='panel_loading' style="display:{{hasResutl==0?'block':'none'}}">
    <image class='img_loading' src='{{loading}}'></image><text class='text_lable'>正在搜索同意时刻摇晃手机的人</text>
    </view>
    <view class='panel_result'  style="display:{{hasResutl==1?'block':'none'}}">
    哈哈
    </view>
  </view>
  </view>
  </view>

  <button class='btn_test' bindtap='startAnimation' >测试</button>

</view>
3.wxss部分
/* pages/testting/shaky/shaky.wxss */
page{
  background-color: greenyellow;
  height: 100%;
}
.panel_root{
  background-color: red;
  height: 100%;
}
.view_top{
  position: absolute;
  display: block;
  height: 40%;
  width: 100%;
  background-color: #2d3132;
  text-align: center;
}
.view_bottom{
  position: absolute;
  top:40%;
  display: block;
  height: 60%;
  width: 100%;
  background-color: #2d3132;
  text-align: center;
}
.img_top{
  position: absolute;
  bottom: 0;
  width: 8rem;
  height: 7rem;
  margin-bottom: -3.5rem;
  margin-left: -4rem;
  clip:rect(0px,8rem,3.5rem,0px);
}
.img_bottom{
  position: absolute;
  top:0;
  width: 8rem;
  height: 7rem;
  margin-top: -3.5rem;
  margin-left: -4rem;
  clip:rect(3.5rem,8rem,200px,0px);
}
.panel_result{
  margin: 2rem;
  padding: 1rem;
  background-color: white;
}
.btn_test{
  position: absolute;
  bottom: 0;
  margin: 2rem;

}
.win_line_top{
  position: absolute;
  bottom: 0;
  height: .3rem;
  width: 100%;
  display: block;
  background-color: gray;
  border-bottom: 1px solid black;
}
.win_line_bottom{
  position: absolute;
  top:0;
  height: .3rem;
  width: 100%;
  display: block;
  background-color: gray;
  border-bottom: 1px top black;
}
.panel_bottom{
  width: 100%;
  position: absolute;
  top: 5rem;
  color: white;
}
.panel_content{
  width: 100%;
  position: relative;
  font-size: .8rem;
  text-align: center;
}
.img_loading{
  width: 1rem;
  height: 1rem;
}
.text_lable{
  font-size: .8rem;
  line-height: 2rem;
  height: 2rem;
}
.panel_result{
  margin: 1rem 2rem;
  background: white;
  border-radius: .3rem;
  padding: 1rem;
  color: black;
}
json部分没什么可说的(html和css水平太差,怎个乱子了得)
得了,简单的效果实现了。