1、简介
使用的是AC-QRCode-RN,github地址https://github.com/MarnoDev/AC-QRCode-RN/blob/master/README_CN.md
通过 react-native-camera 这个库实现使用摄像头实时扫描二维码进行解析的功能。
2、特性
- 支持扫描二维码、条形码
- 支持 Android 和 iOS 系统
- 基于 react-native-camera
- 轻松实现各类扫描界面
3、安装
首先
npm install ac-qrcode –save
其次
npm install react-native-camera –save
react-native link 需要 link 后才能使用
PS:如果 link 没有成功,会报错。如果没有自动 link,可以手动 link
4、基本使用
import { QRScannerView } from 'ac-qrcode';
export default class DefaultScreen extends Component {
render() {
return (
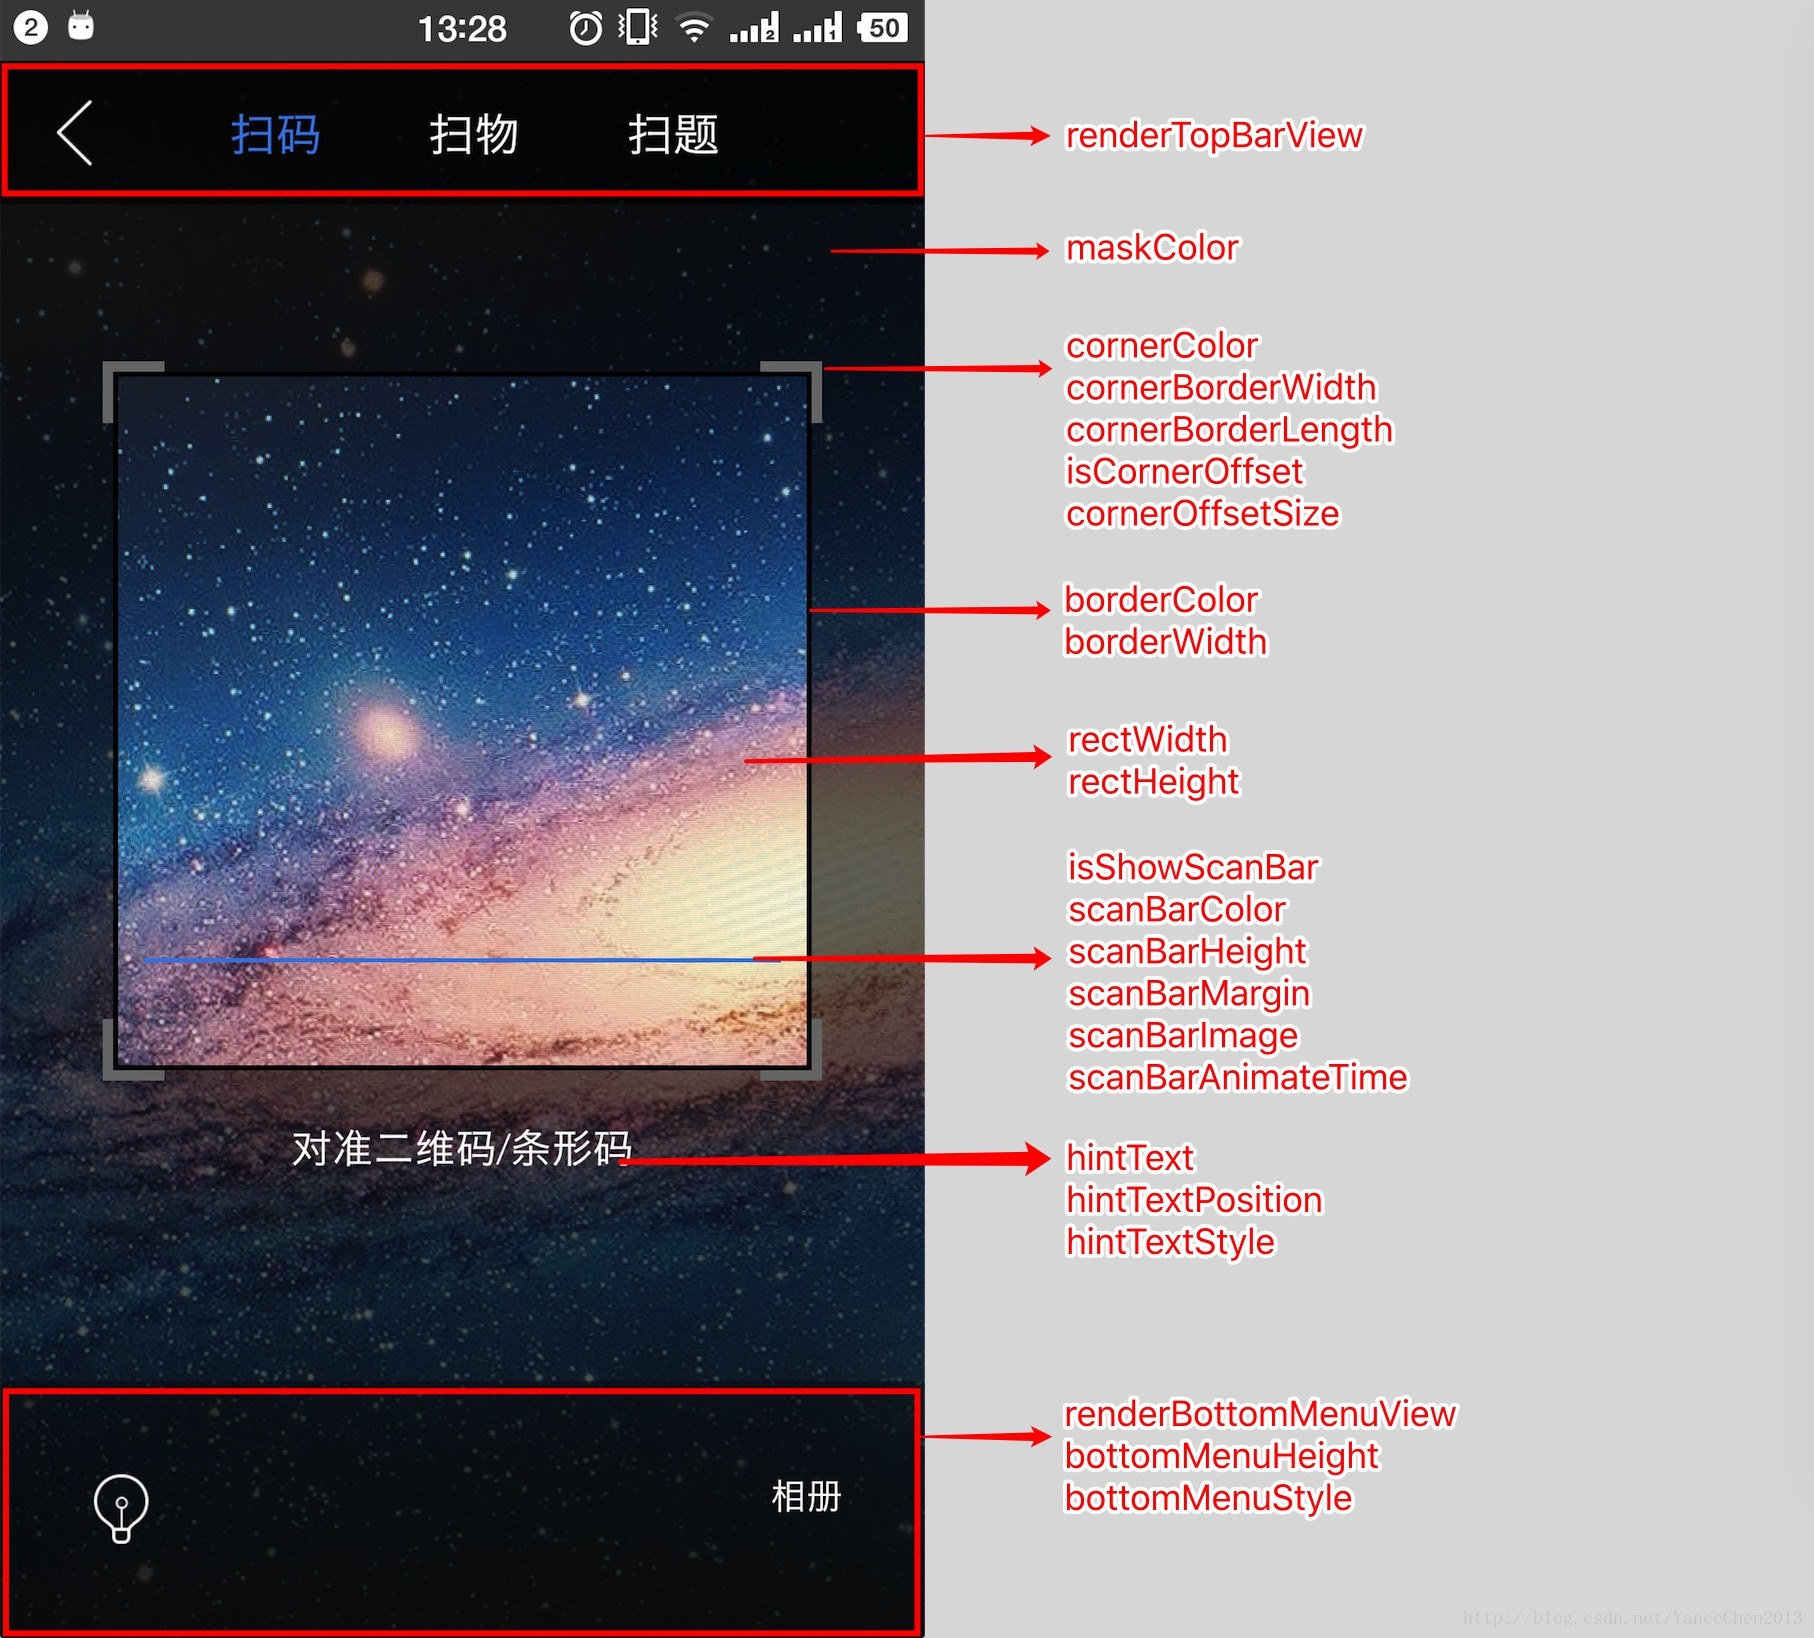
< QRScannerView
onScanResultReceived={this.barcodeReceived.bind(this)}
renderTopBarView={() => this._renderTitleBar()}
renderBottomMenuView={() => this._renderMenu()}
/>
)
}
_renderTitleBar(){
return(
<Text
style={{color:'white',textAlignVertical:'center', textAlign:'center',font:20,padding:12}}
>这里添加标题</Text>
);
}
_renderMenu() {
return (
<Text
style={{color:'white',textAlignVertical:'center', textAlign:'center',font:20,padding:12}}
>这里添加底部菜单</Text>
)
}
barcodeReceived(e) {
Toast.show('Type: ' + e.type + '\nData: ' + e.data);
//console.log(e)
}
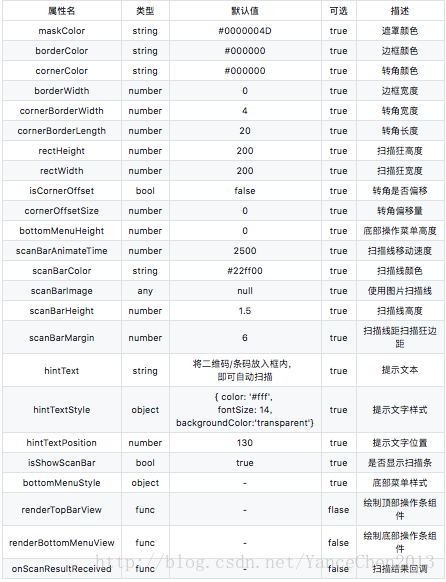
}5、属性列表
6、使用出现问题
- 返回按钮点击无反应
原因:renderBottomMenuView上标题图层将返回按钮图层遮挡,使点击返回按钮事件不能触发;
解决方法:
<View style={{flex: 1}}>
                <Camera
                    onBarCodeRead={this.props.onScanResultReceived}
                    style={{flex: 1}}
                >
                    {/*绘制顶部标题栏组件*/}
                    {this.props.renderTopBarView()}

                    {/*绘制扫描遮罩*/}
                    <QRScannerRectView
                        maskColor={this.props.maskColor}
                        cornerColor={this.props.cornerColor}
                        borderColor={this.props.borderColor}
                        rectHeight={this.props.rectHeight}
                        rectWidth={this.props.rectWidth}
                        borderWidth={this.props.borderWidth}
                        cornerBorderWidth={this.props.cornerBorderWidth}
                        cornerBorderLength={this.props.cornerBorderLength}
                        isLoading={this.props.isLoading}
                        cornerOffsetSize={this.props.cornerOffsetSize}
                        isCornerOffset={this.props.isCornerOffset}
                        bottomMenuHeight={this.props.bottomMenuHeight}
                        scanBarAnimateTime={this.props.scanBarAnimateTime}
                        scanBarColor={this.props.scanBarColor}
                        scanBarHeight={this.props.scanBarHeight}
                        scanBarMargin={this.props.scanBarMargin}
                        hintText={this.props.hintText}
                        hintTextStyle={this.props.hintTextStyle}
                        scanBarImage={this.props.scanBarImage}
                        hintTextPosition={this.props.hintTextPosition}
                        isShowScanBar={this.props.isShowScanBar}
                    />

                    {/*绘制底部操作栏*/}
                    <View style={[styles.buttonsContainer, this.props.bottomMenuStyle]}>
                        {this.props.renderBottomMenuView()}
                    </View>

                </Camera>
            </View>
将绘制顶部标题组件下移到绘制扫描遮罩下方即可。