1 - 引言
之前我们介绍了通过卷积神经网络可以给图像识别技术带来突破性的进展,现在我们从图像的预处理这个角度来继续提升我们图像识别的准确率。
输入的预处理需要使用TFRecord格式来同一不同的原始数据格式,并且更加有效的管理不同的属性。
并且TensorFlow支持图像处理函数,可以通过预处理来弱化与图像识别无关的因素
2 TFRecord输入数据格式
TFRecord文件中的数据都是通过tf.train.Example Protocol Buffer的格式存储的。
下面给出一个样例程序将MNIST输入数据转换为TFRecord的格式:
import tensorflow as tf
from tensorflow.examples.tutorials.mnist import input_data
import numpy as np

#生成整数型的属性
def _int64_feature(value):
    return tf.train.Feature(int64_list = tf.train.Int64List(value=[value]))
#生成字符串型的属性
def _bytes_feature(value):
    return tf.train.Feature(bytes_list=tf.train.BytesList(value=[value]))

mnist = input_data.read_data_sets("/path/to/MNIST_data", one_hot=True)

images = mnist.train.images
#训练数据对应的正确答案,可以作为一个属性保存在TFRecord中
labels = mnist.train.labels
#训练数据的图像分别率,这可以作为Example中的一个属性
pixels = images.shape[1]
num_examples = mnist.train.num_examples

#输出TFRecord文件的地址
filename = "/path/to/output.tfrecords"
#创建一个writer来写TFRecord文件
writer = tf.python_io.TFRecordWriter(filename)


for index in range(num_examples):
        #把图像矩阵转化为字符串
        image_raw = images[index].tostring()
        #将一个样例转化为Example Protocol Buffer,并将所有的信息写入这个数据结构
        example = tf.train.Example(features=tf.train.Features(feature={
            #'pixels': _int64_feature(pixels),
            'label': _int64_feature(np.argmax(labels[index])),
            'image_raw': _bytes_feature(image_raw)}))
        #将 Example 写入TFRecord文件
        writer.write(example.SerializeToString())

writer.close()
下面程序实现怎样读取TFRecord数据:
#读取TFRecord文件中的数据
def read_tfrecords():
    #创建一个reader来读取TFRecord文件中的样例
    reader = tf.TFRecordReader()
    #通过 tf.train.string_input_producer 创建输入队列
    filename_queue = tf.train.string_input_producer(["./output.tfrecords"])
    #从文件中读取一个样例
    _, serialized_example = reader.read(filename_queue)
    #解析读入的一个样例
    features = tf.parse_single_example(
        serialized_example,
        features={
            #这里解析数据的格式需要和上面程序写入数据的格式一致
            'image_raw': tf.FixedLenFeature([], tf.string),
            'label': tf.FixedLenFeature([], tf.int64),
            'pixels':tf.FixedLenFeature([],tf.int64)
        })
    #tf.decode_raw可以将字符串解析成图像对应的像素数组
    images = tf.decode_raw(features['image_raw'], tf.uint8)
    #tf.cast可以将传入的数据转化为想要改成的数据类型
    labels = tf.cast(features['label'], tf.int32)
    pixels = tf.cast(features['pixels'],tf.int32)

    sess = tf.Session()
    #启动多线程处理输入数据
    coord = tf.train.Coordinator()
    threads = tf.train.start_queue_runners(sess=sess, coord=coord)


    with tf.Session() as sess:
        init = tf.global_variables_initializer()
        sess.run(init)
        coord = tf.train.Coordinator()
        threads = tf.train.start_queue_runners(sess=sess, coord=coord)
        # 每次运行可以读取TFRecord文件中的一个样例。当所有样例都读完之后,再次样例中的程序会重头读取
        for i in range(5):
            images,labels,pixels = sess.run([images,labels,pixels])
3 - 图像数据处理
之前我们都是直接使用图像原始的像素矩阵,下面我们将通过图像的预处理,可以尽量避免模型受到无关因素的影响。在大部分图像识别问题中,通过图像预处理过程可以提高模型的准确率。
3.1 - 图像编码处理
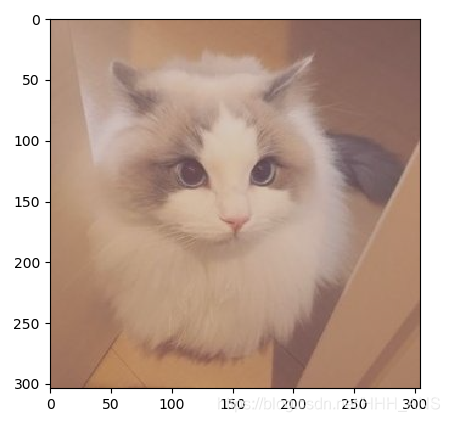
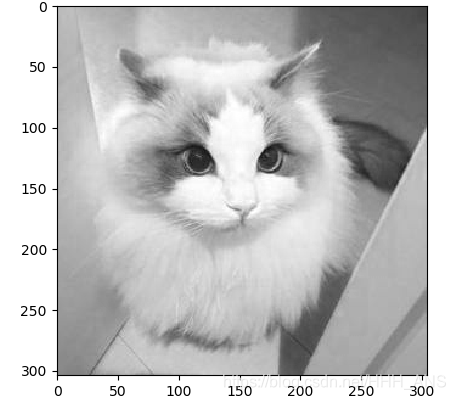
RGB的图像可以看成一个三维矩阵,但是图像在存储时并不是直接记录这些矩阵中的数字,而是记录经过压缩编码之后的结果,所以要将一张图片还原成一个三维矩阵,需要解码的过程。TensorFlow提供了对jpeg、png格式图像的编码\解码函数
以下是实现代码:
# -*- coding: utf-8 -*-
import matplotlib.pyplot as plt
import tensorflow as tf

#读取图像的原始数据
image_raw_data = tf.gfile.FastGFile("/path/to/picture.jpeg",'rb').read()
#读入图像的原始数据
#image_raw_data = tf.gfile.FastGFile("F:/input.jpeg", 'rb').read()

with tf.Session() as sess:
    #将图像使用jpeg的格式解码从而得到图像对应的三维矩阵
    #tf.image.decode_png函数对png格式的图像进行解码。
    img_data = tf.image.decode_jpeg(image_raw_data)
    plt.imshow(img_data.eval())
    plt.show()


    # 将表示一张图片的三维矩阵按照JPEG格式编码并存入文件中。打开图像可以得到和原始图像一样的图像
    img_data = tf.image.convert_image_dtype(img_data,dtype=tf.uint8)
    enconed_image = tf.image.encode_jpeg(img_data)
    with tf.gfile.GFile("/path/to/output.jpeg",'wb') as f:
        f.write(enconed_image.eval())
3.2 - 图像大小调整
因为神经网络输入的节点个数是固定的,事先设置的,但是图片的大小往往不符合我们所设计的神经网络的输入大小,因此,我们需要先将图像的大小统一
图像大小调整有两种方式,第一种是通过算法使得新的图像尽量保存原始图像上的所有信息。TensorFlow提供了四种不同的方法,并且将它们封装到了tf.image.resize_images函数。

(当然这些算法已经涉及到了数字图像处理的内容,要想学好图像识别,那么数字图像处理的知识也要专门的学习!!!)
TensorFlow还提供了API对图像进行裁剪或者填充。一下代码展示了通过tf.image.resize_image_with_crop_or_pad函数来调整图像大小的功能
# -*- coding: utf-8 -*-
import matplotlib.pyplot as plt
import tensorflow as tf
#读取图像的原始数据
image_raw_data = tf.gfile.FastGFile("/path/to/picture.jpeg",'rb').read()
#读入图像的原始数据
#image_raw_data = tf.gfile.FastGFile("F:/input.jpeg", 'rb').read()
with tf.Session() as sess:
#将图像使用jpeg的格式解码从而得到图像对应的三维矩阵
#tf.image.decode_png函数对png格式的图像进行解码。
img_data = tf.image.decode_jpeg(image_raw_data)
plt.imshow(img_data.eval())
plt.show()
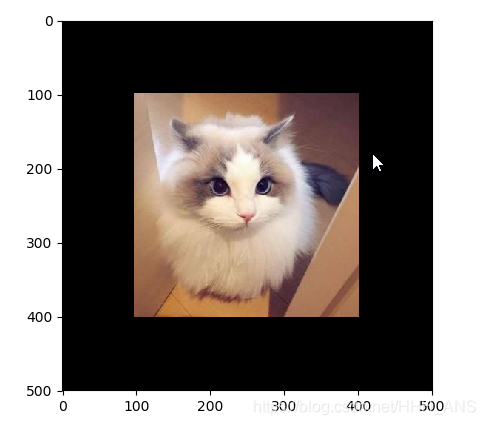
#通过tf.image.resize_image_with_crop_or_pad函数调整图像的大小
#第一个参数为原始图像,后面两个参数是调整后的图像大小,如果原始图像尺寸大于目标图像
#那么函数就会自动截取居中的部分,如果大于原始图像就会在原始图像的四周填充全0背景
croped = tf.image.resize_image_with_crop_or_pad(img_data, 100, 100)
padded = tf.image.resize_image_with_crop_or_pad(img_data, 500, 500)
plt.imshow(croped.eval())
plt.show()
plt.imshow(padded.eval())
plt.show()
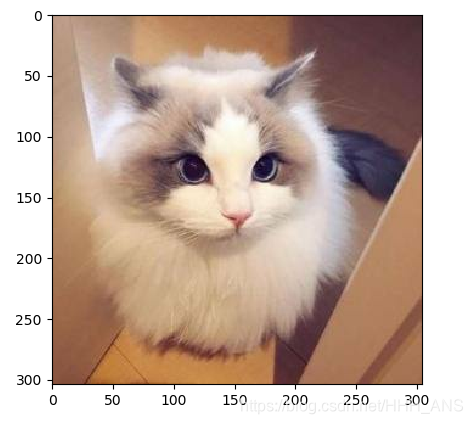
原始图像

图像大小:100x100

图像大小:500x500
3.3 - 图像翻转
TensorFlow提供了一些函数来支持图像的翻转
# -*- coding: utf-8 -*-
import matplotlib.pyplot as plt
import tensorflow as tf
#读取图像的原始数据
image_raw_data = tf.gfile.FastGFile("/path/to/picture.jpeg",'rb').read()
#读入图像的原始数据
#image_raw_data = tf.gfile.FastGFile("F:/input.jpeg", 'rb').read()
with tf.Session() as sess:
#将图像使用jpeg的格式解码从而得到图像对应的三维矩阵
#tf.image.decode_png函数对png格式的图像进行解码。
img_data = tf.image.decode_jpeg(image_raw_data)
#将图像上下翻转
flipped = tf.image.flip_up_down(img_data)
plt.imshow(flipped.eval())
plt.show()
#将图片左右翻转
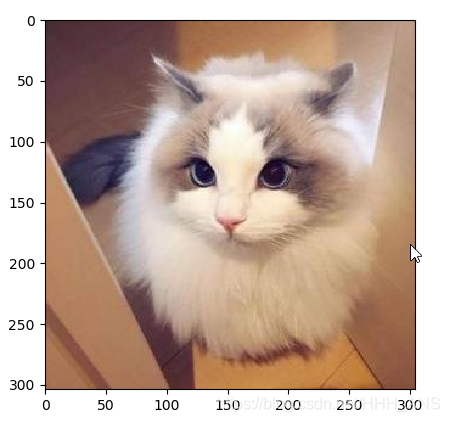
flipped = tf.image.flip_left_right(img_data)
plt.imshow(flipped.eval())
plt.show()
#将图片沿对角线翻转
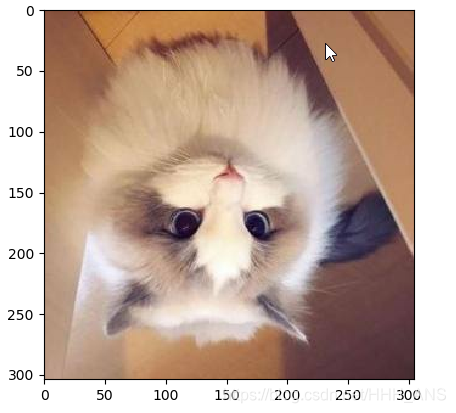
transposed = tf.image.transpose_image(img_data)
plt.imshow(transposed.eval())
plt.show()
上下翻转
左右翻转
沿对角线翻转
在图像识别问题中,图像的翻转经常用来增加训练集的数量,通过随机的翻转训练图像的方式可以在零成本的情况下很大程度地缓解该问题。
TensorFlow也提供了API完成随机图像翻转的过程
#以一定概率上下翻转图像
flipped = tf.image.random_flip_up_down(img_data)
#以一定概率左右翻转图像
flipped = tf.image.random_flip_left_right(img_data)
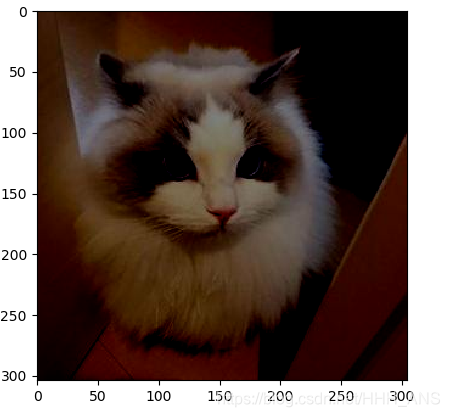
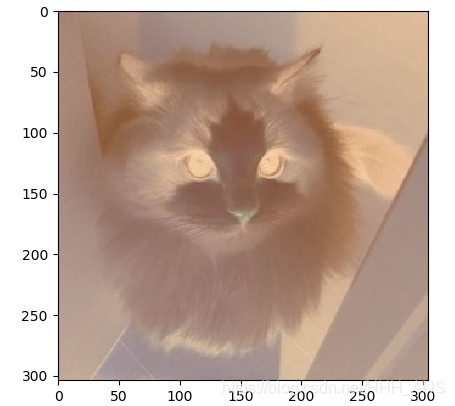
3.4 - 图像色彩调整
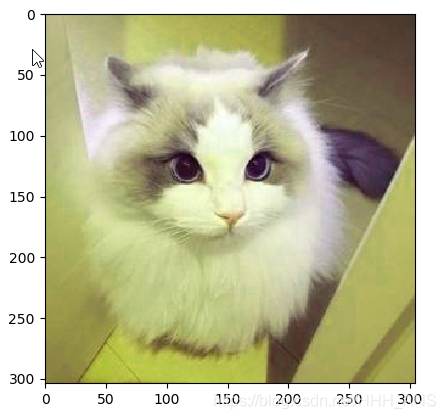
调整图像的亮度、对比度、饱和度和相色在很多图像识别应用中都不会影响识别结果。所以在训练神经网络模型时,可以随机调整训练图像的这些属性,从而使得训练得到的模型尽可能小地受到无关因素的影响。TensorFlow提供了调整这色色彩相关属性的API,以下代码显示了如何修改图像的亮度
亮度调整
# -*- coding: utf-8 -*-
import matplotlib.pyplot as plt
import tensorflow as tf

#读取图像的原始数据
image_raw_data = tf.gfile.FastGFile("/path/to/picture.jpeg",'rb').read()
#读入图像的原始数据
#image_raw_data = tf.gfile.FastGFile("F:/input.jpeg", 'rb').read()

with tf.Session() as sess:
    #将图像使用jpeg的格式解码从而得到图像对应的三维矩阵
    #tf.image.decode_png函数对png格式的图像进行解码。
    img_data = tf.image.decode_jpeg(image_raw_data)
    # 将图像的亮度-0.5
    adjusted = tf.image.adjust_brightness(img_data, -0.5)
    plt.imshow(adjusted.eval())
    plt.show()

    #将图像的亮度+0.5
    adjusted = tf.image.adjust_brightness(img_data,+0.5)
    plt.imshow(adjusted.eval())
    plt.show()
亮度减少0.5
亮度增加0.5

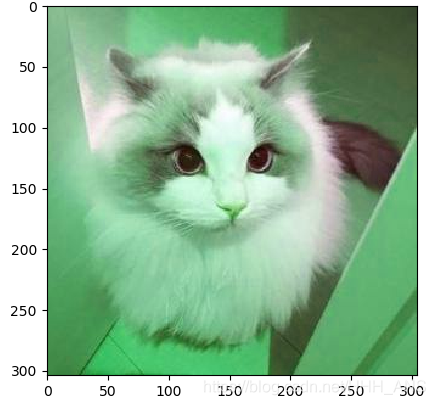
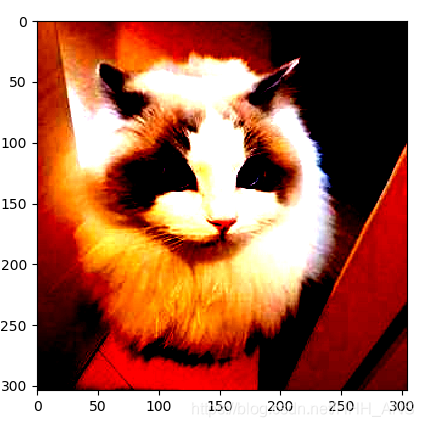
对比度调整
# -*- coding: utf-8 -*-
import matplotlib.pyplot as plt
import tensorflow as tf

#读取图像的原始数据
image_raw_data = tf.gfile.FastGFile("/path/to/picture.jpeg",'rb').read()
#读入图像的原始数据
#image_raw_data = tf.gfile.FastGFile("F:/input.jpeg", 'rb').read()

with tf.Session() as sess:
    #将图像使用jpeg的格式解码从而得到图像对应的三维矩阵
    #tf.image.decode_png函数对png格式的图像进行解码。
    img_data = tf.image.decode_jpeg(image_raw_data)
    # 将图像的对比度-0.5
    adjusted = tf.image.adjust_contrast(img_data, -0.5)
    plt.imshow(adjusted.eval())
    plt.show()

    #将图像的对比度+0.5
    adjusted = tf.image.adjust_contrast(img_data,+0.5)
    plt.imshow(adjusted.eval())
    plt.show()
对比度-0.5
对比度+0.5
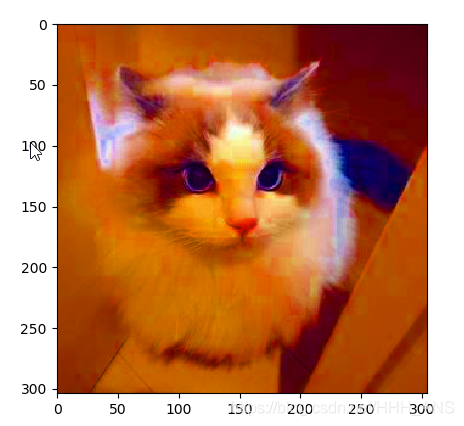
色相调整
# -*- coding: utf-8 -*-
import matplotlib.pyplot as plt
import tensorflow as tf

#读取图像的原始数据
image_raw_data = tf.gfile.FastGFile("/path/to/picture.jpeg",'rb').read()
#读入图像的原始数据
#image_raw_data = tf.gfile.FastGFile("F:/input.jpeg", 'rb').read()

with tf.Session() as sess:
    #将图像使用jpeg的格式解码从而得到图像对应的三维矩阵
    #tf.image.decode_png函数对png格式的图像进行解码。
    img_data = tf.image.decode_jpeg(image_raw_data)
    #下面四条命令分别将色相增加0.1、0.3、0.6、0.9
    adjusted = tf.image.adjust_hue(img_data,0.1)
    plt.imshow(adjusted.eval())
    plt.show()
    adjusted = tf.image.adjust_hue(img_data, 0.3)
    plt.imshow(adjusted.eval())
    plt.show()
    adjusted = tf.image.adjust_hue(img_data, 0.6)
    plt.imshow(adjusted.eval())
    plt.show()
    adjusted = tf.image.adjust_hue(img_data, 0.9)
    plt.imshow(adjusted.eval())
    plt.show()
色相+0.1
色相+0.3
色相+0.6
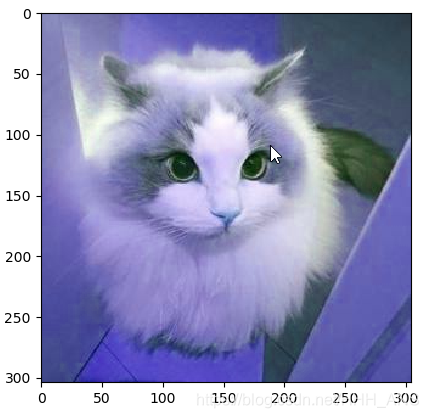
色相+0.9
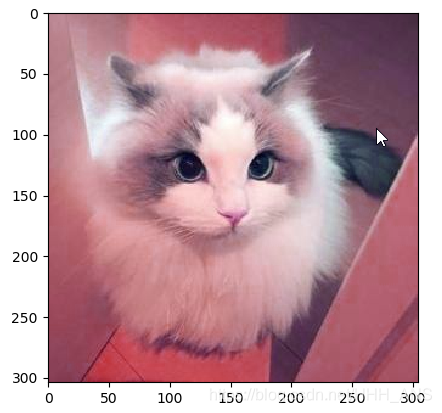
调整饱和度
# -*- coding: utf-8 -*-
import matplotlib.pyplot as plt
import tensorflow as tf

#读取图像的原始数据
image_raw_data = tf.gfile.FastGFile("/path/to/picture.jpeg",'rb').read()
#读入图像的原始数据
#image_raw_data = tf.gfile.FastGFile("F:/input.jpeg", 'rb').read()

with tf.Session() as sess:
    #将图像使用jpeg的格式解码从而得到图像对应的三维矩阵
    #tf.image.decode_png函数对png格式的图像进行解码。
    img_data = tf.image.decode_jpeg(image_raw_data)
    #下面四条命令分别将色相增加0.1、0.3、0.6、0.9
    adjusted = tf.image.adjust_saturation(img_data,-5)
    plt.imshow(adjusted.eval())
    plt.show()
    adjusted = tf.image.adjust_saturation(img_data, 5)
    plt.imshow(adjusted.eval())
    plt.show()
饱和度-5
饱和度+5
图像标准化
# -*- coding: utf-8 -*-
import matplotlib.pyplot as plt
import tensorflow as tf

#读取图像的原始数据
image_raw_data = tf.gfile.FastGFile("/path/to/picture.jpeg",'rb').read()
#读入图像的原始数据
#image_raw_data = tf.gfile.FastGFile("F:/input.jpeg", 'rb').read()

with tf.Session() as sess:
    #将图像使用jpeg的格式解码从而得到图像对应的三维矩阵
    #tf.image.decode_png函数对png格式的图像进行解码。
    img_data = tf.image.decode_jpeg(image_raw_data)
    #下面四条命令分别将色相增加0.1、0.3、0.6、0.9
    adjusted = tf.image.per_image_standardization(img_data)
    plt.imshow(adjusted.eval())
    plt.show()
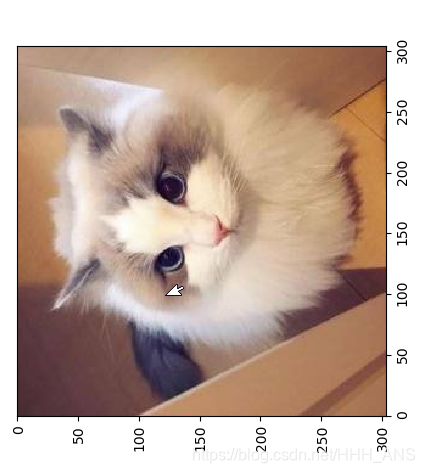
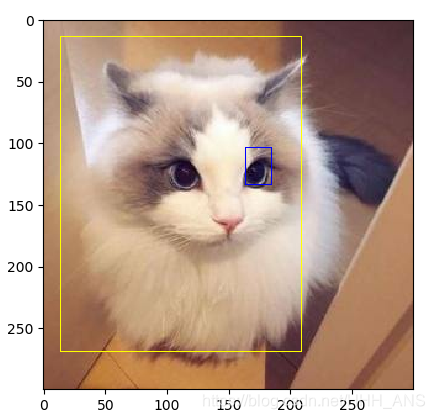
处理标注框
在很多图像识别的实例中,我们都需要把需要关注的物体标注出来,例如人脸识别、自动驾驶等,TensorFlow提供了一些工具来处理标注框,下面展示了如何通过tf.image.draw_bounding_boxes函数在图像中加入标注框
下面这段代码就很好的把猫和猫眼都标注了
# -*- coding: utf-8 -*-
import matplotlib.pyplot as plt
import tensorflow as tf

#读取图像的原始数据
image_raw_data = tf.gfile.FastGFile("/path/to/picture.jpeg",'rb').read()
#读入图像的原始数据
#image_raw_data = tf.gfile.FastGFile("F:/input.jpeg", 'rb').read()

with tf.Session() as sess:
    #将图像使用jpeg的格式解码从而得到图像对应的三维矩阵
    #tf.image.decode_png函数对png格式的图像进行解码。
    img_data = tf.image.decode_jpeg(image_raw_data)
    #将图片缩小一些,这样可视化功能让标注框更加清楚
    img_data = tf.image.resize_images(img_data,[300,300],method=1)
    #tf.image.draw_bounding_boxes函数要求图像矩阵中的数字为实数,所以需要先将图像矩阵转化为实数类型
    #tf.image.draw_bounding_boxes函数图像的输入是一个batch的数据,也就是多张图片组成的四维矩阵,所以要将解码之后的图像
    #矩阵加一维
    batched = tf.expand_dims(tf.image.convert_image_dtype(img_data,tf.float32),0)
    #给出每一张图像的所有标注框,一个标注框有4个数字,分别代表,[y_min.x_min.y_max.x_max]
    #注意这里给出的数字都是图像的相对位置,比如在180x267的图像中
    #[0.35,0.47,0.5,0.56]代表了从(63,125)到(90,150)的图像
    boxes = tf.constant([[[0.05,0.05,0.9,0.7],[0.35,0.55,0.45,0.62]]])
    #图7-11显示了加入标注框的图像
    result = tf.image.draw_bounding_boxes(images=batched,boxes=boxes)
    plt.imshow(result[0].eval())
    plt.show()
4 - 总结
TensorFlow提供了许多图像处理的API帮助我们进一步的提高图像识别的准确率和图像目标检测的功能,可见图像的预处理对于我们的图像识别也十分重要,但是数字图像处理的内容还有很多远远不止这些,需要我们进一步的学习,而且TensorFlow在图像处理方面的表现也远不如OpenCV之后我们也要学习OpenCV的相关内容。